<?xml version="1.0" encoding="UTF-8"?>
<!DOCTYPE html PUBLIC "-//W3C//DTD XHTML 1.0 Strict//EN" "http://www.w3.org/TR/xhtml1/DTD/xhtml1-strict.dtd">
<html xmlns="http://www.w3.org/1999/xhtml"><head><meta http-equiv="Content-Type" content="text/html; charset=UTF-8" /><title>Guia do Administrador do CloudStack</title><link rel="stylesheet" type="text/css" href="Common_Content/css/default.css" /><link rel="stylesheet" media="print" href="Common_Content/css/print.css" type="text/css" /><meta name="generator" content="publican 2.8" /><meta name="package" content="Apache_CloudStack-Admin_Guide-4.1.0-pt-BR-1-" /><meta name="description" content="Guia de administração do CloudStack." /><script type="text/javascript" src="../../../../../toc.js"></script><script type="text/javascript">
              addID('Apache_CloudStack');
              
	      addID('Apache_CloudStack.4.1.0');
              
              addID('Apache_CloudStack.4.1.0.books');
	      addID('Apache_CloudStack.4.1.0.Admin_Guide');
              </script></head><body class="toc_embeded "><div id="tocdiv" class="toc"><iframe id="tocframe" class="toc" src="../../../../toc.html">This is an iframe, to view it upgrade your browser or enable iframe display.</iframe></div><p id="title"><a class="left" href="http://cloudstack.apache.org"><img src="Common_Content/images/image_left.png" alt="Product Site" /></a><a class="right" href="http://cloudstack.apache.org/docs"><img src="Common_Content/images/image_right.png" alt="Documentation Site" /></a></p><div xml:lang="pt-BR" class="book" id="idp21057216" lang="pt-BR"><div class="titlepage"><div><div class="producttitle"><span class="productname">Apache CloudStack</span> <span class="productnumber">4.1.0</span></div><div><h1 id="idp21057216" class="title">Guia do Administrador do CloudStack</h1></div><p class="edition">Edição 1</p><div><h3 class="corpauthor">
			<span class="inlinemediaobject"><object data="Common_Content/images/title_logo.svg" type="image/svg+xml"> </object></span>

		</h3></div><div><div xml:lang="pt-BR" class="authorgroup" lang="pt-BR"><div class="author"><h3 class="author"><span class="firstname">Apache</span> <span class="surname">CloudStack</span></h3></div></div></div><hr /><div><div id="idm8935712" class="legalnotice"><h1 class="legalnotice">Nota Legal</h1><div class="para">
		Licensed to the Apache Software Foundation (ASF) under one or more contributor license agreements. See the NOTICE file distributed with this work for additional information regarding copyright ownership. The ASF licenses this file to you under the Apache License, Version 2.0 (the "License"); you may not use this file except in compliance with the License. You may obtain a copy of the License at
	</div><div class="para">
		http://www.apache.org/licenses/LICENSE-2.0
	</div><div class="para">
		Unless required by applicable law or agreed to in writing, software distributed under the License is distributed on an "AS IS" BASIS, WITHOUT WARRANTIES OR CONDITIONS OF ANY KIND, either express or implied. See the License for the specific language governing permissions and limitations under the License.
	</div><div class="para">
		Apache CloudStack is an effort undergoing incubation at The Apache Software Foundation (ASF).
	</div><div class="para">
		Incubation is required of all newly accepted projects until a further review indicates that the infrastructure, communications, and decision making process have stabilized in a manner consistent with other successful ASF projects. While incubation status is not necessarily a reflection of the completeness or stability of the code, it does indicate that the project has yet to be fully endorsed by the ASF.
	</div></div></div><div><div class="abstract"><h6>Resumo</h6><div class="para">
				Guia de administração do CloudStack.
			</div></div></div></div><hr /></div><div class="toc"><dl><dt><span class="chapter"><a href="#concepts">1. Conceitos</a></span></dt><dd><dl><dt><span class="section"><a href="#whatis">1.1. O que é o CloudStack?</a></span></dt><dt><span class="section"><a href="#feature-overview">1.2. O que o CloudStack pode fazer?</a></span></dt><dt><span class="section"><a href="#deployment-architecture-overview">1.3. Visão geral da arquitetura de implementação</a></span></dt><dd><dl><dt><span class="section"><a href="#management-server-overview">1.3.1. Visão geral da arquitetura de implementação</a></span></dt><dt><span class="section"><a href="#cloud-infrastructure-overview">1.3.2. Visão geral da infraestrutura de nuvem</a></span></dt><dt><span class="section"><a href="#networking-overview">1.3.3. Visão geral de serviços de rede</a></span></dt></dl></dd></dl></dd><dt><span class="chapter"><a href="#cloud-infrastructure-concepts">2. Conceitos de infraestrutura de nuvem</a></span></dt><dd><dl><dt><span class="section"><a href="#about-regions">2.1. About Regions</a></span></dt><dt><span class="section"><a href="#about-zones">2.2. Sobre zonas</a></span></dt><dt><span class="section"><a href="#about-pods">2.3. Sobre pods</a></span></dt><dt><span class="section"><a href="#about-clusters">2.4. Sobre clusters</a></span></dt><dt><span class="section"><a href="#about-hosts">2.5. Sobre hosts</a></span></dt><dt><span class="section"><a href="#about-primary-storage">2.6. Sobre storage primária</a></span></dt><dt><span class="section"><a href="#about-secondary-storage">2.7. Sobre storage secundária</a></span></dt><dt><span class="section"><a href="#about-physical-networks">2.8. Sobre redes físicas</a></span></dt><dd><dl><dt><span class="section"><a href="#basic-zone-network-traffic-types">2.8.1. Tipos de tráfego de rede da zona básica</a></span></dt><dt><span class="section"><a href="#basic-zone-guest-ip-addresses">2.8.2. Endereços IP de hóspedes na zona básica</a></span></dt><dt><span class="section"><a href="#advanced-zone-network-traffic-types">2.8.3. Tipos de tráfego de rede da zona avançada</a></span></dt><dt><span class="section"><a href="#advanced-zone-guest-ip-addresses">2.8.4. Endereços IP de hóspedes na zona avançada</a></span></dt><dt><span class="section"><a href="#advanced-zone-public-ip-addresses">2.8.5. Endereços IP públicos na zona avançada</a></span></dt><dt><span class="section"><a href="#system-reserved-ip-addresses">2.8.6. Endereços IP reservados pelo sistema</a></span></dt></dl></dd></dl></dd><dt><span class="chapter"><a href="#accounts">3. Accounts</a></span></dt><dd><dl><dt><span class="section"><a href="#accounts-users-domains">3.1. Accounts, Users, and Domains</a></span></dt><dt><span class="section"><a href="#LDAPserver-for-user-authentication">3.2. Using an LDAP Server for User Authentication</a></span></dt><dd><dl><dt><span class="section"><a href="#example-LDAP-configuration-commands">3.2.1. Example LDAP Configuration Commands</a></span></dt><dt><span class="section"><a href="#search-base">3.2.2. Search Base</a></span></dt><dt><span class="section"><a href="#query-filter">3.2.3. Query Filter</a></span></dt><dt><span class="section"><a href="#search-user-bind-dn">3.2.4. Search User Bind DN</a></span></dt><dt><span class="section"><a href="#SSL-keystore-path-and-password">3.2.5. SSL Keystore Path and Password</a></span></dt></dl></dd></dl></dd><dt><span class="chapter"><a href="#user-services-overview">4. User Services Overview</a></span></dt><dd><dl><dt><span class="section"><a href="#offerings-and-templates">4.1. Service Offerings, Disk Offerings, Network Offerings, and Templates</a></span></dt></dl></dd><dt><span class="chapter"><a href="#ui">5. Interface do usuário</a></span></dt><dd><dl><dt><span class="section"><a href="#log-in">5.1. Login na interface de usuário</a></span></dt><dd><dl><dt><span class="section"><a href="#end-user-ui-overview">5.1.1. End User's UI Overview</a></span></dt><dt><span class="section"><a href="#root-admin-ui-overview">5.1.2. Root Administrator's UI Overview</a></span></dt><dt><span class="section"><a href="#log-in-root-admin">5.1.3. Fazendo login como o administrador root</a></span></dt><dt><span class="section"><a href="#changing-root-password">5.1.4. Changing the Root Password</a></span></dt></dl></dd><dt><span class="section"><a href="#using-sshkeys">5.2. Usando as chaves SSH para autenticação.</a></span></dt><dd><dl><dt><span class="section"><a href="#create-ssh-template">5.2.1. Criando um template de instância que suporta chaves SSH</a></span></dt><dt><span class="section"><a href="#create-ssh-keypair">5.2.2. Criando o par de chaves SSH</a></span></dt><dt><span class="section"><a href="#creating-ssh-instance">5.2.3. Criando uma instância</a></span></dt><dt><span class="section"><a href="#logging-in-ssh">5.2.4. Fazendo login usando o par de chaves SSH</a></span></dt><dt><span class="section"><a href="#reset-ssh">5.2.5. Resetting SSH Keys</a></span></dt></dl></dd></dl></dd><dt><span class="chapter"><a href="#projects">6. Using Projects to Organize Users and Resources</a></span></dt><dd><dl><dt><span class="section"><a href="#projects-overview">6.1. Overview of Projects</a></span></dt><dt><span class="section"><a href="#configuring-projects">6.2. Configuring Projects</a></span></dt><dd><dl><dt><span class="section"><a href="#set-up-invitations">6.2.1. Setting Up Invitations</a></span></dt><dt><span class="section"><a href="#set-resource-limits-for-projects">6.2.2. Setting Resource Limits for Projects</a></span></dt><dt><span class="section"><a href="#set-projects-creator-permissions">6.2.3. Setting Project Creator Permissions</a></span></dt></dl></dd><dt><span class="section"><a href="#create-new-projects">6.3. Creating a New Project</a></span></dt><dt><span class="section"><a href="#add-members-to-projects">6.4. Adding Members to a Project</a></span></dt><dd><dl><dt><span class="section"><a href="#send-projects-membership-invitation">6.4.1. Sending Project Membership Invitations</a></span></dt><dt><span class="section"><a href="#add-projects-members-from-ui">6.4.2. Adding Project Members From the UI</a></span></dt></dl></dd><dt><span class="section"><a href="#accept-membership-invite">6.5. Accepting a Membership Invitation</a></span></dt><dt><span class="section"><a href="#suspend-project">6.6. Suspending or Deleting a Project</a></span></dt><dt><span class="section"><a href="#use-project-view">6.7. Using the Project View</a></span></dt></dl></dd><dt><span class="chapter"><a href="#provisioning-steps">7. Passos para provisionamento de sua infraestrutura de nuvem</a></span></dt><dd><dl><dt><span class="section"><a href="#provisioning-steps-overview">7.1. Visão geral dos passos de provisionamento</a></span></dt><dt><span class="section"><a href="#region-add">7.2. Adding Regions (optional)</a></span></dt><dd><dl><dt><span class="section"><a href="#region-first">7.2.1. The First Region: The Default Region</a></span></dt><dt><span class="section"><a href="#region-add-2">7.2.2. Adding a Region</a></span></dt><dt><span class="section"><a href="#region-add-n">7.2.3. Adding Third and Subsequent Regions</a></span></dt><dt><span class="section"><a href="#region-delete">7.2.4. Deleting a Region</a></span></dt></dl></dd><dt><span class="section"><a href="#zone-add">7.3. Adicionando uma zona</a></span></dt><dd><dl><dt><span class="section"><a href="#basic-zone-configuration">7.3.1. Configuração de zona básica</a></span></dt><dt><span class="section"><a href="#advanced-zone-configuration">7.3.2. Advanced Zone Configuration</a></span></dt></dl></dd><dt><span class="section"><a href="#pod-add">7.4. Adicionando um pod</a></span></dt><dt><span class="section"><a href="#cluster-add">7.5. Adicionando um cluster</a></span></dt><dd><dl><dt><span class="section"><a href="#add-clusters-kvm-xenserver">7.5.1. Add Cluster: KVM or XenServer</a></span></dt><dt><span class="section"><a href="#add-clusters-vsphere">7.5.2. Add Cluster: vSphere</a></span></dt></dl></dd><dt><span class="section"><a href="#host-add">7.6. Adding a Host</a></span></dt><dd><dl><dt><span class="section"><a href="#host-add-xenserver-kvm-ovm">7.6.1. Adding a Host (XenServer or KVM)</a></span></dt><dt><span class="section"><a href="#host-add-vsphere">7.6.2. Adding a Host (vSphere)</a></span></dt></dl></dd><dt><span class="section"><a href="#primary-storage-add">7.7. Adicionar Storage PrimÃ¡rio</a></span></dt><dd><dl><dt><span class="section"><a href="#sys-require-primary-storage">7.7.1. System Requirements for Primary Storage</a></span></dt><dt><span class="section"><a href="#adding-primary-storage">7.7.2. Adding Primary Stroage</a></span></dt></dl></dd><dt><span class="section"><a href="#secondary-storage-add">7.8. Adicionar Storage SecundÃ¡rio</a></span></dt><dd><dl><dt><span class="section"><a href="#sys-require-secondary-storage">7.8.1. System Requirements for Secondary Storage</a></span></dt><dt><span class="section"><a href="#adding-secondary-storage">7.8.2. Adding Secondary Storage</a></span></dt></dl></dd><dt><span class="section"><a href="#initialize-and-test">7.9. Initialize and Test</a></span></dt></dl></dd><dt><span class="chapter"><a href="#offerings">8. Ofertas de serviços</a></span></dt><dd><dl><dt><span class="section"><a href="#compute-disk-service-offerings">8.1. Compute and Disk Service Offerings</a></span></dt><dd><dl><dt><span class="section"><a href="#creating-compute-offerings">8.1.1. Creating a New Compute Offering</a></span></dt><dt><span class="section"><a href="#creating-disk-offerings">8.1.2. Creating a New Disk Offering</a></span></dt><dt><span class="section"><a href="#modify-delete-service-offerings">8.1.3. Modifying or Deleting a Service Offering</a></span></dt></dl></dd><dt><span class="section"><a href="#system-service-offerings">8.2. System Service Offerings</a></span></dt><dd><dl><dt><span class="section"><a href="#creating-system-service-offerings">8.2.1. Creating a New System Service Offering</a></span></dt></dl></dd><dt><span class="section"><a href="#network-rate">8.3. Network Throttling</a></span></dt><dt><span class="section"><a href="#sys-offering-sysvm">8.4. Changing the Default System Offering for System VMs</a></span></dt></dl></dd><dt><span class="chapter"><a href="#set-up-network-for-users">9. Setting Up Networking for Users</a></span></dt><dd><dl><dt><span class="section"><a href="#networks-for-users-overview">9.1. Overview of Setting Up Networking for Users</a></span></dt><dt><span class="section"><a href="#about-virtual-networks">9.2. About Virtual Networks</a></span></dt><dd><dl><dt><span class="section"><a href="#isolated-networks">9.2.1. Isolated Networks</a></span></dt><dt><span class="section"><a href="#shared-networks">9.2.2. Shared Networks</a></span></dt><dt><span class="section"><a href="#runtime-allocation-virtual-network-resources">9.2.3. Runtime Allocation of Virtual Network Resources</a></span></dt></dl></dd><dt><span class="section"><a href="#network-service-providers">9.3. Provedores de Serviços de Rede</a></span></dt><dt><span class="section"><a href="#network-offerings">9.4. Oferta de Rede</a></span></dt><dd><dl><dt><span class="section"><a href="#creating-network-offerings">9.4.1. Creating a New Network Offering</a></span></dt></dl></dd></dl></dd><dt><span class="chapter"><a href="#virtual-machines">10. Working With Virtual Machines</a></span></dt><dd><dl><dt><span class="section"><a href="#about-working-with-vms">10.1. About Working with Virtual Machines</a></span></dt><dt><span class="section"><a href="#best-practices-vm">10.2. Best Practices for Virtual Machines</a></span></dt><dt><span class="section"><a href="#vm-lifecycle">10.3. VM Lifecycle</a></span></dt><dt><span class="section"><a href="#creating-vms">10.4. Creating VMs</a></span></dt><dt><span class="section"><a href="#accessing-vms">10.5. Accessing VMs</a></span></dt><dt><span class="section"><a href="#stopping-and-starting-vms">10.6. Stopping and Starting VMs</a></span></dt><dt><span class="section"><a href="#changing-vm-name-os-group">10.7. Changing the VM Name, OS, or Group</a></span></dt><dt><span class="section"><a href="#changing-service-offering-for-vm">10.8. Changing the Service Offering for a VM</a></span></dt><dt><span class="section"><a href="#manual-live-migration">10.9. Moving VMs Between Hosts (Manual Live Migration)</a></span></dt><dt><span class="section"><a href="#deleting-vms">10.10. Deleting VMs</a></span></dt><dt><span class="section"><a href="#working-with-iso">10.11. Working with ISOs</a></span></dt><dd><dl><dt><span class="section"><a href="#add-iso">10.11.1. Adding an ISO</a></span></dt><dt><span class="section"><a href="#attach-iso-to-vm">10.11.2. Attaching an ISO to a VM</a></span></dt></dl></dd></dl></dd><dt><span class="chapter"><a href="#working-with-hosts">11. Working With Hosts</a></span></dt><dd><dl><dt><span class="section"><a href="#adding-hosts">11.1. Adding Hosts</a></span></dt><dt><span class="section"><a href="#scheduled-maintenance-maintenance-mode-hosts">11.2. Scheduled Maintenance and Maintenance Mode for Hosts</a></span></dt><dd><dl><dt><span class="section"><a href="#vcenter-maintenance-mode">11.2.1. vCenter and Maintenance Mode</a></span></dt><dt><span class="section"><a href="#xenserver-maintenance-mode">11.2.2. XenServer and Maintenance Mode</a></span></dt></dl></dd><dt><span class="section"><a href="#disable-enable-zones-pods-clusters">11.3. Disabling and Enabling Zones, Pods, and Clusters</a></span></dt><dt><span class="section"><a href="#removing-hosts">11.4. Removing Hosts</a></span></dt><dd><dl><dt><span class="section"><a href="#removing-xenserver-kvm-hosts">11.4.1. Removing XenServer and KVM Hosts</a></span></dt><dt><span class="section"><a href="#removing-vsphere-hosts">11.4.2. Removing vSphere Hosts</a></span></dt></dl></dd><dt><span class="section"><a href="#re-install-hosts">11.5. Re-Installing Hosts</a></span></dt><dt><span class="section"><a href="#maintain-hypervisors-on-hosts">11.6. Mantendo hipervisores em hosts</a></span></dt><dt><span class="section"><a href="#change-host-password">11.7. Changing Host Password</a></span></dt><dt><span class="section"><a href="#host-allocation">11.8. Host Allocation</a></span></dt><dd><dl><dt><span class="section"><a href="#over-provisioning-service-offering-limits">11.8.1. Over-Provisioning and Service Offering Limits</a></span></dt></dl></dd><dt><span class="section"><a href="#vlan-provisioning">11.9. VLAN Provisioning</a></span></dt></dl></dd><dt><span class="chapter"><a href="#working-with-templates">12. Trabalhando com templates</a></span></dt><dd><dl><dt><span class="section"><a href="#create-templates-overview">12.1. Creating Templates: Overview</a></span></dt><dt><span class="section"><a href="#requirements-templates">12.2. Requirements for Templates</a></span></dt><dt><span class="section"><a href="#best-practices-templates">12.3. Best Practices for Templates</a></span></dt><dt><span class="section"><a href="#default-template">12.4. The Default Template</a></span></dt><dt><span class="section"><a href="#private-public-template">12.5. Private and Public Templates</a></span></dt><dt><span class="section"><a href="#create-template-from-existing-vm">12.6. Creating a Template from an Existing Virtual Machine</a></span></dt><dt><span class="section"><a href="#create-template-from-snapshot">12.7. Creating a Template from a Snapshot</a></span></dt><dt><span class="section"><a href="#upload-template">12.8. Uploading Templates</a></span></dt><dt><span class="section"><a href="#export-template">12.9. Exporting Templates</a></span></dt><dt><span class="section"><a href="#create-windows-template">12.10. Creating a Windows Template</a></span></dt><dd><dl><dt><span class="section"><a href="#sysprep-windows-server-2008R2">12.10.1. System Preparation for Windows Server 2008 R2</a></span></dt><dt><span class="section"><a href="#sysprep-for-windows-server-2003R2">12.10.2. System Preparation for Windows Server 2003 R2</a></span></dt></dl></dd><dt><span class="section"><a href="#import-ami">12.11. Importing Amazon Machine Images</a></span></dt><dt><span class="section"><a href="#convert-hyperv-vm-to-template">12.12. Converting a Hyper-V VM to a Template</a></span></dt><dt><span class="section"><a href="#add-password-management-to-templates">12.13. Adding Password Management to Your Templates</a></span></dt><dd><dl><dt><span class="section"><a href="#linux-installation">12.13.1. Instalação do sistema operacional Linux</a></span></dt><dt><span class="section"><a href="#windows-installation">12.13.2. Instalação no Windows</a></span></dt></dl></dd><dt><span class="section"><a href="#delete-templates">12.14. Deleting Templates</a></span></dt></dl></dd><dt><span class="chapter"><a href="#storage">13. Working With Storage</a></span></dt><dd><dl><dt><span class="section"><a href="#storage-overview">13.1. Storage Overview</a></span></dt><dt><span class="section"><a href="#primary-storage">13.2. Storage primária</a></span></dt><dd><dl><dt><span class="section"><a href="#best-practices-primary-storage">13.2.1. Best Practices for Primary Storage</a></span></dt><dt><span class="section"><a href="#runtime-behavior-of-primary-storage">13.2.2. Runtime Behavior of Primary Storage</a></span></dt><dt><span class="section"><a href="#hypervisor-support-for-primarystorage">13.2.3. Hypervisor Support for Primary Storage</a></span></dt><dt><span class="section"><a href="#storage-tags">13.2.4. Storage Tags</a></span></dt><dt><span class="section"><a href="#maintenance-mode-for-primary-storage.xml">13.2.5. Maintenance Mode for Primary Storage</a></span></dt></dl></dd><dt><span class="section"><a href="#secondary-storage">13.3. Storage secundária</a></span></dt><dt><span class="section"><a href="#working-with-volumes">13.4. Working With Volumes</a></span></dt><dd><dl><dt><span class="section"><a href="#creating-new-volumes">13.4.1. Creating a New Volume</a></span></dt><dt><span class="section"><a href="#upload-existing-volume-to-vm">13.4.2. Uploading an Existing Volume to a Virtual Machine</a></span></dt><dt><span class="section"><a href="#attaching-volume">13.4.3. Attaching a Volume</a></span></dt><dt><span class="section"><a href="#detach-move-volumes">13.4.4. Detaching and Moving Volumes</a></span></dt><dt><span class="section"><a href="#vm-storage-migration">13.4.5. VM Storage Migration</a></span></dt><dt><span class="section"><a href="#resizing-volumes">13.4.6. Resizing Volumes</a></span></dt><dt><span class="section"><a href="#volume-deletion-garbage-collection">13.4.7. Volume Deletion and Garbage Collection</a></span></dt></dl></dd><dt><span class="section"><a href="#working-with-snapshots">13.5. Working with Snapshots</a></span></dt><dd><dl><dt><span class="section"><a href="#snapshot-throttling">13.5.1. Snapshot Job Throttling</a></span></dt><dt><span class="section"><a href="#automatic-snapshot-creation-retention">13.5.2. Automatic Snapshot Creation and Retention</a></span></dt><dt><span class="section"><a href="#incremental-snapshots-backup">13.5.3. Incremental Snapshots and Backup </a></span></dt><dt><span class="section"><a href="#volume-status">13.5.4. Volume Status</a></span></dt><dt><span class="section"><a href="#snapshot-restore">13.5.5. Snapshot Restore</a></span></dt></dl></dd></dl></dd><dt><span class="chapter"><a href="#work-with-usage">14. Working with Usage</a></span></dt><dd><dl><dt><span class="section"><a href="#configure-usage-server">14.1. Configuring the Usage Server</a></span></dt><dt><span class="section"><a href="#set-usage-limit">14.2. Setting Usage Limits</a></span></dt><dt><span class="section"><a href="#globally-configured-limits">14.3. Globally Configured Limits</a></span></dt><dt><span class="section"><a href="#default-account-resource-limit">14.4. Default Account Resource Limits</a></span></dt><dt><span class="section"><a href="#per-domain-limits">14.5. Per-Domain Limits</a></span></dt></dl></dd><dt><span class="chapter"><a href="#networks">15. Gerenciando redes e tráfego</a></span></dt><dd><dl><dt><span class="section"><a href="#guest-traffic">15.1. Tráfego de hóspedes</a></span></dt><dt><span class="section"><a href="#networking-in-a-pod">15.2. Rede em um pod</a></span></dt><dt><span class="section"><a href="#networking-in-a-zone">15.3. Rede em uma zona</a></span></dt><dt><span class="section"><a href="#basic-zone-physical-network-configuration">15.4. Configuração de rede física de zona básica</a></span></dt><dt><span class="section"><a href="#advanced-zone-physical-network-configuration">15.5. Configuração de rede física de zona avançada</a></span></dt><dd><dl><dt><span class="section"><a href="#configure-guest-traffic-in-advanced-zone">15.5.1. Configure o tráfego hóspede na zona avançada</a></span></dt><dt><span class="section"><a href="#configure-public-traffic-in-an-advanced-zone">15.5.2. Configure o tráfego público na zona avançada</a></span></dt></dl></dd><dt><span class="section"><a href="#using-multiple-guest-networks">15.6. Usando múltiplas redes hóspedes</a></span></dt><dd><dl><dt><span class="section"><a href="#add-additional-guest-network">15.6.1. Adicionando uma rede hóspede adicional</a></span></dt><dt><span class="section"><a href="#change-network-offering-on-guest-network">15.6.2. Alterando a oferta de rede em uma rede hóspede</a></span></dt></dl></dd><dt><span class="section"><a href="#security-groups">15.7. Grupos de segurança</a></span></dt><dd><dl><dt><span class="section"><a href="#about-security-groups">15.7.1. About Security Groups</a></span></dt><dt><span class="section"><a href="#add-security-group">15.7.2. Adicionando um grupo de segurança</a></span></dt><dt><span class="section"><a href="#security-groups-advanced-zones">15.7.3. Security Groups in Advanced Zones (KVM Only)</a></span></dt><dt><span class="section"><a href="#enable-security-groups">15.7.4. Habilitando grupos de segurança</a></span></dt><dt><span class="section"><a href="#add-ingress-egress-rules">15.7.5. Adicionando regras de ingresso e egresso a um grupo de segurança</a></span></dt></dl></dd><dt><span class="section"><a href="#external-firewalls-and-load-balancers">15.8. Firewalls e balanceadores de carga externos</a></span></dt><dd><dl><dt><span class="section"><a href="#using-netscaler-load-balancers">15.8.1. Sobre a utilização do balanceador de carga NetScaler</a></span></dt><dt><span class="section"><a href="#configure-snmp-rhel">15.8.2. Configuring SNMP Community String on a RHEL Server</a></span></dt><dt><span class="section"><a href="#initial-setup-of-external-firewalls-loadbalancer">15.8.3. Configuração inicial de firewalls e balanceadores de carga externos</a></span></dt><dt><span class="section"><a href="#ongoing-config-of-external-firewalls-ld">15.8.4. Configuração continuada de firewalls e balanceadores de carga externos</a></span></dt><dt><span class="section"><a href="#autoscale">15.8.5. Configuring AutoScale</a></span></dt></dl></dd><dt><span class="section"><a href="#load-balancer-rules">15.9. Regras de balanceamento de carga</a></span></dt><dd><dl><dt><span class="section"><a href="#add-load-balancer-rule">15.9.1. Adding a Load Balancer Rule</a></span></dt><dt><span class="section"><a href="#sticky-session-policies-for-lb-rules">15.9.2. Sticky Session Policies for Load Balancer Rules</a></span></dt></dl></dd><dt><span class="section"><a href="#guest-ip-ranges">15.10. Guest IP Ranges</a></span></dt><dt><span class="section"><a href="#acquire-new-ip-address">15.11. Obtendo um novo endereço IP</a></span></dt><dt><span class="section"><a href="#release-ip-address">15.12. Liberando um endereço IP</a></span></dt><dt><span class="section"><a href="#static-nat">15.13. NAT estática</a></span></dt><dd><dl><dt><span class="section"><a href="#enable-disable-static-nat">15.13.1. Habilitando ou desabilitando NAT estática</a></span></dt></dl></dd><dt><span class="section"><a href="#ip-forwarding-firewalling">15.14. Encaminhamento de IP e firewall</a></span></dt><dd><dl><dt><span class="section"><a href="#egress-firewall-rule">15.14.1. Creating Egress Firewall Rules in an Advanced Zone</a></span></dt><dt><span class="section"><a href="#firewall-rules">15.14.2. Regras de firewall</a></span></dt><dt><span class="section"><a href="#port-forwarding">15.14.3. Encaminhamento de Porta</a></span></dt></dl></dd><dt><span class="section"><a href="#ip-load-balancing">15.15. Balanceamento de carga de IP</a></span></dt><dt><span class="section"><a href="#dns-dhcp">15.16. DNS e DHCP</a></span></dt><dt><span class="section"><a href="#vpn">15.17. VPN</a></span></dt><dd><dl><dt><span class="section"><a href="#configure-vpn">15.17.1. Configurando VPN</a></span></dt><dt><span class="section"><a href="#using-vpn-with-windows">15.17.2. Usando VPN com Windows</a></span></dt><dt><span class="section"><a href="#using-vpn-with-mac">15.17.3. Using VPN with Mac OS X</a></span></dt><dt><span class="section"><a href="#site-to-site-vpn">15.17.4. Configurando uma conexão VPN Site-to-Site</a></span></dt></dl></dd><dt><span class="section"><a href="#inter-vlan-routing">15.18. About Inter-VLAN Routing</a></span></dt><dt><span class="section"><a href="#configure-vpc">15.19. Configuring a Virtual Private Cloud</a></span></dt><dd><dl><dt><span class="section"><a href="#vpc">15.19.1. About Virtual Private Clouds</a></span></dt><dt><span class="section"><a href="#add-vpc">15.19.2. Adding a Virtual Private Cloud</a></span></dt><dt><span class="section"><a href="#add-tier">15.19.3. Adding Tiers</a></span></dt><dt><span class="section"><a href="#configure-acl">15.19.4. Configuring Access Control List</a></span></dt><dt><span class="section"><a href="#add-gateway-vpc">15.19.5. Adicionando um gateway privado a uma VPC</a></span></dt><dt><span class="section"><a href="#add-vm-to-tier">15.19.6. Implantando máquinas virtuais na camada</a></span></dt><dt><span class="section"><a href="#acquire-new-ip-for-vpc">15.19.7. Obtendo um novo endereço IP para uma VPC</a></span></dt><dt><span class="section"><a href="#release-ip-for-vpc">15.19.8. Liberando um endereço IP atribuído a uma VPC</a></span></dt><dt><span class="section"><a href="#enable-disable-static-nat-vpc">15.19.9. Habilitando ou desabilitando NAT estática em uma VPC</a></span></dt><dt><span class="section"><a href="#add-loadbalancer-rule-vpc">15.19.10. Adicionando regras de balanceamento de carga em uma VPC</a></span></dt><dt><span class="section"><a href="#add-portforward-vpc">15.19.11. Adicionando uma regra de encaminhamento de porta em uma VPC</a></span></dt><dt><span class="section"><a href="#remove-tier">15.19.12. Removing Tiers</a></span></dt><dt><span class="section"><a href="#remove-vpc">15.19.13. Editing, Restarting, and Removing a Virtual Private Cloud</a></span></dt></dl></dd><dt><span class="section"><a href="#persistent-network">15.20. Persistent Networks</a></span></dt><dd><dl><dt><span class="section"><a href="#persistent-network-consideration">15.20.1. Persistent Network Considerations</a></span></dt><dt><span class="section"><a href="#set-up-persistent-network">15.20.2. Creating a Persistent Guest Network</a></span></dt></dl></dd></dl></dd><dt><span class="chapter"><a href="#working-with-system-vm">16. Working with System Virtual Machines</a></span></dt><dd><dl><dt><span class="section"><a href="#system-vm-template">16.1. The System VM Template</a></span></dt><dt><span class="section"><a href="#multiple-system-vm-vmware">16.2. Multiple System VM Support for VMware</a></span></dt><dt><span class="section"><a href="#console-proxy">16.3. Console Proxy</a></span></dt><dd><dl><dt><span class="section"><a href="#use-cert">16.3.1. Using a SSL Certificate for the Console Proxy</a></span></dt><dt><span class="section"><a href="#change-console-proxy-ssl-certificate-domain">16.3.2. Changing the Console Proxy SSL Certificate and Domain</a></span></dt></dl></dd><dt><span class="section"><a href="#virtual-router">16.4. Virtual Router</a></span></dt><dd><dl><dt><span class="section"><a href="#configure-virtual-router">16.4.1. Configuring the Virtual Router</a></span></dt><dt><span class="section"><a href="#upgrade-virtual-router-with-service-offering">16.4.2. Upgrading a Virtual Router with System Service Offerings</a></span></dt><dt><span class="section"><a href="#best-practices-virtual-router">16.4.3. Best Practices for Virtual Routers</a></span></dt></dl></dd><dt><span class="section"><a href="#secondary-storage-vm">16.5. Secondary Storage VM</a></span></dt></dl></dd><dt><span class="chapter"><a href="#sys-reliability-and-ha">17. System Reliability and High Availability</a></span></dt><dd><dl><dt><span class="section"><a href="#ha-management-server">17.1. HA for Management Server</a></span></dt><dt><span class="section"><a href="#management-server-lb">17.2. Management Server Load Balancing</a></span></dt><dt><span class="section"><a href="#ha-enabled-vm">17.3. HA-Enabled Virtual Machines</a></span></dt><dt><span class="section"><a href="#ha-for-hosts">17.4. HA for Hosts</a></span></dt><dd><dl><dt><span class="section"><a href="#dedicated-ha-hosts">17.4.1. Dedicated HA Hosts</a></span></dt></dl></dd><dt><span class="section"><a href="#primary-storage-outage-and-data-loss">17.5. Primary Storage Outage and Data Loss</a></span></dt><dt><span class="section"><a href="#secondary-storage-outage-and-data-loss">17.6. Secondary Storage Outage and Data Loss</a></span></dt><dt><span class="section"><a href="#api-throttling">17.7. Limiting the Rate of API Requests</a></span></dt><dd><dl><dt><span class="section"><a href="#api-throttling-configure">17.7.1. Configuring the API Request Rate</a></span></dt><dt><span class="section"><a href="#api-throttling-limitations">17.7.2. Limitations on API Throttling</a></span></dt></dl></dd></dl></dd><dt><span class="chapter"><a href="#manage-cloud">18. Gerenciando a nuvem</a></span></dt><dd><dl><dt><span class="section"><a href="#tagging-resources">18.1. Using Tags to Organize Resources in the Cloud</a></span></dt><dt><span class="section"><a href="#change-database-config">18.2. Changing the Database Configuration</a></span></dt><dt><span class="section"><a href="#change-database-password">18.3. Changing the Database Password</a></span></dt><dt><span class="section"><a href="#admin-alerts">18.4. Administrator Alerts</a></span></dt><dt><span class="section"><a href="#customizing-dns">18.5. Customizing the Network Domain Name</a></span></dt><dt><span class="section"><a href="#stop-restart-management-server">18.6. Stopping and Restarting the Management Server</a></span></dt></dl></dd><dt><span class="chapter"><a href="#global-config">19. Global Configuration Parameters</a></span></dt><dd><dl><dt><span class="section"><a href="#setting-global-config-parameters">19.1. Setting Global Configuration Parameters</a></span></dt><dt><span class="section"><a href="#about-global-config-parameters">19.2. About Global Configuration Parameters</a></span></dt></dl></dd><dt><span class="chapter"><a href="#api-overview">20. CloudStack API</a></span></dt><dd><dl><dt><span class="section"><a href="#provisioning-auth-api">20.1. Provisioning and Authentication API</a></span></dt><dt><span class="section"><a href="#allocators">20.2. Allocators</a></span></dt><dt><span class="section"><a href="#user-data-and-meta-data">20.3. User Data and Meta Data</a></span></dt></dl></dd><dt><span class="chapter"><a href="#tuning">21. Tuning</a></span></dt><dd><dl><dt><span class="section"><a href="#performance-monitoring">21.1. Performance Monitoring</a></span></dt><dt><span class="section"><a href="#increase-management-server-max-memory">21.2. Increase Management Server Maximum Memory</a></span></dt><dt><span class="section"><a href="#set-database-buffer-pool-size">21.3. Set Database Buffer Pool Size</a></span></dt><dt><span class="section"><a href="#set-monitor-total-vm-limits-per-host">21.4. Set and Monitor Total VM Limits per Host</a></span></dt><dt><span class="section"><a href="#configure-xenserver-dom0-memory">21.5. Configure XenServer dom0 Memory</a></span></dt></dl></dd><dt><span class="chapter"><a href="#troubleshooting">22. Troubleshooting</a></span></dt><dd><dl><dt><span class="section"><a href="#events">22.1. Events</a></span></dt><dd><dl><dt><span class="section"><a href="#events-log">22.1.1. Event Logs</a></span></dt><dt><span class="section"><a href="#event-framework">22.1.2. Event Notification</a></span></dt><dt><span class="section"><a href="#standard-events">22.1.3. Standard Events</a></span></dt><dt><span class="section"><a href="#long-running-job-events">22.1.4. Long Running Job Events</a></span></dt><dt><span class="section"><a href="#event-log-queries">22.1.5. Event Log Queries</a></span></dt></dl></dd><dt><span class="section"><a href="#troubleshooting-working-with-server-logs">22.2. Working with Server Logs</a></span></dt><dt><span class="section"><a href="#troubleshooting-dataloss-on-exported-primary-storage">22.3. Data Loss on Exported Primary Storage</a></span></dt><dt><span class="section"><a href="#troubleshooting-recover-lost-virtual-router">22.4. Recovering a Lost Virtual Router </a></span></dt><dt><span class="section"><a href="#troubleshooting-maintenance-mode-not-working-on-vCenter">22.5. Maintenance mode not working on vCenter</a></span></dt><dt><span class="section"><a href="#troubleshooting-unable-to-deploy-vms">22.6. Unable to deploy VMs from uploaded vSphere template</a></span></dt><dt><span class="section"><a href="#troubleshooting-unable-to-power-on-vm">22.7. Unable to power on virtual machine on VMware</a></span></dt><dt><span class="section"><a href="#troubleshooting-lb-rules-fails">22.8. Load balancer rules fail after changing network offering</a></span></dt></dl></dd><dt><span class="appendix"><a href="#time-zones">A. Time Zones</a></span></dt><dt><span class="appendix"><a href="#event-types">B. Event Types</a></span></dt><dt><span class="appendix"><a href="#alerts">C. Alerts</a></span></dt><dt><span class="appendix"><a href="#appe-cloudstack-Revision_History">D. Revision History</a></span></dt></dl></div><div xml:lang="pt-BR" class="chapter" id="concepts" lang="pt-BR"><div class="titlepage"><div><div><h2 class="title">Capítulo 1. Conceitos</h2></div></div></div><div class="toc"><dl><dt><span class="section"><a href="#whatis">1.1. O que é o CloudStack?</a></span></dt><dt><span class="section"><a href="#feature-overview">1.2. O que o CloudStack pode fazer?</a></span></dt><dt><span class="section"><a href="#deployment-architecture-overview">1.3. Visão geral da arquitetura de implementação</a></span></dt><dd><dl><dt><span class="section"><a href="#management-server-overview">1.3.1. Visão geral da arquitetura de implementação</a></span></dt><dt><span class="section"><a href="#cloud-infrastructure-overview">1.3.2. Visão geral da infraestrutura de nuvem</a></span></dt><dt><span class="section"><a href="#networking-overview">1.3.3. Visão geral de serviços de rede</a></span></dt></dl></dd></dl></div><div xml:lang="pt-BR" class="section" id="whatis" lang="pt-BR"><div class="titlepage"><div><div><h2 class="title" id="whatis">1.1. O que é o CloudStack?</h2></div></div></div><div class="para">
		O CloudStack é uma plataforma de software de código aberto que gerencia recursos computacionais para construir nuvens "Infrastructure as a Service" (IaaS). O CloudStack gerencia a rede, storage, e nós computacionais que compõem a infraestrutura de nuvem. Use o CloudStack para implementar, gerenciar e configurar ambientes de computação em nuvem.
	</div><div class="para">
		Provedores de serviços e empresas são os usuários típicos. Com o CloudStack, você pode:
	</div><div class="itemizedlist"><ul><li class="listitem"><div class="para">
				Estabelecer um serviço sob demanda elástico de computação em nuvem. Provedores de serviços podem vender instâncias self service de máquinas virtuais, volumes de armazenamento e configurações de rede pela Internet.
			</div></li><li class="listitem"><div class="para">
				Estabelecer na empresa uma nuvem privada para uso dos funcionários. Ao invés de gerenciar máquinas virtuais do mesmo modo que máquinas físicas, com o CloudStack uma empresa pode oferecer máquinas virtuais self-service para usuários sem envolver os departamentos de TI.
			</div></li></ul></div><div class="mediaobject"><img src="./images/1000-foot-view.png" width="444" alt="1000-foot-view.png: Overview of CloudStack" /></div></div><div xml:lang="pt-BR" class="section" id="feature-overview" lang="pt-BR"><div class="titlepage"><div><div><h2 class="title" id="feature-overview">1.2. O que o CloudStack pode fazer?</h2></div></div></div><div class="para">
		<span class="bold bold"><strong>Suporte a múltiplos hipervisores</strong></span>
	</div><div class="para">
		O CloudStack trabalha com uma variedade de hipervisores. Uma única implementação de nuvem pode conter múltiplas implementações de hipervisores. O release atual do CloudStack suporta soluções empresariais pre-packaged como o Citrix XenServer e o VMware vSphere, assim como KVM ou Xen executando no Ubuntu ou CentOS.
	</div><div class="para">
		<span class="bold bold"><strong>Gestão de infraestrutura altamente escalável</strong></span>
	</div><div class="para">
		O CloudStack pode gerenciar dezenas de milhares de servidores instalados em múltiplos centros de computação geograficamente distribuídos. O servidor de gerenciamento centralizado é linearmente escalável, eliminando a necessidade de servidores de gerenciamento de cluster intermediários. Nenhuma falha de componente único pode causar uma interrupção geral na nuvem. A manutenção periódica do servidor de gerenciamento pode ser executada sem afetar o funcionamento de máquinas virtuais que são executadas na nuvem.
	</div><div class="para">
		<span class="bold bold"><strong>Gerenciamento automático de configuração</strong></span>
	</div><div class="para">
		O CloudStack automaticamente configura os parâmetros de rede e armazenamento de cada máquina virtual hóspede.
	</div><div class="para">
		O CloudStack gerencia internamente um pool de dispositivos virtuais ("virtual appliances") para suporte à nuvem. Estes dispositivos oferecem serviços como firewall, roteamento, DHCP, acesso VPN, console proxy, acesso a storage e replicação de storage. O uso extensivo de dispositivos virtuais simplifica a instalação, configuração e gerenciamento contínuo de uma implementação de nuvem.
	</div><div class="para">
		<span class="bold bold"><strong>Interface gráfica do usuário</strong></span>
	</div><div class="para">
		O CloudStack oferece uma interface web para o administrador, usado para provisionamento e gestão da nuvem, assim como uma interface web do usuário final, usada para executar máquinas virtuais e gerenciar modelos (templates) de máquinas virtuais. A interface de usuário pode ser customizada para refletir os padrões de visuais de apresentação do provedor de serviços ou empresa.
	</div><div class="para">
		<span class="bold bold"><strong>API e extensibilidade</strong></span>
	</div><div class="para">
		CloudStack provides an API that gives programmatic access to all the management features available in the UI. The API is maintained and documented. This API enables the creation of command line tools and new user interfaces to suit particular needs. See the Developer’s Guide and API Reference, both available at <a href="http://cloudstack.apache.org/docs/en-US/index.html">Apache CloudStack Guides</a> and <a href="http://cloudstack.apache.org/docs/api/index.html">Apache CloudStack API Reference</a> respectively.
	</div><div class="para">
		A arquitetura de alocação de plataformas conectáveis do CloudStack permite a criação de novos tipos de alocadores para a seleção de storage e hosts. Veja o "Allocator Implementation Guide" (<a href="http://docs.cloudstack.org/CloudStack_Documentation/Allocator_Implementation_Guide">http://docs.cloudstack.org/CloudStack_Documentation/Allocator_Implementation_Guide</a>).
	</div><div class="para">
		<span class="bold bold"><strong>Alta disponibilidade</strong></span>
	</div><div class="para">
		A plataforma do CloudStack tem um número de recursos para aumentar a disponibilidade do sistema. O próprio servidor de gerenciamento pode ser implementado em um ambiente com múltiplos nós onde é feito balanceamento de carga entre os servidores. MySQL pode ser configurado para usar replicação, provendo uma método manual de recuperação em caso de perda do database. Para os hosts, a plataforma CloudStack suporta NIC bonding e o uso de redes isoladas de storage, assim como iSCSI Multipath.
	</div></div><div xml:lang="pt-BR" class="section" id="deployment-architecture-overview" lang="pt-BR"><div class="titlepage"><div><div><h2 class="title" id="deployment-architecture-overview">1.3. Visão geral da arquitetura de implementação</h2></div></div></div><div class="para">
		Uma instalação do CloudStack consiste em dois componentes: o servidor de gerenciamento e a infraestrutura de nuvem que ele gerencia. Quando você monta e gerencia uma nuvem CloudStack, você provê recursos como hosts, equipamentos de storage, e endereços IP no servidor de gerenciamento, e o servidor de gerenciamento gerencia estes recursos.
	</div><div class="para">
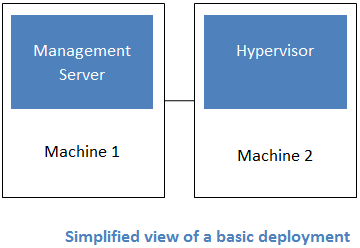
		A instalação mínima de produção consiste em uma máquina executando o servidor de gerenciamento do CloudStack e outra atuando como a infraestrutura de rede (neste caso, uma infraestrutura muito simples consistindo em um host executando software hipervisor). Na menor implementação possível, uma única máquina pode atuar tanto como servidor de gerenciamento quanto o host hipervisor (usando o hipervisor KVM).
	</div><div class="mediaobject"><img src="./images/basic-deployment.png" alt="basic-deployment.png: Basic two-machine deployment" /></div><div class="para">
		A more full-featured installation consists of a highly-available multi-node Management Server installation and up to tens of thousands of hosts using any of several advanced networking setups. For information about deployment options, see the "Choosing a Deployment Architecture" section of the $PRODUCT; Installation Guide.
	</div><div xml:lang="pt-BR" class="section" id="management-server-overview" lang="pt-BR"><div class="titlepage"><div><div><h3 class="title" id="management-server-overview">1.3.1. Visão geral da arquitetura de implementação</h3></div></div></div><div class="para">
		O servidor de gerenciamento é o software do CloudStack que gerencia os recursos da nuvem. Pela interação com o servidor de gerenciamento através de sua interface de usuário ou API, você pode configurar e gerenciar sua infraestrutura de nuvem.
	</div><div class="para">
		O servidor de gerenciamento é executado em um servidor dedicado ou máquina virtual. Ele controla a alocação de máquinas virtuais em hosts e atribui storage e endereços IP às instâncias de máquinas virtuais. O servidor de gerenciamento é executado em um container Tomcat e requer um database MySQL para persistência.
	</div><div class="para">
		A máquina deve atender os requerimentos descritos em "Requerimentos do sistema".
	</div><div class="para">
		O servidor de gerenciamento:
	</div><div class="itemizedlist"><ul><li class="listitem"><div class="para">
				Provê a interface web de usuário para o administrador e uma interface de referência de usuário para usuários finais.
			</div></li><li class="listitem"><div class="para">
				Provê as APIs para o CloudStack.
			</div></li><li class="listitem"><div class="para">
				Gerencia o assinalamento de máquinas virtuais hóspedes a hosts determinados.
			</div></li><li class="listitem"><div class="para">
				Gerencia o assinalamento de endereços IP públicos e privados a determinadas contas.
			</div></li><li class="listitem"><div class="para">
				Gerencia a alocação de storage - como discos virtuais - para hóspedes.
			</div></li><li class="listitem"><div class="para">
				Gerencia snapshots, templates, e imagens ISO, possivelmente replicando estes elementos através de data centers.
			</div></li><li class="listitem"><div class="para">
				Provê um ponto único de configuração para a nuvem.
			</div></li></ul></div></div><div xml:lang="pt-BR" class="section" id="cloud-infrastructure-overview" lang="pt-BR"><div class="titlepage"><div><div><h3 class="title" id="cloud-infrastructure-overview">1.3.2. Visão geral da infraestrutura de nuvem</h3></div></div></div><div class="para">
		O servidor de gerenciamento gerencia uma ou mais zonas (tipicamente, datacenters) contendo hosts onde máquinas virtuais hóspedes serão executadas. A infraestrutura de nuvem é organizada como se segue:
	</div><div class="itemizedlist"><ul><li class="listitem"><div class="para">
				Zona: tipicamente, uma zona é equivalente a um único datacenter. Uma zona consiste em um ou mais pods e storage secundária.
			</div></li><li class="listitem"><div class="para">
				Pod: um pod é usualmente um rack de hardware que inclui uma switch layer-2 e um ou mais clusters.
			</div></li><li class="listitem"><div class="para">
				Cluster: um cluster consiste em um ou mais hosts e storage primária.
			</div></li><li class="listitem"><div class="para">
				Host: um nó computacional em um cluster. É nos hosts onde realmente os serviços de nuvem são executados, na forma de máquinas virtuais hóspedes.
			</div></li><li class="listitem"><div class="para">
				Storage primária é associada com um cluster, e armazena os volumes de disco para todas as máquinas virtuais sendo executadas em hosts neste cluster.
			</div></li><li class="listitem"><div class="para">
				Storage secundária é associada com uma zona, e armazena templates, imagens ISO e snapshots de volumes de disco.
			</div></li></ul></div><div class="mediaobject"><img src="./images/infrastructure-overview.png" width="444" alt="infrastructure_overview.png: Nested organization of a zone" /></div><div class="para">
		<span class="bold bold"><strong>Informações adicionais</strong></span>
	</div><div class="para">
		Para informações adicionais, veja a documentação sobre conceitos de infraestrutura de nuvem.
	</div></div><div xml:lang="pt-BR" class="section" id="networking-overview" lang="pt-BR"><div class="titlepage"><div><div><h3 class="title" id="networking-overview">1.3.3. Visão geral de serviços de rede</h3></div></div></div><div class="para">
		O CloudStack oferece dois tipos de ambiente de rede:
	</div><div class="itemizedlist"><ul><li class="listitem"><div class="para">
				Básico. Para redes no estilo AWS. Provê uma rede única onde isolamento de hóspedes pode ser provido através de recursos da camada 3 como grupos seguros (filtragem de endereço IP de origem).
			</div></li><li class="listitem"><div class="para">
				Avançada. Para topologias de rede mais sofisticadas. Este modelo de rede provê a mais alta flexibilidade na definição de redes hóspedes.
			</div></li></ul></div><div class="para">
		Para mais detalhes, veja Configuração de rede.
	</div></div></div></div><div xml:lang="pt-BR" class="chapter" id="cloud-infrastructure-concepts" lang="pt-BR"><div class="titlepage"><div><div><h2 class="title">Capítulo 2. Conceitos de infraestrutura de nuvem</h2></div></div></div><div class="toc"><dl><dt><span class="section"><a href="#about-regions">2.1. About Regions</a></span></dt><dt><span class="section"><a href="#about-zones">2.2. Sobre zonas</a></span></dt><dt><span class="section"><a href="#about-pods">2.3. Sobre pods</a></span></dt><dt><span class="section"><a href="#about-clusters">2.4. Sobre clusters</a></span></dt><dt><span class="section"><a href="#about-hosts">2.5. Sobre hosts</a></span></dt><dt><span class="section"><a href="#about-primary-storage">2.6. Sobre storage primária</a></span></dt><dt><span class="section"><a href="#about-secondary-storage">2.7. Sobre storage secundária</a></span></dt><dt><span class="section"><a href="#about-physical-networks">2.8. Sobre redes físicas</a></span></dt><dd><dl><dt><span class="section"><a href="#basic-zone-network-traffic-types">2.8.1. Tipos de tráfego de rede da zona básica</a></span></dt><dt><span class="section"><a href="#basic-zone-guest-ip-addresses">2.8.2. Endereços IP de hóspedes na zona básica</a></span></dt><dt><span class="section"><a href="#advanced-zone-network-traffic-types">2.8.3. Tipos de tráfego de rede da zona avançada</a></span></dt><dt><span class="section"><a href="#advanced-zone-guest-ip-addresses">2.8.4. Endereços IP de hóspedes na zona avançada</a></span></dt><dt><span class="section"><a href="#advanced-zone-public-ip-addresses">2.8.5. Endereços IP públicos na zona avançada</a></span></dt><dt><span class="section"><a href="#system-reserved-ip-addresses">2.8.6. Endereços IP reservados pelo sistema</a></span></dt></dl></dd></dl></div><div xml:lang="pt-BR" class="section" id="about-regions" lang="pt-BR"><div class="titlepage"><div><div><h2 class="title" id="about-regions">2.1. About Regions</h2></div></div></div><div class="para">
		To increase reliability of the cloud, you can optionally group resources into multiple geographic regions. A region is the largest available organizational unit within a CloudStack deployment. A region is made up of several availability zones, where each zone is roughly equivalent to a datacenter. Each region is controlled by its own cluster of Management Servers, running in one of the zones. The zones in a region are typically located in close geographical proximity. Regions are a useful technique for providing fault tolerance and disaster recovery.
	</div><div class="para">
		By grouping zones into regions, the cloud can achieve higher availability and scalability. User accounts can span regions, so that users can deploy VMs in multiple, widely-dispersed regions. Even if one of the regions becomes unavailable, the services are still available to the end-user through VMs deployed in another region. And by grouping communities of zones under their own nearby Management Servers, the latency of communications within the cloud is reduced compared to managing widely-dispersed zones from a single central Management Server.
	</div><div class="para">
		Usage records can also be consolidated and tracked at the region level, creating reports or invoices for each geographic region.
	</div><div class="mediaobject"><img src="./images/region-overview.png" width="444" alt="region-overview.png: Nested structure of a region." /></div><div class="para">
		Regions are visible to the end user. When a user starts a guest VM, the user must select a region for their guest. Users might also be required to copy their private templates to additional regions to enable creation of guest VMs using their templates in those regions.
	</div></div><div xml:lang="pt-BR" class="section" id="about-zones" lang="pt-BR"><div class="titlepage"><div><div><h2 class="title" id="about-zones">2.2. Sobre zonas</h2></div></div></div><div class="para">
		A zone is the second largest organizational unit within a CloudStack deployment. A zone typically corresponds to a single datacenter, although it is permissible to have multiple zones in a datacenter. The benefit of organizing infrastructure into zones is to provide physical isolation and redundancy. For example, each zone can have its own power supply and network uplink, and the zones can be widely separated geographically (though this is not required).
	</div><div class="para">
		Uma zona consiste em:
	</div><div class="itemizedlist"><ul><li class="listitem"><div class="para">
				Um ou mais pods. Cada pod contém um ou mais clusters de hosts e um ou mais servidores de storage primária.
			</div></li><li class="listitem"><div class="para">
				Storage secundária, compartilhada por todos os pods na zona.
			</div></li></ul></div><div class="mediaobject"><img src="./images/zone-overview.png" width="444" alt="zone-overview.png: Nested structure of a simple zone." /></div><div class="para">
		Zonas são visíveis para o usuário final. Quando um usuário ativa uma máquina virtual hóspede, o usuário deve selecionar uma zona para seu hóspede. Usuários podem também ter que copiar seus templates privados para outras zonas para possibilitar a criação de máquinas virtuais hóspedes usando seus templates naquelas zonas.
	</div><div class="para">
		Zonas podem ser públicas ou privadas. Zonas públicas são visíveis por todos usuários. Isto significa que qualquer usuário pode criar um hóspede na zona. Zonas privadas são reservadas para um domínio específico. Somente usuários no domínio ou seus subdomínios podem criam hóspedes na zona.
	</div><div class="para">
		Hosts na mesma zona são diretamente acessíveis entre si, sem precisar passar por um firewall. Hosts em zonas distintas podem acessar um ao outro através de túneis VPN configurados estaticamente.
	</div><div class="para">
		Para cada zona, o administrador deve decidir o seguinte:
	</div><div class="itemizedlist"><ul><li class="listitem"><div class="para">
				Quantos pods colocar na zona.
			</div></li><li class="listitem"><div class="para">
				Quantos clusters colocar em cada pod.
			</div></li><li class="listitem"><div class="para">
				Quantos hosts colocar em em cada cluster.
			</div></li><li class="listitem"><div class="para">
				Quantos servidores de storage primária colocar em cada cluster e a capacidade total dos servidores de storage.
			</div></li><li class="listitem"><div class="para">
				Quanto de storage secundária implantar em uma zona.
			</div></li></ul></div><div class="para">
		Quando você adiciona uma zona, você será solicitado a configurar a rede física da zona e adicionar o primeiro pod, primeiro cluster, primeiro host, storage primária inicial, e storage secundária inicial.
	</div></div><div xml:lang="pt-BR" class="section" id="about-pods" lang="pt-BR"><div class="titlepage"><div><div><h2 class="title" id="about-pods">2.3. Sobre pods</h2></div></div></div><div class="para">
		A pod often represents a single rack. Hosts in the same pod are in the same subnet. A pod is the second-largest organizational unit within a CloudStack deployment. Pods are contained within zones. Each zone can contain one or more pods. A pod consists of one or more clusters of hosts and one or more primary storage servers. Pods are not visible to the end user.
	</div><div class="mediaobject"><img src="./images/pod-overview.png" alt="pod-overview.png: Nested structure of a simple pod" /></div></div><div xml:lang="pt-BR" class="section" id="about-clusters" lang="pt-BR"><div class="titlepage"><div><div><h2 class="title" id="about-clusters">2.4. Sobre clusters</h2></div></div></div><div class="para">
		Um cluster provê um modo de agrupar hosts. Mais precisamente, um cluster é um pool de servidores XenServer, um conjunto de servidores KVM, um conjunto de servidores OVM, ou um cluster VMware pré-configurado no vCenter. Todos os hosts em um cluster têm hardwares idênticos, executam o mesmo hipervisor, estão na mesma subnet e acessam a mesma storage primária compartilhada. Instâncias de máquinas virtuais (VMs) ativas em um host podem ser migradas para outro host no mesmo cluster, sem interromper os serviços fornecidos ao usuário.
	</div><div class="para">
		Um cluster é a terceira maior unidade organizacional em uma implementação do CloudStack. Clusters são contidos em pods, e pods são contidos em zonas. O tamanho do cluster é limitado pelo hipervisor subjacente, embora o CloudStack recomenda menos na maioria dos caso; veja "Melhores práticas".
	</div><div class="para">
		Um cluster consiste em um ou mais hosts e um ou mais servidores de storage primária.
	</div><div class="mediaobject"><img src="./images/cluster-overview.png" alt="cluster-overview.png: Structure of a simple cluster" /></div><div class="para">
		O CloudStack permite múltiplos clusters em uma implementação de nuvem.
	</div><div class="para">
		Mesmo quando exclusivamente armazenamento local é usado, clusters ainda são organizacionalmente requeridos, mesmo que haja somente um host por cluster.
	</div><div class="para">
		Quando VMware é usado, todo cluster VMware é gerenciado por um servidor vCenter. O administrador deve registrar o servidor vCenter no CloudStack. Pode haver múltiplos servidores vCenter por zona. Cada servidor vCenter pode gerenciar múltiplos clusters VMware.
	</div></div><div xml:lang="pt-BR" class="section" id="about-hosts" lang="pt-BR"><div class="titlepage"><div><div><h2 class="title" id="about-hosts">2.5. Sobre hosts</h2></div></div></div><div class="para">
		Um host é um único computador. Hosts fornecem os recursos computacionais que executam as máquinas virtuais hóspedes. Cada host tem software hipervisor instalado para gerenciar as máquinas virtuais hóspedes. Por exemplo, um servidor Linux com KVM habilitado, um servidor Citrix XenServer, e um servidor ESXi são hosts.
	</div><div class="para">
		Um host é a menor unidade organizacional em uma implementação do CloudStack. Hosts estão contidos em clusters, clusters são contidos em pods, e pods são contidos em zonas.
	</div><div class="para">
		Hosts em uma implementação do CloudStack:
	</div><div class="itemizedlist"><ul><li class="listitem"><div class="para">
				Proveem os recursos de CPU, memória, storage e de rede necessários para hospedar as máquinas virtuais
			</div></li><li class="listitem"><div class="para">
				Interconectam-se utilizando uma rede TCP/IP de alta capacidade e conectam-se à Internet
			</div></li><li class="listitem"><div class="para">
				Podem residir em múltiplos centros de dados em localidades geograficamente diferentes
			</div></li><li class="listitem"><div class="para">
				Podem ter diferentes capacidades (diferentes velocidades de CPU, diferentes quantidades de RAM, etc.), embora os hosts em um cluster devam ser homogêneos
			</div></li></ul></div><div class="para">
		Hosts adicionais podem ser adicionados a qualquer momento para prover mais capacidade para máquinas virtuais hóspedes.
	</div><div class="para">
		O CloudStack automaticamente detecta as quantidades de recursos de CPU e memória fornecidas pelos hosts.
	</div><div class="para">
		Hosts não são visíveis para o usuário final. Um usuário final não pode determinar a qual host sua máquina hóspede foi assinalada.
	</div><div class="para">
		Para que um host funcione no CloudStack, você deve fazer o seguinte:
	</div><div class="itemizedlist"><ul><li class="listitem"><div class="para">
				Instalar software hipervisor no host
			</div></li><li class="listitem"><div class="para">
				Assinalar um endereço IP ao host
			</div></li><li class="listitem"><div class="para">
				Certificar-se de que o host está conectado ao servidor de gerenciamento do CloudStack
			</div></li></ul></div></div><div xml:lang="pt-BR" class="section" id="about-primary-storage" lang="pt-BR"><div class="titlepage"><div><div><h2 class="title" id="about-primary-storage">2.6. Sobre storage primária</h2></div></div></div><div class="para">
		Storage primária é associada com um cluster, e armazena os volumes de disco para todas as máquinas virtuais sendo executadas em hosts neste cluster. Você pode adicionar múltiplos servidores de storage primária a um cluster. No mínimo um é requerido. Normalmente é localizado perto dos hosts para um melhor desempenho.
	</div><div class="para">
		O CloudStack é projetado para trabalhar com todos os servidores compatíveis com os padrões iSCSI e NFS que são suportados pelo hipervisor subjacente, incluindo, por exemplo:
	</div><div class="itemizedlist"><ul><li class="listitem"><div class="para">
				Dell EqualLogic™ for iSCSI
			</div></li><li class="listitem"><div class="para">
				Servidores de arquivo Network Appliances for NFS and iSCSI
			</div></li><li class="listitem"><div class="para">
				Scale Computing for NFS
			</div></li></ul></div><div class="para">
		Se você pretende utilizar somente o disco local na sua instalação, você pode passar para Adição de storage secundária.
	</div></div><div xml:lang="pt-BR" class="section" id="about-secondary-storage" lang="pt-BR"><div class="titlepage"><div><div><h2 class="title" id="about-secondary-storage">2.7. Sobre storage secundária</h2></div></div></div><div class="para">
		Storage secundária é associada com um zona, e armazena o seguinte:
	</div><div class="itemizedlist"><ul><li class="listitem"><div class="para">
				Templates — imagens de sistemas operacionais que podem ser utilizadas no boot de máquinas virtuais e podem incluir configurações adicionais, tais como aplicativos pré-instalados
			</div></li><li class="listitem"><div class="para">
				Imagens ISO — imagens de disco contendo dados ou mídia bootável de sistema operacional
			</div></li><li class="listitem"><div class="para">
				Snapshots de volumes de disco — cópias de dados de máquinas virtuais que podem ser usadas para recuperação de dados ou na criação de novos templates
			</div></li></ul></div><div class="para">
		Os itens em storage secundária NFS da zona estão disponíveis para todos os hosts na zona. O CloudStack gerencia a alocação de discos virtuais hóspedes em equipamentos de storage primária.
	</div><div class="para">
		Para tornar itens na storage secundária disponíveis para todos os hosts na nuvem, você pode adicionar OpenStack Object Storage (Swift, <a href="http://swift.openstack.org">swift.openstack.org</a>) em adição à storage secundária NFS da zona. Ao utilizar Swift, você configura storage Swift para todo o CloudStack, em seguida configura storage NFS secundária para cada zona, como usual. A storage NFS em cada zona atua como uma área intermediária através da qual todos os templates e outros dados da storage secundária passam antes de serem encaminhados para a Swift. A storage Swift atua como um recurso da nuvem, tornando disponíveis para qualquer zona na nuvem templates e outros dados. Não há hierarquia na storage Swift, apenas um container Swift por objeto de storage. Qualquer storage secundária na nuvem pode obter um container da Swift quando necessário. Não é necessário copiar templates e snapshots de uma zona para outra, como seria requerido ao utilizar somente storage NFS na zona. Tudo está disponível em todo lugar.
	</div></div><div xml:lang="pt-BR" class="section" id="about-physical-networks" lang="pt-BR"><div class="titlepage"><div><div><h2 class="title" id="about-physical-networks">2.8. Sobre redes físicas</h2></div></div></div><div class="para">
		Em parte, a adição de uma zona é configurar a rede física. Uma ou (em uma zona avançada) mais redes físicas podem ser associada com cada zona. A rede corresponde a uma NIC no host hipervisor. Cada rede física pode transportar um ou mais tipos de tráfego de rede. As escolhas de tipo de tráfego para cada rede variam dependendo se você está criando uma zona com rede básica ou rede avançada.
	</div><div class="para">
		Uma rede física é o hardware de rede e o cabeamento em uma zona. Uma zona pode ter múltiplas redes físicas. Um administrador pode:
	</div><div class="itemizedlist"><ul><li class="listitem"><div class="para">
				Adicionar/Remover/Atualizar redes físicas em uma zona
			</div></li><li class="listitem"><div class="para">
				Configurar VLANs na rede física
			</div></li><li class="listitem"><div class="para">
				Configurar um nome para que a rede seja reconhecida pelos hipervisores
			</div></li><li class="listitem"><div class="para">
				Configurar os provedores de serviços (firewalls, balanceadores de carga, etc.) disponíveis em uma rede física
			</div></li><li class="listitem"><div class="para">
				Configurar os endereços IP implementados, ou trunked, para uma rede física
			</div></li><li class="listitem"><div class="para">
				Especificar o tipo de tráfego que é transportado na rede física, assim como outras propriedades como a velocidade da rede
			</div></li></ul></div><div xml:lang="pt-BR" class="section" id="basic-zone-network-traffic-types" lang="pt-BR"><div class="titlepage"><div><div><h3 class="title" id="basic-zone-network-traffic-types">2.8.1. Tipos de tráfego de rede da zona básica</h3></div></div></div><div class="para">
		Quando rede básica é utilizada, somente pode haver um tipo de rede física na zona. Tal rede física transporta os seguintes tipos de tráfego:
	</div><div class="itemizedlist"><ul><li class="listitem"><div class="para">
				Hóspede. Quando usuários finais executam máquinas virtuais, eles geram tráfego hóspede. As máquinas virtuais hóspedes podem se comunicar através de uma rede que pode ser referida como a rede hóspede. Cada pod em uma zona básica é um domínio de broadcast, e portanto cada pod tem um diferente intervalo IP para a rede hóspede. O administrador pode configurar o intervalo IP para cada pod.
			</div></li><li class="listitem"><div class="para">
				Management. When CloudStack's internal resources communicate with each other, they generate management traffic. This includes communication between hosts, system VMs (VMs used by CloudStack to perform various tasks in the cloud), and any other component that communicates directly with the CloudStack Management Server. You must configure the IP range for the system VMs to use.
			</div><div class="note"><div class="admonition_header"><h2>Nota</h2></div><div class="admonition"><div class="para">
					Recomendamos fortemente o uso de placas de rede separadas para o tráfego de gerência e tráfego de hóspedes.
				</div></div></div></li><li class="listitem"><div class="para">
				Público. Tráfego público é gerado quando máquinas virtuais na nuvem acessam a Internet. Endereços IP publicamente acessíveis devem ser alocados para esta finalidade. Usuários finais podem usar a interface de usuário do CloudStack para obter estes endereços IP para implementar NAT entre sua rede hóspede e a rede pública, como descrito em Obtendo um novo endereço IP.
			</div></li><li class="listitem"><div class="para">
				Storage. While labeled "storage" this is specifically about secondary storage, and doesn't affect traffic for primary storage. This includes traffic such as VM templates and snapshots, which is sent between the secondary storage VM and secondary storage servers. CloudStack uses a separate Network Interface Controller (NIC) named storage NIC for storage network traffic. Use of a storage NIC that always operates on a high bandwidth network allows fast template and snapshot copying. You must configure the IP range to use for the storage network.
			</div></li></ul></div><div class="para">
		Em uma rede básica, a configuração da rede física é bastante simples. Na maioria dos casos, você precisa somente configurar uma rede hóspede para transportar tráfego que é gerado pelas máquinas virtuais hóspedes. Se você usa um balanceador de carga NetScaler e habilita suas características de balanceamento elástico de IP e de carga (EIP e ELB), você pode também configurar uma rede para transportar tráfego público. O CloudStack apresenta na interface de usuário os passos de configuração de rede necessários quando você adiciona uma nova zona.
	</div></div><div xml:lang="pt-BR" class="section" id="basic-zone-guest-ip-addresses" lang="pt-BR"><div class="titlepage"><div><div><h3 class="title" id="basic-zone-guest-ip-addresses">2.8.2. Endereços IP de hóspedes na zona básica</h3></div></div></div><div class="para">
		Quando rede básica é usada, o CloudStack irá assinalar endereços IP no CIDR do pod para hóspedes naquele pod. O administrador deve adicionar um intervalo IP direto no pod para este propósito. Estes IPs estão na mesma VLAN que os hosts.
	</div></div><div xml:lang="pt-BR" class="section" id="advanced-zone-network-traffic-types" lang="pt-BR"><div class="titlepage"><div><div><h3 class="title" id="advanced-zone-network-traffic-types">2.8.3. Tipos de tráfego de rede da zona avançada</h3></div></div></div><div class="para">
		Quando rede avançada é usada, pode haver múltiplas redes físicas na zona. Cada rede física pode transportar um ou mais tipos de tráfego, e você precisa informar ao CloudStack qual o tipo de tráfego que você deseja que cada rede transporte. Os tipos de tráfego em uma zona avançada são:
	</div><div class="itemizedlist"><ul><li class="listitem"><div class="para">
				Hóspede. Quando usuários finais executam máquinas virtuais, eles geram tráfego hóspede. As máquinas virtuais hóspedes comunicam-se através de uma rede que pode ser referida como a rede hóspede. Esta rede pode ser isolada ou compartilhada. Em uma rede hóspede isolada, o administrador precisa reservar intervalos de VLAN para prover isolamento para cada rede de conta do CloudStack (potencialmente um grande número de VLANs). Em uma rede hóspede compartilhada, todas as máquinas virtuais hóspedes compartilham uma única rede.
			</div></li><li class="listitem"><div class="para">
				Gerência. Quando recursos internos do CloudStack comunicam-se entre si, eles geram tráfego de gerência. Isto inclui a comunicação entre hosts, máquinas virtuais do sistema (máquinas virtuais usadas pelo CloudStack para executar várias tarefas na nuvem), e qualquer outro componente que se comunica diretamente com o servidor de gerenciamento do CloudStack. Você deve configurar o intervalo de IP para uso das máquinas virtuais do sistema.
			</div></li><li class="listitem"><div class="para">
				Público. Tráfego público é gerado quando máquinas virtuais na nuvem acessam a Internet. Endereços IP publicamente acessíveis devem ser alocados para esta finalidade. Usuários finais podem usar a interface de usuário do CloudStack para obter estes endereços IP para implementar NAT entre sua rede hóspede e a rede pública, como descrito em Obtendo um novo endereço IP no Guia de Administração.
			</div></li><li class="listitem"><div class="para">
				Storage. While labeled "storage" this is specifically about secondary storage, and doesn't affect traffic for primary storage. This includes traffic such as VM templates and snapshots, which is sent between the secondary storage VM and secondary storage servers. CloudStack uses a separate Network Interface Controller (NIC) named storage NIC for storage network traffic. Use of a storage NIC that always operates on a high bandwidth network allows fast template and snapshot copying. You must configure the IP range to use for the storage network.
			</div></li></ul></div><div class="para">
		Cada um destes tipos de tráfego pode estar em uma rede física separada, ou eles podem ser combinados com certas restrições. Quando você usa o assistente Add Zone na interface de usuário para criar uma nova zona, você é orientado a fazer somente escolhas válidas.
	</div></div><div xml:lang="pt-BR" class="section" id="advanced-zone-guest-ip-addresses" lang="pt-BR"><div class="titlepage"><div><div><h3 class="title" id="advanced-zone-guest-ip-addresses">2.8.4. Endereços IP de hóspedes na zona avançada</h3></div></div></div><div class="para">
		Quando rede avançada é usada, o administrador pode criar redes adicionais para uso dos hóspedes. Estas redes podem abranger a zona e ficar disponíveis para todas as contas, ou elas podem ser restritas para uma única conta, e neste caso somente a conta específica pode criar hóspedes que se ligam a estas redes. As redes são definidas pela identificação da VLAN, intervalo de IP, e gateway. Se quiser, o administrador pode prover milhares destas redes.
	</div></div><div xml:lang="pt-BR" class="section" id="advanced-zone-public-ip-addresses" lang="pt-BR"><div class="titlepage"><div><div><h3 class="title" id="advanced-zone-public-ip-addresses">2.8.5. Endereços IP públicos na zona avançada</h3></div></div></div><div class="para">
		Quando rede avançada é usada, o administrador pode criar redes adicionais para uso dos hóspedes. Estas redes podem abranger a zona e ficar disponíveis para todas as contas, ou elas podem ser restritas para uma única conta, e neste caso somente a conta específica pode criar hóspedes que se ligam a estas redes. As redes são definidas pela identificação da VLAN, intervalo de IP, e gateway. Se quiser, o administrador pode prover milhares destas redes.
	</div></div><div xml:lang="pt-BR" class="section" id="system-reserved-ip-addresses" lang="pt-BR"><div class="titlepage"><div><div><h3 class="title" id="system-reserved-ip-addresses">2.8.6. Endereços IP reservados pelo sistema</h3></div></div></div><div class="para">
		Em cada zona, você precisa configurar um intervalo de endereços IP reservados para a rede de gerência. Esta rede transporta a comunicação entre o servidor de gerenciamento do CloudStack e várias máquinas virtuais do sistema, tais como as máquinas virtuais de storage secundária, as máquinas virtuais de proxy de console, e DHCP.
	</div><div class="para">
		Os endereços IP reservados devem ser únicos na nuvem. Você não pode, por exemplo, ter um host em uma zona com o mesmo endereço IP privado que um host em outra zona.
	</div><div class="para">
		Aos hosts em um pod são assinalados endereços IP privados. Estes são tipicamente endereços da RFC1918. As máquinas virtuais de proxy de console e storage secundária também têm endereços IP privados alocados no CIDR do pod onde são criadas.
	</div><div class="para">
		Certifique-se de que servidores de computação e servidores de gerenciamento utilizem endereços IP fora do intervalo de IP reservado pelo sistema. Por exemplo, suponha que o intervalo de IP reservado pelo sistema se inicia em 192.168.154.2 e termina em 192.168.154.7. O CloudStack pode usar .2 a .7 para máquinas virtuais do sistema. Isto deixa o restante do CIDR do pod, de .8 a .254, para o servidor de gerenciamento e para os hosts hipervisores.
	</div><div class="para">
		<span class="bold bold"><strong>Em todas as zonas:</strong></span>
	</div><div class="para">
		Forneça IPs privados para o sistema em cada pod e disponibilize-os no CloudStack.
	</div><div class="para">
		Para o KVM e o XenServer, o número recomendado de IPs privados por pod é um por host. Se você espera que o pod cresça, adicione agora IPs privados suficientes para permitir o crescimento.
	</div><div class="para">
		<span class="bold bold"><strong>Em uma zona que usa rede avançada:</strong></span>
	</div><div class="para">
		Para zonas com rede avançada, recomendamos o fornecimento de IPs privados suficientes para o número total de usuários mais o requerido pelas máquinas virtuais de sistema. Tipicamente, cerca de 10 IPs adicionais são requeridos para as máquinas virtuais de sistema. Para informações adicionais sobre máquinas virtuais de sistema, veja Trabalhando com máquinas virtuais de sistema no Guia do administrador.
	</div><div class="para">
		Quando rede avançada está sendo usada, o número de endereços IP privados disponíveis em cada pod varia dependendo de qual hipervisor está sendo executado nos nós daquele pod. O Citrix XenServer e o KVM usam endereços de enlace local — 169.254.0.0/16 ou fe80::/64 —, o que em teoria provê mais de 65.000 endereços IP privados no bloco de endereçamento. Conforme o pod cresce, isto deveria ser mais que suficiente para qualquer número razoável de hosts, assim como endereços IP para roteadores virtuais hóspedes. O VMWare ESXi, em contraste, usa qualquer esquema de subnet especificada pelo administrador, e o administrador típico provê apenas 255 IPs por pod. Como estes são compartilhados por máquinas físicas, o roteador virtual hóspede, e outras entidades, é possível esgotar os IPs privados ao incrementar a configuração de um pod cujos nós executam ESXi.
	</div><div class="para">
		Para garantir uma margem adequada para redimensionar o espaço de IPs privados em um pod ESXi que usa rede avançada, use uma ou ambas técnicas a seguir:
	</div><div class="itemizedlist"><ul><li class="listitem"><div class="para">
				Especifique um bloco CIDR maior para a subnet. Uma máscara de subnet com um sufixo /20 proverá mais de 4.000 endereços IP.
			</div></li><li class="listitem"><div class="para">
				Crie múltiplos pods, cada um com sua própria subnet. Por exemplo, se você criar 10 pods e cada pod tem 255 IPs, isto irá prover 2.550 endereços IP.
			</div></li></ul></div></div></div></div><div xml:lang="pt-BR" class="chapter" id="accounts" lang="pt-BR"><div class="titlepage"><div><div><h2 class="title">Capítulo 3. Accounts</h2></div></div></div><div class="toc"><dl><dt><span class="section"><a href="#accounts-users-domains">3.1. Accounts, Users, and Domains</a></span></dt><dt><span class="section"><a href="#LDAPserver-for-user-authentication">3.2. Using an LDAP Server for User Authentication</a></span></dt><dd><dl><dt><span class="section"><a href="#example-LDAP-configuration-commands">3.2.1. Example LDAP Configuration Commands</a></span></dt><dt><span class="section"><a href="#search-base">3.2.2. Search Base</a></span></dt><dt><span class="section"><a href="#query-filter">3.2.3. Query Filter</a></span></dt><dt><span class="section"><a href="#search-user-bind-dn">3.2.4. Search User Bind DN</a></span></dt><dt><span class="section"><a href="#SSL-keystore-path-and-password">3.2.5. SSL Keystore Path and Password</a></span></dt></dl></dd></dl></div><div xml:lang="pt-BR" class="section" id="accounts-users-domains" lang="pt-BR"><div class="titlepage"><div><div><h2 class="title" id="accounts-users-domains">3.1. Accounts, Users, and Domains</h2></div></div></div><div class="formalpara"><h5 class="formalpara" id="idm6481640">Contas</h5>
			An account typically represents a customer of the service provider or a department in a large organization. Multiple users can exist in an account.
		</div><div class="formalpara"><h5 class="formalpara" id="idm10532136">DomÃ­nios</h5>
			Accounts are grouped by domains. Domains usually contain multiple accounts that have some logical relationship to each other and a set of delegated administrators with some authority over the domain and its subdomains. For example, a service provider with several resellers could create a domain for each reseller.
		</div><div class="para">
		For each account created, the Cloud installation creates three different types of user accounts: root administrator, domain administrator, and user.
	</div><div class="formalpara"><h5 class="formalpara" id="idp12436144">Usuários</h5>
			Users are like aliases in the account. Users in the same account are not isolated from each other, but they are isolated from users in other accounts. Most installations need not surface the notion of users; they just have one user per account. The same user cannot belong to multiple accounts.
		</div><div class="para">
		Username is unique in a domain across accounts in that domain. The same username can exist in other domains, including sub-domains. Domain name can repeat only if the full pathname from root is unique. For example, you can create root/d1, as well as root/foo/d1, and root/sales/d1.
	</div><div class="para">
		Administrators are accounts with special privileges in the system. There may be multiple administrators in the system. Administrators can create or delete other administrators, and change the password for any user in the system.
	</div><div class="formalpara"><h5 class="formalpara" id="idp22620008">Domain Administrators</h5>
			Domain administrators can perform administrative operations for users who belong to that domain. Domain administrators do not have visibility into physical servers or other domains.
		</div><div class="formalpara"><h5 class="formalpara" id="idp2360472">Root Administrator</h5>
			Root administrators have complete access to the system, including managing templates, service offerings, customer care administrators, and domains
		</div><div class="para">
		The resources belong to the account, not individual users in that account. For example, billing, resource limits, and so on are maintained by the account, not the users. A user can operate on any resource in the account provided the user has privileges for that operation. The privileges are determined by the role.
	</div></div><div xml:lang="pt-BR" class="section" id="LDAPserver-for-user-authentication" lang="pt-BR"><div class="titlepage"><div><div><h2 class="title" id="LDAPserver-for-user-authentication">3.2. Using an LDAP Server for User Authentication</h2></div></div></div><div class="para">
		You can use an external LDAP server such as Microsoft Active Directory or ApacheDS to authenticate CloudStack end-users. Just map CloudStack accounts to the corresponding LDAP accounts using a query filter. The query filter is written using the query syntax of the particular LDAP server, and can include special wildcard characters provided by CloudStack for matching common values such as the user’s email address and name. CloudStack will search the external LDAP directory tree starting at a specified base directory and return the distinguished name (DN) and password of the matching user. This information along with the given password is used to authenticate the user..
	</div><div class="para">
		To set up LDAP authentication in CloudStack, call the CloudStack API command ldapConfig and provide the following:
	</div><div class="itemizedlist"><ul><li class="listitem"><div class="para">
				Hostname or IP address and listening port of the LDAP server
			</div></li><li class="listitem"><div class="para">
				Base directory and query filter
			</div></li><li class="listitem"><div class="para">
				Search user DN credentials, which give CloudStack permission to search on the LDAP server
			</div></li><li class="listitem"><div class="para">
				SSL keystore and password, if SSL is used
			</div></li></ul></div><div xml:lang="pt-BR" class="section" id="example-LDAP-configuration-commands" lang="pt-BR"><div class="titlepage"><div><div><h3 class="title" id="example-LDAP-configuration-commands">3.2.1. Example LDAP Configuration Commands</h3></div></div></div><div class="para">
		To understand the examples in this section, you need to know the basic concepts behind calling the CloudStack API, which are explained in the Developer’s Guide.
	</div><div class="para">
		The following shows an example invocation of ldapConfig with an ApacheDS LDAP server
	</div><pre class="programlisting">http://127.0.0.1:8080/client/api?command=ldapConfig&amp;hostname=127.0.0.1&amp;searchbase=ou%3Dtesting%2Co%3Dproject&amp;queryfilter=%28%26%28uid%3D%25u%29%29&amp;binddn=cn%3DJohn+Singh%2Cou%3Dtesting%2Co%project&amp;bindpass=secret&amp;port=10389&amp;ssl=true&amp;truststore=C%3A%2Fcompany%2Finfo%2Ftrusted.ks&amp;truststorepass=secret&amp;response=json&amp;apiKey=YourAPIKey&amp;signature=YourSignatureHash</pre><div class="para">
		The command must be URL-encoded. Here is the same example without the URL encoding:
	</div><pre class="programlisting">http://127.0.0.1:8080/client/api?command=ldapConfig
&amp;hostname=127.0.0.1
&amp;searchbase=ou=testing,o=project
&amp;queryfilter=(&amp;(%uid=%u))
&amp;binddn=cn=John+Singh,ou=testing,o=project
&amp;bindpass=secret
&amp;port=10389
&amp;ssl=true
&amp;truststore=C:/company/info/trusted.ks
&amp;truststorepass=secret
&amp;response=json
&amp;apiKey=YourAPIKey&amp;signature=YourSignatureHash
</pre><div class="para">
		The following shows a similar command for Active Directory. Here, the search base is the testing group within a company, and the users are matched up based on email address.
	</div><pre class="programlisting">http://10.147.29.101:8080/client/api?command=ldapConfig&amp;hostname=10.147.28.250&amp;searchbase=OU%3Dtesting%2CDC%3Dcompany&amp;queryfilter=%28%26%28mail%3D%25e%29%29 &amp;binddn=CN%3DAdministrator%2COU%3Dtesting%2CDC%3Dcompany&amp;bindpass=1111_aaaa&amp;port=389&amp;response=json&amp;apiKey=YourAPIKey&amp;signature=YourSignatureHash</pre><div class="para">
		The next few sections explain some of the concepts you will need to know when filling out the ldapConfig parameters.
	</div></div><div xml:lang="pt-BR" class="section" id="search-base" lang="pt-BR"><div class="titlepage"><div><div><h3 class="title" id="search-base">3.2.2. Search Base</h3></div></div></div><div class="para">
		An LDAP query is relative to a given node of the LDAP directory tree, called the search base. The search base is the distinguished name (DN) of a level of the directory tree below which all users can be found. The users can be in the immediate base directory or in some subdirectory. The search base may be equivalent to the organization, group, or domain name. The syntax for writing a DN varies depending on which LDAP server you are using. A full discussion of distinguished names is outside the scope of our documentation. The following table shows some examples of search bases to find users in the testing department..
	</div><div class="informaltable"><table border="1"><colgroup><col width="50%" /><col width="50%" /></colgroup><thead><tr><th align="left">
						<div class="para">
							LDAP Server
						</div>
					</th><th align="left">
						<div class="para">
							Example Search Base DN
						</div>
					</th></tr></thead><tbody><tr><td align="left">
						<div class="para">
							ApacheDS
						</div>
					</td><td align="left">
						<div class="para">
							ou=testing,o=project
						</div>
					</td></tr><tr><td align="left">
						<div class="para">
							Active Directory
						</div>
					</td><td align="left">
						<div class="para">
							OU=testing, DC=company
						</div>
					</td></tr></tbody></table></div></div><div xml:lang="pt-BR" class="section" id="query-filter" lang="pt-BR"><div class="titlepage"><div><div><h3 class="title" id="query-filter">3.2.3. Query Filter</h3></div></div></div><div class="para">
		The query filter is used to find a mapped user in the external LDAP server. The query filter should uniquely map the CloudStack user to LDAP user for a meaningful authentication. For more information about query filter syntax, consult the documentation for your LDAP server.
	</div><div class="para">
		The CloudStack query filter wildcards are:
	</div><div class="informaltable"><table border="1"><colgroup><col width="50%" /><col width="50%" /></colgroup><thead><tr><th align="left">
						<div class="para">
							Query Filter Wildcard
						</div>
					</th><th align="left">
						<div class="para">
							Description
						</div>
					</th></tr></thead><tbody><tr><td align="left">
						<div class="para">
							%u
						</div>
					</td><td align="left">
						<div class="para">
							User name
						</div>
					</td></tr><tr><td align="left">
						<div class="para">
							%e
						</div>
					</td><td align="left">
						<div class="para">
							Email address
						</div>
					</td></tr><tr><td align="left">
						<div class="para">
							%n
						</div>
					</td><td align="left">
						<div class="para">
							First and last name
						</div>
					</td></tr></tbody></table></div><div class="para">
		The following examples assume you are using Active Directory, and refer to user attributes from the Active Directory schema.
	</div><div class="para">
		If the CloudStack user name is the same as the LDAP user ID:
	</div><pre class="programlisting">(uid=%u)</pre><div class="para">
		If the CloudStack user name is the LDAP display name:
	</div><pre class="programlisting">(displayName=%u)</pre><div class="para">
		To find a user by email address:
	</div><pre class="programlisting">(mail=%e)</pre></div><div xml:lang="pt-BR" class="section" id="search-user-bind-dn" lang="pt-BR"><div class="titlepage"><div><div><h3 class="title" id="search-user-bind-dn">3.2.4. Search User Bind DN</h3></div></div></div><div class="para">
		The bind DN is the user on the external LDAP server permitted to search the LDAP directory within the defined search base. When the DN is returned, the DN and passed password are used to authenticate the CloudStack user with an LDAP bind. A full discussion of bind DNs is outside the scope of our documentation. The following table shows some examples of bind DNs.
	</div><div class="informaltable"><table border="1"><colgroup><col width="50%" /><col width="50%" /></colgroup><thead><tr><th align="left">
						<div class="para">
							LDAP Server
						</div>
					</th><th align="left">
						<div class="para">
							Example Bind DN
						</div>
					</th></tr></thead><tbody><tr><td align="left">
						<div class="para">
							ApacheDS
						</div>
					</td><td align="left">
						<div class="para">
							cn=Administrator,dc=testing,ou=project,ou=org
						</div>
					</td></tr><tr><td align="left">
						<div class="para">
							Active Directory
						</div>
					</td><td align="left">
						<div class="para">
							CN=Administrator, OU=testing, DC=company, DC=com
						</div>
					</td></tr></tbody></table></div></div><div xml:lang="pt-BR" class="section" id="SSL-keystore-path-and-password" lang="pt-BR"><div class="titlepage"><div><div><h3 class="title" id="SSL-keystore-path-and-password">3.2.5. SSL Keystore Path and Password</h3></div></div></div><div class="para">
		If the LDAP server requires SSL, you need to enable it in the ldapConfig command by setting the parameters ssl, truststore, and truststorepass. Before enabling SSL for ldapConfig, you need to get the certificate which the LDAP server is using and add it to a trusted keystore. You will need to know the path to the keystore and the password.
	</div></div></div></div><div xml:lang="pt-BR" class="chapter" id="user-services-overview" lang="pt-BR"><div class="titlepage"><div><div><h2 class="title">Capítulo 4. User Services Overview</h2></div></div></div><div class="toc"><dl><dt><span class="section"><a href="#offerings-and-templates">4.1. Service Offerings, Disk Offerings, Network Offerings, and Templates</a></span></dt></dl></div><div class="para">
		In addition to the physical and logical infrastructure of your cloud, and the CloudStack software and servers, you also need a layer of user services so that people can actually make use of the cloud. This means not just a user UI, but a set of options and resources that users can choose from, such as templates for creating virtual machines, disk storage, and more. If you are running a commercial service, you will be keeping track of what services and resources users are consuming and charging them for that usage. Even if you do not charge anything for people to use your cloud – say, if the users are strictly internal to your organization, or just friends who are sharing your cloud – you can still keep track of what services they use and how much of them.
	</div><div class="section" id="offerings-and-templates"><div class="titlepage"><div><div><h2 class="title" id="offerings-and-templates">4.1. Service Offerings, Disk Offerings, Network Offerings, and Templates</h2></div></div></div><div class="para">
			A user creating a new instance can make a variety of choices about its characteristics and capabilities. CloudStack provides several ways to present users with choices when creating a new instance:
		</div><div class="itemizedlist"><ul><li class="listitem"><div class="para">
					Service Offerings, defined by the CloudStack administrator, provide a choice of CPU speed, number of CPUs, RAM size, tags on the root disk, and other choices. See Creating a New Compute Offering.
				</div></li><li class="listitem"><div class="para">
					Disk Offerings, defined by the CloudStack administrator, provide a choice of disk size for primary data storage. See Creating a New Disk Offering.
				</div></li><li class="listitem"><div class="para">
					Network Offerings, defined by the CloudStack administrator, describe the feature set that is available to end users from the virtual router or external networking devices on a given guest network. See Network Offerings.
				</div></li><li class="listitem"><div class="para">
					Templates, defined by the CloudStack administrator or by any CloudStack user, are the base OS images that the user can choose from when creating a new instance. For example, CloudStack includes CentOS as a template. See Working with Templates.
				</div></li></ul></div><div class="para">
			In addition to these choices that are provided for users, there is another type of service offering which is available only to the CloudStack root administrator, and is used for configuring virtual infrastructure resources. For more information, see Upgrading a Virtual Router with System Service Offerings.
		</div></div></div><div xml:lang="pt-BR" class="chapter" id="ui" lang="pt-BR"><div class="titlepage"><div><div><h2 class="title">Capítulo 5. Interface do usuário</h2></div></div></div><div class="toc"><dl><dt><span class="section"><a href="#log-in">5.1. Login na interface de usuário</a></span></dt><dd><dl><dt><span class="section"><a href="#end-user-ui-overview">5.1.1. End User's UI Overview</a></span></dt><dt><span class="section"><a href="#root-admin-ui-overview">5.1.2. Root Administrator's UI Overview</a></span></dt><dt><span class="section"><a href="#log-in-root-admin">5.1.3. Fazendo login como o administrador root</a></span></dt><dt><span class="section"><a href="#changing-root-password">5.1.4. Changing the Root Password</a></span></dt></dl></dd><dt><span class="section"><a href="#using-sshkeys">5.2. Usando as chaves SSH para autenticação.</a></span></dt><dd><dl><dt><span class="section"><a href="#create-ssh-template">5.2.1. Criando um template de instância que suporta chaves SSH</a></span></dt><dt><span class="section"><a href="#create-ssh-keypair">5.2.2. Criando o par de chaves SSH</a></span></dt><dt><span class="section"><a href="#creating-ssh-instance">5.2.3. Criando uma instância</a></span></dt><dt><span class="section"><a href="#logging-in-ssh">5.2.4. Fazendo login usando o par de chaves SSH</a></span></dt><dt><span class="section"><a href="#reset-ssh">5.2.5. Resetting SSH Keys</a></span></dt></dl></dd></dl></div><div xml:lang="pt-BR" class="section" id="log-in" lang="pt-BR"><div class="titlepage"><div><div><h2 class="title" id="log-in">5.1. Login na interface de usuário</h2></div></div></div><div class="para">
		O CloudStack provê uma interface de usuário web que pode ser usada tanto por administradores e usuários finais. A versão apropriada da interface é apresentada dependendo das credenciais utilizadas para login. A interface de usuário está disponível em navegadores populares, incluindo o IE7, IE8, IE9, Firefox 3.5+, Firefox 4, Safari 4 e Safari 5. A URL é: (substitua pelo endereço IP de seu servidor de gerenciamento)
	</div><pre class="programlisting">http://&lt;management-server-ip-address&gt;:8080/client</pre><div class="para">
		Em uma nova instalação do servidor de gerenciamento, uma tela de apresentação é exibida. Em visitas posteriores, você verá uma tela de login onde se especifica o seguinte para seguir para o painel de instrumentos:
	</div><div class="formalpara"><h5 class="formalpara" id="idm11307760">Nome de usuário</h5>
			A identificação de usuário de sua conta. O nome default de usuário é admin.
		</div><div class="formalpara"><h5 class="formalpara" id="idp5814616">Senha</h5>
			A senha associada com a identificação do usuário. A senha para identificação default é password.
		</div><div class="formalpara"><h5 class="formalpara" id="idp22064048">Domínio</h5>
			Se você é um usuário root, deixe este campo em branco.
		</div><div class="para">
		Se você é um usuário nos subdomínios, forneça o caminho completo para o domínio, excluindo o domínio root.
	</div><div class="para">
		Por exemplo, suponha que múltiplos níveis são criados sob o domínio root, tal como Comp1/hr. Os usuários no domínio Comp1 devem informar Comp1 no campo Domain, enquanto os usuários no domínio Comp1/sales devem informar Comp1/sales.
	</div><div class="para">
		Para mais orientação sobre as escolhas apresentadas quando você faz login na interface de usuário, veja <a class="xref" href="#log-in-root-admin">Seção 5.1.3, “Fazendo login como o administrador root”</a>.
	</div><div xml:lang="pt-BR" class="section" id="end-user-ui-overview" lang="pt-BR"><div class="titlepage"><div><div><h3 class="title" id="end-user-ui-overview">5.1.1. End User's UI Overview</h3></div></div></div><div class="para">
		The CloudStack UI helps users of cloud infrastructure to view and use their cloud resources, including virtual machines, templates and ISOs, data volumes and snapshots, guest networks, and IP addresses. If the user is a member or administrator of one or more CloudStack projects, the UI can provide a project-oriented view.
	</div></div><div xml:lang="pt-BR" class="section" id="root-admin-ui-overview" lang="pt-BR"><div class="titlepage"><div><div><h3 class="title" id="root-admin-ui-overview">5.1.2. Root Administrator's UI Overview</h3></div></div></div><div class="para">
		The CloudStack UI helps the CloudStack administrator provision, view, and manage the cloud infrastructure, domains, user accounts, projects, and configuration settings. The first time you start the UI after a fresh Management Server installation, you can choose to follow a guided tour to provision your cloud infrastructure. On subsequent logins, the dashboard of the logged-in user appears. The various links in this screen and the navigation bar on the left provide access to a variety of administrative functions. The root administrator can also use the UI to perform all the same tasks that are present in the end-user’s UI.
	</div></div><div xml:lang="pt-BR" class="section" id="log-in-root-admin" lang="pt-BR"><div class="titlepage"><div><div><h3 class="title" id="log-in-root-admin">5.1.3. Fazendo login como o administrador root</h3></div></div></div><div class="para">
		Depois do software do servidor de gerenciamento estar instalado e executando, você pode executar a interface de usuário do CloudStack. Esta interface de usuário está disponível para ajudá-lo a montar, visualizar e gerenciar sua infraestrutura de nuvem.
	</div><div class="orderedlist"><ol><li class="listitem"><div class="para">
				Abra o seu navegador web favorito e acesse esta URL. Substitua o endereço IP de seu servidor de gerenciamento:
			</div><pre class="programlisting">http://&lt;management-server-ip-address&gt;:8080/client</pre><div class="para">
				Após fazer login em um nova instalação do servidor de gerenciamento, uma tela de apresentação é exibida. Em visitas posteriores, você será levado diretamente ao painel de controle.
			</div></li><li class="listitem"><div class="para">
				Se você vê a tela apresentada somente na primeira vez, escolha uma das opções seguintes.
			</div><div class="itemizedlist"><ul><li class="listitem"><div class="para">
						<span class="bold bold"><strong>Continue with basic setup.</strong></span> Escolha esta opção se você está apenas experimentando o CloudStack, e você deseja uma explicação guiada sobre a configuração mais simples possível de modo a iniciar o uso imediatamente. Iremos ajudá-lo a configurar uma nuvem com os seguintes recursos: uma máquina única executando o CloudStack e que provê storage através do NFS; uma máquina única executando máquinas virtuais sob um hipervisor XenServer ou KVM; uma rede pública compartilhada.
					</div><div class="para">
						Os prompts nesta visita guiada devem lhe fornecer toda a informação que você precisa, mas se você deseja um pouco mais de detalhe, você pode seguir o Guia de instalação de avaliação.
					</div></li><li class="listitem"><div class="para">
						<span class="bold bold"><strong>I have used CloudStack before.</strong></span> Escolha esta opção se você já passou pela fase de design e planejou uma implementação mais sofisticada, ou você está pronto para incrementar uma implementação de avaliação que você preparou anteriormente através das telas de configuração básica. Na interface de usuário do administrador, você pode iniciar a utilização dos recursos mais poderosos de CloudPlatform, tais como configuração avançada de rede VLAN, alta disponibilidade, elementos adicionais de rede tais como balanceadores de carga e firewalls, e suporte para múltiplos hipervisores, incluindo Citrix XenServer, KVM, e VMware vSphere.
					</div><div class="para">
						O painel de instrumentos do administrador root é exibido.
					</div></li></ul></div></li><li class="listitem"><div class="para">
				Você deve escolher uma nova senha de root. Se você escolheu configuração básica, você será requisitado a criar uma nova senha imediatamente. Se você selecionou usuário experiente, siga os passos em <a class="xref" href="#changing-root-password">Seção 5.1.4, “Changing the Root Password”</a>.
			</div></li></ol></div><div class="warning"><div class="admonition_header"><h2>Atenção</h2></div><div class="admonition"><div class="para">
			Você está fazendo login como o administrador root. Esta conta gerencia a implementação do CloudStack, incluindo a infraestrutura física. O administrador root pode modificar opções de configuração para alterar funcionalidade básica, criar ou apagar contas de usuários, e tomar várias ações que somente devem ser executadas por uma pessoa autorizada. Por favor, altere a senha default para uma nova e única senha.
		</div></div></div><div class="para">
	</div></div><div xml:lang="pt-BR" class="section" id="changing-root-password" lang="pt-BR"><div class="titlepage"><div><div><h3 class="title" id="changing-root-password">5.1.4. Changing the Root Password</h3></div></div></div><div class="para">
		During installation and ongoing cloud administration, you will need to log in to the UI as the root administrator. The root administrator account manages the CloudStack deployment, including physical infrastructure. The root administrator can modify configuration settings to change basic functionality, create or delete user accounts, and take many actions that should be performed only by an authorized person. When first installing CloudStack, be sure to change the default password to a new, unique value.
	</div><div class="orderedlist"><ol><li class="listitem"><div class="para">
				Open your favorite Web browser and go to this URL. Substitute the IP address of your own Management Server:
			</div><pre class="programlisting">http://&lt;management-server-ip-address&gt;:8080/client</pre></li><li class="listitem"><div class="para">
				Log in to the UI using the current root user ID and password. The default is admin, password.
			</div></li><li class="listitem"><div class="para">
				Click Accounts.
			</div></li><li class="listitem"><div class="para">
				Click the admin account name.
			</div></li><li class="listitem"><div class="para">
				Click View Users.
			</div></li><li class="listitem"><div class="para">
				Click the admin user name.
			</div></li><li class="listitem"><div class="para">
				Click the Change Password button. 
				<span class="inlinemediaobject"><img src="./images/change-password.png" alt="change-password.png: button to change a user's password" /></span>
			</div></li><li class="listitem"><div class="para">
				Type the new password, and click OK.
			</div></li></ol></div></div></div><div xml:lang="pt-BR" class="section" id="using-sshkeys" lang="pt-BR"><div class="titlepage"><div><div><h2 class="title" id="using-sshkeys">5.2. Usando as chaves SSH para autenticação.</h2></div></div></div><div class="para">
		Além da autenticação de usuário e senha, o CloudStack suporta o uso de chaves SSH para efetuar login em infraestrutura de nuvem para segurança adicional. Você pode usar a API createSSHKeyPair para gerar as chaves SSH.
	</div><div class="para">
		Como cada usuário da nuvem tem sua própria chave SSH, um usuário da nuvem não pode efetuar login em instâncias de outro usuário da nuvem, a menos que eles compartilham seus arquivos de chave SSH. Usando um único par chave SSH, você pode gerenciar várias instâncias.
	</div><div class="section" id="create-ssh-template"><div class="titlepage"><div><div><h3 class="title" id="create-ssh-template">5.2.1. Criando um template de instância que suporta chaves SSH</h3></div></div></div><div class="para">
			Crie um template de instância que suporta chaves SSH.
		</div><div class="orderedlist"><ol><li class="listitem"><div class="para">
					Crie uma nova instância usando o template fornecido pelo cloudstack.
				</div><div class="para">
					Para informações adicionais na criação de nova instância, veja
				</div></li><li class="listitem"><div class="para">
					Faça download do script cloudstack de <a href="http://sourceforge.net/projects/cloudstack/files/SSH%20Key%20Gen%20Script/">The SSH Key Gen Script</a> para a instância que você criou.
				</div><pre class="programlisting">wget http://downloads.sourceforge.net/project/cloudstack/SSH%20Key%20Gen%20Script/cloud-set-guest-sshkey.in?r=http%3A%2F%2Fsourceforge.net%2Fprojects%2Fcloudstack%2Ffiles%2FSSH%2520Key%2520Gen%2520Script%2F&amp;ts=1331225219&amp;use_mirror=iweb</pre></li><li class="listitem"><div class="para">
					Copie o arquivo para /etc/init.d.
				</div><pre class="programlisting">cp cloud-set-guest-sshkey.in /etc/init.d/</pre></li><li class="listitem"><div class="para">
					Dê as permissões necessárias ao script:
				</div><pre class="programlisting">chmod +x /etc/init.d/cloud-set-guest-sshkey.in</pre></li><li class="listitem"><div class="para">
					Execute o script ao iniciar o sistema operacional:
				</div><pre class="programlisting">chkconfig --add cloud-set-guest-sshkey.in</pre></li><li class="listitem"><div class="para">
					Pare a instância.
				</div></li></ol></div></div><div class="section" id="create-ssh-keypair"><div class="titlepage"><div><div><h3 class="title" id="create-ssh-keypair">5.2.2. Criando o par de chaves SSH</h3></div></div></div><div class="para">
			Você deve fazer uma chamada para o método api createSSHKeyPair. Você pode usar a biblioteca API Python do CloudStack ou os comandos curl para fazer a chamada para a API CloudStack.
		</div><div class="para">
			Por exemplo, faça uma chamada a partir do servidor CloudStack para criar um par de chaves SSH chamado de "keypair-doc" para a conta admin no domínio root:
		</div><div class="note"><div class="admonition_header"><h2>Nota</h2></div><div class="admonition"><div class="para">
				Certifique-se de ajustar esses valores para atender o que você precisa. Se você está fazendo a chamada da API de um servidor diferente, o URL/PORT será diferente, e você vai precisar usar as chaves de API.
			</div></div></div><div class="orderedlist"><ol><li class="listitem"><div class="para">
					Execute o seguinte comando curl:
				</div><pre class="programlisting">curl --globoff "http://localhost:8096/?command=createSSHKeyPair&amp;name=keypair-doc&amp;account=admin&amp;domainid=5163440e-c44b-42b5-9109-ad75cae8e8a2"</pre><div class="para">
					A saída é algo semelhante ao que é dado a seguir:
				</div><pre class="programlisting">&lt;?xml version="1.0" encoding="ISO-8859-1"?&gt;&lt;createsshkeypairresponse cloud-stack-version="3.0.0.20120228045507"&gt;&lt;keypair&gt;&lt;name&gt;keypair-doc&lt;/name&gt;&lt;fingerprint&gt;f6:77:39:d5:5e:77:02:22:6a:d8:7f:ce:ab:cd:b3:56&lt;/fingerprint&gt;&lt;privatekey&gt;-----BEGIN RSA PRIVATE KEY-----
MIICXQIBAAKBgQCSydmnQ67jP6lNoXdX3noZjQdrMAWNQZ7y5SrEu4wDxplvhYci
dXYBeZVwakDVsU2MLGl/K+wefwefwefwefwefJyKJaogMKn7BperPD6n1wIDAQAB
AoGAdXaJ7uyZKeRDoy6wA0UmF0kSPbMZCR+UTIHNkS/E0/4U+6lhMokmFSHtu
mfDZ1kGGDYhMsdytjDBztljawfawfeawefawfawfawQQDCjEsoRdgkduTy
QpbSGDIa11Jsc+XNDx2fgRinDsxXI/zJYXTKRhSl/LIPHBw/brW8vzxhOlSOrwm7
VvemkkgpAkEAwSeEw394LYZiEVv395ar9MLRVTVLwpo54jC4tsOxQCBlloocK
lYaocpk0yBqqOUSBawfIiDCuLXSdvBo1Xz5ICTM19vgvEp/+kMuECQBzm
nVo8b2Gvyagqt/KEQo8wzH2THghZ1qQ1QRhIeJG2aissEacF6bGB2oZ7Igim5L14
4KR7OeEToyCLC2k+02UCQQCrniSnWKtDVoVqeK/zbB32JhW3Wullv5p5zUEcd
KfEEuzcCUIxtJYTahJ1pvlFkQ8anpuxjSEDp8x/18bq3
-----END RSA PRIVATE KEY-----
&lt;/privatekey&gt;&lt;/keypair&gt;&lt;/createsshkeypairresponse&gt;</pre></li><li class="listitem"><div class="para">
					Copie os dados da chave em um arquivo. O arquivo fica assim:
				</div><pre class="programlisting">-----BEGIN RSA PRIVATE KEY-----
MIICXQIBAAKBgQCSydmnQ67jP6lNoXdX3noZjQdrMAWNQZ7y5SrEu4wDxplvhYci
dXYBeZVwakDVsU2MLGl/K+wefwefwefwefwefJyKJaogMKn7BperPD6n1wIDAQAB
AoGAdXaJ7uyZKeRDoy6wA0UmF0kSPbMZCR+UTIHNkS/E0/4U+6lhMokmFSHtu
mfDZ1kGGDYhMsdytjDBztljawfawfeawefawfawfawQQDCjEsoRdgkduTy
QpbSGDIa11Jsc+XNDx2fgRinDsxXI/zJYXTKRhSl/LIPHBw/brW8vzxhOlSOrwm7
VvemkkgpAkEAwSeEw394LYZiEVv395ar9MLRVTVLwpo54jC4tsOxQCBlloocK
lYaocpk0yBqqOUSBawfIiDCuLXSdvBo1Xz5ICTM19vgvEp/+kMuECQBzm
nVo8b2Gvyagqt/KEQo8wzH2THghZ1qQ1QRhIeJG2aissEacF6bGB2oZ7Igim5L14
4KR7OeEToyCLC2k+02UCQQCrniSnWKtDVoVqeK/zbB32JhW3Wullv5p5zUEcd
KfEEuzcCUIxtJYTahJ1pvlFkQ8anpuxjSEDp8x/18bq3
-----END RSA PRIVATE KEY-----</pre></li><li class="listitem"><div class="para">
					Salve o arquivo.
				</div></li></ol></div></div><div class="section" id="creating-ssh-instance"><div class="titlepage"><div><div><h3 class="title" id="creating-ssh-instance">5.2.3. Criando uma instância</h3></div></div></div><div class="para">
			Depois de salvar o arquivo de par de chaves SSH, é necessário criar uma instância usando o template que você criou no <a class="xref" href="#create-ssh-template">Seção 5.2.1, “Criando um template de instância que suporta chaves SSH”</a>. Certifique-se de usar o nome da mesma chave SSH que você criou no <a class="xref" href="#create-ssh-keypair">Seção 5.2.2, “Criando o par de chaves SSH”</a>.
		</div><div class="note"><div class="admonition_header"><h2>Nota</h2></div><div class="admonition"><div class="para">
				Você não pode criar a instância usando o GUI neste momento e associar a instância com o recém-criado par de chaves SSH.
			</div></div></div><div class="para">
			Uma amostra do comando curl para criar uma nova instância é:
		</div><pre class="programlisting">curl --globoff http://localhost:&lt;port number&gt;/?command=deployVirtualMachine\&amp;zoneId=1\&amp;serviceOfferingId=18727021-7556-4110-9322-d625b52e0813\&amp;templateId=e899c18a-ce13-4bbf-98a9-625c5026e0b5\&amp;securitygroupids=ff03f02f-9e3b-48f8-834d-91b822da40c5\&amp;account=admin\&amp;domainid=1\&amp;keypair=keypair-doc</pre><div class="para">
			Substitua o template, oferta de serviços e IDs de grupo de segurança (se você estiver usando o recurso de grupo de segurança) que estão em seu ambiente de nuvem.
		</div></div><div class="section" id="logging-in-ssh"><div class="titlepage"><div><div><h3 class="title" id="logging-in-ssh">5.2.4. Fazendo login usando o par de chaves SSH</h3></div></div></div><div class="para">
			Para testar se as chaves SSH foram geradas com sucesso, verifique se você pode fazer login para configuração da nuvem.
		</div><div class="para">
			Por exemplo, de um sistema operacional Linux, execute:
		</div><pre class="programlisting">ssh -i ~/.ssh/keypair-doc &lt;ip address&gt;</pre><div class="para">
			O parâmetro -i informa ao cliente ssh para usar uma chave ssh encontrada em ~/.ssh/keypair-doc.
		</div></div><div class="section" id="reset-ssh"><div class="titlepage"><div><div><h3 class="title" id="reset-ssh">5.2.5. Resetting SSH Keys</h3></div></div></div><div class="para">
			With the API command resetSSHKeyForVirtualMachine, a user can set or reset the SSH keypair assigned to a virtual machine. A lost or compromised SSH keypair can be changed, and the user can access the VM by using the new keypair. Just create or register a new keypair, then call resetSSHKeyForVirtualMachine.
		</div></div></div></div><div xml:lang="pt-BR" class="chapter" id="projects" lang="pt-BR"><div class="titlepage"><div><div><h2 class="title">Capítulo 6. Using Projects to Organize Users and Resources</h2></div></div></div><div class="toc"><dl><dt><span class="section"><a href="#projects-overview">6.1. Overview of Projects</a></span></dt><dt><span class="section"><a href="#configuring-projects">6.2. Configuring Projects</a></span></dt><dd><dl><dt><span class="section"><a href="#set-up-invitations">6.2.1. Setting Up Invitations</a></span></dt><dt><span class="section"><a href="#set-resource-limits-for-projects">6.2.2. Setting Resource Limits for Projects</a></span></dt><dt><span class="section"><a href="#set-projects-creator-permissions">6.2.3. Setting Project Creator Permissions</a></span></dt></dl></dd><dt><span class="section"><a href="#create-new-projects">6.3. Creating a New Project</a></span></dt><dt><span class="section"><a href="#add-members-to-projects">6.4. Adding Members to a Project</a></span></dt><dd><dl><dt><span class="section"><a href="#send-projects-membership-invitation">6.4.1. Sending Project Membership Invitations</a></span></dt><dt><span class="section"><a href="#add-projects-members-from-ui">6.4.2. Adding Project Members From the UI</a></span></dt></dl></dd><dt><span class="section"><a href="#accept-membership-invite">6.5. Accepting a Membership Invitation</a></span></dt><dt><span class="section"><a href="#suspend-project">6.6. Suspending or Deleting a Project</a></span></dt><dt><span class="section"><a href="#use-project-view">6.7. Using the Project View</a></span></dt></dl></div><div xml:lang="pt-BR" class="section" id="projects-overview" lang="pt-BR"><div class="titlepage"><div><div><h2 class="title" id="projects-overview">6.1. Overview of Projects</h2></div></div></div><div class="para">
		Projects are used to organize people and resources. CloudStack users within a single domain can group themselves into project teams so they can collaborate and share virtual resources such as VMs, snapshots, templates, data disks, and IP addresses. CloudStack tracks resource usage per project as well as per user, so the usage can be billed to either a user account or a project. For example, a private cloud within a software company might have all members of the QA department assigned to one project, so the company can track the resources used in testing while the project members can more easily isolate their efforts from other users of the same cloud
	</div><div class="para">
		You can configure CloudStack to allow any user to create a new project, or you can restrict that ability to just CloudStack administrators. Once you have created a project, you become that project’s administrator, and you can add others within your domain to the project. CloudStack can be set up either so that you can add people directly to a project, or so that you have to send an invitation which the recipient must accept. Project members can view and manage all virtual resources created by anyone in the project (for example, share VMs). A user can be a member of any number of projects and can switch views in the CloudStack UI to show only project-related information, such as project VMs, fellow project members, project-related alerts, and so on.
	</div><div class="para">
		The project administrator can pass on the role to another project member. The project administrator can also add more members, remove members from the project, set new resource limits (as long as they are below the global defaults set by the CloudStack administrator), and delete the project. When the administrator removes a member from the project, resources created by that user, such as VM instances, remain with the project. This brings us to the subject of resource ownership and which resources can be used by a project.
	</div><div class="para">
		Resources created within a project are owned by the project, not by any particular CloudStack account, and they can be used only within the project. A user who belongs to one or more projects can still create resources outside of those projects, and those resources belong to the user’s account; they will not be counted against the project’s usage or resource limits. You can create project-level networks to isolate traffic within the project and provide network services such as port forwarding, load balancing, VPN, and static NAT. A project can also make use of certain types of resources from outside the project, if those resources are shared. For example, a shared network or public template is available to any project in the domain. A project can get access to a private template if the template’s owner will grant permission. A project can use any service offering or disk offering available in its domain; however, you can not create private service and disk offerings at the project level..
	</div></div><div xml:lang="pt-BR" class="section" id="configuring-projects" lang="pt-BR"><div class="titlepage"><div><div><h2 class="title" id="configuring-projects">6.2. Configuring Projects</h2></div></div></div><div class="para">
		Before CloudStack users start using projects, the CloudStack administrator must set up various systems to support them, including membership invitations, limits on project resources, and controls on who can create projects.
	</div><div xml:lang="pt-BR" class="section" id="set-up-invitations" lang="pt-BR"><div class="titlepage"><div><div><h3 class="title" id="set-up-invitations">6.2.1. Setting Up Invitations</h3></div></div></div><div class="para">
		CloudStack can be set up either so that project administrators can add people directly to a project, or so that it is necessary to send an invitation which the recipient must accept. The invitation can be sent by email or through the user’s CloudStack account. If you want administrators to use invitations to add members to projects, turn on and set up the invitations feature in CloudStack.
	</div><div class="orderedlist"><ol><li class="listitem"><div class="para">
				Log in as administrator to the CloudStack UI.
			</div></li><li class="listitem"><div class="para">
				Na barra de navegação à esquerda, clique em Global Settings.
			</div></li><li class="listitem"><div class="para">
				In the search box, type project and click the search button.
				<span class="inlinemediaobject"><img src="./images/search-button.png" alt="searchbutton.png: Searches projects" /></span>
			</div></li><li class="listitem"><div class="para">
				In the search results, you can see a few other parameters you need to set to control how invitations behave. The table below shows global configuration parameters related to project invitations. Click the edit button to set each parameter.
			</div><div class="informaltable"><table border="1"><colgroup><col width="50%" /><col width="50%" /></colgroup><thead><tr><th align="left">
								<div class="para">
									Configuration Parameters
								</div>
							</th><th align="left">
								<div class="para">
									DescriÃ§Ã£o
								</div>
							</th></tr></thead><tbody><tr><td align="left">
								<div class="para">
									project.invite.required
								</div>
							</td><td align="left">
								<div class="para">
									Set to true to turn on the invitations feature.
								</div>
							</td></tr><tr><td align="left">
								<div class="para">
									project.email.sender
								</div>
							</td><td align="left">
								<div class="para">
									The email address to show in the From field of invitation emails.
								</div>
							</td></tr><tr><td align="left">
								<div class="para">
									project.invite.timeout
								</div>
							</td><td align="left">
								<div class="para">
									Amount of time to allow for a new member to respond to the invitation.
								</div>
							</td></tr><tr><td align="left">
								<div class="para">
									project.smtp.host
								</div>
							</td><td align="left">
								<div class="para">
									Name of the host that acts as an email server to handle invitations.
								</div>
							</td></tr><tr><td align="left">
								<div class="para">
									project.smtp.password
								</div>
							</td><td align="left">
								<div class="para">
									(Optional) Password required by the SMTP server. You must also set project.smtp.username and set project.smtp.useAuth to true.
								</div>
							</td></tr><tr><td align="left">
								<div class="para">
									project.smtp.port
								</div>
							</td><td align="left">
								<div class="para">
									SMTP server’s listening port.
								</div>
							</td></tr><tr><td align="left">
								<div class="para">
									project.smtp.useAuth
								</div>
							</td><td align="left">
								<div class="para">
									Set to true if the SMTP server requires a username and password.
								</div>
							</td></tr><tr><td align="left">
								<div class="para">
									project.smtp.username
								</div>
							</td><td align="left">
								<div class="para">
									(Optional) User name required by the SMTP server for authentication. You must also set project.smtp.password and set project.smtp.useAuth to true..
								</div>
							</td></tr></tbody></table></div></li><li class="listitem"><div class="para">
				Restart the Management Server:
			</div><pre class="programlisting">service cloudstack-management restart</pre></li></ol></div></div><div xml:lang="pt-BR" class="section" id="set-resource-limits-for-projects" lang="pt-BR"><div class="titlepage"><div><div><h3 class="title" id="set-resource-limits-for-projects">6.2.2. Setting Resource Limits for Projects</h3></div></div></div><div class="para">
		The CloudStack administrator can set global default limits to control the amount of resources that can be owned by each project in the cloud. This serves to prevent uncontrolled usage of resources such as snapshots, IP addresses, and virtual machine instances. Domain administrators can override these resource limits for individual projects with their domains, as long as the new limits are below the global defaults set by the CloudStack root administrator. The root administrator can also set lower resource limits for any project in the cloud
	</div><div xml:lang="pt-BR" class="section" id="set-per-project-resource-limits" lang="pt-BR"><div class="titlepage"><div><div><h4 class="title" id="set-per-project-resource-limits">6.2.2.1. Setting Per-Project Resource Limits</h4></div></div></div><div class="para">
		The CloudStack root administrator or the domain administrator of the domain where the project resides can set new resource limits for an individual project. The project owner can set resource limits only if the owner is also a domain or root administrator.
	</div><div class="para">
		The new limits must be below the global default limits set by the CloudStack administrator (as described in <a class="xref" href="#set-resource-limits-for-projects">Seção 6.2.2, “Setting Resource Limits for Projects”</a>). If the project already owns more of a given type of resource than the new maximum, the resources are not affected; however, the project can not add any new resources of that type until the total drops below the new limit.
	</div><div class="orderedlist"><ol><li class="listitem"><div class="para">
				Log in as administrator to the CloudStack UI.
			</div></li><li class="listitem"><div class="para">
				In the left navigation, click Projects.
			</div></li><li class="listitem"><div class="para">
				In Select View, choose Projects.
			</div></li><li class="listitem"><div class="para">
				Click the name of the project you want to work with.
			</div></li><li class="listitem"><div class="para">
				Click the Resources tab. This tab lists the current maximum amount that the project is allowed to own for each type of resource.
			</div></li><li class="listitem"><div class="para">
				Type new values for one or more resources.
			</div></li><li class="listitem"><div class="para">
				Click Apply.
			</div></li></ol></div></div><div xml:lang="pt-BR" class="section" id="set-global-project-resource-limits" lang="pt-BR"><div class="titlepage"><div><div><h4 class="title" id="set-global-project-resource-limits">6.2.2.2. Setting the Global Project Resource Limits</h4></div></div></div><div class="orderedlist"><ol><li class="listitem"><div class="para">
				Log in as administrator to the CloudStack UI.
			</div></li><li class="listitem"><div class="para">
				Na barra de navegação à esquerda, clique em Global Settings.
			</div></li><li class="listitem"><div class="para">
				In the search box, type max.projects and click the search button.
			</div></li><li class="listitem"><div class="para">
				In the search results, you will see the parameters you can use to set per-project maximum resource amounts that apply to all projects in the cloud. No project can have more resources, but an individual project can have lower limits. Click the edit button to set each parameter. 
				<span class="inlinemediaobject"><img src="./images/edit-icon.png" alt="editbutton.png: Edits parameters" /></span>
			</div><div class="informaltable"><table border="1"><colgroup><col width="50%" /><col width="50%" /></colgroup><tbody><tr><td align="left">
								<div class="para">
									max.project.public.ips
								</div>
							</td><td align="left">
								<div class="para">
									Maximum number of public IP addresses that can be owned by any project in the cloud. See About Public IP Addresses.
								</div>
							</td></tr><tr><td align="left">
								<div class="para">
									max.project.snapshots
								</div>
							</td><td align="left">
								<div class="para">
									Maximum number of snapshots that can be owned by any project in the cloud. See Working with Snapshots.
								</div>
							</td></tr><tr><td align="left">
								<div class="para">
									max.project.templates
								</div>
							</td><td align="left">
								<div class="para">
									Maximum number of templates that can be owned by any project in the cloud. See Working with Templates.
								</div>
							</td></tr><tr><td align="left">
								<div class="para">
									max.project.uservms
								</div>
							</td><td align="left">
								<div class="para">
									Maximum number of guest virtual machines that can be owned by any project in the cloud. See Working With Virtual Machines.
								</div>
							</td></tr><tr><td align="left">
								<div class="para">
									max.project.volumes
								</div>
							</td><td align="left">
								<div class="para">
									Maximum number of data volumes that can be owned by any project in the cloud. See Working with Volumes.
								</div>
							</td></tr></tbody></table></div></li><li class="listitem"><div class="para">
				Reinicie o servidor de gerenciamento.
			</div><pre class="programlisting"># service cloudstack-management restart</pre></li></ol></div></div></div><div xml:lang="pt-BR" class="section" id="set-projects-creator-permissions" lang="pt-BR"><div class="titlepage"><div><div><h3 class="title" id="set-projects-creator-permissions">6.2.3. Setting Project Creator Permissions</h3></div></div></div><div class="para">
		You can configure CloudStack to allow any user to create a new project, or you can restrict that ability to just CloudStack administrators.
	</div><div class="orderedlist"><ol><li class="listitem"><div class="para">
				Log in as administrator to the CloudStack UI.
			</div></li><li class="listitem"><div class="para">
				Na barra de navegação à esquerda, clique em Global Settings.
			</div></li><li class="listitem"><div class="para">
				In the search box, type allow.user.create.projects.
			</div></li><li class="listitem"><div class="para">
				Click the edit button to set the parameter.
				<span class="inlinemediaobject"><img src="./images/edit-icon.png" alt="editbutton.png: Edits parameters" /></span>
			</div><div class="informaltable"><table border="1"><colgroup><col width="50%" /><col width="50%" /></colgroup><tbody><tr><td align="left">
								<div class="para">
									allow.user.create.projects
								</div>
							</td><td align="left">
								<div class="para">
									Set to true to allow end users to create projects. Set to false if you want only the CloudStack root administrator and domain administrators to create projects.
								</div>
							</td></tr></tbody></table></div></li><li class="listitem"><div class="para">
				Reinicie o servidor de gerenciamento.
			</div><pre class="programlisting"># service cloudstack-management restart</pre></li></ol></div></div></div><div xml:lang="pt-BR" class="section" id="create-new-projects" lang="pt-BR"><div class="titlepage"><div><div><h2 class="title" id="create-new-projects">6.3. Creating a New Project</h2></div></div></div><div class="para">
		CloudStack administrators and domain administrators can create projects. If the global configuration parameter allow.user.create.projects is set to true, end users can also create projects.
	</div><div class="orderedlist"><ol><li class="listitem"><div class="para">
				Log in as administrator to the CloudStack UI.
			</div></li><li class="listitem"><div class="para">
				In the left navigation, click Projects.
			</div></li><li class="listitem"><div class="para">
				In Select view, click Projects.
			</div></li><li class="listitem"><div class="para">
				Click New Project.
			</div></li><li class="listitem"><div class="para">
				Give the project a name and description for display to users, then click Create Project.
			</div></li><li class="listitem"><div class="para">
				A screen appears where you can immediately add more members to the project. This is optional. Click Next when you are ready to move on.
			</div></li><li class="listitem"><div class="para">
				Click Save.
			</div></li></ol></div></div><div xml:lang="pt-BR" class="section" id="add-members-to-projects" lang="pt-BR"><div class="titlepage"><div><div><h2 class="title" id="add-members-to-projects">6.4. Adding Members to a Project</h2></div></div></div><div class="para">
		New members can be added to a project by the project’s administrator, the domain administrator of the domain where the project resides or any parent domain, or the CloudStack root administrator. There are two ways to add members in CloudStack, but only one way is enabled at a time:
	</div><div class="itemizedlist"><ul><li class="listitem"><div class="para">
				If invitations have been enabled, you can send invitations to new members.
			</div></li><li class="listitem"><div class="para">
				If invitations are not enabled, you can add members directly through the UI.
			</div></li></ul></div><div xml:lang="pt-BR" class="section" id="send-projects-membership-invitation" lang="pt-BR"><div class="titlepage"><div><div><h3 class="title" id="send-projects-membership-invitation">6.4.1. Sending Project Membership Invitations</h3></div></div></div><div class="para">
		Use these steps to add a new member to a project if the invitations feature is enabled in the cloud as described in <a class="xref" href="#set-up-invitations">Seção 6.2.1, “Setting Up Invitations”</a>. If the invitations feature is not turned on, use the procedure in Adding Project Members From the UI.
	</div><div class="orderedlist"><ol><li class="listitem"><div class="para">
				Log in to the CloudStack UI.
			</div></li><li class="listitem"><div class="para">
				In the left navigation, click Projects.
			</div></li><li class="listitem"><div class="para">
				In Select View, choose Projects.
			</div></li><li class="listitem"><div class="para">
				Click the name of the project you want to work with.
			</div></li><li class="listitem"><div class="para">
				Click the Invitations tab.
			</div></li><li class="listitem"><div class="para">
				In Add by, select one of the following:
			</div><div class="orderedlist"><ol><li class="listitem"><div class="para">
						Account – The invitation will appear in the user’s Invitations tab in the Project View. See Using the Project View.
					</div></li><li class="listitem"><div class="para">
						Email – The invitation will be sent to the user’s email address. Each emailed invitation includes a unique code called a token which the recipient will provide back to CloudStack when accepting the invitation. Email invitations will work only if the global parameters related to the SMTP server have been set. See <a class="xref" href="#set-up-invitations">Seção 6.2.1, “Setting Up Invitations”</a>.
					</div></li></ol></div></li><li class="listitem"><div class="para">
				Type the user name or email address of the new member you want to add, and click Invite. Type the CloudStack user name if you chose Account in the previous step. If you chose Email, type the email address. You can invite only people who have an account in this cloud within the same domain as the project. However, you can send the invitation to any email address.
			</div></li><li class="listitem"><div class="para">
				To view and manage the invitations you have sent, return to this tab. When an invitation is accepted, the new member will appear in the project’s Accounts tab.
			</div></li></ol></div></div><div xml:lang="pt-BR" class="section" id="add-projects-members-from-ui" lang="pt-BR"><div class="titlepage"><div><div><h3 class="title" id="add-projects-members-from-ui">6.4.2. Adding Project Members From the UI</h3></div></div></div><div class="para">
		The steps below tell how to add a new member to a project if the invitations feature is not enabled in the cloud. If the invitations feature is enabled cloud,as described in <a class="xref" href="#set-up-invitations">Seção 6.2.1, “Setting Up Invitations”</a>, use the procedure in <a class="xref" href="#send-projects-membership-invitation">Seção 6.4.1, “Sending Project Membership Invitations”</a>.
	</div><div class="orderedlist"><ol><li class="listitem"><div class="para">
				Log in to the CloudStack UI.
			</div></li><li class="listitem"><div class="para">
				In the left navigation, click Projects.
			</div></li><li class="listitem"><div class="para">
				In Select View, choose Projects.
			</div></li><li class="listitem"><div class="para">
				Click the name of the project you want to work with.
			</div></li><li class="listitem"><div class="para">
				Click the Accounts tab. The current members of the project are listed.
			</div></li><li class="listitem"><div class="para">
				Type the account name of the new member you want to add, and click Add Account. You can add only people who have an account in this cloud and within the same domain as the project.
			</div></li></ol></div></div></div><div xml:lang="pt-BR" class="section" id="accept-membership-invite" lang="pt-BR"><div class="titlepage"><div><div><h2 class="title" id="accept-membership-invite">6.5. Accepting a Membership Invitation</h2></div></div></div><div class="para">
		If you have received an invitation to join a CloudStack project, and you want to accept the invitation, follow these steps:
	</div><div class="orderedlist"><ol><li class="listitem"><div class="para">
				Log in to the CloudStack UI.
			</div></li><li class="listitem"><div class="para">
				In the left navigation, click Projects.
			</div></li><li class="listitem"><div class="para">
				In Select View, choose Invitations.
			</div></li><li class="listitem"><div class="para">
				If you see the invitation listed onscreen, click the Accept button.
			</div><div class="para">
				Invitations listed on screen were sent to you using your CloudStack account name.
			</div></li><li class="listitem"><div class="para">
				If you received an email invitation, click the Enter Token button, and provide the project ID and unique ID code (token) from the email.
			</div></li></ol></div></div><div xml:lang="pt-BR" class="section" id="suspend-project" lang="pt-BR"><div class="titlepage"><div><div><h2 class="title" id="suspend-project">6.6. Suspending or Deleting a Project</h2></div></div></div><div class="para">
		When a project is suspended, it retains the resources it owns, but they can no longer be used. No new resources or members can be added to a suspended project.
	</div><div class="para">
		When a project is deleted, its resources are destroyed, and member accounts are removed from the project. The project’s status is shown as Disabled pending final deletion.
	</div><div class="para">
		A project can be suspended or deleted by the project administrator, the domain administrator of the domain the project belongs to or of its parent domain, or the CloudStack root administrator.
	</div><div class="orderedlist"><ol><li class="listitem"><div class="para">
				Log in to the CloudStack UI.
			</div></li><li class="listitem"><div class="para">
				In the left navigation, click Projects.
			</div></li><li class="listitem"><div class="para">
				In Select View, choose Projects.
			</div></li><li class="listitem"><div class="para">
				Click the name of the project.
			</div></li><li class="listitem"><div class="para">
				Click one of the buttons:
			</div><div class="para">
				To delete, use 
				<span class="inlinemediaobject"><img src="./images/delete-button.png" alt="deletebutton.png: Removes a project" /></span>
			</div><div class="para">
				To suspend, use
				<span class="inlinemediaobject"><img src="./images/suspend-icon.png" alt="deletebutton.png: suspends a project" /></span>
			</div></li></ol></div></div><div xml:lang="pt-BR" class="section" id="use-project-view" lang="pt-BR"><div class="titlepage"><div><div><h2 class="title" id="use-project-view">6.7. Using the Project View</h2></div></div></div><div class="para">
		If you are a member of a project, you can use CloudStack’s project view to see project members, resources consumed, and more. The project view shows only information related to one project. It is a useful way to filter out other information so you can concentrate on a project status and resources.
	</div><div class="orderedlist"><ol><li class="listitem"><div class="para">
				Log in to the CloudStack UI.
			</div></li><li class="listitem"><div class="para">
				Click Project View.
			</div></li><li class="listitem"><div class="para">
				The project dashboard appears, showing the project’s VMs, volumes, users, events, network settings, and more. From the dashboard, you can:
			</div><div class="itemizedlist"><ul><li class="listitem"><div class="para">
						Click the Accounts tab to view and manage project members. If you are the project administrator, you can add new members, remove members, or change the role of a member from user to admin. Only one member at a time can have the admin role, so if you set another user’s role to admin, your role will change to regular user.
					</div></li><li class="listitem"><div class="para">
						(If invitations are enabled) Click the Invitations tab to view and manage invitations that have been sent to new project members but not yet accepted. Pending invitations will remain in this list until the new member accepts, the invitation timeout is reached, or you cancel the invitation.
					</div></li></ul></div></li></ol></div></div></div><div xml:lang="pt-BR" class="chapter" id="provisioning-steps" lang="pt-BR"><div class="titlepage"><div><div><h2 class="title">Capítulo 7. Passos para provisionamento de sua infraestrutura de nuvem</h2></div></div></div><div class="toc"><dl><dt><span class="section"><a href="#provisioning-steps-overview">7.1. Visão geral dos passos de provisionamento</a></span></dt><dt><span class="section"><a href="#region-add">7.2. Adding Regions (optional)</a></span></dt><dd><dl><dt><span class="section"><a href="#region-first">7.2.1. The First Region: The Default Region</a></span></dt><dt><span class="section"><a href="#region-add-2">7.2.2. Adding a Region</a></span></dt><dt><span class="section"><a href="#region-add-n">7.2.3. Adding Third and Subsequent Regions</a></span></dt><dt><span class="section"><a href="#region-delete">7.2.4. Deleting a Region</a></span></dt></dl></dd><dt><span class="section"><a href="#zone-add">7.3. Adicionando uma zona</a></span></dt><dd><dl><dt><span class="section"><a href="#basic-zone-configuration">7.3.1. Configuração de zona básica</a></span></dt><dt><span class="section"><a href="#advanced-zone-configuration">7.3.2. Advanced Zone Configuration</a></span></dt></dl></dd><dt><span class="section"><a href="#pod-add">7.4. Adicionando um pod</a></span></dt><dt><span class="section"><a href="#cluster-add">7.5. Adicionando um cluster</a></span></dt><dd><dl><dt><span class="section"><a href="#add-clusters-kvm-xenserver">7.5.1. Add Cluster: KVM or XenServer</a></span></dt><dt><span class="section"><a href="#add-clusters-vsphere">7.5.2. Add Cluster: vSphere</a></span></dt></dl></dd><dt><span class="section"><a href="#host-add">7.6. Adding a Host</a></span></dt><dd><dl><dt><span class="section"><a href="#host-add-xenserver-kvm-ovm">7.6.1. Adding a Host (XenServer or KVM)</a></span></dt><dt><span class="section"><a href="#host-add-vsphere">7.6.2. Adding a Host (vSphere)</a></span></dt></dl></dd><dt><span class="section"><a href="#primary-storage-add">7.7. Adicionar Storage PrimÃ¡rio</a></span></dt><dd><dl><dt><span class="section"><a href="#sys-require-primary-storage">7.7.1. System Requirements for Primary Storage</a></span></dt><dt><span class="section"><a href="#adding-primary-storage">7.7.2. Adding Primary Stroage</a></span></dt></dl></dd><dt><span class="section"><a href="#secondary-storage-add">7.8. Adicionar Storage SecundÃ¡rio</a></span></dt><dd><dl><dt><span class="section"><a href="#sys-require-secondary-storage">7.8.1. System Requirements for Secondary Storage</a></span></dt><dt><span class="section"><a href="#adding-secondary-storage">7.8.2. Adding Secondary Storage</a></span></dt></dl></dd><dt><span class="section"><a href="#initialize-and-test">7.9. Initialize and Test</a></span></dt></dl></div><div class="para">
		This section tells how to add regions, zones, pods, clusters, hosts, storage, and networks to your cloud. If you are unfamiliar with these entities, please begin by looking through <a class="xref" href="#cloud-infrastructure-concepts">Capítulo 2, <em>Conceitos de infraestrutura de nuvem</em></a>.
	</div><div xml:lang="pt-BR" class="section" id="provisioning-steps-overview" lang="pt-BR"><div class="titlepage"><div><div><h2 class="title" id="provisioning-steps-overview">7.1. Visão geral dos passos de provisionamento</h2></div></div></div><div class="para">
		Depois do servidor de gerenciamento ser instalado e estar funcionando, você pode adicionar os recursos de computação para gerenciá-lo. Para uma visão geral de como uma infraestrutura de nuvem CloudStack é organizada, veja <a class="xref" href="#cloud-infrastructure-overview">Seção 1.3.2, “Visão geral da infraestrutura de nuvem”</a>.
	</div><div class="para">
		Para provisionar a infraestrutura de nuvem, ou para escalá-la a qualquer momento, siga estes procedimentos:
	</div><div class="orderedlist"><ol><li class="listitem"><div class="para">
				Define regions (optional). See <a class="xref" href="#region-add">Seção 7.2, “Adding Regions (optional)”</a>.
			</div></li><li class="listitem"><div class="para">
				Add a zone to the region. See <a class="xref" href="#zone-add">Seção 7.3, “Adicionando uma zona”</a>.
			</div></li><li class="listitem"><div class="para">
				Add more pods to the zone (optional). See <a class="xref" href="#pod-add">Seção 7.4, “Adicionando um pod”</a>.
			</div></li><li class="listitem"><div class="para">
				Add more clusters to the pod (optional). See <a class="xref" href="#cluster-add">Seção 7.5, “Adicionando um cluster”</a>.
			</div></li><li class="listitem"><div class="para">
				Add more hosts to the cluster (optional). See <a class="xref" href="#host-add">Seção 7.6, “Adding a Host”</a>.
			</div></li><li class="listitem"><div class="para">
				Add primary storage to the cluster. See <a class="xref" href="#primary-storage-add">Seção 7.7, “Adicionar Storage PrimÃ¡rio”</a>.
			</div></li><li class="listitem"><div class="para">
				Add secondary storage to the zone. See <a class="xref" href="#secondary-storage-add">Seção 7.8, “Adicionar Storage SecundÃ¡rio”</a>.
			</div></li><li class="listitem"><div class="para">
				Inicialize e teste a nova nuvem. Veja <a class="xref" href="#initialize-and-test">Seção 7.9, “Initialize and Test”</a>.
			</div></li></ol></div><div class="para">
		Quando você terminar estes passos, você terá uma implantação com a seguinte estrutura básica:
	</div><div class="mediaobject"><img src="./images/provisioning-overview.png" width="444" alt="provisioning-overview.png: Conceptual overview of a basic deployment" /></div></div><div xml:lang="pt-BR" class="section" id="region-add" lang="pt-BR"><div class="titlepage"><div><div><h2 class="title" id="region-add">7.2. Adding Regions (optional)</h2></div></div></div><div class="para">
		Grouping your cloud resources into geographic regions is an optional step when provisioning the cloud. For an overview of regions, see <a class="xref" href="#about-regions">Seção 2.1, “About Regions”</a>.
	</div><div class="section" id="region-first"><div class="titlepage"><div><div><h3 class="title" id="region-first">7.2.1. The First Region: The Default Region</h3></div></div></div><div class="para">
			If you do not take action to define regions, then all the zones in your cloud will be automatically grouped into a single default region. This region is assigned the region ID of 1.
		</div><div class="para">
			You can change the name or URL of the default region by using the API command updateRegion. For example:
		</div><pre class="programlisting">http://&lt;IP_of_Management_Server&gt;:8080/client/api?command=updateRegion&amp;id=1&amp;name=Northern&amp;endpoint=http://&lt;region_1_IP_address_here&gt;:8080/client&amp;apiKey=miVr6X7u6bN_sdahOBpjNejPgEsT35eXq-jB8CG20YI3yaxXcgpyuaIRmFI_EJTVwZ0nUkkJbPmY3y2bciKwFQ&amp;signature=Lxx1DM40AjcXU%2FcaiK8RAP0O1hU%3D</pre></div><div class="section" id="region-add-2"><div class="titlepage"><div><div><h3 class="title" id="region-add-2">7.2.2. Adding a Region</h3></div></div></div><div class="para">
			Use these steps to add a second region in addition to the default region.
		</div><div class="orderedlist"><ol><li class="listitem"><div class="para">
					Each region has its own CloudStack instance. Therefore, the first step of creating a new region is to install the Management Server software, on one or more nodes, in the geographic area where you want to set up the new region. Use the steps in the Installation guide. When you come to the step where you set up the database, use the additional command-line flag <code class="code">-r &lt;region_id&gt;</code> to set a region ID for the new region. The default region is automatically assigned a region ID of 1, so your first additional region might be region 2.
				</div><pre class="programlisting">cloudstack-setup-databases cloud:&lt;dbpassword&gt;@localhost --deploy-as=root:&lt;password&gt; -e &lt;encryption_type&gt; -m &lt;management_server_key&gt; -k &lt;database_key&gt; -r &lt;region_id&gt;</pre></li><li class="listitem"><div class="para">
					By the end of the installation procedure, the Management Server should have been started. Be sure that the Management Server installation was successful and complete.
				</div></li><li class="listitem"><div class="para">
					Add region 2 to region 1. Use the API command addRegion. (For information about how to make an API call, see the Developer's Guide.)
				</div><pre class="programlisting">http://&lt;IP_of_region_1_Management_Server&gt;:8080/client/api?command=addRegion&amp;id=2&amp;name=Western&amp;endpoint=http://&lt;region_2_IP_address_here&gt;:8080/client&amp;apiKey=miVr6X7u6bN_sdahOBpjNejPgEsT35eXq-jB8CG20YI3yaxXcgpyuaIRmFI_EJTVwZ0nUkkJbPmY3y2bciKwFQ&amp;signature=Lxx1DM40AjcXU%2FcaiK8RAP0O1hU%3D</pre></li><li class="listitem"><div class="para">
					Now perform the same command in reverse, adding region 1 to region 2.
				</div><pre class="programlisting">http://&lt;IP_of_region_2_Management_Server&gt;:8080/client/api?command=addRegion&amp;id=1&amp;name=Northern&amp;endpoint=http://&lt;region_1_IP_address_here&gt;:8080/client&amp;apiKey=miVr6X7u6bN_sdahOBpjNejPgEsT35eXq-jB8CG20YI3yaxXcgpyuaIRmFI_EJTVwZ0nUkkJbPmY3y2bciKwFQ&amp;signature=Lxx1DM40AjcXU%2FcaiK8RAP0O1hU%3D</pre></li><li class="listitem"><div class="para">
					Copy the account, user, and domain tables from the region 1 database to the region 2 database.
				</div><div class="para">
					In the following commands, it is assumed that you have set the root password on the database, which is a CloudStack recommended best practice. Substitute your own MySQL root password.
				</div><div class="orderedlist"><ol class="loweralpha"><li class="listitem"><div class="para">
							First, run this command to copy the contents of the database:
						</div><pre class="programlisting"># mysqldump -u root -p&lt;mysql_password&gt; -h &lt;region1_db_host&gt; cloud account user domain &gt; region1.sql</pre></li><li class="listitem"><div class="para">
							Then run this command to put the data onto the region 2 database:
						</div><pre class="programlisting"># mysql -u root -p&lt;mysql_password&gt; -h &lt;region2_db_host&gt; cloud &lt; region1.sql</pre></li></ol></div></li><li class="listitem"><div class="para">
					Remove project accounts. Run these commands on the region 2 database:
				</div><pre class="programlisting">mysql&gt; delete from account where type = 5;</pre></li><li class="listitem"><div class="para">
					Set the default zone as null:
				</div><pre class="programlisting">mysql&gt; update account set default_zone_id = null;</pre></li><li class="listitem"><div class="para">
					Restart the Management Servers in region 2.
				</div></li></ol></div></div><div class="section" id="region-add-n"><div class="titlepage"><div><div><h3 class="title" id="region-add-n">7.2.3. Adding Third and Subsequent Regions</h3></div></div></div><div class="para">
			To add the third region, and subsequent additional regions, the steps are similar to those for adding the second region. However, you must repeat certain steps additional times for each additional region:
		</div><div class="orderedlist"><ol><li class="listitem"><div class="para">
					Install CloudStack in each additional region. Set the region ID for each region during the database setup step.
				</div><pre class="programlisting">cloudstack-setup-databases cloud:&lt;dbpassword&gt;@localhost --deploy-as=root:&lt;password&gt; -e &lt;encryption_type&gt; -m &lt;management_server_key&gt; -k &lt;database_key&gt; -r &lt;region_id&gt;</pre></li><li class="listitem"><div class="para">
					Once the Management Server is running, add your new region to all existing regions by repeatedly calling the API command addRegion. For example, if you were adding region 3:
				</div><pre class="programlisting">http://&lt;IP_of_region_1_Management_Server&gt;:8080/client/api?command=addRegion&amp;id=3&amp;name=Eastern&amp;endpoint=http://&lt;region_3_IP_address_here&gt;:8080/client&amp;apiKey=miVr6X7u6bN_sdahOBpjNejPgEsT35eXq-jB8CG20YI3yaxXcgpyuaIRmFI_EJTVwZ0nUkkJbPmY3y2bciKwFQ&amp;signature=Lxx1DM40AjcXU%2FcaiK8RAP0O1hU%3D

http://&lt;IP_of_region_2_Management_Server&gt;:8080/client/api?command=addRegion&amp;id=3&amp;name=Eastern&amp;endpoint=http://&lt;region_3_IP_address_here&gt;:8080/client&amp;apiKey=miVr6X7u6bN_sdahOBpjNejPgEsT35eXq-jB8CG20YI3yaxXcgpyuaIRmFI_EJTVwZ0nUkkJbPmY3y2bciKwFQ&amp;signature=Lxx1DM40AjcXU%2FcaiK8RAP0O1hU%3D</pre></li><li class="listitem"><div class="para">
					Repeat the procedure in reverse to add all existing regions to the new region. For example, for the third region, add the other two existing regions:
				</div><pre class="programlisting">http://&lt;IP_of_region_3_Management_Server&gt;:8080/client/api?command=addRegion&amp;id=1&amp;name=Northern&amp;endpoint=http://&lt;region_1_IP_address_here&gt;:8080/client&amp;apiKey=miVr6X7u6bN_sdahOBpjNejPgEsT35eXq-jB8CG20YI3yaxXcgpyuaIRmFI_EJTVwZ0nUkkJbPmY3y2bciKwFQ&amp;signature=Lxx1DM40AjcXU%2FcaiK8RAP0O1hU%3D

http://&lt;IP_of_region_3_Management_Server&gt;:8080/client/api?command=addRegion&amp;id=2&amp;name=Western&amp;endpoint=http://&lt;region_2_IP_address_here&gt;:8080/client&amp;apiKey=miVr6X7u6bN_sdahOBpjNejPgEsT35eXq-jB8CG20YI3yaxXcgpyuaIRmFI_EJTVwZ0nUkkJbPmY3y2bciKwFQ&amp;signature=Lxx1DM40AjcXU%2FcaiK8RAP0O1hU%3D</pre></li><li class="listitem"><div class="para">
					Copy the account, user, and domain tables from any existing region's database to the new region's database.
				</div><div class="para">
					In the following commands, it is assumed that you have set the root password on the database, which is a CloudStack recommended best practice. Substitute your own MySQL root password.
				</div><div class="orderedlist"><ol class="loweralpha"><li class="listitem"><div class="para">
							First, run this command to copy the contents of the database:
						</div><pre class="programlisting"># mysqldump -u root -p&lt;mysql_password&gt; -h &lt;region1_db_host&gt; cloud account user domain &gt; region1.sql</pre></li><li class="listitem"><div class="para">
							Then run this command to put the data onto the new region's database. For example, for region 3:
						</div><pre class="programlisting"># mysql -u root -p&lt;mysql_password&gt; -h &lt;region3_db_host&gt; cloud &lt; region1.sql</pre></li></ol></div></li><li class="listitem"><div class="para">
					Remove project accounts. Run these commands on the region 2 database:
				</div><pre class="programlisting">mysql&gt; delete from account where type = 5;</pre></li><li class="listitem"><div class="para">
					Set the default zone as null:
				</div><pre class="programlisting">mysql&gt; update account set default_zone_id = null;</pre></li><li class="listitem"><div class="para">
					Restart the Management Servers in the new region.
				</div></li></ol></div></div><div class="section" id="region-delete"><div class="titlepage"><div><div><h3 class="title" id="region-delete">7.2.4. Deleting a Region</h3></div></div></div><div class="para">
			To delete a region, use the API command removeRegion. Repeat the call to remove the region from all other regions. For example, to remove the 3rd region in a three-region cloud:
		</div><pre class="programlisting">http://&lt;IP_of_region_1_Management_Server&gt;:8080/client/api?command=removeRegion&amp;id=3&amp;apiKey=miVr6X7u6bN_sdahOBpjNejPgEsT35eXq-jB8CG20YI3yaxXcgpyuaIRmFI_EJTVwZ0nUkkJbPmY3y2bciKwFQ&amp;signature=Lxx1DM40AjcXU%2FcaiK8RAP0O1hU%3D

http://&lt;IP_of_region_2_Management_Server&gt;:8080/client/api?command=removeRegion&amp;id=3&amp;apiKey=miVr6X7u6bN_sdahOBpjNejPgEsT35eXq-jB8CG20YI3yaxXcgpyuaIRmFI_EJTVwZ0nUkkJbPmY3y2bciKwFQ&amp;signature=Lxx1DM40AjcXU%2FcaiK8RAP0O1hU%3D</pre></div></div><div xml:lang="pt-BR" class="section" id="zone-add" lang="pt-BR"><div class="titlepage"><div><div><h2 class="title" id="zone-add">7.3. Adicionando uma zona</h2></div></div></div><div class="para">
		Nestes passos se supõe que você já está logado na interface de usuário do CloudStack. Veja <a class="xref" href="#log-in">Seção 5.1, “Login na interface de usuário”</a>.
	</div><div class="orderedlist"><ol><li class="listitem"><div class="para">
				(Opcional) Se você irá usar Swift para storage secundária na nuvem, você precisa adicioná-la antes de adicionar zonas.
			</div><div class="orderedlist"><ol class="loweralpha"><li class="listitem"><div class="para">
						Faça login na interface de usuário do CloudStack como administrador.
					</div></li><li class="listitem"><div class="para">
						Se esta é a primeira vez utilizando a interface de usuário, você verá uma tela de apresentação. Selecione “Experienced user.” O painel de instrumentos é exibido.
					</div></li><li class="listitem"><div class="para">
						Na barra de navegação à esquerda, clique em Global Settings.
					</div></li><li class="listitem"><div class="para">
						Na caixa de pesquisa, digite swift.enable e clique no botão de pesquisa.
					</div></li><li class="listitem"><div class="para">
						Clique no botão de edit e marque swift.enable como true. 
						<span class="inlinemediaobject"><img src="./images/edit-icon.png" alt="edit-icon.png: botão para alterar datos" /></span>
					</div></li><li class="listitem"><div class="para">
						Reinicie o servidor de gerenciamento.
					</div><pre class="programlisting"># service cloudstack-management restart</pre></li><li class="listitem"><div class="para">
						Recarregue a interface de usuário do CloudStack no navegador e faça logon novamente.
					</div></li></ol></div></li><li class="listitem"><div class="para">
				Na barra de navegação à esquerda, selecione Infrastructure.
			</div></li><li class="listitem"><div class="para">
				Em Zones, clique em View More.
			</div></li><li class="listitem"><div class="para">
				(Opcional) Se você está utilizando storage Swift, clique Enable Swift. Forneça o seguinte:
			</div><div class="itemizedlist"><ul><li class="listitem"><div class="para">
						<span class="bold bold"><strong>URL.</strong></span> A URL Swift.
					</div></li><li class="listitem"><div class="para">
						<span class="bold bold"><strong>Account.</strong></span> A conta Swift.
					</div></li><li class="listitem"><div class="para">
						<span class="bold bold"><strong>Username.</strong></span> O nome de usuário associado à conta Swift.
					</div></li><li class="listitem"><div class="para">
						<span class="bold bold"><strong>Key.</strong></span> A chave Swift.
					</div></li></ul></div></li><li class="listitem"><div class="para">
				Clique em Add Zone. O consultor de criação de zona será exibido.
			</div></li><li class="listitem"><div class="para">
				Selecione um dos seguintes tipos de rede:
			</div><div class="itemizedlist"><ul><li class="listitem"><div class="para">
						<span class="bold bold"><strong>Basic.</strong></span> Para redes no estilo AWS. Provê um rede única a cada instância de máquina virtual é assinalado um endereço IP diretamente da rede. O isolamento de hóspedes pode ser provido através de recursos da camada 3 como grupos seguros (filtragem de endereço IP de origem).
					</div></li><li class="listitem"><div class="para">
						<span class="bold bold"><strong>Advanced.</strong></span> Para topologias de rede mais sofisticadas. Este modelo de rede provê a mais alta flexibilidade na definição de redes hóspedes e oferece customização de rede como firewall, VPN, ou suporte a balanceador de carga.
					</div></li></ul></div><div class="para">
				For more information about the network types, see <a class="xref" href="#about-physical-networks">Seção 2.8, “Sobre redes físicas”</a>.
			</div></li><li class="listitem"><div class="para">
				O restante dos passos diferem dependendo se você escolheu Basic ou Advanced. Continue com os passos que se aplicam a você:
			</div><div class="itemizedlist"><ul><li class="listitem"><div class="para">
						<a class="xref" href="#basic-zone-configuration">Seção 7.3.1, “Configuração de zona básica”</a>
					</div></li><li class="listitem"><div class="para">
						<a class="xref" href="#advanced-zone-configuration">Seção 7.3.2, “Advanced Zone Configuration”</a>
					</div></li></ul></div></li></ol></div><div xml:lang="pt-BR" class="section" id="basic-zone-configuration" lang="pt-BR"><div class="titlepage"><div><div><h3 class="title" id="basic-zone-configuration">7.3.1. Configuração de zona básica</h3></div></div></div><div class="orderedlist"><ol><li class="listitem"><div class="para">
				Após selecionar Basic no assistente de Adicionar Zona e clicar em Next, você será solicitado a digitar os seguintes detalhes. Em seguida, clique em Next.
			</div><div class="itemizedlist"><ul><li class="listitem"><div class="para">
						<span class="bold bold"><strong>Name.</strong></span> O nome da zona.
					</div></li><li class="listitem"><div class="para">
						<span class="bold bold"><strong>DNS 1 and 2.</strong></span> Estes são os servidores DNS utilizados pelas máquinas virtuais na zona. Estes servidores serão acessados pela rede publica que será adicionada posteriormente. Os IPs públicos da zona deverão ter acesso a estes servidores.
					</div></li><li class="listitem"><div class="para">
						<span class="bold bold"><strong>Internal DNS 1 and Internal DNS 2.</strong></span> \nEstes são os servidores DNS utilizados pelas máquinas virtuais na zona (estas são máquinas virtuais usadas pelo CloudStack tais como os roteadores virtuais, proxies console e máquinas virtuais de storage secundária). Estes servidores DNS serão acessados através da interface de gerenciamento de tráfego rede das máquinas virtuais de sistema. O endereço IP privado que você fornecer para os pods devem ter uma rota para o servidor DNS interno identificado aqui.
					</div></li><li class="listitem"><div class="para">
						<span class="bold bold"><strong>Hypervisor.</strong></span> (Introduzido na versão 3.0.1) Escolha o hipervisor para primeiro cluster na zona. Você pode adicionar clusters com diferentes hipervisores mais tarde, depois de você terminar de adicionar a zona.
					</div></li><li class="listitem"><div class="para">
						<span class="bold bold"><strong>Network Offering.</strong></span>Sua escolha aqui determina quais serviços de rede estarão disponíveis na rede para máquinas virtuais hóspedes.
					</div><div class="informaltable"><table border="1"><colgroup><col align="left" class="c1" width="50%" /><col align="left" class="c2" width="50%" /></colgroup><thead><tr><th align="left">
										<div class="para">
											Network Offering
										</div>
									</th><th align="left">
										<div class="para">
											Descrição
										</div>
									</th></tr></thead><tbody><tr><td align="left">
										<div class="para">
											DefaultSharedNetworkOfferingWithSGService
										</div>
									</td><td align="left">
										<div class="para">
											Se você quer habilitar grupos de segurança para isolamento de tráfego de hóspedes, escolha esta. (Veja Utilizando grupos de segurança para controlar o tráfego de máquinas virtuais).
										</div>
									</td></tr><tr><td align="left">
										<div class="para">
											DefaultSharedNetworkOffering
										</div>
									</td><td align="left">
										<div class="para">
											Se você não precisa de grupos de segurança, escolha esta.
										</div>
									</td></tr><tr><td align="left">
										<div class="para">
											DefaultSharedNetscalerEIPandELBNetworkOffering
										</div>
									</td><td align="left">
										<div class="para">
											Se você tiver instalado o dispositivo Citrix NetScaler como parte de sua rede de zona, e você estará usando o seu IP elástico e características de balanceamento de carga elástica, escolha esta. Com os recursos de EIP e ELB, uma zona básica com grupos de segurança habilitados pode oferecer NAT estático 1:1 e balanceamento de carga.
										</div>
									</td></tr></tbody></table></div></li><li class="listitem"><div class="para">
						<span class="bold bold"><strong>Network Domain.</strong></span> (Opcional) Se você quiser atribuir um nome de domínio especial à rede de máquina virtual hóspede, especifique o sufixo DNS.
					</div></li><li class="listitem"><div class="para">
						<span class="bold bold"><strong>Public.</strong></span> Uma zona pública está disponível para todos usuários. Uma zona que não é pública será atribuída a um domínio específico. Somente a usuários nesse domínio será permitido criar máquinas virtuais hóspedes nesta zona.
					</div></li></ul></div></li><li class="listitem"><div class="para">
				Escolha os tipos de tráfego que serão transportados pela rede física.
			</div><div class="para">
				Os tipos de tráfego são: gerência, público, hóspede, e storage. Para mais informações sobre os tipos, role sobre os ícones para exibir suas dicas de ferramentas, ou veja Tipos de tráfego de rede de zona básica. Esta tela começa com alguns tipos de tráfego já atribuídos. Para adicionar mais, arraste e solte os tipos de tráfego na rede. Você também pode alterar o nome da rede, se desejar.
			</div></li><li class="listitem"><div class="para">
				3. (Introduced in version 3.0.1) Assign a network traffic label to each traffic type on the physical network. These labels must match the labels you have already defined on the hypervisor host. To assign each label, click the Edit button under the traffic type icon. A popup dialog appears where you can type the label, then click OK.
			</div><div class="para">
				Essas etiquetas de tráfego serão definidas apenas para o hipervisor selecionado para o primeiro cluster. Para todos os outros hipervisores, as etiquetas podem ser configuradas depois que a zona é criada.
			</div></li><li class="listitem"><div class="para">
				Clique em Next.
			</div></li><li class="listitem"><div class="para">
				(Somente NetScaler) Se você escolheu a oferta de rede para NetScaler, você tem uma tela adicional para preencher. Forneça as informações solicitadas para configurar o NetScaler, em seguida, clique em Next.
			</div><div class="itemizedlist"><ul><li class="listitem"><div class="para">
						<span class="bold bold"><strong>IP address.</strong></span>O endereço NSIP (NetScaler IP) do dispositivo NetScaler.
					</div></li><li class="listitem"><div class="para">
						<span class="bold bold"><strong>Username/Password.</strong></span>A autenticação de credenciais para acessar o dispositivo. O CloudStack usa essas credenciais para acessar o dispositivo.
					</div></li><li class="listitem"><div class="para">
						<span class="bold bold"><strong>Type.</strong></span> O tipo de dispositivo NetScaler que está sendo adicionado. Pode ser NetScaler VPX, o NetScaler MPX, ou NetScaler SDX. Para uma comparação dos tipos, veja Sobre como usar um balanceador de carga NetScaler.
					</div></li><li class="listitem"><div class="para">
						<span class="bold bold"><strong>Public interface.</strong></span> A Interface de NetScaler que está configurada para ser parte da rede pública.
					</div></li><li class="listitem"><div class="para">
						<span class="bold bold"><strong>Private interface.</strong></span> A Interface de NetScaler que está configurada para ser parte da rede privada.
					</div></li><li class="listitem"><div class="para">
						<span class="bold bold"><strong>Number of retries.</strong></span>Número de vezes para tentar um comando no dispositivo antes de considerar falhas na operação. O default é 2.
					</div></li><li class="listitem"><div class="para">
						<span class="bold bold"><strong>Capacity.</strong></span> Número de redes hóspedes/contas que irão compartilhar este dispositivo NetScaler.
					</div></li><li class="listitem"><div class="para">
						<span class="bold bold"><strong>Dedicated.</strong></span>Quando marcado como dedicado, este dispositivo será dedicado a uma única conta. Quando dedicado é verificado, o valor no campo Capacity não tem significado - implicitamente, o seu valor é 1.
					</div></li></ul></div></li><li class="listitem"><div class="para">
				(NetScaler apenas) Configure a faixa de IP para tráfego público. Os IPs nesta faixa serão usados para a capacidade de NAT estática que você ativou selecionando a oferta de rede para NetScaler com EIP e ELB. Insira os detalhes seguintes, e então clique em Add. Se desejar, você pode repetir este passo para adicionar mais intervalos de IP. Quando terminar, clique em Next.
			</div><div class="itemizedlist"><ul><li class="listitem"><div class="para">
						<span class="bold bold"><strong>Gateway.</strong></span> O gateway em uso para estes endereços IPs.
					</div></li><li class="listitem"><div class="para">
						<span class="bold bold"><strong>Netmask.</strong></span> A netmask associada com este intervalo de IP.
					</div></li><li class="listitem"><div class="para">
						<span class="bold bold"><strong>VLAN.</strong></span>A VLAN que será usada pelo tráfego público.
					</div></li><li class="listitem"><div class="para">
						<span class="bold bold"><strong>Start IP/End IP.</strong></span>. Um intervalo de endereços IP que se supõe serem accessíveis da Internet e que serão alocados para acesso a máquinas virtuais hóspedes.
					</div></li></ul></div></li><li class="listitem"><div class="para">
				Em uma nova zona, o CloudStack adiciona o primeiro pod para você. Você sempre pode adicionar pods mais tarde. Para uma visão geral do que é pod, veja <a class="xref" href="#about-pods">Seção 2.3, “Sobre pods”</a>.
			</div><div class="para">
				Para configurar o primeiro pod, informe o que se segue, então clique em Next:
			</div><div class="itemizedlist"><ul><li class="listitem"><div class="para">
						<span class="bold bold"><strong>Pod Name.</strong></span> Um nome para o pod.
					</div></li><li class="listitem"><div class="para">
						<span class="bold bold"><strong>Reserved system gateway.</strong></span> O gateway para os hosts no pod.
					</div></li><li class="listitem"><div class="para">
						<span class="bold bold"><strong>Reserved system netmask.</strong></span> O prefixo de rede que define a sub-rede do pod. Use notação CIDR.
					</div></li><li class="listitem"><div class="para">
						<span class="bold bold"><strong>Start/End Reserved System IP.</strong></span> O intervalo IP na rede de gerenciamento que o CloudStack usa para gerenciar várias máquinas virtuais de sistema, tais como as máquinas virtuais de storage secundária, máquinas virtuais de proxy de console, e DHCP. Para mais informações, veja Endereços IP reservados pelo sistema.
					</div></li></ul></div></li><li class="listitem"><div class="para">
				Configure a rede para o tráfego de hóspedes. Forneça o que se segue, então clique em Next:
			</div><div class="itemizedlist"><ul><li class="listitem"><div class="para">
						<span class="bold bold"><strong>Guest gateway.</strong></span> O gateway que os hóspedes devem utilizar.
					</div></li><li class="listitem"><div class="para">
						<span class="bold bold"><strong>Guest netmask.</strong></span> A máscara de rede em uso na sub-rede que os hóspedes utilizarão.
					</div></li><li class="listitem"><div class="para">
						<span class="bold bold"><strong>Guest start IP/End IP.</strong></span> Informe o primeiro e o último endereços IP que definem um intervalo que o CloudStack pode atribuir aos convidados.
					</div><div class="itemizedlist"><ul><li class="listitem"><div class="para">
								Recomendamos fortemente o uso de várias placas de rede. Se várias placas de rede são usadas, elas podem estar em uma sub-rede diferente.
							</div></li><li class="listitem"><div class="para">
								Se uma placa de rede é utilizada, estes IPs devem estar na mesma CIDR que o CIDR do pod.
							</div></li></ul></div></li></ul></div></li><li class="listitem"><div class="para">
				Em um novo pod, o CloudStack adiciona o primeiro cluster para você. Você sempre pode adicionar clusters mais tarde. Para uma visão geral do que um cluster é, veja Sobre clusters.
			</div><div class="para">
				Para configurar o primeiro cluster, informe o que segue, então clique em Next:
			</div><div class="itemizedlist"><ul><li class="listitem"><div class="para">
						<span class="bold bold"><strong>Hypervisor.</strong></span> (Versão 3.0.0 apenas; na 3.0.1, este campo é somente leitura) Escolha o tipo de software hipervisor que todos os hosts deste cluster executarão. Se você escolher VMware, campos adicionais aparecem para que você possa dar informações sobre um cluster vSphere. Para os servidores vSphere, recomendamos criar o cluster de hosts em vCenter e então adicionar o cluster inteiro no CloudStack. Veja Adicionar cluster: vSphere.
					</div></li><li class="listitem"><div class="para">
						<span class="bold bold"><strong>Cluster name.</strong></span> Informe um nome para o cluster. Este pode ser um texto de sua escolha e não é usado pelo CloudStack.
					</div></li></ul></div></li><li class="listitem"><div class="para">
				Em um novo cluster, o CloudStack adiciona o primeiro host para você. Você sempre pode adicionar mais hosts depois. Para uma visão geral do que um host é, veja Sobre hosts.
			</div><div class="note"><div class="admonition_header"><h2>Nota</h2></div><div class="admonition"><div class="para">
					Quando você adicionar um host hipervisor ao CloudStack, o host não deve ter nenhuma máquina virtual já executando.
				</div></div></div><div class="para">
				Antes de configurar o host, você precisa instalar o software hipervisor no host. Você precisará saber qual versão do software hipervisor é suportada pelo CloudStack e qual configuração adicional é requerida para garantir que o host trabalhará com CloudStack. Para encontrar detalhes dessa instalação, veja:
			</div><div class="itemizedlist"><ul><li class="listitem"><div class="para">
						Instalação e configuração do Citrix XenServer
					</div></li><li class="listitem"><div class="para">
						Instalação e configuração do VMware vSphere
					</div></li><li class="listitem"><div class="para">
						Instalação e configuração do KVM
					</div></li></ul></div><div class="para">
				Para configurar o primeiro host, informe o que segue, então clique em Next:
			</div><div class="itemizedlist"><ul><li class="listitem"><div class="para">
						<span class="bold bold"><strong>Host Name.</strong></span> O nome DNS ou endereço IP do host.
					</div></li><li class="listitem"><div class="para">
						<span class="bold bold"><strong>Username.</strong></span> O nome do usuário é root.
					</div></li><li class="listitem"><div class="para">
						<span class="bold bold"><strong>Password.</strong></span> Esta é a senha para o usuário identificado acima (da sua instalação XenServer ou KVM).
					</div></li><li class="listitem"><div class="para">
						<span class="bold bold"><strong>Host Tags.</strong></span> (Opcional) Qualquer rótulo que você usa para categorizar hosts para facilidade de manutenção. Por exemplo, você pode definir isso para o rótulo de alta disponibilidade da nuvem (definido no parâmetro de configuração ha.tag global) se você quer este host a ser usado apenas para máquinas virtuais com o recurso "alta disponibilidade" habilitado. Para mais informações, veja Máquinas virtuais HA-Enabled, assim como HA para hosts.
					</div></li></ul></div></li><li class="listitem"><div class="para">
				Em um novo cluster, o CloudStack acrescenta o primeiro servidor de storage primária para você. Você sempre pode adicionar mais servidores mais tarde. Para uma visão geral do que é storage primária, veja Sobre storage primária.
			</div><div class="para">
				Para configurar o primeiro servidor de storage primária, entre o que segue, então clique em Next:
			</div><div class="itemizedlist"><ul><li class="listitem"><div class="para">
						<span class="bold bold"><strong>Name.</strong></span> O nome do dispositivo do storage.
					</div></li><li class="listitem"><div class="para">
						<span class="bold bold"><strong>Protocol.</strong></span> Para XenServer, escolha NFS, iSCSI ou PreSetup. Para o KVM, escolha NFS, SharedMountPoint, CLVM, ou RBD. Para vSphere escolha VMFS (iSCSI ou FiberChannel) ou NFS. Os campos restantes na tela variam dependendo do que você escolher aqui.
					</div></li></ul></div></li></ol></div></div><div xml:lang="pt-BR" class="section" id="advanced-zone-configuration" lang="pt-BR"><div class="titlepage"><div><div><h3 class="title" id="advanced-zone-configuration">7.3.2. Advanced Zone Configuration</h3></div></div></div><div class="orderedlist"><ol><li class="listitem"><div class="para">
				After you select Advanced in the Add Zone wizard and click Next, you will be asked to enter the following details. Then click Next.
			</div><div class="itemizedlist"><ul><li class="listitem"><div class="para">
						<span class="bold bold"><strong>Nome.</strong></span> O nome da zona.
					</div></li><li class="listitem"><div class="para">
						<span class="bold bold"><strong>DNS 1 e 2.</strong></span> Serão os servidores DNS utilizados pelas máquinas virtuais na Zona. Estes servidores serão acessados pela rede publica que será adicionada a frente. Os ips públicos da zona deverão ter acesso a estes servidores.
					</div></li><li class="listitem"><div class="para">
						<span class="bold bold"><strong>Internal DNS 1 and Internal DNS 2.</strong></span> These are DNS servers for use by system VMs in the zone(these are VMs used by CloudStack itself, such as virtual routers, console proxies,and Secondary Storage VMs.) These DNS servers will be accessed via the management traffic network interface of the System VMs. The private IP address you provide for the pods must have a route to the internal DNS server named here.
					</div></li><li class="listitem"><div class="para">
						<span class="bold bold"><strong>Network Domain.</strong></span> (Opcional) Se você quiser atribuir um nome de domínio especial à rede de máquina virtual convidada, especificar o sufixo DNS.
					</div></li><li class="listitem"><div class="para">
						<span class="bold bold"><strong>Guest CIDR.</strong></span> This is the CIDR that describes the IP addresses in use in the guest virtual networks in this zone. For example, 10.1.1.0/24. As a matter of good practice you should set different CIDRs for different zones. This will make it easier to set up VPNs between networks in different zones.
					</div></li><li class="listitem"><div class="para">
						<span class="bold bold"><strong>Hypervisor.</strong></span> (Introduced in version 3.0.1) Escolha o hipervisor para primeiro cluster na zona.Você pode adicionar clusters com diferentes hipervisors mais tarde
					</div></li><li class="listitem"><div class="para">
						<span class="bold bold"><strong>Public.</strong></span> Uma zona pública está disponível para todos usuários.Uma zona que não é público será atribuído a um domínio particular. Somente usuários nesse domínio serão permitido criar máquinas virtuais convidadas nesta zona.
					</div></li></ul></div></li><li class="listitem"><div class="para">
				Escolher os tipos de tráfego serão transmitidos pela rede física.
			</div><div class="para">
				The traffic types are management, public, guest, and storage traffic. For more information about the types, roll over the icons to display their tool tips, or see <a class="xref" href="#advanced-zone-network-traffic-types">Seção 2.8.3, “Tipos de tráfego de rede da zona avançada”</a>. This screen starts out with one network already configured. If you have multiple physical networks, you need to add more. Drag and drop traffic types onto a greyed-out network and it will become active. You can move the traffic icons from one network to another; for example, if the default traffic types shown for Network 1 do not match your actual setup, you can move them down. You can also change the network names if desired.
			</div></li><li class="listitem"><div class="para">
				(Introduced in version 3.0.1) Assign a network traffic label to each traffic type on each physical network. These labels must match the labels you have already defined on the hypervisor host. To assign each label, click the Edit button under the traffic type icon within each physical network. A popup dialog appears where you can type the label, then click OK.
			</div><div class="para">
				Esses label de tráfego serão definidos apenas para o hipervisor selecionado para o primeiro cluster. Para todos os outros hipervisores, os rótulos podem ser configurados depois que a zona é criado.
			</div></li><li class="listitem"><div class="para">
				Clicar em Next
			</div></li><li class="listitem"><div class="para">
				Configure the IP range for public Internet traffic. Enter the following details, then click Add. If desired, you can repeat this step to add more public Internet IP ranges. When done, click Next.
			</div><div class="itemizedlist"><ul><li class="listitem"><div class="para">
						<span class="bold bold"><strong>Gateway.</strong></span> O gateway em uso para estes endereços IPs.
					</div></li><li class="listitem"><div class="para">
						<span class="bold bold"><strong>Netmask.</strong></span> O netmask associado com esta faixa de IP
					</div></li><li class="listitem"><div class="para">
						<span class="bold bold"><strong>VLAN.</strong></span>A VLAN que será usada pelo tráfego píblico will be used for public traffic.
					</div></li><li class="listitem"><div class="para">
						<span class="bold bold"><strong>Start IP/End IP.</strong></span> A range of IP addresses that are assumed to be accessible from the Internet and will be allocated for access to guest networks.
					</div></li></ul></div></li><li class="listitem"><div class="para">
				Em uma nova zona, CloudStack acrescenta primeiro pod para você. Você sempre pode adicionar pods mais tarde. Para uma visão geral do que é pod, Veja <a class="xref" href="#about-pods">Seção 2.3, “Sobre pods”</a>.
			</div><div class="para">
				Para configurar o primeiro pod, enter o seguinte, clique em Next
			</div><div class="itemizedlist"><ul><li class="listitem"><div class="para">
						<span class="bold bold"><strong>Pod Name.</strong></span> Um nome para o pod.
					</div></li><li class="listitem"><div class="para">
						<span class="bold bold"><strong>Reserved system gateway.</strong></span> O gateway para hóspedes em que pod
					</div></li><li class="listitem"><div class="para">
						<span class="bold bold"><strong>Reserved system netmask.</strong></span> O prefixo de rede que define a subrede do pod. Use notação CIDR.
					</div></li><li class="listitem"><div class="para">
						<span class="bold bold"><strong>Start/End Reserved System IP.</strong></span> The IP range in the management network that CloudStack uses to manage various system VMs, such as Secondary Storage VMs, Console Proxy VMs, and DHCP. For more information, see <a class="xref" href="#system-reserved-ip-addresses">Seção 2.8.6, “Endereços IP reservados pelo sistema”</a>.
					</div></li></ul></div></li><li class="listitem"><div class="para">
				Specify a range of VLAN IDs to carry guest traffic for each physical network (see VLAN Allocation Example ), then click Next.
			</div></li><li class="listitem"><div class="para">
				In a new pod, CloudStack adds the first cluster for you. You can always add more clusters later. For an overview of what a cluster is, see <a class="xref" href="#about-clusters">Seção 2.4, “Sobre clusters”</a>.
			</div><div class="para">
				Para configurar o primeiro cluster, Entre o seguinte, então clique Next:
			</div><div class="itemizedlist"><ul><li class="listitem"><div class="para">
						<span class="bold bold"><strong>Hypervisor.</strong></span> (Version 3.0.0 only; in 3.0.1, this field is read only) Choose the type of hypervisor software that all hosts in this cluster will run. If you choose VMware, additional fields appear so you can give information about a vSphere cluster. For vSphere servers, we recommend creating the cluster of hosts in vCenter and then adding the entire cluster to CloudStack. See Add Cluster: vSphere .
					</div></li><li class="listitem"><div class="para">
						(Versão 3.0.0 só, em 3.0.1, este campo é somente leitura) Escolha o tipo de software hypervisor que todos os anfitriões deste cluster será executado. Se você escolher a VMware, campos adicionais aparecem assim que você pode dar informações sobre um cluster vSphere. Para os servidores vSphere, recomendamos criar o cluster de hosts em vCenter e adicionando todo o cluster para CloudStack. Consulte Adicionar Cluster: vSphere.
					</div></li></ul></div></li><li class="listitem"><div class="para">
				In a new cluster, CloudStack adds the first host for you. You can always add more hosts later. For an overview of what a host is, see <a class="xref" href="#about-hosts">Seção 2.5, “Sobre hosts”</a>.
			</div><div class="note"><div class="admonition_header"><h2>Nota</h2></div><div class="admonition"><div class="para">
					When you deploy CloudStack, the hypervisor host must not have any VMs already running.
				</div></div></div><div class="para">
				Antes de configurar o host, você precisa instalar o software hipervisor no host. Você precisará saber qual versão do software hipervisor é suportada pelo CloudStack e qual configuração adicional é requerida para
			</div><div class="itemizedlist"><ul><li class="listitem"><div class="para">
						Citrix XenServer Installation for CloudStack
					</div></li><li class="listitem"><div class="para">
						Instalação e configuração do VMware vSphere
					</div></li><li class="listitem"><div class="para">
						KVM Installation and Configuration
					</div></li></ul></div><div class="para">
				Para configurar o primeiro host, Entre o seguinte, então clique Next:
			</div><div class="itemizedlist"><ul><li class="listitem"><div class="para">
						<span class="bold bold"><strong>Host Name.</strong></span> O nome DNS ou endereço IP do host..
					</div></li><li class="listitem"><div class="para">
						<span class="bold bold"><strong>Username.</strong></span> Usually root.
					</div></li><li class="listitem"><div class="para">
						<span class="bold bold"><strong>Password.</strong></span> Esta é a senha para o usuário chamado acima ( do seu XenServer ou instalação KVM).
					</div></li><li class="listitem"><div class="para">
						<span class="bold bold"><strong>Host Tags.</strong></span> (Optional) Any labels that you use to categorize hosts for ease of maintenance. For example, you can set to the cloud's HA tag (set in the ha.tag global configuration parameter) if you want this host to be used only for VMs with the "high availability" feature enabled. For more information, see HA-Enabled Virtual Machines as well as HA for Hosts, both in the Administration Guide.
					</div></li></ul></div></li><li class="listitem"><div class="para">
				In a new cluster, CloudStack adds the first primary storage server for you. You can always add more servers later. For an overview of what primary storage is, see <a class="xref" href="#about-primary-storage">Seção 2.6, “Sobre storage primária”</a>.
			</div><div class="para">
				Para configurar o primeiro servidor de storage primário, entre o seguinte, então clique Next.
			</div><div class="itemizedlist"><ul><li class="listitem"><div class="para">
						<span class="bold bold"><strong>Name.</strong></span> O nome do dispositivo do storage.
					</div></li><li class="listitem"><div class="para">
						<span class="bold bold"><strong>Protocol.</strong></span> For XenServer, choose either NFS, iSCSI, or PreSetup. For KVM, choose NFS, SharedMountPoint, CLVM, and RBD. For vSphere choose either VMFS (iSCSI or FiberChannel) or NFS. The remaining fields in the screen vary depending on what you choose here.
					</div><div class="informaltable"><table border="1"><colgroup><col align="left" class="c1" width="50%" /><col align="left" class="c2" width="50%" /></colgroup><tbody><tr><td align="left">
										<div class="para">
											NFS
										</div>
									</td><td align="left">
										<div class="itemizedlist"><ul><li class="listitem"><div class="para">
													<span class="bold bold"><strong>Server.</strong></span> The IP address or DNS name of the storage device.
												</div></li><li class="listitem"><div class="para">
													<span class="bold bold"><strong>Path.</strong></span> The exported path from the server.
												</div></li><li class="listitem"><div class="para">
													<span class="bold bold"><strong>Tags (optional).</strong></span> The comma-separated list of tags for this storage device. It should be an equivalent set or superset of the tags on your disk offerings.
												</div></li></ul></div>
										 <div class="para">
											The tag sets on primary storage across clusters in a Zone must be identical. For example, if cluster A provides primary storage that has tags T1 and T2, all other clusters in the Zone must also provide primary storage that has tags T1 and T2.
										</div>

									</td></tr><tr><td align="left">
										<div class="para">
											iSCSI
										</div>
									</td><td align="left">
										<div class="itemizedlist"><ul><li class="listitem"><div class="para">
													<span class="bold bold"><strong>Server.</strong></span> The IP address or DNS name of the storage device.
												</div></li><li class="listitem"><div class="para">
													<span class="bold bold"><strong>Target IQN.</strong></span> The IQN of the target. For example, iqn.1986-03.com.sun:02:01ec9bb549-1271378984.
												</div></li><li class="listitem"><div class="para">
													<span class="bold bold"><strong>Lun.</strong></span> The LUN number. For example, 3.
												</div></li><li class="listitem"><div class="para">
													<span class="bold bold"><strong>Tags (optional).</strong></span> The comma-separated list of tags for this storage device. It should be an equivalent set or superset of the tags on your disk offerings.
												</div></li></ul></div>
										 <div class="para">
											The tag sets on primary storage across clusters in a Zone must be identical. For example, if cluster A provides primary storage that has tags T1 and T2, all other clusters in the Zone must also provide primary storage that has tags T1 and T2.
										</div>

									</td></tr><tr><td align="left">
										<div class="para">
											preSetup
										</div>
									</td><td align="left">
										<div class="itemizedlist"><ul><li class="listitem"><div class="para">
													<span class="bold bold"><strong>Server.</strong></span> The IP address or DNS name of the storage device.
												</div></li><li class="listitem"><div class="para">
													<span class="bold bold"><strong>SR Name-Label.</strong></span> Enter the name-label of the SR that has been set up outside CloudStack.
												</div></li><li class="listitem"><div class="para">
													<span class="bold bold"><strong>Tags (optional).</strong></span> The comma-separated list of tags for this storage device. It should be an equivalent set or superset of the tags on your disk offerings.
												</div></li></ul></div>
										 <div class="para">
											The tag sets on primary storage across clusters in a Zone must be identical. For example, if cluster A provides primary storage that has tags T1 and T2, all other clusters in the Zone must also provide primary storage that has tags T1 and T2.
										</div>

									</td></tr><tr><td align="left">
										<div class="para">
											SharedMountPoint
										</div>
									</td><td align="left">
										<div class="itemizedlist"><ul><li class="listitem"><div class="para">
													<span class="bold bold"><strong>Path.</strong></span> The path on each host that is where this primary storage is mounted. For example, "/mnt/primary".
												</div></li><li class="listitem"><div class="para">
													<span class="bold bold"><strong>Tags (optional).</strong></span> The comma-separated list of tags for this storage device. It should be an equivalent set or superset of the tags on your disk offerings.
												</div></li></ul></div>
										 <div class="para">
											The tag sets on primary storage across clusters in a Zone must be identical. For example, if cluster A provides primary storage that has tags T1 and T2, all other clusters in the Zone must also provide primary storage that has tags T1 and T2.
										</div>

									</td></tr><tr><td align="left">
										<div class="para">
											VMFS
										</div>
									</td><td align="left">
										<div class="itemizedlist"><ul><li class="listitem"><div class="para">
													<span class="bold bold"><strong>Server.</strong></span> The IP address or DNS name of the vCenter server.
												</div></li><li class="listitem"><div class="para">
													<span class="bold bold"><strong>Path.</strong></span> A combination of the datacenter name and the datastore name. The format is "/" datacenter name "/" datastore name. For example, "/cloud.dc.VM/cluster1datastore".
												</div></li><li class="listitem"><div class="para">
													<span class="bold bold"><strong>Tags (optional).</strong></span> The comma-separated list of tags for this storage device. It should be an equivalent set or superset of the tags on your disk offerings.
												</div></li></ul></div>
										 <div class="para">
											The tag sets on primary storage across clusters in a Zone must be identical. For example, if cluster A provides primary storage that has tags T1 and T2, all other clusters in the Zone must also provide primary storage that has tags T1 and T2.
										</div>

									</td></tr></tbody></table></div></li></ul></div></li><li class="listitem"><div class="para">
				In a new zone, CloudStack adds the first secondary storage server for you. For an overview of what secondary storage is, see <a class="xref" href="#about-secondary-storage">Seção 2.7, “Sobre storage secundária”</a>.
			</div><div class="para">
				Before you can fill out this screen, you need to prepare the secondary storage by setting up NFS shares and installing the latest CloudStack System VM template. See Adding Secondary Storage :
			</div><div class="itemizedlist"><ul><li class="listitem"><div class="para">
						<span class="bold bold"><strong>NFS Server.</strong></span> The IP address of the server or fully qualified domain name of the server.
					</div></li><li class="listitem"><div class="para">
						<span class="bold bold"><strong>Path.</strong></span> The exported path from the server.
					</div></li></ul></div></li><li class="listitem"><div class="para">
				Click Launch.
			</div></li></ol></div></div></div><div xml:lang="pt-BR" class="section" id="pod-add" lang="pt-BR"><div class="titlepage"><div><div><h2 class="title" id="pod-add">7.4. Adicionando um pod</h2></div></div></div><div class="para">
		Quando você cria uma nova zona, o CloudStack adiciona o primeiro pod para você. Você pode adicionar mais pods a qualquer momento usando o procedimento nesta seção.
	</div><div class="orderedlist"><ol><li class="listitem"><div class="para">
				Faça login na interface de usuário do CloudStack. Veja <a class="xref" href="#log-in">Seção 5.1, “Login na interface de usuário”</a>.
			</div></li><li class="listitem"><div class="para">
				No painel de navegação à esquerda, selecione Infrastructure. Em Zones, clique View More, então clique na zona à qual você deseja adicionar um pod.
			</div></li><li class="listitem"><div class="para">
				Clique na aba Compute and Storage. No nó Pods do diagrama, clique em View All.
			</div></li><li class="listitem"><div class="para">
				Clique em Add Pod.
			</div></li><li class="listitem"><div class="para">
				Forneça os seguintes detalhes no diálogo.
			</div><div class="itemizedlist"><ul><li class="listitem"><div class="para">
						<span class="bold bold"><strong>Name.</strong></span> O nome do pod.
					</div></li><li class="listitem"><div class="para">
						<span class="bold bold"><strong>Gateway.</strong></span> O gateway para os hosts no pod.
					</div></li><li class="listitem"><div class="para">
						<span class="bold bold"><strong>Netmask.</strong></span> O prefixo de rede que define a subrede deste pod. Utilize a notação CIDR.
					</div></li><li class="listitem"><div class="para">
						<span class="bold bold"><strong>Start/End Reserved System IP.</strong></span> O intervalo IP na rede de gerenciamento que o CloudStack usa para gerenciar várias máquinas virtuais de sistema, tais como as máquinas virtuais de storage secundária, máquinas virtuais de proxy de console, e DHCP. Para mais informações, veja Endereços IP reservados pelo sistema.
					</div></li></ul></div></li><li class="listitem"><div class="para">
				Clique em OK.
			</div></li></ol></div></div><div xml:lang="pt-BR" class="section" id="cluster-add" lang="pt-BR"><div class="titlepage"><div><div><h2 class="title" id="cluster-add">7.5. Adicionando um cluster</h2></div></div></div><div class="para">
		Você precisa informar ao CloudStack sobre os hosts que ele irá gerenciar. Hosts existem em clusters, portanto antes de você começar a adicionar hosts à nuvem, você deve adicionar pelo menos um cluster.
	</div><div xml:lang="pt-BR" class="section" id="add-clusters-kvm-xenserver" lang="pt-BR"><div class="titlepage"><div><div><h3 class="title" id="add-clusters-kvm-xenserver">7.5.1. Add Cluster: KVM or XenServer</h3></div></div></div><div class="para">
		These steps assume you have already installed the hypervisor on the hosts and logged in to the CloudStack UI.
	</div><div class="orderedlist"><ol><li class="listitem"><div class="para">
				In the left navigation, choose Infrastructure. In Zones, click View More, then click the zone in which you want to add the cluster.
			</div></li><li class="listitem"><div class="para">
				Click the Compute tab.
			</div></li><li class="listitem"><div class="para">
				In the Clusters node of the diagram, click View All.
			</div></li><li class="listitem"><div class="para">
				Click Add Cluster.
			</div></li><li class="listitem"><div class="para">
				Choose the hypervisor type for this cluster.
			</div></li><li class="listitem"><div class="para">
				Choose the pod in which you want to create the cluster.
			</div></li><li class="listitem"><div class="para">
				Enter a name for the cluster. This can be text of your choosing and is not used by CloudStack.
			</div></li><li class="listitem"><div class="para">
				Clique em OK.
			</div></li></ol></div></div><div xml:lang="pt-BR" class="section" id="add-clusters-vsphere" lang="pt-BR"><div class="titlepage"><div><div><h3 class="title" id="add-clusters-vsphere">7.5.2. Add Cluster: vSphere</h3></div></div></div><div class="para">
		Host management for vSphere is done through a combination of vCenter and the CloudStack admin UI. CloudStack requires that all hosts be in a CloudStack cluster, but the cluster may consist of a single host. As an administrator you must decide if you would like to use clusters of one host or of multiple hosts. Clusters of multiple hosts allow for features like live migration. Clusters also require shared storage such as NFS or iSCSI.
	</div><div class="para">
		For vSphere servers, we recommend creating the cluster of hosts in vCenter and then adding the entire cluster to CloudStack. Follow these requirements:
	</div><div class="itemizedlist"><ul><li class="listitem"><div class="para">
				Do not put more than 8 hosts in a vSphere cluster
			</div></li><li class="listitem"><div class="para">
				Make sure the hypervisor hosts do not have any VMs already running before you add them to CloudStack.
			</div></li></ul></div><div class="para">
		To add a vSphere cluster to CloudStack:
	</div><div class="orderedlist"><ol><li class="listitem"><div class="para">
				Create the cluster of hosts in vCenter. Follow the vCenter instructions to do this. You will create a cluster that looks something like this in vCenter.
			</div><div class="mediaobject"><img src="./images/vsphere-client.png" width="444" alt="vsphereclient.png: vSphere client" /></div></li><li class="listitem"><div class="para">
				Log in to the UI.
			</div></li><li class="listitem"><div class="para">
				In the left navigation, choose Infrastructure. In Zones, click View More, then click the zone in which you want to add the cluster.
			</div></li><li class="listitem"><div class="para">
				Click the Compute tab, and click View All on Pods. Choose the pod to which you want to add the cluster.
			</div></li><li class="listitem"><div class="para">
				Click View Clusters.
			</div></li><li class="listitem"><div class="para">
				Click Add Cluster.
			</div></li><li class="listitem"><div class="para">
				In Hypervisor, choose VMware.
			</div></li><li class="listitem"><div class="para">
				Provide the following information in the dialog. The fields below make reference to values from vCenter.
			</div><div class="itemizedlist"><ul><li class="listitem"><div class="para">
						Cluster Name. Enter the name of the cluster you created in vCenter. For example, "cloud.cluster.2.2.1"
					</div></li><li class="listitem"><div class="para">
						vCenter Host. Enter the hostname or IP address of the vCenter server.
					</div></li><li class="listitem"><div class="para">
						vCenter Username. Enter the username that CloudStack should use to connect to vCenter. This user must have all administrative privileges.
					</div></li><li class="listitem"><div class="para">
						vCenter Password. Enter the password for the user named above
					</div></li><li class="listitem"><div class="para">
						vCenter Datacenter. Enter the vCenter datacenter that the cluster is in. For example, "cloud.dc.VM".
					</div></li><li class="listitem"><div class="mediaobject"><img src="./images/add-cluster.png" alt="addcluster.png: add cluster" /></div><div class="para">
						There might be a slight delay while the cluster is provisioned. It will automatically display in the UI
					</div></li></ul></div></li></ol></div></div></div><div xml:lang="pt-BR" class="section" id="host-add" lang="pt-BR"><div class="titlepage"><div><div><h2 class="title" id="host-add">7.6. Adding a Host</h2></div></div></div><div class="orderedlist"><ol><li class="listitem"><div class="para">
				Before adding a host to the CloudStack configuration, you must first install your chosen hypervisor on the host. CloudStack can manage hosts running VMs under a variety of hypervisors.
			</div><div class="para">
				The CloudStack Installation Guide provides instructions on how to install each supported hypervisor and configure it for use with CloudStack. See the appropriate section in the Installation Guide for information about which version of your chosen hypervisor is supported, as well as crucial additional steps to configure the hypervisor hosts for use with CloudStack.
			</div><div class="warning"><div class="admonition_header"><h2>Atenção</h2></div><div class="admonition"><div class="para">
					Be sure you have performed the additional CloudStack-specific configuration steps described in the hypervisor installation section for your particular hypervisor.
				</div></div></div></li><li class="listitem"><div class="para">
				Now add the hypervisor host to CloudStack. The technique to use varies depending on the hypervisor.
			</div><div class="itemizedlist"><ul><li class="listitem"><div class="para">
						<a class="xref" href="#host-add-xenserver-kvm-ovm">Seção 7.6.1, “Adding a Host (XenServer or KVM)”</a>
					</div></li><li class="listitem"><div class="para">
						<a class="xref" href="#host-add-vsphere">Seção 7.6.2, “Adding a Host (vSphere)”</a>
					</div></li></ul></div></li></ol></div><div xml:lang="pt-BR" class="section" id="host-add-xenserver-kvm-ovm" lang="pt-BR"><div class="titlepage"><div><div><h3 class="title" id="host-add-xenserver-kvm-ovm">7.6.1. Adding a Host (XenServer or KVM)</h3></div></div></div><div class="para">
		XenServer and KVM hosts can be added to a cluster at any time.
	</div><div class="section"><div class="titlepage"><div><div><h4 class="title" id="idp10441608">7.6.1.1. Requirements for XenServer and KVM Hosts</h4></div></div></div><div class="warning"><div class="admonition_header"><h2>Atenção</h2></div><div class="admonition"><div class="para">
				Make sure the hypervisor host does not have any VMs already running before you add it to CloudStack.
			</div></div></div><div class="para">
			Configuration requirements:
		</div><div class="itemizedlist"><ul><li class="listitem"><div class="para">
					Each cluster must contain only hosts with the identical hypervisor.
				</div></li><li class="listitem"><div class="para">
					For XenServer, do not put more than 8 hosts in a cluster.
				</div></li><li class="listitem"><div class="para">
					For KVM, do not put more than 16 hosts in a cluster.
				</div></li></ul></div><div class="para">
			For hardware requirements, see the installation section for your hypervisor in the CloudStack Installation Guide.
		</div><div class="section"><div class="titlepage"><div><div><h5 class="title" id="idp1294192">7.6.1.1.1. XenServer Host Additional Requirements</h5></div></div></div><div class="para">
				If network bonding is in use, the administrator must cable the new host identically to other hosts in the cluster.
			</div><div class="para">
				For all additional hosts to be added to the cluster, run the following command. This will cause the host to join the master in a XenServer pool.
			</div><pre class="programlisting"># xe pool-join master-address=[master IP] master-username=root master-password=[your password]</pre><div class="note"><div class="admonition_header"><h2>Nota</h2></div><div class="admonition"><div class="para">
					Ao copiar e colar um comando, certifique-se que o comando tenha colado como uma única linha antes de executar. Alguns viewers documento pode introduzir quebras de linha indesejadas no texto copiado.
				</div></div></div><div class="para">
				With all hosts added to the XenServer pool, run the cloud-setup-bond script. This script will complete the configuration and setup of the bonds on the new hosts in the cluster.
			</div><div class="orderedlist"><ol><li class="listitem"><div class="para">
						Copy the script from the Management Server in /usr/lib64/cloud/common/scripts/vm/hypervisor/xenserver/cloud-setup-bonding.sh to the master host and ensure it is executable.
					</div></li><li class="listitem"><div class="para">
						Run the script:
					</div><pre class="programlisting"># ./cloud-setup-bonding.sh</pre></li></ol></div></div><div class="section"><div class="titlepage"><div><div><h5 class="title" id="idp14003600">7.6.1.1.2. KVM Host Additional Requirements</h5></div></div></div><div class="itemizedlist"><ul><li class="listitem"><div class="para">
						If shared mountpoint storage is in use, the administrator should ensure that the new host has all the same mountpoints (with storage mounted) as the other hosts in the cluster.
					</div></li><li class="listitem"><div class="para">
						Make sure the new host has the same network configuration (guest, private, and public network) as other hosts in the cluster.
					</div></li><li class="listitem"><div class="para">
						If you are using OpenVswitch bridges edit the file agent.properties on the KVM host and set the parameter <span class="italic italic">network.bridge.type</span> to <span class="italic italic">openvswitch</span> before adding the host to CloudStack
					</div></li></ul></div></div></div><div class="section"><div class="titlepage"><div><div><h4 class="title" id="idp33312784">7.6.1.2. Adding a XenServer or KVM Host</h4></div></div></div><div class="itemizedlist"><ul><li class="listitem"><div class="para">
					If you have not already done so, install the hypervisor software on the host. You will need to know which version of the hypervisor software version is supported by CloudStack and what additional configuration is required to ensure the host will work with CloudStack. To find these installation details, see the appropriate section for your hypervisor in the CloudStack Installation Guide.
				</div></li><li class="listitem"><div class="para">
					Faça login na interface de usuário do CloudStack como administrador.
				</div></li><li class="listitem"><div class="para">
					In the left navigation, choose Infrastructure. In Zones, click View More, then click the zone in which you want to add the host.
				</div></li><li class="listitem"><div class="para">
					Click the Compute tab. In the Clusters node, click View All.
				</div></li><li class="listitem"><div class="para">
					Click the cluster where you want to add the host.
				</div></li><li class="listitem"><div class="para">
					Click View Hosts.
				</div></li><li class="listitem"><div class="para">
					Click Add Host.
				</div></li><li class="listitem"><div class="para">
					Provide the following information.
				</div><div class="itemizedlist"><ul><li class="listitem"><div class="para">
							Host Name. The DNS name or IP address of the host.
						</div></li><li class="listitem"><div class="para">
							Username. Usually root.
						</div></li><li class="listitem"><div class="para">
							Password. This is the password for the user from your XenServer or KVM install).
						</div></li><li class="listitem"><div class="para">
							Host Tags (Optional). Any labels that you use to categorize hosts for ease of maintenance. For example, you can set to the cloud's HA tag (set in the ha.tag global configuration parameter) if you want this host to be used only for VMs with the "high availability" feature enabled. For more information, see HA-Enabled Virtual Machines as well as HA for Hosts.
						</div></li></ul></div><div class="para">
					There may be a slight delay while the host is provisioned. It should automatically display in the UI.
				</div></li><li class="listitem"><div class="para">
					Repeat for additional hosts.
				</div></li></ul></div></div></div><div xml:lang="pt-BR" class="section" id="host-add-vsphere" lang="pt-BR"><div class="titlepage"><div><div><h3 class="title" id="host-add-vsphere">7.6.2. Adding a Host (vSphere)</h3></div></div></div><div class="para">
		For vSphere servers, we recommend creating the cluster of hosts in vCenter and then adding the entire cluster to CloudStack. See Add Cluster: vSphere.
	</div></div></div><div xml:lang="pt-BR" class="section" id="primary-storage-add" lang="pt-BR"><div class="titlepage"><div><div><h2 class="title" id="primary-storage-add">7.7. Adicionar Storage PrimÃ¡rio</h2></div></div></div><div class="section" id="sys-require-primary-storage"><div class="titlepage"><div><div><h3 class="title" id="sys-require-primary-storage">7.7.1. System Requirements for Primary Storage</h3></div></div></div><div class="para">
			Hardware requirements:
		</div><div class="itemizedlist"><ul><li class="listitem"><div class="para">
					Any standards-compliant iSCSI or NFS server that is supported by the underlying hypervisor.
				</div></li><li class="listitem"><div class="para">
					The storage server should be a machine with a large number of disks. The disks should ideally be managed by a hardware RAID controller.
				</div></li><li class="listitem"><div class="para">
					Minimum required capacity depends on your needs.
				</div></li></ul></div><div class="para">
			When setting up primary storage, follow these restrictions:
		</div><div class="itemizedlist"><ul><li class="listitem"><div class="para">
					Primary storage cannot be added until a host has been added to the cluster.
				</div></li><li class="listitem"><div class="para">
					If you do not provision shared primary storage, you must set the global configuration parameter system.vm.local.storage.required to true, or else you will not be able to start VMs.
				</div></li></ul></div></div><div class="section" id="adding-primary-storage"><div class="titlepage"><div><div><h3 class="title" id="adding-primary-storage">7.7.2. Adding Primary Stroage</h3></div></div></div><div class="para">
			When you create a new zone, the first primary storage is added as part of that procedure. You can add primary storage servers at any time, such as when adding a new cluster or adding more servers to an existing cluster.
		</div><div class="warning"><div class="admonition_header"><h2>Atenção</h2></div><div class="admonition"><div class="para">
				Be sure there is nothing stored on the server. Adding the server to CloudStack will destroy any existing data.
			</div></div></div><div class="orderedlist"><ol><li class="listitem"><div class="para">
					Log in to the CloudStack UI (see <a class="xref" href="#log-in">Seção 5.1, “Login na interface de usuário”</a>).
				</div></li><li class="listitem"><div class="para">
					In the left navigation, choose Infrastructure. In Zones, click View More, then click the zone in which you want to add the primary storage.
				</div></li><li class="listitem"><div class="para">
					Click the Compute tab.
				</div></li><li class="listitem"><div class="para">
					In the Primary Storage node of the diagram, click View All.
				</div></li><li class="listitem"><div class="para">
					Click Add Primary Storage.
				</div></li><li class="listitem"><div class="para">
					Provide the following information in the dialog. The information required varies depending on your choice in Protocol.
				</div><div class="itemizedlist"><ul><li class="listitem"><div class="para">
							<span class="bold bold"><strong>Pod.</strong></span> The pod for the storage device.
						</div></li><li class="listitem"><div class="para">
							<span class="bold bold"><strong>Cluster.</strong></span> The cluster for the storage device.
						</div></li><li class="listitem"><div class="para">
							<span class="bold bold"><strong>Name.</strong></span> O nome do dispositivo do storage.
						</div></li><li class="listitem"><div class="para">
							<span class="bold bold"><strong>Protocol.</strong></span> For XenServer, choose either NFS, iSCSI, or PreSetup. For KVM, choose NFS or SharedMountPoint. For vSphere choose either VMFS (iSCSI or FiberChannel) or NFS.
						</div></li><li class="listitem"><div class="para">
							<span class="bold bold"><strong>Server (for NFS, iSCSI, or PreSetup).</strong></span> The IP address or DNS name of the storage device.
						</div></li><li class="listitem"><div class="para">
							<span class="bold bold"><strong>Server (for VMFS).</strong></span> The IP address or DNS name of the vCenter server.
						</div></li><li class="listitem"><div class="para">
							<span class="bold bold"><strong>Path (for NFS).</strong></span> In NFS this is the exported path from the server.
						</div></li><li class="listitem"><div class="para">
							<span class="bold bold"><strong>Path (for VMFS).</strong></span> In vSphere this is a combination of the datacenter name and the datastore name. The format is "/" datacenter name "/" datastore name. For example, "/cloud.dc.VM/cluster1datastore".
						</div></li><li class="listitem"><div class="para">
							<span class="bold bold"><strong>Path (for SharedMountPoint).</strong></span> With KVM this is the path on each host that is where this primary storage is mounted. For example, "/mnt/primary".
						</div></li><li class="listitem"><div class="para">
							<span class="bold bold"><strong>SR Name-Label (for PreSetup).</strong></span> Enter the name-label of the SR that has been set up outside CloudStack.
						</div></li><li class="listitem"><div class="para">
							<span class="bold bold"><strong>Target IQN (for iSCSI).</strong></span> In iSCSI this is the IQN of the target. For example, iqn.1986-03.com.sun:02:01ec9bb549-1271378984.
						</div></li><li class="listitem"><div class="para">
							<span class="bold bold"><strong>Lun # (for iSCSI).</strong></span> In iSCSI this is the LUN number. For example, 3.
						</div></li><li class="listitem"><div class="para">
							<span class="bold bold"><strong>Tags (optional).</strong></span> The comma-separated list of tags for this storage device. It should be an equivalent set or superset of the tags on your disk offerings..
						</div></li></ul></div><div class="para">
					The tag sets on primary storage across clusters in a Zone must be identical. For example, if cluster A provides primary storage that has tags T1 and T2, all other clusters in the Zone must also provide primary storage that has tags T1 and T2.
				</div></li><li class="listitem"><div class="para">
					Clique em OK.
				</div></li></ol></div></div></div><div xml:lang="pt-BR" class="section" id="secondary-storage-add" lang="pt-BR"><div class="titlepage"><div><div><h2 class="title" id="secondary-storage-add">7.8. Adicionar Storage SecundÃ¡rio</h2></div></div></div><div class="section" id="sys-require-secondary-storage"><div class="titlepage"><div><div><h3 class="title" id="sys-require-secondary-storage">7.8.1. System Requirements for Secondary Storage</h3></div></div></div><div class="itemizedlist"><ul><li class="listitem"><div class="para">
					NFS storage appliance or Linux NFS server
				</div></li><li class="listitem"><div class="para">
					(Optional) OpenStack Object Storage (Swift) (see http://swift.openstack.org)
				</div></li><li class="listitem"><div class="para">
					100GB minimum capacity
				</div></li><li class="listitem"><div class="para">
					A secondary storage device must be located in the same zone as the guest VMs it serves.
				</div></li><li class="listitem"><div class="para">
					Each Secondary Storage server must be available to all hosts in the zone.
				</div></li></ul></div></div><div class="section" id="adding-secondary-storage"><div class="titlepage"><div><div><h3 class="title" id="adding-secondary-storage">7.8.2. Adding Secondary Storage</h3></div></div></div><div class="para">
			When you create a new zone, the first secondary storage is added as part of that procedure. You can add secondary storage servers at any time to add more servers to an existing zone.
		</div><div class="warning"><div class="admonition_header"><h2>Atenção</h2></div><div class="admonition"><div class="para">
				Be sure there is nothing stored on the server. Adding the server to CloudStack will destroy any existing data.
			</div></div></div><div class="orderedlist"><ol><li class="listitem"><div class="para">
					If you are going to use Swift for cloud-wide secondary storage, you must add the Swift storage to CloudStack before you add the local zone secondary storage servers. See <a class="xref" href="#zone-add">Seção 7.3, “Adicionando uma zona”</a>.
				</div></li><li class="listitem"><div class="para">
					To prepare for local zone secondary storage, you should have created and mounted an NFS share during Management Server installation. <span>See Preparing NFS Shares in the Installation Guide.</span>
				</div></li><li class="listitem"><div class="para">
					Make sure you prepared the system VM template during Management Server installation. <span>See Prepare the System VM Template in the Installation Guide.</span>
				</div></li><li class="listitem"><div class="para">
					Now that the secondary storage server for per-zone storage is prepared, add it to CloudStack. Secondary storage is added as part of the procedure for adding a new zone. See <a class="xref" href="#zone-add">Seção 7.3, “Adicionando uma zona”</a>.
				</div></li></ol></div></div></div><div xml:lang="pt-BR" class="section" id="initialize-and-test" lang="pt-BR"><div class="titlepage"><div><div><h2 class="title" id="initialize-and-test">7.9. Initialize and Test</h2></div></div></div><div class="para">
		After everything is configured, CloudStack will perform its initialization. This can take 30 minutes or more, depending on the speed of your network. When the initialization has completed successfully, the administrator's Dashboard should be displayed in the CloudStack UI.
	</div><div class="orderedlist"><ol><li class="listitem"><div class="para">
				Verify that the system is ready. In the left navigation bar, select Templates. Click on the CentOS 5.5 (64bit) no Gui (KVM) template. Check to be sure that the status is "Download Complete." Do not proceed to the next step until this status is displayed.
			</div></li><li class="listitem"><div class="para">
				Go to the Instances tab, and filter by My Instances.
			</div></li><li class="listitem"><div class="para">
				Click Add Instance and follow the steps in the wizard.
			</div><div class="orderedlist"><ol class="loweralpha"><li class="listitem"><div class="para">
						Choose the zone you just added.
					</div></li><li class="listitem"><div class="para">
						In the template selection, choose the template to use in the VM. If this is a fresh installation, likely only the provided CentOS template is available.
					</div></li><li class="listitem"><div class="para">
						Select a service offering. Be sure that the hardware you have allows starting the selected service offering.
					</div></li><li class="listitem"><div class="para">
						In data disk offering, if desired, add another data disk. This is a second volume that will be available to but not mounted in the guest. For example, in Linux on XenServer you will see /dev/xvdb in the guest after rebooting the VM. A reboot is not required if you have a PV-enabled OS kernel in use.
					</div></li><li class="listitem"><div class="para">
						In default network, choose the primary network for the guest. In a trial installation, you would have only one option here.
					</div></li><li class="listitem"><div class="para">
						Optionally give your VM a name and a group. Use any descriptive text you would like.
					</div></li><li class="listitem"><div class="para">
						Click Launch VM. Your VM will be created and started. It might take some time to download the template and complete the VM startup. You can watch the VMâ€™s progress in the Instances screen.
					</div></li></ol></div></li><li class="listitem"><div class="para">
				To use the VM, click the View Console button. 
				<span class="inlinemediaobject"><img src="./images/console-icon.png" alt="ConsoleButton.png: button to launch a console" /></span>

			</div><div class="para">
				For more information about using VMs, including instructions for how to allow incoming network traffic to the VM, start, stop, and delete VMs, and move a VM from one host to another, see Working With Virtual Machines in the Administratorâ€™s Guide.
			</div></li></ol></div><div class="para">
		Congratulations! You have successfully completed a CloudStack Installation.
	</div><div class="para">
		If you decide to grow your deployment, you can add more hosts, primary storage, zones, pods, and clusters.
	</div></div></div><div xml:lang="pt-BR" class="chapter" id="offerings" lang="pt-BR"><div class="titlepage"><div><div><h2 class="title">Capítulo 8. Ofertas de serviços</h2></div></div></div><div class="toc"><dl><dt><span class="section"><a href="#compute-disk-service-offerings">8.1. Compute and Disk Service Offerings</a></span></dt><dd><dl><dt><span class="section"><a href="#creating-compute-offerings">8.1.1. Creating a New Compute Offering</a></span></dt><dt><span class="section"><a href="#creating-disk-offerings">8.1.2. Creating a New Disk Offering</a></span></dt><dt><span class="section"><a href="#modify-delete-service-offerings">8.1.3. Modifying or Deleting a Service Offering</a></span></dt></dl></dd><dt><span class="section"><a href="#system-service-offerings">8.2. System Service Offerings</a></span></dt><dd><dl><dt><span class="section"><a href="#creating-system-service-offerings">8.2.1. Creating a New System Service Offering</a></span></dt></dl></dd><dt><span class="section"><a href="#network-rate">8.3. Network Throttling</a></span></dt><dt><span class="section"><a href="#sys-offering-sysvm">8.4. Changing the Default System Offering for System VMs</a></span></dt></dl></div><div class="para">
		Neste capítulo discutimos ofertas serviços de computação, disco, e sistema. Ofertas de rede são discutidas na seção sobre configuração de rede para usuários.
	</div><div xml:lang="pt-BR" class="section" id="compute-disk-service-offerings" lang="pt-BR"><div class="titlepage"><div><div><h2 class="title" id="compute-disk-service-offerings">8.1. Compute and Disk Service Offerings</h2></div></div></div><div class="para">
		A service offering is a set of virtual hardware features such as CPU core count and speed, memory, and disk size. The CloudStack administrator can set up various offerings, and then end users choose from the available offerings when they create a new VM. A service offering includes the following elements:
	</div><div class="itemizedlist"><ul><li class="listitem"><div class="para">
				CPU, memory, and network resource guarantees
			</div></li><li class="listitem"><div class="para">
				How resources are metered
			</div></li><li class="listitem"><div class="para">
				How the resource usage is charged
			</div></li><li class="listitem"><div class="para">
				How often the charges are generated
			</div></li></ul></div><div class="para">
		For example, one service offering might allow users to create a virtual machine instance that is equivalent to a 1 GHz Intel® Core™ 2 CPU, with 1 GB memory at $0.20/hour, with network traffic metered at $0.10/GB. Based on the user’s selected offering, CloudStack emits usage records that can be integrated with billing systems. CloudStack separates service offerings into compute offerings and disk offerings. The computing service offering specifies:
	</div><div class="itemizedlist"><ul><li class="listitem"><div class="para">
				Guest CPU
			</div></li><li class="listitem"><div class="para">
				Guest RAM
			</div></li><li class="listitem"><div class="para">
				Guest Networking type (virtual or direct)
			</div></li><li class="listitem"><div class="para">
				Tags on the root disk
			</div></li></ul></div><div class="para">
		The disk offering specifies:
	</div><div class="itemizedlist"><ul><li class="listitem"><div class="para">
				Disk size (optional). An offering without a disk size will allow users to pick their own
			</div></li><li class="listitem"><div class="para">
				Tags on the data disk
			</div></li></ul></div><div xml:lang="pt-BR" class="section" id="creating-compute-offerings" lang="pt-BR"><div class="titlepage"><div><div><h3 class="title" id="creating-compute-offerings">8.1.1. Creating a New Compute Offering</h3></div></div></div><div class="para">
		To create a new compute offering:
	</div><div class="orderedlist"><ol><li class="listitem"><div class="para">
				Log in with admin privileges to the CloudStack UI.
			</div></li><li class="listitem"><div class="para">
				In the left navigation bar, click Service Offerings.
			</div></li><li class="listitem"><div class="para">
				In Select Offering, choose Compute Offering.
			</div></li><li class="listitem"><div class="para">
				Click Add Compute Offering.
			</div></li><li class="listitem"><div class="para">
				In the dialog, make the following choices:
			</div><div class="itemizedlist"><ul><li class="listitem"><div class="para">
						<span class="bold bold"><strong>Name</strong></span>: Any desired name for the service offering.
					</div></li><li class="listitem"><div class="para">
						<span class="bold bold"><strong>Description</strong></span>: A short description of the offering that can be displayed to users
					</div></li><li class="listitem"><div class="para">
						<span class="bold bold"><strong>Storage type</strong></span>: The type of disk that should be allocated. Local allocates from storage attached directly to the host where the system VM is running. Shared allocates from storage accessible via NFS.
					</div></li><li class="listitem"><div class="para">
						<span class="bold bold"><strong># of CPU cores</strong></span>: The number of cores which should be allocated to a system VM with this offering
					</div></li><li class="listitem"><div class="para">
						<span class="bold bold"><strong>CPU (in MHz)</strong></span>: The CPU speed of the cores that the system VM is allocated. For example, “2000” would provide for a 2 GHz clock.
					</div></li><li class="listitem"><div class="para">
						<span class="bold bold"><strong>Memory (in MB)</strong></span>: The amount of memory in megabytes that the system VM should be allocated. For example, “2048” would provide for a 2 GB RAM allocation.
					</div></li><li class="listitem"><div class="para">
						<span class="bold bold"><strong>Network Rate</strong></span>: Allowed data transfer rate in MB per second.
					</div></li><li class="listitem"><div class="para">
						<span class="bold bold"><strong>Offer HA</strong></span>: If yes, the administrator can choose to have the system VM be monitored and as highly available as possible.
					</div></li><li class="listitem"><div class="para">
						<span class="bold bold"><strong>Storage Tags</strong></span>: The tags that should be associated with the primary storage used by the system VM.
					</div></li><li class="listitem"><div class="para">
						<span class="bold bold"><strong>Host Tags</strong></span>: (Optional) Any tags that you use to organize your hosts
					</div></li><li class="listitem"><div class="para">
						<span class="bold bold"><strong>CPU cap</strong></span>: Whether to limit the level of CPU usage even if spare capacity is available.
					</div></li><li class="listitem"><div class="para">
						<span class="bold bold"><strong>Public</strong></span>: Indicate whether the service offering should be available all domains or only some domains. Choose Yes to make it available to all domains. Choose No to limit the scope to a subdomain; CloudStack will then prompt for the subdomain's name.
					</div></li></ul></div></li><li class="listitem"><div class="para">
				Clique em Add.
			</div></li></ol></div></div><div xml:lang="pt-BR" class="section" id="creating-disk-offerings" lang="pt-BR"><div class="titlepage"><div><div><h3 class="title" id="creating-disk-offerings">8.1.2. Creating a New Disk Offering</h3></div></div></div><div class="para">
		To create a system service offering:
	</div><div class="orderedlist"><ol><li class="listitem"><div class="para">
				Log in with admin privileges to the CloudStack UI.
			</div></li><li class="listitem"><div class="para">
				In the left navigation bar, click Service Offerings.
			</div></li><li class="listitem"><div class="para">
				In Select Offering, choose Disk Offering.
			</div></li><li class="listitem"><div class="para">
				Click Add Disk Offering.
			</div></li><li class="listitem"><div class="para">
				In the dialog, make the following choices:
			</div><div class="itemizedlist"><ul><li class="listitem"><div class="para">
						Name. Any desired name for the system offering.
					</div></li><li class="listitem"><div class="para">
						Description. A short description of the offering that can be displayed to users
					</div></li><li class="listitem"><div class="para">
						Custom Disk Size. If checked, the user can set their own disk size. If not checked, the root administrator must define a value in Disk Size.
					</div></li><li class="listitem"><div class="para">
						Disk Size. Appears only if Custom Disk Size is not selected. Define the volume size in GB.
					</div></li><li class="listitem"><div class="para">
						(Optional)Storage Tags. The tags that should be associated with the primary storage for this disk. Tags are a comma separated list of attributes of the storage. For example "ssd,blue". Tags are also added on Primary Storage. CloudStack matches tags on a disk offering to tags on the storage. If a tag is present on a disk offering that tag (or tags) must also be present on Primary Storage for the volume to be provisioned. If no such primary storage exists, allocation from the disk offering will fail..
					</div></li><li class="listitem"><div class="para">
						Public. Indicate whether the service offering should be available all domains or only some domains. Choose Yes to make it available to all domains. Choose No to limit the scope to a subdomain; CloudStack will then prompt for the subdomain's name.
					</div></li></ul></div></li><li class="listitem"><div class="para">
				Clique em Add.
			</div></li></ol></div></div><div xml:lang="pt-BR" class="section" id="modify-delete-service-offerings" lang="pt-BR"><div class="titlepage"><div><div><h3 class="title" id="modify-delete-service-offerings">8.1.3. Modifying or Deleting a Service Offering</h3></div></div></div><div class="para">
		Service offerings cannot be changed once created. This applies to both compute offerings and disk offerings.
	</div><div class="para">
		A service offering can be deleted. If it is no longer in use, it is deleted immediately and permanently. If the service offering is still in use, it will remain in the database until all the virtual machines referencing it have been deleted. After deletion by the administrator, a service offering will not be available to end users that are creating new instances.
	</div></div></div><div xml:lang="pt-BR" class="section" id="system-service-offerings" lang="pt-BR"><div class="titlepage"><div><div><h2 class="title" id="system-service-offerings">8.2. System Service Offerings</h2></div></div></div><div class="para">
		System service offerings provide a choice of CPU speed, number of CPUs, tags, and RAM size, just as other service offerings do. But rather than being used for virtual machine instances and exposed to users, system service offerings are used to change the default properties of virtual routers, console proxies, and other system VMs. System service offerings are visible only to the CloudStack root administrator. CloudStack provides default system service offerings. The CloudStack root administrator can create additional custom system service offerings.
	</div><div class="para">
		When CloudStack creates a virtual router for a guest network, it uses default settings which are defined in the system service offering associated with the network offering. You can upgrade the capabilities of the virtual router by applying a new network offering that contains a different system service offering. All virtual routers in that network will begin using the settings from the new service offering.
	</div><div xml:lang="pt-BR" class="section" id="creating-system-service-offerings" lang="pt-BR"><div class="titlepage"><div><div><h3 class="title" id="creating-system-service-offerings">8.2.1. Creating a New System Service Offering</h3></div></div></div><div class="para">
		To create a system service offering:
	</div><div class="orderedlist"><ol><li class="listitem"><div class="para">
				Log in with admin privileges to the CloudStack UI.
			</div></li><li class="listitem"><div class="para">
				In the left navigation bar, click Service Offerings.
			</div></li><li class="listitem"><div class="para">
				In Select Offering, choose System Offering.
			</div></li><li class="listitem"><div class="para">
				Click Add System Service Offering.
			</div></li><li class="listitem"><div class="para">
				In the dialog, make the following choices:
			</div><div class="itemizedlist"><ul><li class="listitem"><div class="para">
						Name. Any desired name for the system offering.
					</div></li><li class="listitem"><div class="para">
						Description. A short description of the offering that can be displayed to users
					</div></li><li class="listitem"><div class="para">
						System VM Type. Select the type of system virtual machine that this offering is intended to support.
					</div></li><li class="listitem"><div class="para">
						Storage type. The type of disk that should be allocated. Local allocates from storage attached directly to the host where the system VM is running. Shared allocates from storage accessible via NFS.
					</div></li><li class="listitem"><div class="para">
						# of CPU cores. The number of cores which should be allocated to a system VM with this offering
					</div></li><li class="listitem"><div class="para">
						CPU (in MHz). The CPU speed of the cores that the system VM is allocated. For example, "2000" would provide for a 2 GHz clock.
					</div></li><li class="listitem"><div class="para">
						Memory (in MB). The amount of memory in megabytes that the system VM should be allocated. For example, "2048" would provide for a 2 GB RAM allocation.
					</div></li><li class="listitem"><div class="para">
						Network Rate. Allowed data transfer rate in MB per second.
					</div></li><li class="listitem"><div class="para">
						Offer HA. If yes, the administrator can choose to have the system VM be monitored and as highly available as possible.
					</div></li><li class="listitem"><div class="para">
						Storage Tags. The tags that should be associated with the primary storage used by the system VM.
					</div></li><li class="listitem"><div class="para">
						Host Tags. (Optional) Any tags that you use to organize your hosts
					</div></li><li class="listitem"><div class="para">
						CPU cap. Whether to limit the level of CPU usage even if spare capacity is available.
					</div></li><li class="listitem"><div class="para">
						Public. Indicate whether the service offering should be available all domains or only some domains. Choose Yes to make it available to all domains. Choose No to limit the scope to a subdomain; CloudStack will then prompt for the subdomain's name.
					</div></li></ul></div></li><li class="listitem"><div class="para">
				Clique em Add.
			</div></li></ol></div></div></div><div xml:lang="pt-BR" class="section" id="network-rate" lang="pt-BR"><div class="titlepage"><div><div><h2 class="title" id="network-rate">8.3. Network Throttling</h2></div></div></div><div class="para">
		Network throttling is the process of controlling the network access and bandwidth usage based on certain rules. CloudStack controls this behaviour of the guest networks in the cloud by using the network rate parameter. This parameter is defined as the default data transfer rate in Mbps (Megabits Per Second) allowed in a guest network. It defines the upper limits for network utilization. If the current utilization is below the allowed upper limits, access is granted, else revoked.
	</div><div class="para">
		You can throttle the network bandwidth either to control the usage above a certain limit for some accounts, or to control network congestion in a large cloud environment. The network rate for your cloud can be configured on the following:
	</div><div class="itemizedlist"><ul><li class="listitem"><div class="para">
				Network Offering
			</div></li><li class="listitem"><div class="para">
				Plano
			</div></li><li class="listitem"><div class="para">
				Global parameter
			</div></li></ul></div><div class="para">
		If network rate is set to NULL in service offering, the value provided in the vm.network.throttling.rate global parameter is applied. If the value is set to NULL for network offering, the value provided in the network.throttling.rate global parameter is considered.
	</div><div class="para">
		For the default public, storage, and management networks, network rate is set to 0. This implies that the public, storage, and management networks will have unlimited bandwidth by default. For default guest networks, network rate is set to NULL. In this case, network rate is defaulted to the global parameter value.
	</div><div class="para">
		The following table gives you an overview of how network rate is applied on different types of networks in CloudStack.
	</div><div class="informaltable"><table border="1"><colgroup><col width="50%" align="left" class="1" /><col width="50%" align="left" class="2" /></colgroup><thead><tr><th align="left">
						<div class="para">
							Redes
						</div>
					</th><th align="left">
						<div class="para">
							Network Rate Is Taken from
						</div>
					</th></tr></thead><tbody><tr><td align="left">
						<div class="para">
							Guest network of Virtual Router
						</div>
					</td><td align="left">
						<div class="para">
							Guest Network Offering
						</div>
					</td></tr><tr><td align="left">
						<div class="para">
							Public network of Virtual Router
						</div>
					</td><td align="left">
						<div class="para">
							Guest Network Offering
						</div>
					</td></tr><tr><td align="left">
						<div class="para">
							Storage network of Secondary Storage VM
						</div>
					</td><td align="left">
						<div class="para">
							System Network Offering
						</div>
					</td></tr><tr><td align="left">
						<div class="para">
							Management network of Secondary Storage VM
						</div>
					</td><td align="left">
						<div class="para">
							System Network Offering
						</div>
					</td></tr><tr><td align="left">
						<div class="para">
							Storage network of Console Proxy VM
						</div>
					</td><td align="left">
						<div class="para">
							System Network Offering
						</div>
					</td></tr><tr><td align="left">
						<div class="para">
							Management network of Console Proxy VM
						</div>
					</td><td align="left">
						<div class="para">
							System Network Offering
						</div>
					</td></tr><tr><td align="left">
						<div class="para">
							Storage network of Virtual Router
						</div>
					</td><td align="left">
						<div class="para">
							System Network Offering
						</div>
					</td></tr><tr><td align="left">
						<div class="para">
							Management network of Virtual Router
						</div>
					</td><td align="left">
						<div class="para">
							System Network Offering
						</div>
					</td></tr><tr><td align="left">
						<div class="para">
							Public network of Secondary Storage VM
						</div>
					</td><td align="left">
						<div class="para">
							System Network Offering
						</div>
					</td></tr><tr><td align="left">
						<div class="para">
							Public network of Console Proxy VM
						</div>
					</td><td align="left">
						<div class="para">
							System Network Offering
						</div>
					</td></tr><tr><td align="left">
						<div class="para">
							Default network of a guest VM
						</div>
					</td><td align="left">
						<div class="para">
							Compute Offering
						</div>
					</td></tr><tr><td align="left">
						<div class="para">
							Additional networks of a guest VM
						</div>
					</td><td align="left">
						<div class="para">
							Corresponding Network Offerings
						</div>
					</td></tr></tbody></table></div><div class="para">
		A guest VM must have a default network, and can also have many additional networks. Depending on various parameters, such as the host and virtual switch used, you can observe a difference in the network rate in your cloud. For example, on a VMware host the actual network rate varies based on where they are configured (compute offering, network offering, or both); the network type (shared or isolated); and traffic direction (ingress or egress).
	</div><div class="para">
		The network rate set for a network offering used by a particular network in CloudStack is used for the traffic shaping policy of a port group, for example: port group A, for that network: a particular subnet or VLAN on the actual network. The virtual routers for that network connects to the port group A, and by default instances in that network connects to this port group. However, if an instance is deployed with a compute offering with the network rate set, and if this rate is used for the traffic shaping policy of another port group for the network, for example port group B, then instances using this compute offering are connected to the port group B, instead of connecting to port group A.
	</div><div class="para">
		The traffic shaping policy on standard port groups in VMware only applies to the egress traffic, and the net effect depends on the type of network used in CloudStack. In shared networks, ingress traffic is unlimited for CloudStack, and egress traffic is limited to the rate that applies to the port group used by the instance if any. If the compute offering has a network rate configured, this rate applies to the egress traffic, otherwise the network rate set for the network offering applies. For isolated networks, the network rate set for the network offering, if any, effectively applies to the ingress traffic. This is mainly because the network rate set for the network offering applies to the egress traffic from the virtual router to the instance. The egress traffic is limited by the rate that applies to the port group used by the instance if any, similar to shared networks.
	</div><div class="para">
		For example:
	</div><div class="para">
		Network rate of network offering = 10 Mbps
	</div><div class="para">
		Network rate of compute offering = 200 Mbps
	</div><div class="para">
		In shared networks, ingress traffic will not be limited for CloudStack, while egress traffic will be limited to 200 Mbps. In an isolated network, ingress traffic will be limited to 10 Mbps and egress to 200 Mbps.
	</div></div><div xml:lang="pt-BR" class="section" id="sys-offering-sysvm" lang="pt-BR"><div class="titlepage"><div><div><h2 class="title" id="sys-offering-sysvm">8.4. Changing the Default System Offering for System VMs</h2></div></div></div><div class="para">
		You can manually change the system offering for a particular System VM. Additionally, as a CloudStack administrator, you can also change the default system offering used for System VMs.
	</div><div class="orderedlist"><ol><li class="listitem"><div class="para">
				Create a new system offering.
			</div><div class="para">
				For more information, see  <span>Creating a New System Service Offering</span>.
			</div></li><li class="listitem"><div class="para">
				Back up the database:
			</div><pre class="programlisting">mysqldump -u root -p cloud | bzip2 &gt; cloud_backup.sql.bz2</pre></li><li class="listitem"><div class="para">
				Open an MySQL prompt:
			</div><pre class="programlisting">mysql -u cloud -p cloud</pre></li><li class="listitem"><div class="para">
				Run the following queries on the cloud database.
			</div><div class="orderedlist"><ol class="loweralpha"><li class="listitem"><div class="para">
						In the disk_offering table, identify the original default offering and the new offering you want to use by default.
					</div><div class="para">
						Take a note of the ID of the new offering.
					</div><pre class="programlisting">select id,name,unique_name,type from disk_offering;</pre></li><li class="listitem"><div class="para">
						For the original default offering, set the value of unique_name to NULL.
					</div><pre class="programlisting"># update disk_offering set unique_name = NULL where id = 10;</pre><div class="para">
						Ensure that you use the correct value for the ID.
					</div></li><li class="listitem"><div class="para">
						For the new offering that you want to use by default, set the value of unique_name as follows:
					</div><div class="para">
						For the default Console Proxy VM (CPVM) offering,set unique_name to 'Cloud.com-ConsoleProxy'. For the default Secondary Storage VM (SSVM) offering, set unique_name to 'Cloud.com-SecondaryStorage'. For example:
					</div><pre class="programlisting">update disk_offering set unique_name = 'Cloud.com-ConsoleProxy' where id = 16;</pre></li></ol></div></li><li class="listitem"><div class="para">
				Restart CloudStack Management Server. Restarting is required because the default offerings are loaded into the memory at startup.
			</div><pre class="programlisting">service cloudstack-management restart</pre></li><li class="listitem"><div class="para">
				Destroy the existing CPVM or SSVM offerings and wait for them to be recreated. The new CPVM or SSVM are configured with the new offering.
			</div></li></ol></div></div></div><div xml:lang="pt-BR" class="chapter" id="set-up-network-for-users" lang="pt-BR"><div class="titlepage"><div><div><h2 class="title">Capítulo 9. Setting Up Networking for Users</h2></div></div></div><div class="toc"><dl><dt><span class="section"><a href="#networks-for-users-overview">9.1. Overview of Setting Up Networking for Users</a></span></dt><dt><span class="section"><a href="#about-virtual-networks">9.2. About Virtual Networks</a></span></dt><dd><dl><dt><span class="section"><a href="#isolated-networks">9.2.1. Isolated Networks</a></span></dt><dt><span class="section"><a href="#shared-networks">9.2.2. Shared Networks</a></span></dt><dt><span class="section"><a href="#runtime-allocation-virtual-network-resources">9.2.3. Runtime Allocation of Virtual Network Resources</a></span></dt></dl></dd><dt><span class="section"><a href="#network-service-providers">9.3. Provedores de Serviços de Rede</a></span></dt><dt><span class="section"><a href="#network-offerings">9.4. Oferta de Rede</a></span></dt><dd><dl><dt><span class="section"><a href="#creating-network-offerings">9.4.1. Creating a New Network Offering</a></span></dt></dl></dd></dl></div><div xml:lang="pt-BR" class="section" id="networks-for-users-overview" lang="pt-BR"><div class="titlepage"><div><div><h2 class="title" id="networks-for-users-overview">9.1. Overview of Setting Up Networking for Users</h2></div></div></div><div class="para">
		People using cloud infrastructure have a variety of needs and preferences when it comes to the networking services provided by the cloud. As a CloudStack administrator, you can do the following things to set up networking for your users:
	</div><div class="itemizedlist"><ul><li class="listitem"><div class="para">
				Set up physical networks in zones
			</div></li><li class="listitem"><div class="para">
				Set up several different providers for the same service on a single physical network (for example, both Cisco and Juniper firewalls)
			</div></li><li class="listitem"><div class="para">
				Bundle different types of network services into network offerings, so users can choose the desired network services for any given virtual machine
			</div></li><li class="listitem"><div class="para">
				Add new network offerings as time goes on so end users can upgrade to a better class of service on their network
			</div></li><li class="listitem"><div class="para">
				Provide more ways for a network to be accessed by a user, such as through a project of which the user is a member
			</div></li></ul></div></div><div xml:lang="pt-BR" class="section" id="about-virtual-networks" lang="pt-BR"><div class="titlepage"><div><div><h2 class="title" id="about-virtual-networks">9.2. About Virtual Networks</h2></div></div></div><div class="para">
		A virtual network is a logical construct that enables multi-tenancy on a single physical network. In CloudStack a virtual network can be shared or isolated.
	</div><div xml:lang="pt-BR" class="section" id="isolated-networks" lang="pt-BR"><div class="titlepage"><div><div><h3 class="title" id="isolated-networks">9.2.1. Isolated Networks</h3></div></div></div><div class="para">
		An isolated network can be accessed only by virtual machines of a single account. Isolated networks have the following properties.
	</div><div class="itemizedlist"><ul><li class="listitem"><div class="para">
				Resources such as VLAN are allocated and garbage collected dynamically
			</div></li><li class="listitem"><div class="para">
				There is one network offering for the entire network
			</div></li><li class="listitem"><div class="para">
				The network offering can be upgraded or downgraded but it is for the entire network
			</div></li></ul></div></div><div xml:lang="pt-BR" class="section" id="shared-networks" lang="pt-BR"><div class="titlepage"><div><div><h3 class="title" id="shared-networks">9.2.2. Shared Networks</h3></div></div></div><div class="para">
		A shared network can be accessed by virtual machines that belong to many different accounts. Network Isolation on shared networks is accomplished using techniques such as security groups (supported only in basic zones).
	</div><div class="itemizedlist"><ul><li class="listitem"><div class="para">
				Shared Networks are created by the administrator
			</div></li><li class="listitem"><div class="para">
				Shared Networks can be designated to a certain domain
			</div></li><li class="listitem"><div class="para">
				Shared Network resources such as VLAN and physical network that it maps to are designated by the administrator
			</div></li><li class="listitem"><div class="para">
				Shared Networks are isolated by security groups
			</div></li><li class="listitem"><div class="para">
				Public Network is a shared network that is not shown to the end users
			</div></li></ul></div></div><div xml:lang="pt-BR" class="section" id="runtime-allocation-virtual-network-resources" lang="pt-BR"><div class="titlepage"><div><div><h3 class="title" id="runtime-allocation-virtual-network-resources">9.2.3. Runtime Allocation of Virtual Network Resources</h3></div></div></div><div class="para">
		When you define a new virtual network, all your settings for that network are stored in CloudStack. The actual network resources are activated only when the first virtual machine starts in the network. When all virtual machines have left the virtual network, the network resources are garbage collected so they can be allocated again. This helps to conserve network resources.
	</div></div></div><div xml:lang="pt-BR" class="section" id="network-service-providers" lang="pt-BR"><div class="titlepage"><div><div><h2 class="title" id="network-service-providers">9.3. Provedores de Serviços de Rede</h2></div></div></div><div class="note"><div class="admonition_header"><h2>Nota</h2></div><div class="admonition"><div class="para">
			For the most up-to-date list of supported network service providers, see the CloudStack UI or call listNetworkServiceProviders.
		</div></div></div><div class="para">
		A service provider (also called a network element) is hardware or virtual appliance that makes a network service possible; for example, a firewall appliance can be installed in the cloud to provide firewall service. On a single network, multiple providers can provide the same network service. For example, a firewall service may be provided by Cisco or Juniper devices in the same physical network.
	</div><div class="para">
		You can have multiple instances of the same service provider in a network (say, more than one Juniper SRX device).
	</div><div class="para">
		If different providers are set up to provide the same service on the network, the administrator can create network offerings so users can specify which network service provider they prefer (along with the other choices offered in network offerings). Otherwise, CloudStack will choose which provider to use whenever the service is called for.
	</div><div class="formalpara"><h5 class="formalpara" id="idp18950632">Supported Network Service Providers</h5>
			CloudStack ships with an internal list of the supported service providers, and you can choose from this list when creating a network offering.
		</div><div class="informaltable"><table border="1"><colgroup><col width="17%" align="left" class="c1" /><col width="17%" align="left" class="c2" /><col width="17%" align="left" class="c3" /><col width="17%" align="left" class="c4" /><col width="17%" align="left" class="c5" /><col width="17%" align="left" class="c6" /></colgroup><thead><tr><th align="left">
					</th><th align="left">
						<div class="para">
							Roteador Virtual
						</div>
					</th><th align="left">
						<div class="para">
							Citrix NetScaler
						</div>
					</th><th align="left">
						<div class="para">
							Juniper SRX
						</div>
					</th><th align="left">
						<div class="para">
							F5 BigIP
						</div>
					</th><th align="left">
						<div class="para">
							Host based (KVM/Xen)
						</div>
					</th></tr></thead><tbody><tr><td align="left">
						<div class="para">
							Remote Access VPN
						</div>
					</td><td align="left">
						<div class="para">
							Sim
						</div>
					</td><td align="left">
						<div class="para">
							Não
						</div>
					</td><td align="left">
						<div class="para">
							Não
						</div>
					</td><td align="left">
						<div class="para">
							Não
						</div>
					</td><td align="left">
						<div class="para">
							Não
						</div>
					</td></tr><tr><td align="left">
						<div class="para">
							DNS/DHCP/User Data
						</div>
					</td><td align="left">
						<div class="para">
							Sim
						</div>
					</td><td align="left">
						<div class="para">
							Não
						</div>
					</td><td align="left">
						<div class="para">
							Não
						</div>
					</td><td align="left">
						<div class="para">
							Não
						</div>
					</td><td align="left">
						<div class="para">
							Não
						</div>
					</td></tr><tr><td align="left">
						<div class="para">
							Firewall
						</div>
					</td><td align="left">
						<div class="para">
							Sim
						</div>
					</td><td align="left">
						<div class="para">
							Não
						</div>
					</td><td align="left">
						<div class="para">
							Sim
						</div>
					</td><td align="left">
						<div class="para">
							Não
						</div>
					</td><td align="left">
						<div class="para">
							Não
						</div>
					</td></tr><tr><td align="left">
						<div class="para">
							Balanceamento de Carga
						</div>
					</td><td align="left">
						<div class="para">
							Sim
						</div>
					</td><td align="left">
						<div class="para">
							Sim
						</div>
					</td><td align="left">
						<div class="para">
							Não
						</div>
					</td><td align="left">
						<div class="para">
							Sim
						</div>
					</td><td align="left">
						<div class="para">
							Não
						</div>
					</td></tr><tr><td align="left">
						<div class="para">
							IP Elástico
						</div>
					</td><td align="left">
						<div class="para">
							Não
						</div>
					</td><td align="left">
						<div class="para">
							Sim
						</div>
					</td><td align="left">
						<div class="para">
							Não
						</div>
					</td><td align="left">
						<div class="para">
							Não
						</div>
					</td><td align="left">
						<div class="para">
							Não
						</div>
					</td></tr><tr><td align="left">
						<div class="para">
							LB Elástico
						</div>
					</td><td align="left">
						<div class="para">
							Não
						</div>
					</td><td align="left">
						<div class="para">
							Sim
						</div>
					</td><td align="left">
						<div class="para">
							Não
						</div>
					</td><td align="left">
						<div class="para">
							Não
						</div>
					</td><td align="left">
						<div class="para">
							Não
						</div>
					</td></tr><tr><td align="left">
						<div class="para">
							NAT de origem
						</div>
					</td><td align="left">
						<div class="para">
							Sim
						</div>
					</td><td align="left">
						<div class="para">
							Não
						</div>
					</td><td align="left">
						<div class="para">
							Sim
						</div>
					</td><td align="left">
						<div class="para">
							Não
						</div>
					</td><td align="left">
						<div class="para">
							Não
						</div>
					</td></tr><tr><td align="left">
						<div class="para">
							NAT estática
						</div>
					</td><td align="left">
						<div class="para">
							Sim
						</div>
					</td><td align="left">
						<div class="para">
							Sim
						</div>
					</td><td align="left">
						<div class="para">
							Sim
						</div>
					</td><td align="left">
						<div class="para">
							Não
						</div>
					</td><td align="left">
						<div class="para">
							Não
						</div>
					</td></tr><tr><td align="left">
						<div class="para">
							Encaminhamento de Porta
						</div>
					</td><td align="left">
						<div class="para">
							Sim
						</div>
					</td><td align="left">
						<div class="para">
							Não
						</div>
					</td><td align="left">
						<div class="para">
							Sim
						</div>
					</td><td align="left">
						<div class="para">
							Não
						</div>
					</td><td align="left">
						<div class="para">
							Não
						</div>
					</td></tr></tbody></table></div></div><div xml:lang="pt-BR" class="section" id="network-offerings" lang="pt-BR"><div class="titlepage"><div><div><h2 class="title" id="network-offerings">9.4. Oferta de Rede</h2></div></div></div><div class="note"><div class="admonition_header"><h2>Nota</h2></div><div class="admonition"><div class="para">
			Para a mais atualizada lista de serviços de rede suportados, veja o interface de usuário do CloudStack ou chame listNetworkServices.
		</div></div></div><div class="para">
		Uma oferta de rede é um conjunto identificado de serviços de rede, tais como:
	</div><div class="itemizedlist"><ul><li class="listitem"><div class="para">
				DHCP
			</div></li><li class="listitem"><div class="para">
				DNS
			</div></li><li class="listitem"><div class="para">
				Source NAT
			</div></li><li class="listitem"><div class="para">
				NAT EstÃ¡tico
			</div></li><li class="listitem"><div class="para">
				Encaminhamento de Porta
			</div></li><li class="listitem"><div class="para">
				Balanceamento de Carga
			</div></li><li class="listitem"><div class="para">
				Firewall
			</div></li><li class="listitem"><div class="para">
				VPN
			</div></li><li class="listitem"><div class="para">
				Opcional) Nome de um entre vários fornecedores para usar para um dado serviço, tal como Juniper para o firewall
			</div></li><li class="listitem"><div class="para">
				(Opcional) Tag de rede para especificar qual a rede física a utilizar
			</div></li></ul></div><div class="para">
		Ao criar uma nova máquina virtual, o usuário escolhe uma das ofertas de rede disponíveis, e isto determina quais serviços de rede a máquina virtual pode usar.
	</div><div class="para">
		O administrado do CloudStack pode criar qualquer número de ofertas de rede customizadas, em adição às ofertas de rede default providas pelo CloudStack. Criando múltiplas ofertas de rede customizadas, você pode configurar sua nuvem para oferecer diferentes classes de serviço em uma única rede física multi-tenant. Por exemplo, enquanto o cabeamento físico subjacente pode ser o mesmo para dois tenants, o tenant A pode requerer apenas proteção de firewall simples para o seu website, enquanto o tenant B pode estar executando um web server farm e requerer uma solução escalável de firewall, solução de balanceamento de carga e redes alternativas para acessar o database no backend.
	</div><div class="note"><div class="admonition_header"><h2>Nota</h2></div><div class="admonition"><div class="para">
			Se você cria regras de balanceamento de carga enquanto usando um oferta de serviço de rede que inclui um equipamento externo de balanceamento de carga, como o NetScaler, e depois altera a oferta de serviço para um que usa o roteador virtual do CloudStack , você deve criar uma regra no firewall do roteador virtual para cada uma das regras de balanceamento de carga existentes, de forma que elas possam continuar funcionado.
		</div></div></div><div class="para">
		Ao criar uma nova rede virtual, o administrador do CloudStack escolhe qual oferta de rede habilitar para aquela rede. Cada rede virtual é associada com uma oferta de rede. Uma rede virtual pode ser incrementada ou decrementada alterando sua oferta de rede associada. Se você fizer isto, certifique-se de reprogramar a rede física para coincidir.
	</div><div class="para">
		O CloudStack também possui ofertas de rede internas para uso das máquinas virtuais de sistema do CloudStack. Estas ofertas de rede não são visíveis pelos usuários, mas podem ser modificadas pelos administradores.
	</div><div xml:lang="pt-BR" class="section" id="creating-network-offerings" lang="pt-BR"><div class="titlepage"><div><div><h3 class="title" id="creating-network-offerings">9.4.1. Creating a New Network Offering</h3></div></div></div><div class="para">
		To create a network offering:
	</div><div class="orderedlist"><ol><li class="listitem"><div class="para">
				Log in with admin privileges to the CloudStack UI.
			</div></li><li class="listitem"><div class="para">
				In the left navigation bar, click Service Offerings.
			</div></li><li class="listitem"><div class="para">
				In Select Offering, choose Network Offering.
			</div></li><li class="listitem"><div class="para">
				Click Add Network Offering.
			</div></li><li class="listitem"><div class="para">
				In the dialog, make the following choices:
			</div><div class="itemizedlist"><ul><li class="listitem"><div class="para">
						<span class="bold bold"><strong>Name</strong></span>. Any desired name for the network offering.
					</div></li><li class="listitem"><div class="para">
						<span class="bold bold"><strong>Description</strong></span>. A short description of the offering that can be displayed to users.
					</div></li><li class="listitem"><div class="para">
						<span class="bold bold"><strong>Network Rate</strong></span>. Allowed data transfer rate in MB per second.
					</div></li><li class="listitem"><div class="para">
						<span class="bold bold"><strong>Guest Type</strong></span>. Choose whether the guest network is isolated or shared.
					</div><div class="para">
						For a description of this term, see <a class="xref" href="#about-virtual-networks">Seção 9.2, “About Virtual Networks”</a>.
					</div></li><li class="listitem"><div class="para">
						<span class="bold bold"><strong>Persistent</strong></span>. Indicate whether the guest network is persistent or not. The network that you can provision without having to deploy a VM on it is termed persistent network. For more information, see <a class="xref" href="#persistent-network">Seção 15.20, “Persistent Networks”</a>.
					</div></li><li class="listitem"><div class="para">
						<span class="bold bold"><strong>Specify VLAN</strong></span>. (Isolated guest networks only) Indicate whether a VLAN should be specified when this offering is used.
					</div></li><li class="listitem"><div class="para">
						<span class="bold bold"><strong>VPC</strong></span>. This option indicate whether the guest network is Virtual Private Cloud-enabled. A Virtual Private Cloud (VPC) is a private, isolated part of CloudStack. A VPC can have its own virtual network topology that resembles a traditional physical network. For more information on VPCs, see <a class="xref" href="#vpc">Seção 15.19.1, “About Virtual Private Clouds”</a>.
					</div></li><li class="listitem"><div class="para">
						<span class="bold bold"><strong>Supported Services</strong></span>. Select one or more of the possible network services. For some services, you must also choose the service provider; for example, if you select Load Balancer, you can choose the CloudStack virtual router or any other load balancers that have been configured in the cloud. Depending on which services you choose, additional fields may appear in the rest of the dialog box.
					</div><div class="para">
						Based on the guest network type selected, you can see the following supported services:
					</div><div class="informaltable"><table border="1"><colgroup><col width="25%" /><col width="25%" /><col width="25%" /><col width="25%" /></colgroup><thead><tr><th align="left">
										<div class="para">
											Serviços Suportados
										</div>
									</th><th align="left">
										<div class="para">
											DescriÃ§Ã£o
										</div>
									</th><th align="left">
										<div class="para">
											Isolated
										</div>
									</th><th align="left">
										<div class="para">
											Compatilhado
										</div>
									</th></tr></thead><tbody><tr><td align="left">
										<div class="para">
											DHCP
										</div>
									</td><td align="left">
										<div class="para">
											For more information, see <a class="xref" href="#dns-dhcp">Seção 15.16, “DNS e DHCP”</a>.
										</div>
									</td><td align="left">
										<div class="para">
											Supported
										</div>
									</td><td align="left">
										<div class="para">
											Supported
										</div>
									</td></tr><tr><td align="left">
										<div class="para">
											DNS
										</div>
									</td><td align="left">
										<div class="para">
											For more information, see <a class="xref" href="#dns-dhcp">Seção 15.16, “DNS e DHCP”</a>.
										</div>
									</td><td align="left">
										<div class="para">
											Supported
										</div>
									</td><td align="left">
										<div class="para">
											Supported
										</div>
									</td></tr><tr><td align="left">
										<div class="para">
											Load Balancer
										</div>
									</td><td align="left">
										<div class="para">
											If you select Load Balancer, you can choose the CloudStack virtual router or any other load balancers that have been configured in the cloud.
										</div>
									</td><td align="left">
										<div class="para">
											Supported
										</div>
									</td><td align="left">
										<div class="para">
											Supported
										</div>
									</td></tr><tr><td align="left">
										<div class="para">
											Firewall
										</div>
									</td><td align="left">
										<div class="para">
											For more information, see the Administration Guide.
										</div>
									</td><td align="left">
										<div class="para">
											Supported
										</div>
									</td><td align="left">
										<div class="para">
											Supported
										</div>
									</td></tr><tr><td align="left">
										<div class="para">
											Source NAT
										</div>
									</td><td align="left">
										<div class="para">
											If you select Source NAT, you can choose the CloudStack virtual router or any other Source NAT providers that have been configured in the cloud.
										</div>
									</td><td align="left">
										<div class="para">
											Supported
										</div>
									</td><td align="left">
										<div class="para">
											Supported
										</div>
									</td></tr><tr><td align="left">
										<div class="para">
											NAT EstÃ¡tico
										</div>
									</td><td align="left">
										<div class="para">
											If you select Static NAT, you can choose the CloudStack virtual router or any other Static NAT providers that have been configured in the cloud.
										</div>
									</td><td align="left">
										<div class="para">
											Supported
										</div>
									</td><td align="left">
										<div class="para">
											Supported
										</div>
									</td></tr><tr><td align="left">
										<div class="para">
											Encaminhamento de Porta
										</div>
									</td><td align="left">
										<div class="para">
											If you select Port Forwarding, you can choose the CloudStack virtual router or any other Port Forwarding providers that have been configured in the cloud.
										</div>
									</td><td align="left">
										<div class="para">
											Supported
										</div>
									</td><td align="left">
										<div class="para">
											Not Supported
										</div>
									</td></tr><tr><td align="left">
										<div class="para">
											VPN
										</div>
									</td><td align="left">
										<div class="para">
											For more information, see <a class="xref" href="#vpn">Seção 15.17, “VPN”</a>.
										</div>
									</td><td align="left">
										<div class="para">
											Supported
										</div>
									</td><td align="left">
										<div class="para">
											Not Supported
										</div>
									</td></tr><tr><td align="left">
										<div class="para">
											User Data
										</div>
									</td><td align="left">
										<div class="para">
											For more information, see <a class="xref" href="#user-data-and-meta-data">Seção 20.3, “User Data and Meta Data”</a>.
										</div>

									</td><td align="left">
										<div class="para">
											Not Supported
										</div>
									</td><td align="left">
										<div class="para">
											Supported
										</div>
									</td></tr><tr><td align="left">
										<div class="para">
											Network ACL
										</div>
									</td><td align="left">
										<div class="para">
											For more information, see <a class="xref" href="#configure-acl">Seção 15.19.4, “Configuring Access Control List”</a>.
										</div>
									</td><td align="left">
										<div class="para">
											Supported
										</div>
									</td><td align="left">
										<div class="para">
											Not Supported
										</div>
									</td></tr><tr><td align="left">
										<div class="para">
											Security Groups
										</div>
									</td><td align="left">
										<div class="para">
											For more information, see <a class="xref" href="#add-security-group">Seção 15.7.2, “Adicionando um grupo de segurança”</a>.
										</div>
									</td><td align="left">
										<div class="para">
											Not Supported
										</div>
									</td><td align="left">
										<div class="para">
											Supported
										</div>
									</td></tr></tbody></table></div></li><li class="listitem"><div class="para">
						<span class="bold bold"><strong>System Offering</strong></span>. If the service provider for any of the services selected in Supported Services is a virtual router, the System Offering field appears. Choose the system service offering that you want virtual routers to use in this network. For example, if you selected Load Balancer in Supported Services and selected a virtual router to provide load balancing, the System Offering field appears so you can choose between the CloudStack default system service offering and any custom system service offerings that have been defined by the CloudStack root administrator.
					</div><div class="para">
						For more information, see <a class="xref" href="#system-service-offerings">Seção 8.2, “System Service Offerings”</a>.
					</div></li><li class="listitem"><div class="para">
						<span class="bold bold"><strong>Redundant router capability</strong></span>. Available only when Virtual Router is selected as the Source NAT provider. Select this option if you want to use two virtual routers in the network for uninterrupted connection: one operating as the master virtual router and the other as the backup. The master virtual router receives requests from and sends responses to the user’s VM. The backup virtual router is activated only when the master is down. After the failover, the backup becomes the master virtual router. CloudStack deploys the routers on different hosts to ensure reliability if one host is down.
					</div></li><li class="listitem"><div class="para">
						<span class="bold bold"><strong>Conserve mode</strong></span>. Indicate whether to use conserve mode. In this mode, network resources are allocated only when the first virtual machine starts in the network. When conservative mode is off, the public IP can only be used for a single service. For example, a public IP used for a port forwarding rule cannot be used for defining other services, such as StaticNAT or load balancing. When the conserve mode is on, you can define more than one service on the same public IP.
					</div><div class="note"><div class="admonition_header"><h2>Nota</h2></div><div class="admonition"><div class="para">
							If StaticNAT is enabled, irrespective of the status of the conserve mode, no port forwarding or load balancing rule can be created for the IP. However, you can add the firewall rules by using the createFirewallRule command.
						</div></div></div></li><li class="listitem"><div class="para">
						<span class="bold bold"><strong>Tags</strong></span>. Network tag to specify which physical network to use.
					</div></li></ul></div></li><li class="listitem"><div class="para">
				Clique em Add.
			</div></li></ol></div></div></div></div><div xml:lang="pt-BR" class="chapter" id="virtual-machines" lang="pt-BR"><div class="titlepage"><div><div><h2 class="title">Capítulo 10. Working With Virtual Machines</h2></div></div></div><div class="toc"><dl><dt><span class="section"><a href="#about-working-with-vms">10.1. About Working with Virtual Machines</a></span></dt><dt><span class="section"><a href="#best-practices-vm">10.2. Best Practices for Virtual Machines</a></span></dt><dt><span class="section"><a href="#vm-lifecycle">10.3. VM Lifecycle</a></span></dt><dt><span class="section"><a href="#creating-vms">10.4. Creating VMs</a></span></dt><dt><span class="section"><a href="#accessing-vms">10.5. Accessing VMs</a></span></dt><dt><span class="section"><a href="#stopping-and-starting-vms">10.6. Stopping and Starting VMs</a></span></dt><dt><span class="section"><a href="#changing-vm-name-os-group">10.7. Changing the VM Name, OS, or Group</a></span></dt><dt><span class="section"><a href="#changing-service-offering-for-vm">10.8. Changing the Service Offering for a VM</a></span></dt><dt><span class="section"><a href="#manual-live-migration">10.9. Moving VMs Between Hosts (Manual Live Migration)</a></span></dt><dt><span class="section"><a href="#deleting-vms">10.10. Deleting VMs</a></span></dt><dt><span class="section"><a href="#working-with-iso">10.11. Working with ISOs</a></span></dt><dd><dl><dt><span class="section"><a href="#add-iso">10.11.1. Adding an ISO</a></span></dt><dt><span class="section"><a href="#attach-iso-to-vm">10.11.2. Attaching an ISO to a VM</a></span></dt></dl></dd></dl></div><div xml:lang="pt-BR" class="section" id="about-working-with-vms" lang="pt-BR"><div class="titlepage"><div><div><h2 class="title" id="about-working-with-vms">10.1. About Working with Virtual Machines</h2></div></div></div><div class="para">
		CloudStack provides administrators with complete control over the lifecycle of all guest VMs executing in the cloud. CloudStack provides several guest management operations for end users and administrators. VMs may be stopped, started, rebooted, and destroyed.
	</div><div class="para">
		Guest VMs have a name and group. VM names and groups are opaque to CloudStack and are available for end users to organize their VMs. Each VM can have three names for use in different contexts. Only two of these names can be controlled by the user:
	</div><div class="itemizedlist"><ul><li class="listitem"><div class="para">
				Instance name – a unique, immutable ID that is generated by CloudStack, and can not be modified by the user. This name conforms to the requirements in IETF RFC 1123.
			</div></li><li class="listitem"><div class="para">
				Display name – the name displayed in the CloudStack web UI. Can be set by the user. Defaults to instance name.
			</div></li><li class="listitem"><div class="para">
				Name – host name that the DHCP server assigns to the VM. Can be set by the user. Defaults to instance name
			</div></li></ul></div><div class="para">
		Guest VMs can be configured to be Highly Available (HA). An HA-enabled VM is monitored by the system. If the system detects that the VM is down, it will attempt to restart the VM, possibly on a different host. For more information, see HA-Enabled Virtual Machines on
	</div><div class="para">
		Each new VM is allocated one public IP address. When the VM is started, CloudStack automatically creates a static NAT between this public IP address and the private IP address of the VM.
	</div><div class="para">
		If elastic IP is in use (with the NetScaler load balancer), the IP address initially allocated to the new VM is not marked as elastic. The user must replace the automatically configured IP with a specifically acquired elastic IP, and set up the static NAT mapping between this new IP and the guest VM’s private IP. The VM’s original IP address is then released and returned to the pool of available public IPs.
	</div><div class="para">
		CloudStack cannot distinguish a guest VM that was shut down by the user (such as with the “shutdown” command in Linux) from a VM that shut down unexpectedly. If an HA-enabled VM is shut down from inside the VM, CloudStack will restart it. To shut down an HA-enabled VM, you must go through the CloudStack UI or API.
	</div></div><div xml:lang="pt-BR" class="section" id="best-practices-vm" lang="pt-BR"><div class="titlepage"><div><div><h2 class="title" id="best-practices-vm">10.2. Best Practices for Virtual Machines</h2></div></div></div><div class="para">
		The CloudStack administrator should monitor the total number of VM instances in each cluster, and disable allocation to the cluster if the total is approaching the maximum that the hypervisor can handle. Be sure to leave a safety margin to allow for the possibility of one or more hosts failing, which would increase the VM load on the other hosts as the VMs are automatically redeployed. Consult the documentation for your chosen hypervisor to find the maximum permitted number of VMs per host, then use CloudStack global configuration settings to set this as the default limit. Monitor the VM activity in each cluster at all times. Keep the total number of VMs below a safe level that allows for the occasional host failure. For example, if there are N hosts in the cluster, and you want to allow for one host in the cluster to be down at any given time, the total number of VM instances you can permit in the cluster is at most (N-1) * (per-host-limit). Once a cluster reaches this number of VMs, use the CloudStack UI to disable allocation of more VMs to the cluster.
	</div></div><div xml:lang="pt-BR" class="section" id="vm-lifecycle" lang="pt-BR"><div class="titlepage"><div><div><h2 class="title" id="vm-lifecycle">10.3. VM Lifecycle</h2></div></div></div><div class="para">
		Virtual machines can be in the following states:
	</div><div class="mediaobject"><img src="./images/vm-lifecycle.png" width="444" alt="basic-deployment.png: Basic two-machine CloudStack deployment" /></div><div class="para">
		Once a virtual machine is destroyed, it cannot be recovered. All the resources used by the virtual machine will be reclaimed by the system. This includes the virtual machine’s IP address.
	</div><div class="para">
		A stop will attempt to gracefully shut down the operating system, which typically involves terminating all the running applications. If the operation system cannot be stopped, it will be forcefully terminated. This has the same effect as pulling the power cord to a physical machine.
	</div><div class="para">
		A reboot is a stop followed by a start.
	</div><div class="para">
		CloudStack preserves the state of the virtual machine hard disk until the machine is destroyed.
	</div><div class="para">
		A running virtual machine may fail because of hardware or network issues. A failed virtual machine is in the down state.
	</div><div class="para">
		The system places the virtual machine into the down state if it does not receive the heartbeat from the hypervisor for three minutes.
	</div><div class="para">
		The user can manually restart the virtual machine from the down state.
	</div><div class="para">
		The system will start the virtual machine from the down state automatically if the virtual machine is marked as HA-enabled.
	</div></div><div xml:lang="pt-BR" class="section" id="creating-vms" lang="pt-BR"><div class="titlepage"><div><div><h2 class="title" id="creating-vms">10.4. Creating VMs</h2></div></div></div><div class="para">
		Virtual machines are usually created from a template. Users can also create blank virtual machines. A blank virtual machine is a virtual machine without an OS template. Users can attach an ISO file and install the OS from the CD/DVD-ROM.
	</div><div class="note"><div class="admonition_header"><h2>Nota</h2></div><div class="admonition"><div class="para">
			You can create a VM without starting it. You can determine whether the VM needs to be started as part of the VM deployment. A request parameter, startVM, in the deployVm API provides this feature. For more information, see the Developer's Guide
		</div></div></div><div class="para">
		To create a VM from a template:
	</div><div class="orderedlist"><ol><li class="listitem"><div class="para">
				Log in to the CloudStack UI as an administrator or user.
			</div></li><li class="listitem"><div class="para">
				In the left navigation bar, click Instances.
			</div></li><li class="listitem"><div class="para">
				Click Add Instance.
			</div></li><li class="listitem"><div class="para">
				Select a zone.
			</div></li><li class="listitem"><div class="para">
				Select a template, then follow the steps in the wizard. For more information about how the templates came to be in this list, see <a class="xref" href="#working-with-templates">Capítulo 12, <em>Trabalhando com templates</em></a>.
			</div></li><li class="listitem"><div class="para">
				Be sure that the hardware you have allows starting the selected service offering.
			</div></li><li class="listitem"><div class="para">
				Click Submit and your VM will be created and started.
			</div><div class="note"><div class="admonition_header"><h2>Nota</h2></div><div class="admonition"><div class="para">
					For security reason, the internal name of the VM is visible only to the root admin.
				</div></div></div></li></ol></div><div class="para">
		To create a VM from an ISO:
	</div><div class="note"><div class="admonition_header"><h2>Nota</h2></div><div class="admonition"><div class="para">
			(XenServer) Windows VMs running on XenServer require PV drivers, which may be provided in the template or added after the VM is created. The PV drivers are necessary for essential management functions such as mounting additional volumes and ISO images, live migration, and graceful shutdown.
		</div></div></div><div class="orderedlist"><ol><li class="listitem"><div class="para">
				Log in to the CloudStack UI as an administrator or user.
			</div></li><li class="listitem"><div class="para">
				In the left navigation bar, click Instances.
			</div></li><li class="listitem"><div class="para">
				Click Add Instance.
			</div></li><li class="listitem"><div class="para">
				Select a zone.
			</div></li><li class="listitem"><div class="para">
				Select ISO Boot, and follow the steps in the wizard.
			</div></li><li class="listitem"><div class="para">
				Click Submit and your VM will be created and started.
			</div></li></ol></div></div><div xml:lang="pt-BR" class="section" id="accessing-vms" lang="pt-BR"><div class="titlepage"><div><div><h2 class="title" id="accessing-vms">10.5. Accessing VMs</h2></div></div></div><div class="para">
		Any user can access their own virtual machines. The administrator can access all VMs running in the cloud.
	</div><div class="para">
		To access a VM through the CloudStack UI:
	</div><div class="orderedlist"><ol><li class="listitem"><div class="para">
				Log in to the CloudStack UI as a user or admin.
			</div></li><li class="listitem"><div class="para">
				Click Instances, then click the name of a running VM.
			</div></li><li class="listitem"><div class="para">
				Click the View Console button <img src="images/view-console-button.png" />.
			</div></li></ol></div><div class="para">
		To access a VM directly over the network:
	</div><div class="orderedlist"><ol><li class="listitem"><div class="para">
				The VM must have some port open to incoming traffic. For example, in a basic zone, a new VM might be assigned to a security group which allows incoming traffic. This depends on what security group you picked when creating the VM. In other cases, you can open a port by setting up a port forwarding policy. See <a class="xref" href="#ip-forwarding-firewalling">Seção 15.14, “Encaminhamento de IP e firewall”</a>.
			</div></li><li class="listitem"><div class="para">
				If a port is open but you can not access the VM using ssh, it’s possible that ssh is not already enabled on the VM. This will depend on whether ssh is enabled in the template you picked when creating the VM. Access the VM through the CloudStack UI and enable ssh on the machine using the commands for the VM’s operating system.
			</div></li><li class="listitem"><div class="para">
				If the network has an external firewall device, you will need to create a firewall rule to allow access. See <a class="xref" href="#ip-forwarding-firewalling">Seção 15.14, “Encaminhamento de IP e firewall”</a>.
			</div></li></ol></div></div><div xml:lang="pt-BR" class="section" id="stopping-and-starting-vms" lang="pt-BR"><div class="titlepage"><div><div><h2 class="title" id="stopping-and-starting-vms">10.6. Stopping and Starting VMs</h2></div></div></div><div class="para">
		Once a VM instance is created, you can stop, restart, or delete it as needed. In the CloudStack UI, click Instances, select the VM, and use the Stop, Start, Reboot, and Destroy links.
	</div></div><div xml:lang="pt-BR" class="section" id="changing-vm-name-os-group" lang="pt-BR"><div class="titlepage"><div><div><h2 class="title" id="changing-vm-name-os-group">10.7. Changing the VM Name, OS, or Group</h2></div></div></div><div class="para">
		After a VM is created, you can modify the display name, operating system, and the group it belongs to.
	</div><div class="para">
		To access a VM through the CloudStack UI:
	</div><div class="orderedlist"><ol><li class="listitem"><div class="para">
				Log in to the CloudStack UI as a user or admin.
			</div></li><li class="listitem"><div class="para">
				In the left navigation, click Instances.
			</div></li><li class="listitem"><div class="para">
				Select the VM that you want to modify.
			</div></li><li class="listitem"><div class="para">
				Click the Stop button to stop the VM. 
				<span class="inlinemediaobject"><img src="./images/stop-instance-icon.png" alt="StopButton.png: button to stop a VM" /></span>

			</div></li><li class="listitem"><div class="para">
				Click Edit. 
				<span class="inlinemediaobject"><img src="./images/edit-icon.png" alt="EditButton.png: button to edit the properties of a VM" /></span>
			</div></li><li class="listitem"><div class="para">
				Make the desired changes to the following:
			</div></li><li class="listitem"><div class="para">
				<span class="bold bold"><strong>Display name</strong></span>: Enter a new display name if you want to change the name of the VM.
			</div></li><li class="listitem"><div class="para">
				<span class="bold bold"><strong>OS Type</strong></span>: Select the desired operating system.
			</div></li><li class="listitem"><div class="para">
				<span class="bold bold"><strong>Group</strong></span>: Enter the group name for the VM.
			</div></li><li class="listitem"><div class="para">
				Click Apply.
			</div></li></ol></div></div><div xml:lang="pt-BR" class="section" id="changing-service-offering-for-vm" lang="pt-BR"><div class="titlepage"><div><div><h2 class="title" id="changing-service-offering-for-vm">10.8. Changing the Service Offering for a VM</h2></div></div></div><div class="para">
		To upgrade or downgrade the level of compute resources available to a virtual machine, you can change the VM's compute offering.
	</div><div class="orderedlist"><ol><li class="listitem"><div class="para">
				Log in to the CloudStack UI as a user or admin.
			</div></li><li class="listitem"><div class="para">
				In the left navigation, click Instances.
			</div></li><li class="listitem"><div class="para">
				Choose the VM that you want to work with.
			</div></li><li class="listitem"><div class="para">
				Click the Stop button to stop the VM.
				<span class="inlinemediaobject"><img src="./images/stop-instance-icon.png" alt="StopButton.png: button to stop a VM" /></span>

			</div></li><li class="listitem"><div class="para">
				Click the Change Service button.
				<span class="inlinemediaobject"><img src="./images/change-service-icon.png" alt="ChangeServiceButton.png: button to change the service of a VM" /></span>
			</div><div class="para">
				The Change service dialog box is displayed.
			</div></li><li class="listitem"><div class="para">
				Select the offering you want to apply to the selected VM.
			</div></li><li class="listitem"><div class="para">
				Clique em OK.
			</div></li></ol></div></div><div xml:lang="pt-BR" class="section" id="manual-live-migration" lang="pt-BR"><div class="titlepage"><div><div><h2 class="title" id="manual-live-migration">10.9. Moving VMs Between Hosts (Manual Live Migration)</h2></div></div></div><div class="para">
		The CloudStack administrator can move a running VM from one host to another without interrupting service to users or going into maintenance mode. This is called manual live migration, and can be done under the following conditions:
	</div><div class="itemizedlist"><ul><li class="listitem"><div class="para">
				The root administrator is logged in. Domain admins and users can not perform manual live migration of VMs.
			</div></li><li class="listitem"><div class="para">
				The VM is running. Stopped VMs can not be live migrated.
			</div></li><li class="listitem"><div class="para">
				The destination host must be in the same cluster as the original host.
			</div></li><li class="listitem"><div class="para">
				The VM must not be using local disk storage.
			</div></li><li class="listitem"><div class="para">
				The destination host must have enough available capacity. If not, the VM will remain in the "migrating" state until memory becomes available.
			</div></li></ul></div><div class="para">
		To manually live migrate a virtual machine
	</div><div class="orderedlist"><ol><li class="listitem"><div class="para">
				Log in to the CloudStack UI as a user or admin.
			</div></li><li class="listitem"><div class="para">
				In the left navigation, click Instances.
			</div></li><li class="listitem"><div class="para">
				Choose the VM that you want to migrate.
			</div></li><li class="listitem"><div class="para">
				Click the Migrate Instance button.
				<span class="inlinemediaobject"><img src="./images/migrate-instance.png" alt="Migrateinstance.png: button to migrate an instance" /></span>

			</div></li><li class="listitem"><div class="para">
				From the list of hosts, choose the one to which you want to move the VM.
			</div></li><li class="listitem"><div class="para">
				Clique em OK.
			</div></li></ol></div></div><div xml:lang="pt-BR" class="section" id="deleting-vms" lang="pt-BR"><div class="titlepage"><div><div><h2 class="title" id="deleting-vms">10.10. Deleting VMs</h2></div></div></div><div class="para">
		Users can delete their own virtual machines. A running virtual machine will be abruptly stopped before it is deleted. Administrators can delete any virtual machines.
	</div><div class="para">
		To delete a virtual machine:
	</div><div class="orderedlist"><ol><li class="listitem"><div class="para">
				Log in to the CloudStack UI as a user or admin.
			</div></li><li class="listitem"><div class="para">
				In the left navigation, click Instances.
			</div></li><li class="listitem"><div class="para">
				Choose the VM that you want to delete.
			</div></li><li class="listitem"><div class="para">
				Click the Destroy Instance button. 
				<span class="inlinemediaobject"><img src="./images/destroy-instance.png" alt="Destroyinstance.png: button to destroy an instance" /></span>

			</div></li></ol></div></div><div xml:lang="pt-BR" class="section" id="working-with-iso" lang="pt-BR"><div class="titlepage"><div><div><h2 class="title" id="working-with-iso">10.11. Working with ISOs</h2></div></div></div><div class="para">
		CloudStack supports ISOs and their attachment to guest VMs. An ISO is a read-only file that has an ISO/CD-ROM style file system. Users can upload their own ISOs and mount them on their guest VMs.
	</div><div class="para">
		ISOs are uploaded based on a URL. HTTP is the supported protocol. Once the ISO is available via HTTP specify an upload URL such as http://my.web.server/filename.iso.
	</div><div class="para">
		ISOs may be public or private, like templates.ISOs are not hypervisor-specific. That is, a guest on vSphere can mount the exact same image that a guest on KVM can mount.
	</div><div class="para">
		ISO images may be stored in the system and made available with a privacy level similar to templates. ISO images are classified as either bootable or not bootable. A bootable ISO image is one that contains an OS image. CloudStack allows a user to boot a guest VM off of an ISO image. Users can also attach ISO images to guest VMs. For example, this enables installing PV drivers into Windows. ISO images are not hypervisor-specific.
	</div><div xml:lang="pt-BR" class="section" id="add-iso" lang="pt-BR"><div class="titlepage"><div><div><h3 class="title" id="add-iso">10.11.1. Adding an ISO</h3></div></div></div><div class="para">
		To make additional operating system or other software available for use with guest VMs, you can add an ISO. The ISO is typically thought of as an operating system image, but you can also add ISOs for other types of software, such as desktop applications that you want to be installed as part of a template.
	</div><div class="orderedlist"><ol><li class="listitem"><div class="para">
				Faça login na interface de usuário do CloudStack como administrador ou usuário final.
			</div></li><li class="listitem"><div class="para">
				In the left navigation bar, click Templates.
			</div></li><li class="listitem"><div class="para">
				In Select View, choose ISOs.
			</div></li><li class="listitem"><div class="para">
				Click Add ISO.
			</div></li><li class="listitem"><div class="para">
				In the Add ISO screen, provide the following:
			</div><div class="itemizedlist"><ul><li class="listitem"><div class="para">
						<span class="bold bold"><strong>Name</strong></span>: Short name for the ISO image. For example, CentOS 6.2 64-bit.
					</div></li><li class="listitem"><div class="para">
						<span class="bold bold"><strong>Description</strong></span>: Display test for the ISO image. For example, CentOS 6.2 64-bit.
					</div></li><li class="listitem"><div class="para">
						<span class="bold bold"><strong>URL</strong></span>: The URL that hosts the ISO image. The Management Server must be able to access this location via HTTP. If needed you can place the ISO image directly on the Management Server
					</div></li><li class="listitem"><div class="para">
						<span class="bold bold"><strong>Zone</strong></span>: Choose the zone where you want the ISO to be available, or All Zones to make it available throughout CloudStack.
					</div></li><li class="listitem"><div class="para">
						<span class="bold bold"><strong>Bootable</strong></span>: Whether or not a guest could boot off this ISO image. For example, a CentOS ISO is bootable, a Microsoft Office ISO is not bootable.
					</div></li><li class="listitem"><div class="para">
						<span class="bold bold"><strong>OS Type</strong></span>: This helps CloudStack and the hypervisor perform certain operations and make assumptions that improve the performance of the guest. Select one of the following.
					</div><div class="itemizedlist"><ul><li class="listitem"><div class="para">
								If the operating system of your desired ISO image is listed, choose it.
							</div></li><li class="listitem"><div class="para">
								If the OS Type of the ISO is not listed or if the ISO is not bootable, choose Other.
							</div></li><li class="listitem"><div class="para">
								(XenServer only) If you want to boot from this ISO in PV mode, choose Other PV (32-bit) or Other PV (64-bit)
							</div></li><li class="listitem"><div class="para">
								(KVM only) If you choose an OS that is PV-enabled, the VMs created from this ISO will have a SCSI (virtio) root disk. If the OS is not PV-enabled, the VMs will have an IDE root disk. The PV-enabled types are:
							</div><div class="informaltable"><table border="1"><colgroup><col width="33%" /><col width="33%" /><col width="33%" /></colgroup><tbody><tr><td align="left">
												<div class="para">
													Fedora 13
												</div>
											</td><td align="left">
												<div class="para">
													Fedora 12
												</div>
											</td><td align="left">
												<div class="para">
													Fedora 11
												</div>
											</td></tr><tr><td align="left">
												<div class="para">
													Fedora 10
												</div>
											</td><td align="left">
												<div class="para">
													Fedora 9
												</div>
											</td><td align="left">
												<div class="para">
													Other PV
												</div>
											</td></tr><tr><td align="left">
												<div class="para">
													Debian GNU/Linux
												</div>
											</td><td align="left">
												<div class="para">
													CentOS 5.3
												</div>
											</td><td align="left">
												<div class="para">
													CentOS 5.4
												</div>
											</td></tr><tr><td align="left">
												<div class="para">
													CentOS 5.5
												</div>
											</td><td align="left">
												<div class="para">
													Red Hat Enterprise Linux 5.3
												</div>
											</td><td align="left">
												<div class="para">
													Red Hat Enterprise Linux 5.4
												</div>
											</td></tr><tr><td align="left">
												<div class="para">
													Red Hat Enterprise Linux 5.5
												</div>
											</td><td align="left">
												<div class="para">
													Red Hat Enterprise Linux 6
												</div>
											</td><td align="left">
											</td></tr></tbody></table></div></li></ul></div><div class="note"><div class="admonition_header"><h2>Nota</h2></div><div class="admonition"><div class="para">
							It is not recommended to choose an older version of the OS than the version in the image. For example, choosing CentOS 5.4 to support a CentOS 6.2 image will usually not work. In these cases, choose Other.
						</div></div></div></li><li class="listitem"><div class="para">
						<span class="bold bold"><strong>Extractable</strong></span>: Choose Yes if the ISO should be available for extraction.
					</div></li><li class="listitem"><div class="para">
						<span class="bold bold"><strong>Public</strong></span>: Choose Yes if this ISO should be available to other users.
					</div></li><li class="listitem"><div class="para">
						<span class="bold bold"><strong>Featured</strong></span>: Choose Yes if you would like this ISO to be more prominent for users to select. The ISO will appear in the Featured ISOs list. Only an administrator can make an ISO Featured.
					</div></li></ul></div></li><li class="listitem"><div class="para">
				Clique em OK.
			</div><div class="para">
				The Management Server will download the ISO. Depending on the size of the ISO, this may take a long time. The ISO status column will display Ready once it has been successfully downloaded into secondary storage. Clicking Refresh updates the download percentage.
			</div></li><li class="listitem"><div class="para">
				<span class="bold bold"><strong>Important</strong></span>: Wait for the ISO to finish downloading. If you move on to the next task and try to use the ISO right away, it will appear to fail. The entire ISO must be available before CloudStack can work with it.
			</div></li></ol></div></div><div xml:lang="pt-BR" class="section" id="attach-iso-to-vm" lang="pt-BR"><div class="titlepage"><div><div><h3 class="title" id="attach-iso-to-vm">10.11.2. Attaching an ISO to a VM</h3></div></div></div><div class="orderedlist"><ol><li class="listitem"><div class="para">
				In the left navigation, click Instances.
			</div></li><li class="listitem"><div class="para">
				Choose the virtual machine you want to work with.
			</div></li><li class="listitem"><div class="para">
				Click the Attach ISO button. 
				<span class="inlinemediaobject"><img src="./images/iso-icon.png" alt="iso.png: depicts adding an iso image" /></span>
			</div></li><li class="listitem"><div class="para">
				In the Attach ISO dialog box, select the desired ISO.
			</div></li><li class="listitem"><div class="para">
				Clique em OK.
			</div></li></ol></div></div></div></div><div xml:lang="pt-BR" class="chapter" id="working-with-hosts" lang="pt-BR"><div class="titlepage"><div><div><h2 class="title">Capítulo 11. Working With Hosts</h2></div></div></div><div class="toc"><dl><dt><span class="section"><a href="#adding-hosts">11.1. Adding Hosts</a></span></dt><dt><span class="section"><a href="#scheduled-maintenance-maintenance-mode-hosts">11.2. Scheduled Maintenance and Maintenance Mode for Hosts</a></span></dt><dd><dl><dt><span class="section"><a href="#vcenter-maintenance-mode">11.2.1. vCenter and Maintenance Mode</a></span></dt><dt><span class="section"><a href="#xenserver-maintenance-mode">11.2.2. XenServer and Maintenance Mode</a></span></dt></dl></dd><dt><span class="section"><a href="#disable-enable-zones-pods-clusters">11.3. Disabling and Enabling Zones, Pods, and Clusters</a></span></dt><dt><span class="section"><a href="#removing-hosts">11.4. Removing Hosts</a></span></dt><dd><dl><dt><span class="section"><a href="#removing-xenserver-kvm-hosts">11.4.1. Removing XenServer and KVM Hosts</a></span></dt><dt><span class="section"><a href="#removing-vsphere-hosts">11.4.2. Removing vSphere Hosts</a></span></dt></dl></dd><dt><span class="section"><a href="#re-install-hosts">11.5. Re-Installing Hosts</a></span></dt><dt><span class="section"><a href="#maintain-hypervisors-on-hosts">11.6. Mantendo hipervisores em hosts</a></span></dt><dt><span class="section"><a href="#change-host-password">11.7. Changing Host Password</a></span></dt><dt><span class="section"><a href="#host-allocation">11.8. Host Allocation</a></span></dt><dd><dl><dt><span class="section"><a href="#over-provisioning-service-offering-limits">11.8.1. Over-Provisioning and Service Offering Limits</a></span></dt></dl></dd><dt><span class="section"><a href="#vlan-provisioning">11.9. VLAN Provisioning</a></span></dt></dl></div><div class="section" id="adding-hosts"><div class="titlepage"><div><div><h2 class="title" id="adding-hosts">11.1. Adding Hosts</h2></div></div></div><div class="para">
			Additional hosts can be added at any time to provide more capacity for guest VMs. For requirements and instructions, see <a class="xref" href="#host-add">Seção 7.6, “Adding a Host”</a>.
		</div></div><div xml:lang="pt-BR" class="section" id="scheduled-maintenance-maintenance-mode-hosts" lang="pt-BR"><div class="titlepage"><div><div><h2 class="title" id="scheduled-maintenance-maintenance-mode-hosts">11.2. Scheduled Maintenance and Maintenance Mode for Hosts</h2></div></div></div><div class="para">
		You can place a host into maintenance mode. When maintenance mode is activated, the host becomes unavailable to receive new guest VMs, and the guest VMs already running on the host are seamlessly migrated to another host not in maintenance mode. This migration uses live migration technology and does not interrupt the execution of the guest.
	</div><div xml:lang="pt-BR" class="section" id="vcenter-maintenance-mode" lang="pt-BR"><div class="titlepage"><div><div><h3 class="title" id="vcenter-maintenance-mode">11.2.1. vCenter and Maintenance Mode</h3></div></div></div><div class="para">
		To enter maintenance mode on a vCenter host, both vCenter and CloudStack must be used in concert. CloudStack and vCenter have separate maintenance modes that work closely together.
	</div><div class="orderedlist"><ol><li class="listitem"><div class="para">
				Place the host into CloudStack's "scheduled maintenance" mode. This does not invoke the vCenter maintenance mode, but only causes VMs to be migrated off the host
			</div><div class="para">
				When the CloudStack maintenance mode is requested, the host first moves into the Prepare for Maintenance state. In this state it cannot be the target of new guest VM starts. Then all VMs will be migrated off the server. Live migration will be used to move VMs off the host. This allows the guests to be migrated to other hosts with no disruption to the guests. After this migration is completed, the host will enter the Ready for Maintenance mode.
			</div></li><li class="listitem"><div class="para">
				Wait for the "Ready for Maintenance" indicator to appear in the UI.
			</div></li><li class="listitem"><div class="para">
				Now use vCenter to perform whatever actions are necessary to maintain the host. During this time, the host cannot be the target of new VM allocations.
			</div></li><li class="listitem"><div class="para">
				When the maintenance tasks are complete, take the host out of maintenance mode as follows:
			</div><div class="orderedlist"><ol class="loweralpha"><li class="listitem"><div class="para">
						First use vCenter to exit the vCenter maintenance mode.
					</div><div class="para">
						This makes the host ready for CloudStack to reactivate it.
					</div></li><li class="listitem"><div class="para">
						Then use CloudStack's administrator UI to cancel the CloudStack maintenance mode
					</div><div class="para">
						When the host comes back online, the VMs that were migrated off of it may be migrated back to it manually and new VMs can be added.
					</div></li></ol></div></li></ol></div></div><div xml:lang="pt-BR" class="section" id="xenserver-maintenance-mode" lang="pt-BR"><div class="titlepage"><div><div><h3 class="title" id="xenserver-maintenance-mode">11.2.2. XenServer and Maintenance Mode</h3></div></div></div><div class="para">
		For XenServer, you can take a server offline temporarily by using the Maintenance Mode feature in XenCenter. When you place a server into Maintenance Mode, all running VMs are automatically migrated from it to another host in the same pool. If the server is the pool master, a new master will also be selected for the pool. While a server is Maintenance Mode, you cannot create or start any VMs on it.
	</div><div class="para">
		<span class="bold bold"><strong>To place a server in Maintenance Mode:</strong></span>
	</div><div class="orderedlist"><ol><li class="listitem"><div class="para">
				In the Resources pane, select the server, then do one of the following:
			</div><div class="itemizedlist"><ul><li class="listitem"><div class="para">
						Right-click, then click Enter Maintenance Mode on the shortcut menu.
					</div></li><li class="listitem"><div class="para">
						On the Server menu, click Enter Maintenance Mode.
					</div></li></ul></div></li><li class="listitem"><div class="para">
				Click Enter Maintenance Mode.
			</div></li></ol></div><div class="para">
		The server's status in the Resources pane shows when all running VMs have been successfully migrated off the server.
	</div><div class="para">
		<span class="bold bold"><strong>To take a server out of Maintenance Mode:</strong></span>
	</div><div class="orderedlist"><ol><li class="listitem"><div class="para">
				In the Resources pane, select the server, then do one of the following:
			</div><div class="itemizedlist"><ul><li class="listitem"><div class="para">
						Right-click, then click Exit Maintenance Mode on the shortcut menu.
					</div></li><li class="listitem"><div class="para">
						On the Server menu, click Exit Maintenance Mode.
					</div></li></ul></div></li><li class="listitem"><div class="para">
				Click Exit Maintenance Mode.
			</div></li></ol></div></div></div><div xml:lang="pt-BR" class="section" id="disable-enable-zones-pods-clusters" lang="pt-BR"><div class="titlepage"><div><div><h2 class="title" id="disable-enable-zones-pods-clusters">11.3. Disabling and Enabling Zones, Pods, and Clusters</h2></div></div></div><div class="para">
		You can enable or disable a zone, pod, or cluster without permanently removing it from the cloud. This is useful for maintenance or when there are problems that make a portion of the cloud infrastructure unreliable. No new allocations will be made to a disabled zone, pod, or cluster until its state is returned to Enabled. When a zone, pod, or cluster is first added to the cloud, it is Disabled by default.
	</div><div class="para">
		To disable and enable a zone, pod, or cluster:
	</div><div class="orderedlist"><ol><li class="listitem"><div class="para">
				Log in to the CloudStack UI as administrator
			</div></li><li class="listitem"><div class="para">
				In the left navigation bar, click Infrastructure.
			</div></li><li class="listitem"><div class="para">
				In Zones, click View More.
			</div></li><li class="listitem"><div class="para">
				If you are disabling or enabling a zone, find the name of the zone in the list, and click the Enable/Disable button.
				<span class="inlinemediaobject"><img src="./images/enable-disable.png" alt="enable-disable.png: button to enable or disable zone, pod, or cluster." /></span>

			</div></li><li class="listitem"><div class="para">
				If you are disabling or enabling a pod or cluster, click the name of the zone that contains the pod or cluster.
			</div></li><li class="listitem"><div class="para">
				Click the Compute tab.
			</div></li><li class="listitem"><div class="para">
				In the Pods or Clusters node of the diagram, click View All.
			</div></li><li class="listitem"><div class="para">
				Click the pod or cluster name in the list.
			</div></li><li class="listitem"><div class="para">
				Click the Enable/Disable button. 
				<span class="inlinemediaobject"><img src="./images/enable-disable.png" /></span>
			</div></li></ol></div></div><div xml:lang="pt-BR" class="section" id="removing-hosts" lang="pt-BR"><div class="titlepage"><div><div><h2 class="title" id="removing-hosts">11.4. Removing Hosts</h2></div></div></div><div class="para">
		Hosts can be removed from the cloud as needed. The procedure to remove a host depends on the hypervisor type.
	</div><div xml:lang="pt-BR" class="section" id="removing-xenserver-kvm-hosts" lang="pt-BR"><div class="titlepage"><div><div><h3 class="title" id="removing-xenserver-kvm-hosts">11.4.1. Removing XenServer and KVM Hosts</h3></div></div></div><div class="para">
		A node cannot be removed from a cluster until it has been placed in maintenance mode. This will ensure that all of the VMs on it have been migrated to other Hosts. To remove a Host from the cloud:
	</div><div class="orderedlist"><ol><li class="listitem"><div class="para">
				Place the node in maintenance mode.
			</div><div class="para">
				See <a class="xref" href="#scheduled-maintenance-maintenance-mode-hosts">Seção 11.2, “Scheduled Maintenance and Maintenance Mode for Hosts”</a>.
			</div></li><li class="listitem"><div class="para">
				For KVM, stop the cloudstack-agent service.
			</div></li><li class="listitem"><div class="para">
				Use the UI option to remove the node.
			</div><div class="para">
				Then you may power down the Host, re-use its IP address, re-install it, etc
			</div></li></ol></div></div><div xml:lang="pt-BR" class="section" id="removing-vsphere-hosts" lang="pt-BR"><div class="titlepage"><div><div><h3 class="title" id="removing-vsphere-hosts">11.4.2. Removing vSphere Hosts</h3></div></div></div><div class="para">
		To remove this type of host, first place it in maintenance mode, as described in <a class="xref" href="#scheduled-maintenance-maintenance-mode-hosts">Seção 11.2, “Scheduled Maintenance and Maintenance Mode for Hosts”</a>. Then use CloudStack to remove the host. CloudStack will not direct commands to a host that has been removed using CloudStack. However, the host may still exist in the vCenter cluster.
	</div></div></div><div xml:lang="pt-BR" class="section" id="re-install-hosts" lang="pt-BR"><div class="titlepage"><div><div><h2 class="title" id="re-install-hosts">11.5. Re-Installing Hosts</h2></div></div></div><div class="para">
		You can re-install a host after placing it in maintenance mode and then removing it. If a host is down and cannot be placed in maintenance mode, it should still be removed before the re-install.
	</div></div><div xml:lang="pt-BR" class="section" id="maintain-hypervisors-on-hosts" lang="pt-BR"><div class="titlepage"><div><div><h2 class="title" id="maintain-hypervisors-on-hosts">11.6. Mantendo hipervisores em hosts</h2></div></div></div><div class="para">
		Ao executar software de hipervisor em hosts, certifique-se de que todas as hotfixes providas pelo fornecedor do hipervisor estejam aplicadas. Acompanhe a liberação de correções do hipervisor através do canal de suporte do fornecedor, e aplique as correções assim que possível após sua liberação. O CloudStack não acompanhará ou notificará você sobre correções requeridas no hipervisor. É essencial que seus hosts estejam completamente atualizados com as correções fornecidas para o hipervisor. O fornecedor do hipervisor provavelmente recusará suporte a qualquer sistema que não esteja atualizado com as correções fornecidas.
	</div><div class="note"><div class="admonition_header"><h2>Nota</h2></div><div class="admonition"><div class="para">
			A falta de hotfixes atualizadas pode levar a dados corrompidos e à perda de máquinas virtuais.
		</div></div></div><div class="para">
		(XenServer) For more information, see <a href="http://docs.cloudstack.org/Knowledge_Base/Possible_VM_corruption_if_XenServer_Hotfix_is_not_Applied/Highly_Recommended_Hotfixes_for_XenServer_5.6_SP2">Highly Recommended Hotfixes for XenServer in the CloudStack Knowledge Base</a>.
	</div></div><div xml:lang="pt-BR" class="section" id="change-host-password" lang="pt-BR"><div class="titlepage"><div><div><h2 class="title" id="change-host-password">11.7. Changing Host Password</h2></div></div></div><div class="para">
		The password for a XenServer Node, KVM Node, or vSphere Node may be changed in the database. Note that all Nodes in a Cluster must have the same password.
	</div><div class="para">
		To change a Node's password:
	</div><div class="orderedlist"><ol><li class="listitem"><div class="para">
				Identify all hosts in the cluster.
			</div></li><li class="listitem"><div class="para">
				Change the password on all hosts in the cluster. Now the password for the host and the password known to CloudStack will not match. Operations on the cluster will fail until the two passwords match.
			</div></li><li class="listitem"><div class="para">
				Get the list of host IDs for the host in the cluster where you are changing the password. You will need to access the database to determine these host IDs. For each hostname "h" (or vSphere cluster) that you are changing the password for, execute:
			</div><pre class="programlisting">mysql&gt; select id from cloud.host where name like '%h%';</pre></li><li class="listitem"><div class="para">
				This should return a single ID. Record the set of such IDs for these hosts.
			</div></li><li class="listitem"><div class="para">
				Update the passwords for the host in the database. In this example, we change the passwords for hosts with IDs 5, 10, and 12 to "password".
			</div><pre class="programlisting">mysql&gt; update cloud.host set password='password' where id=5 or id=10 or id=12;</pre></li></ol></div></div><div xml:lang="pt-BR" class="section" id="host-allocation" lang="pt-BR"><div class="titlepage"><div><div><h2 class="title" id="host-allocation">11.8. Host Allocation</h2></div></div></div><div class="para">
		The system automatically picks the most appropriate host to run each virtual machine. End users may specify the zone in which the virtual machine will be created. End users do not have control over which host will run the virtual machine instance.
	</div><div class="para">
		CloudStack administrators can specify that certain hosts should have a preference for particular types of guest instances. For example, an administrator could state that a host should have a preference to run Windows guests. The default host allocator will attempt to place guests of that OS type on such hosts first. If no such host is available, the allocator will place the instance wherever there is sufficient physical capacity.
	</div><div class="para">
		Both vertical and horizontal allocation is allowed. Vertical allocation consumes all the resources of a given host before allocating any guests on a second host. This reduces power consumption in the cloud. Horizontal allocation places a guest on each host in a round-robin fashion. This may yield better performance to the guests in some cases. CloudStack also allows an element of CPU over-provisioning as configured by the administrator. Over-provisioning allows the administrator to commit more CPU cycles to the allocated guests than are actually available from the hardware.
	</div><div class="para">
		CloudStack also provides a pluggable interface for adding new allocators. These custom allocators can provide any policy the administrator desires.
	</div><div xml:lang="pt-BR" class="section" id="over-provisioning-service-offering-limits" lang="pt-BR"><div class="titlepage"><div><div><h3 class="title" id="over-provisioning-service-offering-limits">11.8.1. Over-Provisioning and Service Offering Limits</h3></div></div></div><div class="para">
		CloudStack performs CPU over-provisioning based on an over-provisioning ratio configured by the administrator. This is defined by the cpu.overprovisioning.factor global configuration variable.
	</div><div class="para">
		CloudStack performs CPU over-provisioning based on an over-provisioning ratio configured by the administrator. This is defined by the cpu.overprovisioning.factor global configuration variable
	</div><div class="para">
		Service offerings limits (e.g. 1 GHz, 1 core) are strictly enforced for core count. For example, a guest with a service offering of one core will have only one core available to it regardless of other activity on the Host.
	</div><div class="para">
		Service offering limits for gigahertz are enforced only in the presence of contention for CPU resources. For example, suppose that a guest was created with a service offering of 1 GHz on a Host that has 2 GHz cores, and that guest is the only guest running on the Host. The guest will have the full 2 GHz available to it. When multiple guests are attempting to use the CPU a weighting factor is used to schedule CPU resources. The weight is based on the clock speed in the service offering. Guests receive a CPU allocation that is proportionate to the GHz in the service offering. For example, a guest created from a 2 GHz service offering will receive twice the CPU allocation as a guest created from a 1 GHz service offering. CloudStack does not perform memory over-provisioning.
	</div></div></div><div xml:lang="pt-BR" class="section" id="vlan-provisioning" lang="pt-BR"><div class="titlepage"><div><div><h2 class="title" id="vlan-provisioning">11.9. VLAN Provisioning</h2></div></div></div><div class="para">
		CloudStack automatically creates and destroys interfaces bridged to VLANs on the hosts. In general the administrator does not need to manage this process.
	</div><div class="para">
		CloudStack manages VLANs differently based on hypervisor type. For XenServer or KVM, the VLANs are created on only the hosts where they will be used and then they are destroyed when all guests that require them have been terminated or moved to another host.
	</div><div class="para">
		For vSphere the VLANs are provisioned on all hosts in the cluster even if there is no guest running on a particular Host that requires the VLAN. This allows the administrator to perform live migration and other functions in vCenter without having to create the VLAN on the destination Host. Additionally, the VLANs are not removed from the Hosts when they are no longer needed.
	</div><div class="para">
		You can use the same VLANs on different physical networks provided that each physical network has its own underlying layer-2 infrastructure, such as switches. For example, you can specify VLAN range 500 to 1000 while deploying physical networks A and B in an Advanced zone setup. This capability allows you to set up an additional layer-2 physical infrastructure on a different physical NIC and use the same set of VLANs if you run out of VLANs. Another advantage is that you can use the same set of IPs for different customers, each one with their own routers and the guest networks on different physical NICs.
	</div></div></div><div xml:lang="pt-BR" class="chapter" id="working-with-templates" lang="pt-BR"><div class="titlepage"><div><div><h2 class="title">Capítulo 12. Trabalhando com templates</h2></div></div></div><div class="toc"><dl><dt><span class="section"><a href="#create-templates-overview">12.1. Creating Templates: Overview</a></span></dt><dt><span class="section"><a href="#requirements-templates">12.2. Requirements for Templates</a></span></dt><dt><span class="section"><a href="#best-practices-templates">12.3. Best Practices for Templates</a></span></dt><dt><span class="section"><a href="#default-template">12.4. The Default Template</a></span></dt><dt><span class="section"><a href="#private-public-template">12.5. Private and Public Templates</a></span></dt><dt><span class="section"><a href="#create-template-from-existing-vm">12.6. Creating a Template from an Existing Virtual Machine</a></span></dt><dt><span class="section"><a href="#create-template-from-snapshot">12.7. Creating a Template from a Snapshot</a></span></dt><dt><span class="section"><a href="#upload-template">12.8. Uploading Templates</a></span></dt><dt><span class="section"><a href="#export-template">12.9. Exporting Templates</a></span></dt><dt><span class="section"><a href="#create-windows-template">12.10. Creating a Windows Template</a></span></dt><dd><dl><dt><span class="section"><a href="#sysprep-windows-server-2008R2">12.10.1. System Preparation for Windows Server 2008 R2</a></span></dt><dt><span class="section"><a href="#sysprep-for-windows-server-2003R2">12.10.2. System Preparation for Windows Server 2003 R2</a></span></dt></dl></dd><dt><span class="section"><a href="#import-ami">12.11. Importing Amazon Machine Images</a></span></dt><dt><span class="section"><a href="#convert-hyperv-vm-to-template">12.12. Converting a Hyper-V VM to a Template</a></span></dt><dt><span class="section"><a href="#add-password-management-to-templates">12.13. Adding Password Management to Your Templates</a></span></dt><dd><dl><dt><span class="section"><a href="#linux-installation">12.13.1. Instalação do sistema operacional Linux</a></span></dt><dt><span class="section"><a href="#windows-installation">12.13.2. Instalação no Windows</a></span></dt></dl></dd><dt><span class="section"><a href="#delete-templates">12.14. Deleting Templates</a></span></dt></dl></div><div class="para">
		Um template é uma configuração reusável para máquinas virtuais. Quando usuários criam máquinas virtuais, eles pode escolher em uma lista de templates no CloudStack.
	</div><div class="para">
		Especificamente, um template é uma imagem de disco virtual que inclui um sistema operacional, software adicional opcional, tais como aplicativos de escritório, e customizações tais como controle de acesso para determinar quem pode utilizar o template. Cada template é associado com um tipo específico de hipervisor, que é especificado quando o template é adicionado ao CloudStack.
	</div><div class="para">
		O CloudStack vem com um template default. Para apresentar mais opções para os usuários, os administradores e usuários do CloudStack podem criar templates e adicioná-los ao CloudStack.
	</div><div xml:lang="pt-BR" class="section" id="create-templates-overview" lang="pt-BR"><div class="titlepage"><div><div><h2 class="title" id="create-templates-overview">12.1. Creating Templates: Overview</h2></div></div></div><div class="para">
		CloudStack ships with a default template for the CentOS operating system. There are a variety of ways to add more templates. Administrators and end users can add templates. The typical sequence of events is:
	</div><div class="orderedlist"><ol><li class="listitem"><div class="para">
				Launch a VM instance that has the operating system you want. Make any other desired configuration changes to the VM.
			</div></li><li class="listitem"><div class="para">
				Stop the VM.
			</div></li><li class="listitem"><div class="para">
				Convert the volume into a template.
			</div></li></ol></div><div class="para">
		There are other ways to add templates to CloudStack. For example, you can take a snapshot of the VM's volume and create a template from the snapshot, or import a VHD from another system into CloudStack.
	</div><div class="para">
		The various techniques for creating templates are described in the next few sections.
	</div></div><div xml:lang="pt-BR" class="section" id="requirements-templates" lang="pt-BR"><div class="titlepage"><div><div><h2 class="title" id="requirements-templates">12.2. Requirements for Templates</h2></div></div></div><div class="itemizedlist"><ul><li class="listitem"><div class="para">
				For XenServer, install PV drivers / Xen tools on each template that you create. This will enable live migration and clean guest shutdown.
			</div></li><li class="listitem"><div class="para">
				For vSphere, install VMware Tools on each template that you create. This will enable console view to work properly.
			</div></li></ul></div></div><div xml:lang="pt-BR" class="section" id="best-practices-templates" lang="pt-BR"><div class="titlepage"><div><div><h2 class="title" id="best-practices-templates">12.3. Best Practices for Templates</h2></div></div></div><div class="para">
		If you plan to use large templates (100 GB or larger), be sure you have a 10-gigabit network to support the large templates. A slower network can lead to timeouts and other errors when large templates are used.
	</div></div><div xml:lang="pt-BR" class="section" id="default-template" lang="pt-BR"><div class="titlepage"><div><div><h2 class="title" id="default-template">12.4. The Default Template</h2></div></div></div><div class="para">
		CloudStack includes a CentOS template. This template is downloaded by the Secondary Storage VM after the primary and secondary storage are configured. You can use this template in your production deployment or you can delete it and use custom templates.
	</div><div class="para">
		The root password for the default template is "password".
	</div><div class="para">
		A default template is provided for each of XenServer, KVM, and vSphere. The templates that are downloaded depend on the hypervisor type that is available in your cloud. Each template is approximately 2.5 GB physical size.
	</div><div class="para">
		The default template includes the standard iptables rules, which will block most access to the template excluding ssh.
	</div><pre class="programlisting"># iptables --list
Chain INPUT (policy ACCEPT)
target     prot opt source               destination
RH-Firewall-1-INPUT  all  --  anywhere             anywhere

Chain FORWARD (policy ACCEPT)
target     prot opt source               destination
RH-Firewall-1-INPUT  all  --  anywhere             anywhere

Chain OUTPUT (policy ACCEPT)
target     prot opt source               destination

Chain RH-Firewall-1-INPUT (2 references)
target     prot opt source               destination
ACCEPT     all  --  anywhere             anywhere
ACCEPT     icmp --  anywhere        anywhere       icmp any
ACCEPT     esp  --  anywhere        anywhere
ACCEPT     ah   --  anywhere        anywhere
ACCEPT     udp  --  anywhere        224.0.0.251    udp dpt:mdns
ACCEPT     udp  --  anywhere        anywhere       udp dpt:ipp
ACCEPT     tcp  --  anywhere        anywhere       tcp dpt:ipp
ACCEPT     all  --  anywhere        anywhere       state RELATED,ESTABLISHED
ACCEPT     tcp  --  anywhere        anywhere       state NEW tcp dpt:ssh
REJECT     all  --  anywhere        anywhere       reject-with icmp-host-
</pre></div><div xml:lang="pt-BR" class="section" id="private-public-template" lang="pt-BR"><div class="titlepage"><div><div><h2 class="title" id="private-public-template">12.5. Private and Public Templates</h2></div></div></div><div class="para">
		When a user creates a template, it can be designated private or public.
	</div><div class="para">
		Private templates are only available to the user who created them. By default, an uploaded template is private.
	</div><div class="para">
		When a user marks a template as “public,” the template becomes available to all users in all accounts in the user's domain, as well as users in any other domains that have access to the Zone where the template is stored. This depends on whether the Zone, in turn, was defined as private or public. A private Zone is assigned to a single domain, and a public Zone is accessible to any domain. If a public template is created in a private Zone, it is available only to users in the domain assigned to that Zone. If a public template is created in a public Zone, it is available to all users in all domains.
	</div></div><div xml:lang="pt-BR" class="section" id="create-template-from-existing-vm" lang="pt-BR"><div class="titlepage"><div><div><h2 class="title" id="create-template-from-existing-vm">12.6. Creating a Template from an Existing Virtual Machine</h2></div></div></div><div class="para">
		Once you have at least one VM set up in the way you want, you can use it as the prototype for other VMs.
	</div><div class="orderedlist"><ol><li class="listitem"><div class="para">
				Create and start a virtual machine using any of the techniques given in <a class="xref" href="#creating-vms">Seção 10.4, “Creating VMs”</a>.
			</div></li><li class="listitem"><div class="para">
				Make any desired configuration changes on the running VM, then click Stop.
			</div></li><li class="listitem"><div class="para">
				Wait for the VM to stop. When the status shows Stopped, go to the next step.
			</div></li><li class="listitem"><div class="para">
				Click Create Template and provide the following:
			</div><div class="itemizedlist"><ul><li class="listitem"><div class="para">
						<span class="bold bold"><strong>Name and Display Text</strong></span>. These will be shown in the UI, so choose something descriptive.
					</div></li><li class="listitem"><div class="para">
						<span class="bold bold"><strong>OS Type</strong></span>. This helps CloudStack and the hypervisor perform certain operations and make assumptions that improve the performance of the guest. Select one of the following.
					</div><div class="itemizedlist"><ul><li class="listitem"><div class="para">
								If the operating system of the stopped VM is listed, choose it.
							</div></li><li class="listitem"><div class="para">
								If the OS type of the stopped VM is not listed, choose Other.
							</div></li><li class="listitem"><div class="para">
								If you want to boot from this template in PV mode, choose Other PV (32-bit) or Other PV (64-bit). This choice is available only for XenServere:
							</div><div class="note"><div class="admonition_header"><h2>Nota</h2></div><div class="admonition"><div class="para">
									Note: Generally you should not choose an older version of the OS than the version in the image. For example, choosing CentOS 5.4 to support a CentOS 6.2 image will in general not work. In those cases you should choose Other.
								</div></div></div></li></ul></div></li><li class="listitem"><div class="para">
						<span class="bold bold"><strong>Public</strong></span>. Choose Yes to make this template accessible to all users of this CloudStack installation. The template will appear in the Community Templates list. See <a class="xref" href="#private-public-template">Seção 12.5, “Private and Public Templates”</a>.
					</div></li><li class="listitem"><div class="para">
						<span class="bold bold"><strong>Password Enabled</strong></span>. Choose Yes if your template has the CloudStack password change script installed. See <a class="xref" href="#add-password-management-to-templates">Seção 12.13, “Adding Password Management to Your Templates”</a>.
					</div></li></ul></div></li><li class="listitem"><div class="para">
				Clique em Add.
			</div></li></ol></div><div class="para">
		The new template will be visible in the Templates section when the template creation process has been completed. The template is then available when creating a new VM.
	</div></div><div xml:lang="pt-BR" class="section" id="create-template-from-snapshot" lang="pt-BR"><div class="titlepage"><div><div><h2 class="title" id="create-template-from-snapshot">12.7. Creating a Template from a Snapshot</h2></div></div></div><div class="para">
		If you do not want to stop the VM in order to use the Create Template menu item (as described in <a class="xref" href="#create-template-from-existing-vm">Seção 12.6, “Creating a Template from an Existing Virtual Machine”</a>), you can create a template directly from any snapshot through the CloudStack UI.
	</div></div><div xml:lang="pt-BR" class="section" id="upload-template" lang="pt-BR"><div class="titlepage"><div><div><h2 class="title" id="upload-template">12.8. Uploading Templates</h2></div></div></div><div class="warning"><div class="admonition_header"><h2>vSphere Templates and ISOs</h2></div><div class="admonition"><div class="para">
			If you are uploading a template that was created using vSphere Client, be sure the OVA file does not contain an ISO. If it does, the deployment of VMs from the template will fail.
		</div></div></div><div class="para">
		Templates are uploaded based on a URL. HTTP is the supported access protocol. Templates are frequently large files. You can optionally gzip them to decrease upload times.
	</div><div class="para">
		To upload a template:
	</div><div class="orderedlist"><ol><li class="listitem"><div class="para">
				In the left navigation bar, click Templates.
			</div></li><li class="listitem"><div class="para">
				Click Register Template.
			</div></li><li class="listitem"><div class="para">
				Provide the following:
			</div><div class="itemizedlist"><ul><li class="listitem"><div class="para">
						<span class="bold bold"><strong>Name and Description</strong></span>. These will be shown in the UI, so choose something descriptive.
					</div></li><li class="listitem"><div class="para">
						<span class="bold bold"><strong>URL</strong></span>. The Management Server will download the file from the specified URL, such as http://my.web.server/filename.vhd.gz.
					</div></li><li class="listitem"><div class="para">
						<span class="bold bold"><strong>Zone</strong></span>. Choose the zone where you want the template to be available, or All Zones to make it available throughout CloudStack.
					</div></li><li class="listitem"><div class="para">
						<span class="bold bold"><strong>OS Type</strong></span>: This helps CloudStack and the hypervisor perform certain operations and make assumptions that improve the performance of the guest. Select one of the following:
					</div><div class="itemizedlist"><ul><li class="listitem"><div class="para">
								If the operating system of the stopped VM is listed, choose it.
							</div></li><li class="listitem"><div class="para">
								If the OS type of the stopped VM is not listed, choose Other.
							</div><div class="note"><div class="admonition_header"><h2>Nota</h2></div><div class="admonition"><div class="para">
									You should not choose an older version of the OS than the version in the image. For example, choosing CentOS 5.4 to support a CentOS 6.2 image will in general not work. In those cases you should choose Other.
								</div></div></div></li></ul></div></li><li class="listitem"><div class="para">
						<span class="bold bold"><strong>Hypervisor</strong></span>: The supported hypervisors are listed. Select the desired one.
					</div></li><li class="listitem"><div class="para">
						<span class="bold bold"><strong>Format</strong></span>. The format of the template upload file, such as VHD or OVA.
					</div></li><li class="listitem"><div class="para">
						<span class="bold bold"><strong>Password Enabled</strong></span>. Choose Yes if your template has the CloudStack password change script installed. See Adding Password Management to Your Templates
					</div></li><li class="listitem"><div class="para">
						<span class="bold bold"><strong>Extractable</strong></span>. Choose Yes if the template is available for extraction. If this option is selected, end users can download a full image of a template.
					</div></li><li class="listitem"><div class="para">
						<span class="bold bold"><strong>Public</strong></span>. Choose Yes to make this template accessible to all users of this CloudStack installation. The template will appear in the Community Templates list. See <a class="xref" href="#private-public-template">Seção 12.5, “Private and Public Templates”</a>.
					</div></li><li class="listitem"><div class="para">
						<span class="bold bold"><strong>Featured</strong></span>. Choose Yes if you would like this template to be more prominent for users to select. The template will appear in the Featured Templates list. Only an administrator can make a template Featured.
					</div></li></ul></div></li></ol></div></div><div xml:lang="pt-BR" class="section" id="export-template" lang="pt-BR"><div class="titlepage"><div><div><h2 class="title" id="export-template">12.9. Exporting Templates</h2></div></div></div><div class="para">
		End users and Administrators may export templates from the CloudStack. Navigate to the template in the UI and choose the Download function from the Actions menu.
	</div></div><div xml:lang="pt-BR" class="section" id="create-windows-template" lang="pt-BR"><div class="titlepage"><div><div><h2 class="title" id="create-windows-template">12.10. Creating a Windows Template</h2></div></div></div><div class="para">
		Windows templates must be prepared with Sysprep before they can be provisioned on multiple machines. Sysprep allows you to create a generic Windows template and avoid any possible SID conflicts.
	</div><div class="note"><div class="admonition_header"><h2>Nota</h2></div><div class="admonition"><div class="para">
			(XenServer) Windows VMs running on XenServer require PV drivers, which may be provided in the template or added after the VM is created. The PV drivers are necessary for essential management functions such as mounting additional volumes and ISO images, live migration, and graceful shutdown.
		</div></div></div><div class="para">
	</div><div class="para">
		An overview of the procedure is as follows:
	</div><div class="orderedlist"><ol><li class="listitem"><div class="para">
				Upload your Windows ISO.
			</div><div class="para">
				For more information, see <a class="xref" href="#add-iso">Seção 10.11.1, “Adding an ISO”</a>.
			</div></li><li class="listitem"><div class="para">
				Create a VM Instance with this ISO.
			</div><div class="para">
				For more information, see <a class="xref" href="#creating-vms">Seção 10.4, “Creating VMs”</a>.
			</div></li><li class="listitem"><div class="para">
				Follow the steps in Sysprep for Windows Server 2008 R2 (below) or Sysprep for Windows Server 2003 R2, depending on your version of Windows Server
			</div></li><li class="listitem"><div class="para">
				The preparation steps are complete. Now you can actually create the template as described in Creating the Windows Template.
			</div></li></ol></div><div xml:lang="pt-BR" class="section" id="sysprep-windows-server-2008R2" lang="pt-BR"><div class="titlepage"><div><div><h3 class="title" id="sysprep-windows-server-2008R2">12.10.1. System Preparation for Windows Server 2008 R2</h3></div></div></div><div class="para">
		For Windows 2008 R2, you run Windows System Image Manager to create a custom sysprep response XML file. Windows System Image Manager is installed as part of the Windows Automated Installation Kit (AIK). Windows AIK can be downloaded from <a href="http://www.microsoft.com/en-us/download/details.aspx?id=9085">Microsoft Download Center</a>.
	</div><div class="para">
		Use the following steps to run sysprep for Windows 2008 R2:
	</div><div class="note"><div class="admonition_header"><h2>Nota</h2></div><div class="admonition"><div class="para">
			The steps outlined here are derived from the excellent guide by Charity Shelbourne, originally published at <a href="http://blogs.technet.com/askcore/archive/2008/10/31/automating-the-oobe-process-during-windows-server-2008-sysprep-mini-setup.aspx">Windows Server 2008 Sysprep Mini-Setup.</a>
		</div></div></div><div class="para">
	</div><div class="orderedlist"><ol><li class="listitem"><div class="para">
				Download and install the Windows AIK
			</div><div class="note"><div class="admonition_header"><h2>Nota</h2></div><div class="admonition"><div class="para">
					Windows AIK should not be installed on the Windows 2008 R2 VM you just created. Windows AIK should not be part of the template you create. It is only used to create the sysprep answer file.
				</div></div></div></li><li class="listitem"><div class="para">
				Copy the install.wim file in the \sources directory of the Windows 2008 R2 installation DVD to the hard disk. This is a very large file and may take a long time to copy. Windows AIK requires the WIM file to be writable.
			</div></li><li class="listitem"><div class="para">
				Start the Windows System Image Manager, which is part of the Windows AIK.
			</div></li><li class="listitem"><div class="para">
				In the Windows Image pane, right click the Select a Windows image or catalog file option to load the install.wim file you just copied.
			</div></li><li class="listitem"><div class="para">
				Select the Windows 2008 R2 Edition.
			</div><div class="para">
				You may be prompted with a warning that the catalog file cannot be opened. Click Yes to create a new catalog file.
			</div></li><li class="listitem"><div class="para">
				In the Answer File pane, right click to create a new answer file.
			</div></li><li class="listitem"><div class="para">
				Generate the answer file from the Windows System Image Manager using the following steps:
			</div><div class="orderedlist"><ol class="loweralpha"><li class="listitem"><div class="para">
						The first page you need to automate is the Language and Country or Region Selection page. To automate this, expand Components in your Windows Image pane, right-click and add the Microsoft-Windows-International-Core setting to Pass 7 oobeSystem. In your Answer File pane, configure the InputLocale, SystemLocale, UILanguage, and UserLocale with the appropriate settings for your language and country or region. Should you have a question about any of these settings, you can right-click on the specific setting and select Help. This will open the appropriate CHM help file with more information, including examples on the setting you are attempting to configure.
					</div><div class="mediaobject"><img src="./images/sysmanager.png" width="444" alt="sysmanager.png: System Image Manager" /></div></li><li class="listitem"><div class="para">
						You need to automate the Software License Terms Selection page, otherwise known as the End-User License Agreement (EULA). To do this, expand the Microsoft-Windows-Shell-Setup component. High-light the OOBE setting, and add the setting to the Pass 7 oobeSystem. In Settings, set HideEULAPage true.
					</div><div class="mediaobject"><img src="./images/software-license.png" width="444" alt="software-license.png: Depicts hiding the EULA page." /></div></li><li class="listitem"><div class="para">
						Make sure the license key is properly set. If you use MAK key, you can just enter the MAK key on the Windows 2008 R2 VM. You need not input the MAK into the Windows System Image Manager. If you use KMS host for activation you need not enter the Product Key. Details of Windows Volume Activation can be found at <a href="http://technet.microsoft.com/en-us/library/bb892849.aspx">http://technet.microsoft.com/en-us/library/bb892849.aspx</a>
					</div></li><li class="listitem"><div class="para">
						You need to automate is the Change Administrator Password page. Expand the Microsoft-Windows-Shell-Setup component (if it is not still expanded), expand UserAccounts, right-click on AdministratorPassword, and add the setting to the Pass 7 oobeSystem configuration pass of your answer file. Under Settings, specify a password next to Value.
					</div><div class="mediaobject"><img src="./images/change-admin-password.png" width="444" alt="change-admin-password.png: Depicts changing the administrator password" /></div><div class="para">
						You may read the AIK documentation and set many more options that suit your deployment. The steps above are the minimum needed to make Windows unattended setup work.
					</div></li></ol></div></li><li class="listitem"><div class="para">
				Save the answer file as unattend.xml. You can ignore the warning messages that appear in the validation window.
			</div></li><li class="listitem"><div class="para">
				Copy the unattend.xml file into the c:\windows\system32\sysprep directory of the Windows 2008 R2 Virtual Machine
			</div></li><li class="listitem"><div class="para">
				Once you place the unattend.xml file in c:\windows\system32\sysprep directory, you run the sysprep tool as follows:
			</div><pre class="programlisting">cd c:\Windows\System32\sysprep
sysprep.exe /oobe /generalize /shutdown
</pre><div class="para">
				The Windows 2008 R2 VM will automatically shut down after sysprep is complete.
			</div></li></ol></div></div><div xml:lang="pt-BR" class="section" id="sysprep-for-windows-server-2003R2" lang="pt-BR"><div class="titlepage"><div><div><h3 class="title" id="sysprep-for-windows-server-2003R2">12.10.2. System Preparation for Windows Server 2003 R2</h3></div></div></div><div class="para">
		Earlier versions of Windows have a different sysprep tool. Follow these steps for Windows Server 2003 R2.
	</div><div class="orderedlist"><ol><li class="listitem"><div class="para">
				Extract the content of \support\tools\deploy.cab on the Windows installation CD into a directory called c:\sysprep on the Windows 2003 R2 VM.
			</div></li><li class="listitem"><div class="para">
				Run c:\sysprep\setupmgr.exe to create the sysprep.inf file.
			</div><div class="orderedlist"><ol class="loweralpha"><li class="listitem"><div class="para">
						Select Create New to create a new Answer File.
					</div></li><li class="listitem"><div class="para">
						Enter “Sysprep setup” for the Type of Setup.
					</div></li><li class="listitem"><div class="para">
						Select the appropriate OS version and edition.
					</div></li><li class="listitem"><div class="para">
						On the License Agreement screen, select “Yes fully automate the installation”.
					</div></li><li class="listitem"><div class="para">
						Provide your name and organization.
					</div></li><li class="listitem"><div class="para">
						Leave display settings at default.
					</div></li><li class="listitem"><div class="para">
						Set the appropriate time zone.
					</div></li><li class="listitem"><div class="para">
						Provide your product key.
					</div></li><li class="listitem"><div class="para">
						Select an appropriate license mode for your deployment
					</div></li><li class="listitem"><div class="para">
						Select “Automatically generate computer name”.
					</div></li><li class="listitem"><div class="para">
						Type a default administrator password. If you enable the password reset feature, the users will not actually use this password. This password will be reset by the instance manager after the guest boots up.
					</div></li><li class="listitem"><div class="para">
						Leave Network Components at “Typical Settings”.
					</div></li><li class="listitem"><div class="para">
						Select the “WORKGROUP” option.
					</div></li><li class="listitem"><div class="para">
						Leave Telephony options at default.
					</div></li><li class="listitem"><div class="para">
						Select appropriate Regional Settings.
					</div></li><li class="listitem"><div class="para">
						Select appropriate language settings.
					</div></li><li class="listitem"><div class="para">
						Do not install printers.
					</div></li><li class="listitem"><div class="para">
						Do not specify “Run Once commands”.
					</div></li><li class="listitem"><div class="para">
						You need not specify an identification string.
					</div></li><li class="listitem"><div class="para">
						Save the Answer File as c:\sysprep\sysprep.inf.
					</div></li></ol></div></li><li class="listitem"><div class="para">
				Run the following command to sysprep the image:
			</div><pre class="programlisting">c:\sysprep\sysprep.exe -reseal -mini -activated</pre><div class="para">
				After this step the machine will automatically shut down
			</div></li></ol></div></div></div><div xml:lang="pt-BR" class="section" id="import-ami" lang="pt-BR"><div class="titlepage"><div><div><h2 class="title" id="import-ami">12.11. Importing Amazon Machine Images</h2></div></div></div><div class="para">
		The following procedures describe how to import an Amazon Machine Image (AMI) into CloudStack when using the XenServer hypervisor.
	</div><div class="para">
		Assume you have an AMI file and this file is called CentOS_6.2_x64. Assume further that you are working on a CentOS host. If the AMI is a Fedora image, you need to be working on a Fedora host initially.
	</div><div class="para">
		You need to have a XenServer host with a file-based storage repository (either a local ext3 SR or an NFS SR) to convert to a VHD once the image file has been customized on the Centos/Fedora host.
	</div><div class="note"><div class="admonition_header"><h2>Nota</h2></div><div class="admonition"><div class="para">
			Ao copiar e colar um comando, certifique-se que o comando tenha colado como uma única linha antes de executar. Alguns viewers documento pode introduzir quebras de linha indesejadas no texto copiado.
		</div></div></div><div class="para">
	</div><div class="para">
		To import an AMI:
	</div><div class="orderedlist"><ol><li class="listitem"><div class="para">
				Set up loopback on image file:
			</div><pre class="programlisting"># mkdir -p /mnt/loop/centos62
# mount -o loop  CentOS_6.2_x64 /mnt/loop/centos54
</pre></li><li class="listitem"><div class="para">
				Install the kernel-xen package into the image. This downloads the PV kernel and ramdisk to the image.
			</div><pre class="programlisting"># yum -c /mnt/loop/centos54/etc/yum.conf --installroot=/mnt/loop/centos62/ -y install kernel-xen</pre></li><li class="listitem"><div class="para">
				Create a grub entry in /boot/grub/grub.conf.
			</div><pre class="programlisting"># mkdir -p /mnt/loop/centos62/boot/grub
# touch /mnt/loop/centos62/boot/grub/grub.conf
# echo "" &gt; /mnt/loop/centos62/boot/grub/grub.conf
</pre></li><li class="listitem"><div class="para">
				Determine the name of the PV kernel that has been installed into the image.
			</div><pre class="programlisting"># cd /mnt/loop/centos62
# ls lib/modules/
2.6.16.33-xenU  2.6.16-xenU  2.6.18-164.15.1.el5xen  2.6.18-164.6.1.el5.centos.plus  2.6.18-xenU-ec2-v1.0  2.6.21.7-2.fc8xen  2.6.31-302-ec2
# ls boot/initrd*
boot/initrd-2.6.18-164.6.1.el5.centos.plus.img boot/initrd-2.6.18-164.15.1.el5xen.img
# ls boot/vmlinuz*
boot/vmlinuz-2.6.18-164.15.1.el5xen  boot/vmlinuz-2.6.18-164.6.1.el5.centos.plus  boot/vmlinuz-2.6.18-xenU-ec2-v1.0  boot/vmlinuz-2.6.21-2952.fc8xen
</pre><div class="para">
				Xen kernels/ramdisk always end with "xen". For the kernel version you choose, there has to be an entry for that version under lib/modules, there has to be an initrd and vmlinuz corresponding to that. Above, the only kernel that satisfies this condition is 2.6.18-164.15.1.el5xen.
			</div></li><li class="listitem"><div class="para">
				Based on your findings, create an entry in the grub.conf file. Below is an example entry.
			</div><pre class="programlisting">default=0
timeout=5
hiddenmenu
title CentOS (2.6.18-164.15.1.el5xen)
        root (hd0,0)
        kernel /boot/vmlinuz-2.6.18-164.15.1.el5xen ro root=/dev/xvda 
        initrd /boot/initrd-2.6.18-164.15.1.el5xen.img
</pre></li><li class="listitem"><div class="para">
				Edit etc/fstab, changing “sda1” to “xvda” and changing “sdb” to “xvdb”.
			</div><pre class="programlisting"># cat etc/fstab
/dev/xvda  /         ext3    defaults        1 1
/dev/xvdb  /mnt      ext3    defaults        0 0
none       /dev/pts  devpts  gid=5,mode=620  0 0
none       /proc     proc    defaults        0 0
none       /sys      sysfs   defaults        0 0
</pre></li><li class="listitem"><div class="para">
				Enable login via the console. The default console device in a XenServer system is xvc0. Ensure that etc/inittab and etc/securetty have the following lines respectively:
			</div><pre class="programlisting"># grep xvc0 etc/inittab 
co:2345:respawn:/sbin/agetty xvc0 9600 vt100-nav
# grep xvc0 etc/securetty 
xvc0
</pre></li><li class="listitem"><div class="para">
				Ensure the ramdisk supports PV disk and PV network. Customize this for the kernel version you have determined above.
			</div><pre class="programlisting"># chroot /mnt/loop/centos54
# cd /boot/
# mv initrd-2.6.18-164.15.1.el5xen.img initrd-2.6.18-164.15.1.el5xen.img.bak
# mkinitrd -f /boot/initrd-2.6.18-164.15.1.el5xen.img --with=xennet --preload=xenblk --omit-scsi-modules 2.6.18-164.15.1.el5xen
</pre></li><li class="listitem"><div class="para">
				Change the password.
			</div><pre class="programlisting"># passwd
Changing password for user root.
New UNIX password: 
Retype new UNIX password: 
passwd: all authentication tokens updated successfully.
</pre></li><li class="listitem"><div class="para">
				Exit out of chroot.
			</div><pre class="programlisting"># exit</pre></li><li class="listitem"><div class="para">
				Check etc/ssh/sshd_config for lines allowing ssh login using a password.
			</div><pre class="programlisting"># egrep "PermitRootLogin|PasswordAuthentication" /mnt/loop/centos54/etc/ssh/sshd_config  
PermitRootLogin yes
PasswordAuthentication yes
</pre></li><li class="listitem"><div class="para">
				If you need the template to be enabled to reset passwords from the CloudStack UI or API, install the password change script into the image at this point. See <a class="xref" href="#add-password-management-to-templates">Seção 12.13, “Adding Password Management to Your Templates”</a>.
			</div></li><li class="listitem"><div class="para">
				Unmount and delete loopback mount.
			</div><pre class="programlisting"># umount /mnt/loop/centos54
# losetup -d /dev/loop0
</pre></li><li class="listitem"><div class="para">
				Copy the image file to your XenServer host's file-based storage repository. In the example below, the Xenserver is "xenhost". This XenServer has an NFS repository whose uuid is a9c5b8c8-536b-a193-a6dc-51af3e5ff799.
			</div><pre class="programlisting"># scp CentOS_6.2_x64 xenhost:/var/run/sr-mount/a9c5b8c8-536b-a193-a6dc-51af3e5ff799/</pre></li><li class="listitem"><div class="para">
				Log in to the Xenserver and create a VDI the same size as the image.
			</div><pre class="programlisting">[root@xenhost ~]# cd /var/run/sr-mount/a9c5b8c8-536b-a193-a6dc-51af3e5ff799
[root@xenhost a9c5b8c8-536b-a193-a6dc-51af3e5ff799]#  ls -lh CentOS_6.2_x64
-rw-r--r-- 1 root root 10G Mar 16 16:49 CentOS_6.2_x64
[root@xenhost a9c5b8c8-536b-a193-a6dc-51af3e5ff799]# xe vdi-create virtual-size=10GiB sr-uuid=a9c5b8c8-536b-a193-a6dc-51af3e5ff799 type=user name-label="Centos 6.2 x86_64"
cad7317c-258b-4ef7-b207-cdf0283a7923
</pre></li><li class="listitem"><div class="para">
				Import the image file into the VDI. This may take 10–20 minutes.
			</div><pre class="programlisting">[root@xenhost a9c5b8c8-536b-a193-a6dc-51af3e5ff799]# xe vdi-import filename=CentOS_6.2_x64 uuid=cad7317c-258b-4ef7-b207-cdf0283a7923</pre></li><li class="listitem"><div class="para">
				Locate a the VHD file. This is the file with the VDI’s UUID as its name. Compress it and upload it to your web server.
			</div><pre class="programlisting">[root@xenhost a9c5b8c8-536b-a193-a6dc-51af3e5ff799]# bzip2 -c cad7317c-258b-4ef7-b207-cdf0283a7923.vhd &gt; CentOS_6.2_x64.vhd.bz2
[root@xenhost a9c5b8c8-536b-a193-a6dc-51af3e5ff799]# scp CentOS_6.2_x64.vhd.bz2 webserver:/var/www/html/templates/
</pre></li></ol></div></div><div xml:lang="pt-BR" class="section" id="convert-hyperv-vm-to-template" lang="pt-BR"><div class="titlepage"><div><div><h2 class="title" id="convert-hyperv-vm-to-template">12.12. Converting a Hyper-V VM to a Template</h2></div></div></div><div class="para">
		To convert a Hyper-V VM to a XenServer-compatible CloudStack template, you will need a standalone XenServer host with an attached NFS VHD SR. Use whatever XenServer version you are using with CloudStack, but use XenCenter 5.6 FP1 or SP2 (it is backwards compatible to 5.6). Additionally, it may help to have an attached NFS ISO SR.
	</div><div class="para">
		For Linux VMs, you may need to do some preparation in Hyper-V before trying to get the VM to work in XenServer. Clone the VM and work on the clone if you still want to use the VM in Hyper-V. Uninstall Hyper-V Integration Components and check for any references to device names in /etc/fstab:
	</div><div class="orderedlist"><ol><li class="listitem"><div class="para">
				From the linux_ic/drivers/dist directory, run make uninstall (where "linux_ic" is the path to the copied Hyper-V Integration Components files).
			</div></li><li class="listitem"><div class="para">
				Restore the original initrd from backup in /boot/ (the backup is named *.backup0).
			</div></li><li class="listitem"><div class="para">
				Remove the "hdX=noprobe" entries from /boot/grub/menu.lst.
			</div></li><li class="listitem"><div class="para">
				Check /etc/fstab for any partitions mounted by device name. Change those entries (if any) to mount by LABEL or UUID. You can get that information with the blkid command.
			</div></li></ol></div><div class="para">
		The next step is make sure the VM is not running in Hyper-V, then get the VHD into XenServer. There are two options for doing this.
	</div><div class="para">
		Option one:
	</div><div class="orderedlist"><ol><li class="listitem"><div class="para">
				Import the VHD using XenCenter. In XenCenter, go to Tools&gt;Virtual Appliance Tools&gt;Disk Image Import.
			</div></li><li class="listitem"><div class="para">
				Choose the VHD, then click Next.
			</div></li><li class="listitem"><div class="para">
				Name the VM, choose the NFS VHD SR under Storage, enable "Run Operating System Fixups" and choose the NFS ISO SR.
			</div></li><li class="listitem"><div class="para">
				Click Next, then Finish. A VM should be created.
			</div></li></ol></div><div class="para">
		Option two:
	</div><div class="orderedlist"><ol><li class="listitem"><div class="para">
				Run XenConvert, under From choose VHD, under To choose XenServer. Click Next.
			</div></li><li class="listitem"><div class="para">
				Choose the VHD, then click Next.
			</div></li><li class="listitem"><div class="para">
				Input the XenServer host info, then click Next.
			</div></li><li class="listitem"><div class="para">
				Name the VM, then click Next, then Convert. A VM should be created.
			</div></li></ol></div><div class="para">
		Once you have a VM created from the Hyper-V VHD, prepare it using the following steps:
	</div><div class="orderedlist"><ol><li class="listitem"><div class="para">
				Boot the VM, uninstall Hyper-V Integration Services, and reboot.
			</div></li><li class="listitem"><div class="para">
				Install XenServer Tools, then reboot.
			</div></li><li class="listitem"><div class="para">
				Prepare the VM as desired. For example, run sysprep on Windows VMs. See <a class="xref" href="#create-windows-template">Seção 12.10, “Creating a Windows Template”</a>.
			</div></li></ol></div><div class="para">
		Either option above will create a VM in HVM mode. This is fine for Windows VMs, but Linux VMs may not perform optimally. Converting a Linux VM to PV mode will require additional steps and will vary by distribution.
	</div><div class="orderedlist"><ol><li class="listitem"><div class="para">
				Shut down the VM and copy the VHD from the NFS storage to a web server; for example, mount the NFS share on the web server and copy it, or from the XenServer host use sftp or scp to upload it to the web server.
			</div></li><li class="listitem"><div class="para">
				In CloudStack, create a new template using the following values:
			</div><div class="itemizedlist"><ul><li class="listitem"><div class="para">
						URL. Give the URL for the VHD
					</div></li><li class="listitem"><div class="para">
						OS Type. Use the appropriate OS. For PV mode on CentOS, choose Other PV (32-bit) or Other PV (64-bit). This choice is available only for XenServer.
					</div></li><li class="listitem"><div class="para">
						Hypervisor. XenServer
					</div></li><li class="listitem"><div class="para">
						Format. VHD
					</div></li></ul></div></li></ol></div><div class="para">
		The template will be created, and you can create instances from it.
	</div></div><div xml:lang="pt-BR" class="section" id="add-password-management-to-templates" lang="pt-BR"><div class="titlepage"><div><div><h2 class="title" id="add-password-management-to-templates">12.13. Adding Password Management to Your Templates</h2></div></div></div><div class="para">
		CloudStack provides an optional password reset feature that allows users to set a temporary admin or root password as well as reset the existing admin or root password from the CloudStack UI.
	</div><div class="para">
		To enable the Reset Password feature, you will need to download an additional script to patch your template. When you later upload the template into CloudStack, you can specify whether reset admin/root password feature should be enabled for this template.
	</div><div class="para">
		The password management feature works always resets the account password on instance boot. The script does an HTTP call to the virtual router to retrieve the account password that should be set. As long as the virtual router is accessible the guest will have access to the account password that should be used. When the user requests a password reset the management server generates and sends a new password to the virtual router for the account. Thus an instance reboot is necessary to effect any password changes.
	</div><div class="para">
		If the script is unable to contact the virtual router during instance boot it will not set the password but boot will continue normally.
	</div><div xml:lang="pt-BR" class="section" id="linux-installation" lang="pt-BR"><div class="titlepage"><div><div><h3 class="title" id="linux-installation">12.13.1. Instalação do sistema operacional Linux</h3></div></div></div><div class="para">
		Siga os seguintes passos para iniciar a instalação do Linux:
	</div><div class="orderedlist"><ol><li class="listitem"><div class="para">
				Faça download do script cloud-set-guest-password:
			</div><div class="itemizedlist"><ul><li class="listitem"><div class="para">
						Linux: <a href="     http://cloudstack.org/dl/cloud-set-guest-password     ">     http://cloudstack.org/dl/cloud-set-guest-password     </a>
					</div></li><li class="listitem"><div class="para">
						Windows: <a href="     http://sourceforge.net/projects/cloudstack/files/Password%20Management%20Scripts/CloudInstanceManager.msi/download     ">     http://sourceforge.net/projects/cloudstack/files/Password%20Management%20Scripts/CloudInstanceManager.msi/download     </a>
					</div></li></ul></div></li><li class="listitem"><div class="para">
				Copie este arquivo para /etc/init.d.
			</div><div class="para">
				Em algumas distribuições Linux, copie o arquivo para /etc/rc.d/init.d.
			</div></li><li class="listitem"><div class="para">
				Execute o seguinte comando para tornar executável o script:
			</div><pre class="programlisting">chmod +x /etc/init.d/cloud-set-guest-password</pre></li><li class="listitem"><div class="para">
				Dependendo da distribuição Linux, continue com o passo apropriado.
			</div><div class="para">
				No Fedora, CentOS/RHEL, e Debian, execute:
			</div><pre class="programlisting">chkconfig --add cloud-set-guest-password</pre></li></ol></div></div><div xml:lang="pt-BR" class="section" id="windows-installation" lang="pt-BR"><div class="titlepage"><div><div><h3 class="title" id="windows-installation">12.13.2. Instalação no Windows</h3></div></div></div><div class="para">
		Faça download do instalador, CloudInstanceManager.msi, da <a href="http://cloudstack.org/download.html">página de download</a> e execute o instalador na nova máquina virtual Windows.
	</div></div></div><div xml:lang="pt-BR" class="section" id="delete-templates" lang="pt-BR"><div class="titlepage"><div><div><h2 class="title" id="delete-templates">12.14. Deleting Templates</h2></div></div></div><div class="para">
		Templates may be deleted. In general, when a template spans multiple Zones, only the copy that is selected for deletion will be deleted; the same template in other Zones will not be deleted. The provided CentOS template is an exception to this. If the provided CentOS template is deleted, it will be deleted from all Zones.
	</div><div class="para">
		When templates are deleted, the VMs instantiated from them will continue to run. However, new VMs cannot be created based on the deleted template.
	</div></div></div><div xml:lang="pt-BR" class="chapter" id="storage" lang="pt-BR"><div class="titlepage"><div><div><h2 class="title">Capítulo 13. Working With Storage</h2></div></div></div><div class="toc"><dl><dt><span class="section"><a href="#storage-overview">13.1. Storage Overview</a></span></dt><dt><span class="section"><a href="#primary-storage">13.2. Storage primária</a></span></dt><dd><dl><dt><span class="section"><a href="#best-practices-primary-storage">13.2.1. Best Practices for Primary Storage</a></span></dt><dt><span class="section"><a href="#runtime-behavior-of-primary-storage">13.2.2. Runtime Behavior of Primary Storage</a></span></dt><dt><span class="section"><a href="#hypervisor-support-for-primarystorage">13.2.3. Hypervisor Support for Primary Storage</a></span></dt><dt><span class="section"><a href="#storage-tags">13.2.4. Storage Tags</a></span></dt><dt><span class="section"><a href="#maintenance-mode-for-primary-storage.xml">13.2.5. Maintenance Mode for Primary Storage</a></span></dt></dl></dd><dt><span class="section"><a href="#secondary-storage">13.3. Storage secundária</a></span></dt><dt><span class="section"><a href="#working-with-volumes">13.4. Working With Volumes</a></span></dt><dd><dl><dt><span class="section"><a href="#creating-new-volumes">13.4.1. Creating a New Volume</a></span></dt><dt><span class="section"><a href="#upload-existing-volume-to-vm">13.4.2. Uploading an Existing Volume to a Virtual Machine</a></span></dt><dt><span class="section"><a href="#attaching-volume">13.4.3. Attaching a Volume</a></span></dt><dt><span class="section"><a href="#detach-move-volumes">13.4.4. Detaching and Moving Volumes</a></span></dt><dt><span class="section"><a href="#vm-storage-migration">13.4.5. VM Storage Migration</a></span></dt><dt><span class="section"><a href="#resizing-volumes">13.4.6. Resizing Volumes</a></span></dt><dt><span class="section"><a href="#volume-deletion-garbage-collection">13.4.7. Volume Deletion and Garbage Collection</a></span></dt></dl></dd><dt><span class="section"><a href="#working-with-snapshots">13.5. Working with Snapshots</a></span></dt><dd><dl><dt><span class="section"><a href="#snapshot-throttling">13.5.1. Snapshot Job Throttling</a></span></dt><dt><span class="section"><a href="#automatic-snapshot-creation-retention">13.5.2. Automatic Snapshot Creation and Retention</a></span></dt><dt><span class="section"><a href="#incremental-snapshots-backup">13.5.3. Incremental Snapshots and Backup </a></span></dt><dt><span class="section"><a href="#volume-status">13.5.4. Volume Status</a></span></dt><dt><span class="section"><a href="#snapshot-restore">13.5.5. Snapshot Restore</a></span></dt></dl></dd></dl></div><div xml:lang="pt-BR" class="section" id="storage-overview" lang="pt-BR"><div class="titlepage"><div><div><h2 class="title" id="storage-overview">13.1. Storage Overview</h2></div></div></div><div class="para">
		CloudStack defines two types of storage: primary and secondary. Primary storage can be accessed by either iSCSI or NFS. Additionally, direct attached storage may be used for primary storage. Secondary storage is always accessed using NFS.
	</div><div class="para">
		There is no ephemeral storage in CloudStack. All volumes on all nodes are persistent.
	</div></div><div xml:lang="pt-BR" class="section" id="primary-storage" lang="pt-BR"><div class="titlepage"><div><div><h2 class="title" id="primary-storage">13.2. Storage primária</h2></div></div></div><div class="para">
		Esta seção fornece conceitos e detalhes técnicos sobre a storage primária do CloudStack. Para informações sobre como instalar e configurar storage primária através da interface de usuário do CloudStack, veja o Guia de instalação.
	</div><div class="para">
		<a class="xref" href="#about-primary-storage">Seção 2.6, “Sobre storage primária”</a>
	</div><div xml:lang="pt-BR" class="section" id="best-practices-primary-storage" lang="pt-BR"><div class="titlepage"><div><div><h3 class="title" id="best-practices-primary-storage">13.2.1. Best Practices for Primary Storage</h3></div></div></div><div class="itemizedlist"><ul><li class="listitem"><div class="para">
				The speed of primary storage will impact guest performance. If possible, choose smaller, higher RPM drives for primary storage.
			</div></li><li class="listitem"><div class="para">
				Ensure that nothing is stored on the server. Adding the server to CloudStack will destroy any existing data
			</div></li></ul></div></div><div xml:lang="pt-BR" class="section" id="runtime-behavior-of-primary-storage" lang="pt-BR"><div class="titlepage"><div><div><h3 class="title" id="runtime-behavior-of-primary-storage">13.2.2. Runtime Behavior of Primary Storage</h3></div></div></div><div class="para">
		Root volumes are created automatically when a virtual machine is created. Root volumes are deleted when the VM is destroyed. Data volumes can be created and dynamically attached to VMs.  Data volumes are not deleted when VMs are destroyed.
	</div><div class="para">
		Administrators should monitor the capacity of primary storage devices and add additional primary storage as needed. See the Advanced Installation Guide.
	</div><div class="para">
		Administrators add primary storage to the system by creating a CloudStack storage pool. Each storage pool is associated with a cluster.
	</div></div><div xml:lang="pt-BR" class="section" id="hypervisor-support-for-primarystorage" lang="pt-BR"><div class="titlepage"><div><div><h3 class="title" id="hypervisor-support-for-primarystorage">13.2.3. Hypervisor Support for Primary Storage</h3></div></div></div><div class="para">
		The following table shows storage options and parameters for different hypervisors.
	</div><div class="informaltable"><table border="1"><colgroup><col width="34%" class="c1" /><col width="16%" class="c2" /><col width="16%" class="c3" /><col width="17%" class="c4" /><col width="17%" class="c5" /></colgroup><thead><tr><th>
					</th><th>
						<div class="para">
							VMware vSphere
						</div>
					</th><th>
						<div class="para">
							Citrix XenServer
						</div>
					</th><th>
						<div class="para">
							KVM
						</div>
					</th><td class="auto-generated"> </td></tr></thead><tbody><tr><td>
						<div class="para">
							<span class="bold bold"><strong><span class="bold bold"><strong>Format for Disks, Templates, and Snapshots</strong></span></strong></span>
						</div>
					</td><td>
						<div class="para">
							VMDK
						</div>
					</td><td>
						<div class="para">
							VHD
						</div>
					</td><td>
						<div class="para">
							QCOW2
						</div>
					</td><td class="auto-generated"> </td></tr><tr><td>
						<div class="para">
							<span class="bold bold"><strong>iSCSI support</strong></span>
						</div>
					</td><td>
						<div class="para">
							VMFS
						</div>
					</td><td>
						<div class="para">
							Clustered LVM
						</div>
					</td><td>
						<div class="para">
							Yes, via Shared Mountpoint
						</div>
					</td><td class="auto-generated"> </td></tr><tr><td>
						<div class="para">
							<span class="bold bold"><strong>Fiber Channel support</strong></span>
						</div>
					</td><td>
						<div class="para">
							VMFS
						</div>
					</td><td>
						<div class="para">
							Yes, via Existing SR
						</div>
					</td><td>
						<div class="para">
							Yes, via Shared Mountpoint
						</div>
					</td><td class="auto-generated"> </td></tr><tr><td>
						<div class="para">
							<span class="bold bold"><strong>NFS support</strong></span>
						</div>
					</td><td>
						<div class="para">
							Y
						</div>
					</td><td>
						<div class="para">
							Y
						</div>
					</td><td>
						<div class="para">
							Y
						</div>
					</td><td class="auto-generated"> </td></tr><tr><td>
						<div class="para">
							<span class="bold bold"><strong>Local storage support</strong></span>
						</div>
					</td><td>
						<div class="para">
							Y
						</div>
					</td><td>
						<div class="para">
							Y
						</div>
					</td><td>
						<div class="para">
							Y
						</div>
					</td><td class="auto-generated"> </td></tr><tr><td>
						<div class="para">
							<span class="bold bold"><strong>Storage over-provisioning</strong></span>
						</div>
					</td><td>
						<div class="para">
							NFS and iSCSI
						</div>
					</td><td>
						<div class="para">
							NFS
						</div>
					</td><td>
						<div class="para">
							NFS
						</div>
					</td><td class="auto-generated"> </td></tr></tbody></table></div><div class="para">
		XenServer uses a clustered LVM system to store VM images on iSCSI and Fiber Channel volumes and does not support over-provisioning in the hypervisor. The storage server itself, however, can support thin-provisioning. As a result the CloudStack can still support storage over-provisioning by running on thin-provisioned storage volumes.
	</div><div class="para">
		KVM supports "Shared Mountpoint" storage. A shared mountpoint is a file system path local to each server in a given cluster. The path must be the same across all Hosts in the cluster, for example /mnt/primary1. This shared mountpoint is assumed to be a clustered filesystem such as OCFS2. In this case the CloudStack does not attempt to mount or unmount the storage as is done with NFS. The CloudStack requires that the administrator insure that the storage is available
	</div><div class="para">
		With NFS storage, CloudStack manages the overprovisioning. In this case the global configuration parameter storage.overprovisioning.factor controls the degree of overprovisioning. This is independent of hypervisor type.
	</div><div class="para">
		Local storage is an option for primary storage for vSphere, XenServer, and KVM. When the local disk option is enabled, a local disk storage pool is automatically created on each host. To use local storage for the System Virtual Machines (such as the Virtual Router), set system.vm.use.local.storage to true in global configuration.
	</div><div class="para">
		CloudStack supports multiple primary storage pools in a Cluster. For example, you could provision 2 NFS servers in primary storage. Or you could provision 1 iSCSI LUN initially and then add a second iSCSI LUN when the first approaches capacity.
	</div></div><div xml:lang="pt-BR" class="section" id="storage-tags" lang="pt-BR"><div class="titlepage"><div><div><h3 class="title" id="storage-tags">13.2.4. Storage Tags</h3></div></div></div><div class="para">
		Storage may be "tagged". A tag is a text string attribute associated with primary storage, a Disk Offering, or a Service Offering. Tags allow administrators to provide additional information about the storage. For example, that is a "SSD" or it is "slow". Tags are not interpreted by CloudStack. They are matched against tags placed on service and disk offerings. CloudStack requires all tags on service and disk offerings to exist on the primary storage before it allocates root or data disks on the primary storage. Service and disk offering tags are used to identify the requirements of the storage that those offerings have. For example, the high end service offering may require "fast" for its root disk volume.
	</div><div class="para">
		The interaction between tags, allocation, and volume copying across clusters and pods can be complex. To simplify the situation, use the same set of tags on the primary storage for all clusters in a pod. Even if different devices are used to present those tags, the set of exposed tags can be the same.
	</div></div><div xml:lang="pt-BR" class="section" id="maintenance-mode-for-primary-storage.xml" lang="pt-BR"><div class="titlepage"><div><div><h3 class="title" id="maintenance-mode-for-primary-storage.xml">13.2.5. Maintenance Mode for Primary Storage</h3></div></div></div><div class="para">
		Primary storage may be placed into maintenance mode. This is useful, for example, to replace faulty RAM in a storage device. Maintenance mode for a storage device will first stop any new guests from being provisioned on the storage device. Then it will stop all guests that have any volume on that storage device. When all such guests are stopped the storage device is in maintenance mode and may be shut down. When the storage device is online again you may cancel maintenance mode for the device. The CloudStack will bring the device back online and attempt to start all guests that were running at the time of the entry into maintenance mode.
	</div></div></div><div xml:lang="pt-BR" class="section" id="secondary-storage" lang="pt-BR"><div class="titlepage"><div><div><h2 class="title" id="secondary-storage">13.3. Storage secundária</h2></div></div></div><div class="para">
		Esta seção fornece conceitos e detalhes técnicos sobre a storage secundária do CloudStack. Para informações sobre como instalar e configurar storage secundária através da interface de usuário do CloudStack UI, veja o Advanced Installation Guide.
	</div><div class="para">
		<a class="xref" href="#about-secondary-storage">Seção 2.7, “Sobre storage secundária”</a>
	</div></div><div xml:lang="pt-BR" class="section" id="working-with-volumes" lang="pt-BR"><div class="titlepage"><div><div><h2 class="title" id="working-with-volumes">13.4. Working With Volumes</h2></div></div></div><div class="para">
		A volume provides storage to a guest VM. The volume can provide for a root disk or an additional data disk. CloudStack supports additional volumes for guest VMs.
	</div><div class="para">
		Volumes are created for a specific hypervisor type. A volume that has been attached to guest using one hypervisor type (e.g, XenServer) may not be attached to a guest that is using another hypervisor type, for example:vSphere, KVM. This is because the different hypervisors use different disk image formats.
	</div><div class="para">
		CloudStack defines a volume as a unit of storage available to a guest VM. Volumes are either root disks or data disks. The root disk has "/" in the file system and is usually the boot device. Data disks provide for additional storage, for example: "/opt" or "D:". Every guest VM has a root disk, and VMs can also optionally have a data disk. End users can mount multiple data disks to guest VMs. Users choose data disks from the disk offerings created by administrators. The user can create a template from a volume as well; this is the standard procedure for private template creation. Volumes are hypervisor-specific: a volume from one hypervisor type may not be used on a guest of another hypervisor type.
	</div><div class="note"><div class="admonition_header"><h2>Nota</h2></div><div class="admonition"><div class="para">
			CloudStack supports attaching up to 13 data disks to a VM on XenServer hypervisor versions 6.0 and above. For the VMs on other hypervisor types, the data disk limit is 6.
		</div></div></div><div xml:lang="pt-BR" class="section" id="creating-new-volumes" lang="pt-BR"><div class="titlepage"><div><div><h3 class="title" id="creating-new-volumes">13.4.1. Creating a New Volume</h3></div></div></div><div class="para">
		You can add more data disk volumes to a guest VM at any time, up to the limits of your storage capacity. Both CloudStack administrators and users can add volumes to VM instances. When you create a new volume, it is stored as an entity in CloudStack, but the actual storage resources are not allocated on the physical storage device until you attach the volume. This optimization allows the CloudStack to provision the volume nearest to the guest that will use it when the first attachment is made.
	</div><div class="section" id="local-storage-data-volumes"><div class="titlepage"><div><div><h4 class="title" id="local-storage-data-volumes">13.4.1.1. Using Local Storage for Data Volumes</h4></div></div></div><div class="para">
			You can create data volumes on local storage (supported with XenServer, KVM, and VMware). The data volume is placed on the same host as the VM instance that is attached to the data volume. These local data volumes can be attached to virtual machines, detached, re-attached, and deleted just as with the other types of data volume.
		</div><div class="para">
			Local storage is ideal for scenarios where persistence of data volumes and HA is not required. Some of the benefits include reduced disk I/O latency and cost reduction from using inexpensive local disks.
		</div><div class="para">
			In order for local volumes to be used, the feature must be enabled for the zone.
		</div><div class="para">
			You can create a data disk offering for local storage. When a user creates a new VM, they can select this disk offering in order to cause the data disk volume to be placed in local storage.
		</div><div class="para">
			You can not migrate a VM that has a volume in local storage to a different host, nor migrate the volume itself away to a different host. If you want to put a host into maintenance mode, you must first stop any VMs with local data volumes on that host.
		</div></div><div class="section" id="creating-new-volume-steps"><div class="titlepage"><div><div><h4 class="title" id="creating-new-volume-steps">13.4.1.2. To Create a New Volume</h4></div></div></div><div class="orderedlist"><ol><li class="listitem"><div class="para">
					Log in to the CloudStack UI as a user or admin.
				</div></li><li class="listitem"><div class="para">
					In the left navigation bar, click Storage.
				</div></li><li class="listitem"><div class="para">
					In Select View, choose Volumes.
				</div></li><li class="listitem"><div class="para">
					To create a new volume, click Add Volume, provide the following details, and click OK.
				</div><div class="itemizedlist"><ul><li class="listitem"><div class="para">
							Name. Give the volume a unique name so you can find it later.
						</div></li><li class="listitem"><div class="para">
							Availability Zone. Where do you want the storage to reside? This should be close to the VM that will use the volume.
						</div></li><li class="listitem"><div class="para">
							Disk Offering. Choose the characteristics of the storage.
						</div></li></ul></div><div class="para">
					The new volume appears in the list of volumes with the state “Allocated.” The volume data is stored in CloudStack, but the volume is not yet ready for use
				</div></li><li class="listitem"><div class="para">
					To start using the volume, continue to Attaching a Volume
				</div></li></ol></div></div></div><div xml:lang="pt-BR" class="section" id="upload-existing-volume-to-vm" lang="pt-BR"><div class="titlepage"><div><div><h3 class="title" id="upload-existing-volume-to-vm">13.4.2. Uploading an Existing Volume to a Virtual Machine</h3></div></div></div><div class="para">
		Existing data can be made accessible to a virtual machine. This is called uploading a volume to the VM. For example, this is useful to upload data from a local file system and attach it to a VM. Root administrators, domain administrators, and end users can all upload existing volumes to VMs.
	</div><div class="para">
		The upload is performed using HTTP. The uploaded volume is placed in the zone's secondary storage
	</div><div class="para">
		You cannot upload a volume if the preconfigured volume limit has already been reached. The default limit for the cloud is set in the global configuration parameter max.account.volumes, but administrators can also set per-domain limits that are different from the global default. See Setting Usage Limits
	</div><div class="para">
		To upload a volume:
	</div><div class="orderedlist"><ol><li class="listitem" id="optional-hash"><div class="para">
				(Optional) Create an MD5 hash (checksum) of the disk image file that you are going to upload. After uploading the data disk, CloudStack will use this value to verify that no data corruption has occurred.
			</div></li><li class="listitem"><div class="para">
				Log in to the CloudStack UI as an administrator or user
			</div></li><li class="listitem"><div class="para">
				In the left navigation bar, click Storage.
			</div></li><li class="listitem"><div class="para">
				Click Upload Volume.
			</div></li><li class="listitem"><div class="para">
				Provide the following:
			</div><div class="itemizedlist"><ul><li class="listitem" id="volume-name"><div class="para">
						Name and Description. Any desired name and a brief description that can be shown in the UI.
					</div></li><li class="listitem"><div class="para">
						Availability Zone. Choose the zone where you want to store the volume. VMs running on hosts in this zone can attach the volume.
					</div></li><li class="listitem"><div class="para">
						Format. Choose one of the following to indicate the disk image format of the volume.
					</div><div class="informaltable"><table border="1"><colgroup><col width="50%" /><col width="50%" /></colgroup><thead><tr><th align="left">
										<div class="para">
											Hypervisor
										</div>
									</th><th align="left">
										<div class="para">
											Disk Image Format
										</div>
									</th></tr></thead><tbody><tr><td align="left">
										<div class="para">
											XenServer
										</div>
									</td><td align="left">
										<div class="para">
											VHD
										</div>
									</td></tr><tr><td align="left">
										<div class="para">
											VMware
										</div>
									</td><td align="left">
										<div class="para">
											OVA
										</div>
									</td></tr><tr><td align="left">
										<div class="para">
											KVM
										</div>
									</td><td align="left">
										<div class="para">
											QCOW2
										</div>
									</td></tr></tbody></table></div></li><li class="listitem"><div class="para">
						URL. The secure HTTP or HTTPS URL that CloudStack can use to access your disk. The type of file at the URL must match the value chosen in Format. For example, if Format is VHD, the URL might look like the following:
					</div><div class="para">
						http://yourFileServerIP/userdata/myDataDisk.vhd
					</div></li><li class="listitem"><div class="para">
						MD5 checksum. (Optional) Use the hash that you created in step <a class="xref" href="#optional-hash">1</a>.
					</div></li></ul></div></li><li class="listitem"><div class="para">
				Wait until the status of the volume shows that the upload is complete. Click Instances - Volumes, find the name you specified in step <a class="xref" href="#volume-name">???</a>, and make sure the status is Uploaded.
			</div></li></ol></div></div><div xml:lang="pt-BR" class="section" id="attaching-volume" lang="pt-BR"><div class="titlepage"><div><div><h3 class="title" id="attaching-volume">13.4.3. Attaching a Volume</h3></div></div></div><div class="para">
		You can attach a volume to a guest VM to provide extra disk storage. Attach a volume when you first create a new volume, when you are moving an existing volume from one VM to another, or after you have migrated a volume from one storage pool to another.
	</div><div class="orderedlist"><ol><li class="listitem"><div class="para">
				Log in to the CloudStack UI as a user or admin.
			</div></li><li class="listitem"><div class="para">
				In the left navigation, click Storage.
			</div></li><li class="listitem"><div class="para">
				In Select View, choose Volumes.
			</div></li><li class="listitem"><div class="para">
				4. Click the volume name in the Volumes list, then click the Attach Disk button
				<span class="inlinemediaobject"><img src="./images/attach-disk-icon.png" alt="AttachDiskButton.png: button to attach a volume" /></span>

			</div></li><li class="listitem"><div class="para">
				In the Instance popup, choose the VM to which you want to attach the volume. You will only see instances to which you are allowed to attach volumes; for example, a user will see only instances created by that user, but the administrator will have more choices.
			</div></li><li class="listitem"><div class="para">
				When the volume has been attached, you should be able to see it by clicking Instances, the instance name, and View Volumes.
			</div></li></ol></div></div><div xml:lang="pt-BR" class="section" id="detach-move-volumes" lang="pt-BR"><div class="titlepage"><div><div><h3 class="title" id="detach-move-volumes">13.4.4. Detaching and Moving Volumes</h3></div></div></div><div class="note"><div class="admonition_header"><h2>Nota</h2></div><div class="admonition"><div class="para">
			This procedure is different from moving disk volumes from one storage pool to another. See VM Storage Migration
		</div></div></div><div class="para">
		A volume can be detached from a guest VM and attached to another guest. Both CloudStack administrators and users can detach volumes from VMs and move them to other VMs.
	</div><div class="para">
		If the two VMs are in different clusters, and the volume is large, it may take several minutes for the volume to be moved to the new VM.
	</div><div class="orderedlist"><ol><li class="listitem"><div class="para">
				Log in to the CloudStack UI as a user or admin.
			</div></li><li class="listitem"><div class="para">
				In the left navigation bar, click Storage, and choose Volumes in Select View. Alternatively, if you know which VM the volume is attached to, you can click Instances, click the VM name, and click View Volumes.
			</div></li><li class="listitem"><div class="para">
				Click the name of the volume you want to detach, then click the Detach Disk button. 
				<span class="inlinemediaobject"><img src="./images/detach-disk-icon.png" alt="DetachDiskButton.png: button to detach a volume" /></span>

			</div></li><li class="listitem"><div class="para">
				To move the volume to another VM, follow the steps in <a class="xref" href="#attaching-volume">Seção 13.4.3, “Attaching a Volume”</a>.
			</div></li></ol></div></div><div xml:lang="pt-BR" class="section" id="vm-storage-migration" lang="pt-BR"><div class="titlepage"><div><div><h3 class="title" id="vm-storage-migration">13.4.5. VM Storage Migration</h3></div></div></div><div class="para">
		Supported in XenServer, KVM, and VMware.
	</div><div class="note"><div class="admonition_header"><h2>Nota</h2></div><div class="admonition"><div class="para">
			This procedure is different from moving disk volumes from one VM to another. See Detaching and Moving Volumes <a class="xref" href="#detach-move-volumes">Seção 13.4.4, “Detaching and Moving Volumes”</a>.
		</div></div></div><div class="para">
		You can migrate a virtual machine’s root disk volume or any additional data disk volume from one storage pool to another in the same zone.
	</div><div class="para">
		You can use the storage migration feature to achieve some commonly desired administration goals, such as balancing the load on storage pools and increasing the reliability of virtual machines by moving them away from any storage pool that is experiencing issues.
	</div><div xml:lang="pt-BR" class="section" id="migrate-datadisk-volume-new-storage-pool" lang="pt-BR"><div class="titlepage"><div><div><h4 class="title" id="migrate-datadisk-volume-new-storage-pool">13.4.5.1. Migrating a Data Disk Volume to a New Storage Pool</h4></div></div></div><div class="orderedlist"><ol><li class="listitem"><div class="para">
				Log in to the CloudStack UI as a user or admin.
			</div></li><li class="listitem"><div class="para">
				Detach the data disk from the VM. See Detaching and Moving Volumes <a class="xref" href="#detach-move-volumes">Seção 13.4.4, “Detaching and Moving Volumes”</a> (but skip the “reattach” step at the end. You will do that after migrating to new storage).
			</div></li><li class="listitem"><div class="para">
				Call the CloudStack API command migrateVolume and pass in the volume ID and the ID of any storage pool in the zone.
			</div></li><li class="listitem"><div class="para">
				Watch for the volume status to change to Migrating, then back to Ready.
			</div></li><li class="listitem"><div class="para">
				Attach the volume to any desired VM running in the same cluster as the new storage server. See Attaching a Volume <a class="xref" href="#attaching-volume">Seção 13.4.3, “Attaching a Volume”</a>
			</div></li></ol></div></div><div xml:lang="pt-BR" class="section" id="migrate-vm-rootvolume-volume-new-storage-pool" lang="pt-BR"><div class="titlepage"><div><div><h4 class="title" id="migrate-vm-rootvolume-volume-new-storage-pool">13.4.5.2. Migrating a VM Root Volume to a New Storage Pool</h4></div></div></div><div class="para">
		When migrating the root disk volume, the VM must first be stopped, and users can not access the VM. After migration is complete, the VM can be restarted.
	</div><div class="orderedlist"><ol><li class="listitem"><div class="para">
				Log in to the CloudStack UI as a user or admin.
			</div></li><li class="listitem"><div class="para">
				Detach the data disk from the VM. See Detaching and Moving Volumes <a class="xref" href="#detach-move-volumes">Seção 13.4.4, “Detaching and Moving Volumes”</a> (but skip the “reattach” step at the end. You will do that after migrating to new storage).
			</div></li><li class="listitem"><div class="para">
				Stop the VM.
			</div></li><li class="listitem"><div class="para">
				Use the CloudStack API command, migrateVirtualMachine, with the ID of the VM to migrate and the IDs of a destination host and destination storage pool in the same zone.
			</div></li><li class="listitem"><div class="para">
				Watch for the VM status to change to Migrating, then back to Stopped.
			</div></li><li class="listitem"><div class="para">
				Restart the VM.
			</div></li></ol></div></div></div><div xml:lang="pt-BR" class="section" id="resizing-volumes" lang="pt-BR"><div class="titlepage"><div><div><h3 class="title" id="resizing-volumes">13.4.6. Resizing Volumes</h3></div></div></div><div class="para">
		CloudStack provides the ability to resize data disks; CloudStack controls volume size by using disk offerings. This provides CloudStack administrators with the flexibility to choose how much space they want to make available to the end users. Volumes within the disk offerings with the same storage tag can be resized. For example, if you only want to offer 10, 50, and 100 GB offerings, the allowed resize should stay within those limits. That implies if you define a 10 GB, a 50 GB and a 100 GB disk offerings, a user can upgrade from 10 GB to 50 GB, or 50 GB to 100 GB. If you create a custom-sized disk offering, then you have the option to resize the volume by specifying a new, larger size.
	</div><div class="para">
		Additionally, using the resizeVolume API, a data volume can be moved from a static disk offering to a custom disk offering with the size specified. This functionality allows those who might be billing by certain volume sizes or disk offerings to stick to that model, while providing the flexibility to migrate to whatever custom size necessary.
	</div><div class="para">
		This feature is supported on KVM, XenServer, and VMware hosts. However, shrinking volumes is not supported on VMware hosts.
	</div><div class="para">
		Before you try to resize a volume, consider the following:
	</div><div class="itemizedlist"><ul><li class="listitem"><div class="para">
				The VMs associated with the volume are stopped.
			</div></li><li class="listitem"><div class="para">
				The data disks associated with the volume are removed.
			</div></li><li class="listitem"><div class="para">
				When a volume is shrunk, the disk associated with it is simply truncated, and doing so would put its content at risk of data loss. Therefore, resize any partitions or file systems before you shrink a data disk so that all the data is moved off from that disk.
			</div></li></ul></div><div class="para">
		To resize a volume:
	</div><div class="orderedlist"><ol><li class="listitem"><div class="para">
				Log in to the CloudStack UI as a user or admin.
			</div></li><li class="listitem"><div class="para">
				In the left navigation bar, click Storage.
			</div></li><li class="listitem"><div class="para">
				In Select View, choose Volumes.
			</div></li><li class="listitem"><div class="para">
				Select the volume name in the Volumes list, then click the Resize Volume button 
				<span class="inlinemediaobject"><img src="./images/resize-volume-icon.png" alt="resize-volume-icon.png: button to display the resize volume option." /></span>
			</div></li><li class="listitem"><div class="para">
				In the Resize Volume pop-up, choose desired characteristics for the storage.
			</div><div class="mediaobject"><img src="./images/resize-volume.png" alt="resize-volume.png: option to resize a volume." /></div><div class="orderedlist"><ol class="loweralpha"><li class="listitem"><div class="para">
						If you select Custom Disk, specify a custom size.
					</div></li><li class="listitem"><div class="para">
						Click Shrink OK to confirm that you are reducing the size of a volume.
					</div><div class="para">
						This parameter protects against inadvertent shrinking of a disk, which might lead to the risk of data loss. You must sign off that you know what you are doing.
					</div></li></ol></div></li><li class="listitem"><div class="para">
				Clique em OK.
			</div></li></ol></div></div><div xml:lang="pt-BR" class="section" id="volume-deletion-garbage-collection" lang="pt-BR"><div class="titlepage"><div><div><h3 class="title" id="volume-deletion-garbage-collection">13.4.7. Volume Deletion and Garbage Collection</h3></div></div></div><div class="para">
		The deletion of a volume does not delete the snapshots that have been created from the volume
	</div><div class="para">
		When a VM is destroyed, data disk volumes that are attached to the VM are not deleted.
	</div><div class="para">
		Volumes are permanently destroyed using a garbage collection process. The global configuration variables expunge.delay and expunge.interval determine when the physical deletion of volumes will occur.
	</div><div class="itemizedlist"><ul><li class="listitem"><div class="para">
				expunge.delay: determines how old the volume must be before it is destroyed, in seconds
			</div></li><li class="listitem"><div class="para">
				expunge.interval: determines how often to run the garbage collection check
			</div></li></ul></div><div class="para">
		Administrators should adjust these values depending on site policies around data retention.
	</div></div></div><div xml:lang="pt-BR" class="section" id="working-with-snapshots" lang="pt-BR"><div class="titlepage"><div><div><h2 class="title" id="working-with-snapshots">13.5. Working with Snapshots</h2></div></div></div><div class="para">
		(Supported for the following hypervisors: <span class="bold bold"><strong>XenServer</strong></span>, <span class="bold bold"><strong>VMware vSphere</strong></span>, and <span class="bold bold"><strong>KVM</strong></span>)
	</div><div class="para">
		CloudStack supports snapshots of disk volumes. Snapshots are a point-in-time capture of virtual machine disks. Memory and CPU states are not captured. 
	</div><div class="para">
		Snapshots may be taken for volumes, including both root and data disks. The administrator places a limit on the number of stored snapshots per user. Users can create new volumes from the snapshot for recovery of particular files and they can create templates from snapshots to boot from a restored disk.
	</div><div class="para">
		Users can create snapshots manually or by setting up automatic recurring snapshot policies. Users can also create disk volumes from snapshots, which may be attached to a VM like any other disk volume. Snapshots of both root disks and data disks are supported. However, CloudStack does not currently support booting a VM from a recovered root disk. A disk recovered from snapshot of a root disk is treated as a regular data disk; the data on recovered disk can be accessed by attaching the disk to a VM.
	</div><div class="para">
		A completed snapshot is copied from primary storage to secondary storage, where it is stored until deleted or purged by newer snapshot.
	</div><div xml:lang="pt-BR" class="section" id="snapshot-throttling" lang="pt-BR"><div class="titlepage"><div><div><h3 class="title" id="snapshot-throttling">13.5.1. Snapshot Job Throttling</h3></div></div></div><div class="para">
		When a snapshot of a virtual machine is requested, the snapshot job runs on the same host where the VM is running or, in the case of a stopped VM, the host where it ran last. If many snapshots are requested for VMs on a single host, this can lead to problems with too many snapshot jobs overwhelming the resources of the host.
	</div><div class="para">
		To address this situation, the cloud's root administrator can throttle how many snapshot jobs are executed simultaneously on the hosts in the cloud by using the global configuration setting concurrent.snapshots.threshold.perhost. By using this setting, the administrator can better ensure that snapshot jobs do not time out and hypervisor hosts do not experience performance issues due to hosts being overloaded with too many snapshot requests.
	</div><div class="para">
		Set concurrent.snapshots.threshold.perhost to a value that represents a best guess about how many snapshot jobs the hypervisor hosts can execute at one time, given the current resources of the hosts and the number of VMs running on the hosts. If a given host has more snapshot requests, the additional requests are placed in a waiting queue. No new snapshot jobs will start until the number of currently executing snapshot jobs falls below the configured limit.
	</div><div class="para">
		The admin can also set job.expire.minutes to place a maximum on how long a snapshot request will wait in the queue. If this limit is reached, the snapshot request fails and returns an error message.
	</div></div><div xml:lang="pt-BR" class="section" id="automatic-snapshot-creation-retention" lang="pt-BR"><div class="titlepage"><div><div><h3 class="title" id="automatic-snapshot-creation-retention">13.5.2. Automatic Snapshot Creation and Retention</h3></div></div></div><div class="para">
		(Supported for the following hypervisors: <span class="bold bold"><strong>XenServer</strong></span>, <span class="bold bold"><strong>VMware vSphere</strong></span>, and <span class="bold bold"><strong>KVM</strong></span>)
	</div><div class="para">
		Users can set up a recurring snapshot policy to automatically create multiple snapshots of a disk at regular intervals. Snapshots can be created on an hourly, daily, weekly, or monthly interval. One snapshot policy can be set up per disk volume. For example, a user can set up a daily snapshot at 02:30.
	</div><div class="para">
		With each snapshot schedule, users can also specify the number of scheduled snapshots to be retained. Older snapshots that exceed the retention limit are automatically deleted. This user-defined limit must be equal to or lower than the global limit set by the CloudStack administrator. See <a class="xref" href="#globally-configured-limits">Seção 14.3, “Globally Configured Limits”</a>. The limit applies only to those snapshots that are taken as part of an automatic recurring snapshot policy. Additional manual snapshots can be created and retained.
	</div></div><div xml:lang="pt-BR" class="section" id="incremental-snapshots-backup" lang="pt-BR"><div class="titlepage"><div><div><h3 class="title" id="incremental-snapshots-backup">13.5.3. Incremental Snapshots and Backup </h3></div></div></div><div class="para">
		Snapshots are created on primary storage where a disk resides. After a snapshot is created, it is immediately backed up to secondary storage and removed from primary storage for optimal utilization of space on primary storage.
	</div><div class="para">
		CloudStack does incremental backups for some hypervisors. When incremental backups are supported, every N backup is a full backup.
	</div><div class="informaltable"><table border="1"><colgroup><col width="25%" /><col width="25%" /><col width="25%" /><col width="25%" /></colgroup><thead><tr><th align="left">
					</th><th align="left">
						<div class="para">
							VMware vSphere
						</div>
					</th><th align="left">
						<div class="para">
							Citrix XenServer
						</div>
					</th><th align="left">
						<div class="para">
							KVM
						</div>
					</th></tr></thead><tbody><tr><td align="left">
						<div class="para">
							Support incremental backup
						</div>
					</td><td align="left">
						<div class="para">
							N
						</div>
					</td><td align="left">
						<div class="para">
							Y
						</div>
					</td><td align="left">
						<div class="para">
							N
						</div>
					</td></tr></tbody></table></div></div><div xml:lang="pt-BR" class="section" id="volume-status" lang="pt-BR"><div class="titlepage"><div><div><h3 class="title" id="volume-status">13.5.4. Volume Status</h3></div></div></div><div class="para">
		When a snapshot operation is triggered by means of a recurring snapshot policy, a snapshot is skipped if a volume has remained inactive since its last snapshot was taken. A volume is considered to be inactive if it is either detached or attached to a VM that is not running. CloudStack ensures that at least one snapshot is taken since the volume last became inactive.
	</div><div class="para">
		When a snapshot is taken manually, a snapshot is always created regardless of whether a volume has been active or not.
	</div></div><div xml:lang="pt-BR" class="section" id="snapshot-restore" lang="pt-BR"><div class="titlepage"><div><div><h3 class="title" id="snapshot-restore">13.5.5. Snapshot Restore</h3></div></div></div><div class="para">
		There are two paths to restoring snapshots. Users can create a volume from the snapshot. The volume can then be mounted to a VM and files recovered as needed. Alternatively, a template may be created from the snapshot of a root disk. The user can then boot a VM from this template to effect recovery of the root disk.
	</div></div></div></div><div xml:lang="pt-BR" class="chapter" id="work-with-usage" lang="pt-BR"><div class="titlepage"><div><div><h2 class="title">Capítulo 14. Working with Usage</h2></div></div></div><div class="toc"><dl><dt><span class="section"><a href="#configure-usage-server">14.1. Configuring the Usage Server</a></span></dt><dt><span class="section"><a href="#set-usage-limit">14.2. Setting Usage Limits</a></span></dt><dt><span class="section"><a href="#globally-configured-limits">14.3. Globally Configured Limits</a></span></dt><dt><span class="section"><a href="#default-account-resource-limit">14.4. Default Account Resource Limits</a></span></dt><dt><span class="section"><a href="#per-domain-limits">14.5. Per-Domain Limits</a></span></dt></dl></div><div class="para">
		The Usage Server is an optional, separately-installed part of CloudStack that provides aggregated usage records which you can use to create billing integration for CloudStack. The Usage Server works by taking data from the events log and creating summary usage records that you can access using the listUsageRecords API call.
	</div><div class="para">
		The usage records show the amount of resources, such as VM run time or template storage space, consumed by guest instances.
	</div><div class="para">
		The Usage Server runs at least once per day. It can be configured to run multiple times per day.
	</div><div xml:lang="pt-BR" class="section" id="configure-usage-server" lang="pt-BR"><div class="titlepage"><div><div><h2 class="title" id="configure-usage-server">14.1. Configuring the Usage Server</h2></div></div></div><div class="para">
		To configure the usage server:
	</div><div class="orderedlist"><ol><li class="listitem"><div class="para">
				Be sure the Usage Server has been installed. This requires extra steps beyond just installing the CloudStack software. See Installing the Usage Server (Optional) in the Advanced Installation Guide.
			</div></li><li class="listitem"><div class="para">
				Faça login na interface de usuário do CloudStack como administrador.
			</div></li><li class="listitem"><div class="para">
				Click Global Settings.
			</div></li><li class="listitem"><div class="para">
				In Search, type usage. Find the configuration parameter that controls the behavior you want to set. See the table below for a description of the available parameters.
			</div></li><li class="listitem"><div class="para">
				In Actions, click the Edit icon.
			</div></li><li class="listitem"><div class="para">
				Type the desired value and click the Save icon.
			</div></li><li class="listitem"><div class="para">
				Restart the Management Server (as usual with any global configuration change) and also the Usage Server:
			</div><pre class="programlisting"><span class="perl_Comment"># service cloudstack-management restart</span><span class="perl_Comment"></span>
<span class="perl_Comment"></span><span class="perl_Comment"># service cloudstack-usage restart</span><span class="perl_Comment"></span>
<span class="perl_Comment"></span></pre></li></ol></div><div class="para">
		The following table shows the global configuration settings that control the behavior of the Usage Server.
	</div><div class="informaltable"><table border="1"><colgroup><col width="50%" /><col width="50%" /></colgroup><thead><tr><th align="left">
						<div class="para">
							Parameter Name
						</div>
					</th><th align="left">
						<div class="para">
							DescriÃ§Ã£o
						</div>
					</th></tr></thead><tbody><tr><td align="left">
						<div class="para">
							enable.usage.server
						</div>
					</td><td align="left">
						<div class="para">
							Whether the Usage Server is active.
						</div>
					</td></tr><tr><td align="left">
						<div class="para">
							usage.aggregation.timezone
						</div>
					</td><td align="left">
						<div class="para">
							Time zone of usage records. Set this if the usage records and daily job execution are in different time zones. For example, with the following settings, the usage job will run at PST 00:15 and generate usage records for the 24 hours from 00:00:00 GMT to 23:59:59 GMT:
						</div>
						 
<pre class="programlisting">usage.stats.job.exec.time = 00:15	
usage.execution.timezone = PST
usage.aggregation.timezone = GMT
</pre>
						 <div class="para">
							Valid values for the time zone are specified in <a class="xref" href="#time-zones">Apêndice A, <em>Time Zones</em></a>
						</div>
						 <div class="para">
							Default: GMT
						</div>

					</td></tr><tr><td align="left">
						<div class="para">
							usage.execution.timezone
						</div>
					</td><td align="left">
						<div class="para">
							The time zone of usage.stats.job.exec.time. Valid values for the time zone are specified in <a class="xref" href="#time-zones">Apêndice A, <em>Time Zones</em></a>
						</div>
						 <div class="para">
							Default: The time zone of the management server.
						</div>

					</td></tr><tr><td align="left">
						<div class="para">
							usage.sanity.check.interval
						</div>
					</td><td align="left">
						<div class="para">
							The number of days between sanity checks. Set this in order to periodically search for records with erroneous data before issuing customer invoices. For example, this checks for VM usage records created after the VM was destroyed, and similar checks for templates, volumes, and so on. It also checks for usage times longer than the aggregation range. If any issue is found, the alert ALERT_TYPE_USAGE_SANITY_RESULT = 21 is sent.
						</div>
					</td></tr><tr><td align="left">
						<div class="para">
							usage.stats.job.aggregation.range
						</div>
					</td><td align="left">
						<div class="para">
							The time period in minutes between Usage Server processing jobs. For example, if you set it to 1440, the Usage Server will run once per day. If you set it to 600, it will run every ten hours. In general, when a Usage Server job runs, it processes all events generated since usage was last run.
						</div>
						 <div class="para">
							There is special handling for the case of 1440 (once per day). In this case the Usage Server does not necessarily process all records since Usage was last run. CloudStack assumes that you require processing once per day for the previous, complete day’s records. For example, if the current day is October 7, then it is assumed you would like to process records for October 6, from midnight to midnight. CloudStack assumes this “midnight to midnight” is relative to the usage.execution.timezone.
						</div>
						 <div class="para">
							Default: 1440
						</div>

					</td></tr><tr><td align="left">
						<div class="para">
							usage.stats.job.exec.time
						</div>
					</td><td align="left">
						<div class="para">
							The time when the Usage Server processing will start. It is specified in 24-hour format (HH:MM) in the time zone of the server, which should be GMT. For example, to start the Usage job at 10:30 GMT, enter “10:30”.
						</div>
						 <div class="para">
							If usage.stats.job.aggregation.range is also set, and its value is not 1440, then its value will be added to usage.stats.job.exec.time to get the time to run the Usage Server job again. This is repeated until 24 hours have elapsed, and the next day's processing begins again at usage.stats.job.exec.time.
						</div>
						 <div class="para">
							Default: 00:15.
						</div>

					</td></tr></tbody></table></div><div class="para">
		For example, suppose that your server is in GMT, your user population is predominantly in the East Coast of the United States, and you would like to process usage records every night at 2 AM local (EST) time. Choose these settings:
	</div><div class="itemizedlist"><ul><li class="listitem"><div class="para">
				enable.usage.server = true
			</div></li><li class="listitem"><div class="para">
				usage.execution.timezone = America/New_York
			</div></li><li class="listitem"><div class="para">
				usage.stats.job.exec.time = 07:00. This will run the Usage job at 2:00 AM EST. Note that this will shift by an hour as the East Coast of the U.S. enters and exits Daylight Savings Time.
			</div></li><li class="listitem"><div class="para">
				usage.stats.job.aggregation.range = 1440
			</div></li></ul></div><div class="para">
		With this configuration, the Usage job will run every night at 2 AM EST and will process records for the previous day’s midnight-midnight as defined by the EST (America/New_York) time zone.
	</div><div class="note"><div class="admonition_header"><h2>Nota</h2></div><div class="admonition"><div class="para">
			Because the special value 1440 has been used for usage.stats.job.aggregation.range, the Usage Server will ignore the data between midnight and 2 AM. That data will be included in the next day's run.
		</div></div></div><div class="para">
	</div></div><div xml:lang="pt-BR" class="section" id="set-usage-limit" lang="pt-BR"><div class="titlepage"><div><div><h2 class="title" id="set-usage-limit">14.2. Setting Usage Limits</h2></div></div></div><div class="para">
		CloudStack provides several administrator control points for capping resource usage by users. Some of these limits are global configuration parameters. Others are applied at the ROOT domain and may be overridden on a per-account basis.
	</div><div class="para">
		Aggregate limits may be set on a per-domain basis. For example, you may limit a domain and all subdomains to the creation of 100 VMs.
	</div><div class="para">
		This section covers the following topics:
	</div></div><div xml:lang="pt-BR" class="section" id="globally-configured-limits" lang="pt-BR"><div class="titlepage"><div><div><h2 class="title" id="globally-configured-limits">14.3. Globally Configured Limits</h2></div></div></div><div class="para">
		In a zone, the guest virtual network has a 24 bit CIDR by default. This limits the guest virtual network to 254 running instances. It can be adjusted as needed, but this must be done before any instances are created in the zone. For example, 10.1.1.0/22 would provide for ~1000 addresses.
	</div><div class="para">
		The following table lists limits set in the Global Configuration:
	</div><div class="informaltable"><table border="1"><colgroup><col width="50%" /><col width="50%" /></colgroup><thead><tr><th>
						<div class="para">
							Parameter Name
						</div>
					</th><th>
						<div class="para">
							Definition
						</div>
					</th></tr></thead><tbody><tr><td>
						<div class="para">
							max.account.public.ips
						</div>
					</td><td>
						<div class="para">
							Number of public IP addresses that can be owned by an account
						</div>
					</td></tr><tr><td>
						<div class="para">
							max.account.snapshots
						</div>
					</td><td>
						<div class="para">
							Number of snapshots that can exist for an account
						</div>
					</td></tr><tr><td>
						<div class="para">
							max.account.templates
						</div>
					</td><td>
						<div class="para">
							Number of templates that can exist for an account
						</div>
					</td></tr><tr><td>
						<div class="para">
							max.account.user.vms
						</div>
					</td><td>
						<div class="para">
							Number of virtual machine instances that can exist for an account
						</div>
					</td></tr><tr><td>
						<div class="para">
							max.account.volumes
						</div>
					</td><td>
						<div class="para">
							Number of disk volumes that can exist for an account
						</div>
					</td></tr><tr><td>
						<div class="para">
							max.template.iso.size
						</div>
					</td><td>
						<div class="para">
							Maximum size for a downloaded template or ISO in GB
						</div>
					</td></tr><tr><td>
						<div class="para">
							max.volume.size.gb
						</div>
					</td><td>
						<div class="para">
							Maximum size for a volume in GB
						</div>
					</td></tr><tr><td>
						<div class="para">
							network.throttling.rate
						</div>
					</td><td>
						<div class="para">
							Default data transfer rate in megabits per second allowed per user (supported on XenServer)
						</div>
					</td></tr><tr><td>
						<div class="para">
							snapshot.max.hourly
						</div>
					</td><td>
						<div class="para">
							Maximum recurring hourly snapshots to be retained for a volume. If the limit is reached, early snapshots from the start of the hour are deleted so that newer ones can be saved. This limit does not apply to manual snapshots. If set to 0, recurring hourly snapshots can not be scheduled
						</div>
					</td></tr><tr><td>
						<div class="para">
							snapshot.max.daily
						</div>
					</td><td>
						<div class="para">
							Maximum recurring daily snapshots to be retained for a volume. If the limit is reached, snapshots from the start of the day are deleted so that newer ones can be saved. This limit does not apply to manual snapshots. If set to 0, recurring daily snapshots can not be scheduled
						</div>
					</td></tr><tr><td>
						<div class="para">
							snapshot.max.weekly
						</div>
					</td><td>
						<div class="para">
							Maximum recurring weekly snapshots to be retained for a volume. If the limit is reached, snapshots from the beginning of the week are deleted so that newer ones can be saved. This limit does not apply to manual snapshots. If set to 0, recurring weekly snapshots can not be scheduled
						</div>
					</td></tr><tr><td>
						<div class="para">
							snapshot.max.monthly
						</div>
					</td><td>
						<div class="para">
							Maximum recurring monthly snapshots to be retained for a volume. If the limit is reached, snapshots from the beginning of the month are deleted so that newer ones can be saved. This limit does not apply to manual snapshots. If set to 0, recurring monthly snapshots can not be scheduled.
						</div>
					</td></tr></tbody></table></div><div class="para">
		To modify global configuration parameters, use the global configuration screen in the CloudStack UI. See Setting Global Configuration Parameters
	</div></div><div xml:lang="pt-BR" class="section" id="default-account-resource-limit" lang="pt-BR"><div class="titlepage"><div><div><h2 class="title" id="default-account-resource-limit">14.4. Default Account Resource Limits</h2></div></div></div><div class="para">
		You can limit resource use by accounts. The default limits are set by using global configuration parameters, and they affect all accounts within a cloud. The relevant parameters are those beginning with max.account, for example: max.account.snapshots.
	</div><div class="para">
		To override a default limit for a particular account, set a per-account resource limit.
	</div><div class="orderedlist"><ol><li class="listitem"><div class="para">
				Log in to the CloudStack UI.
			</div></li><li class="listitem"><div class="para">
				In the left navigation tree, click Accounts.
			</div></li><li class="listitem"><div class="para">
				Select the account you want to modify. The current limits are displayed. A value of -1 shows that there is no limit in place.
			</div></li><li class="listitem"><div class="para">
				Click the Edit button.
				<span class="inlinemediaobject"><img src="./images/edit-icon.png" alt="editbutton.png: edits the settings" /></span>
			</div></li></ol></div></div><div xml:lang="pt-BR" class="section" id="per-domain-limits" lang="pt-BR"><div class="titlepage"><div><div><h2 class="title" id="per-domain-limits">14.5. Per-Domain Limits</h2></div></div></div><div class="para">
		CloudStack allows the configuration of limits on a domain basis. With a domain limit in place, all users still have their account limits. They are additionally limited, as a group, to not exceed the resource limits set on their domain. Domain limits aggregate the usage of all accounts in the domain as well as all accounts in all subdomains of that domain. Limits set at the root domain level apply to the sum of resource usage by the accounts in all domains and sub-domains below that root domain.
	</div><div class="para">
		To set a domain limit:
	</div><div class="orderedlist"><ol><li class="listitem"><div class="para">
				Log in to the CloudStack UI.
			</div></li><li class="listitem"><div class="para">
				In the left navigation tree, click Domains.
			</div></li><li class="listitem"><div class="para">
				Select the domain you want to modify. The current domain limits are displayed. A value of -1 shows that there is no limit in place.
			</div></li><li class="listitem"><div class="para">
				Click the Edit button
				<span class="inlinemediaobject"><img src="./images/edit-icon.png" alt="editbutton.png: edits the settings." /></span>
			</div></li></ol></div></div></div><div xml:lang="pt-BR" class="chapter" id="networks" lang="pt-BR"><div class="titlepage"><div><div><h2 class="title">Capítulo 15. Gerenciando redes e tráfego</h2></div></div></div><div class="toc"><dl><dt><span class="section"><a href="#guest-traffic">15.1. Tráfego de hóspedes</a></span></dt><dt><span class="section"><a href="#networking-in-a-pod">15.2. Rede em um pod</a></span></dt><dt><span class="section"><a href="#networking-in-a-zone">15.3. Rede em uma zona</a></span></dt><dt><span class="section"><a href="#basic-zone-physical-network-configuration">15.4. Configuração de rede física de zona básica</a></span></dt><dt><span class="section"><a href="#advanced-zone-physical-network-configuration">15.5. Configuração de rede física de zona avançada</a></span></dt><dd><dl><dt><span class="section"><a href="#configure-guest-traffic-in-advanced-zone">15.5.1. Configure o tráfego hóspede na zona avançada</a></span></dt><dt><span class="section"><a href="#configure-public-traffic-in-an-advanced-zone">15.5.2. Configure o tráfego público na zona avançada</a></span></dt></dl></dd><dt><span class="section"><a href="#using-multiple-guest-networks">15.6. Usando múltiplas redes hóspedes</a></span></dt><dd><dl><dt><span class="section"><a href="#add-additional-guest-network">15.6.1. Adicionando uma rede hóspede adicional</a></span></dt><dt><span class="section"><a href="#change-network-offering-on-guest-network">15.6.2. Alterando a oferta de rede em uma rede hóspede</a></span></dt></dl></dd><dt><span class="section"><a href="#security-groups">15.7. Grupos de segurança</a></span></dt><dd><dl><dt><span class="section"><a href="#about-security-groups">15.7.1. About Security Groups</a></span></dt><dt><span class="section"><a href="#add-security-group">15.7.2. Adicionando um grupo de segurança</a></span></dt><dt><span class="section"><a href="#security-groups-advanced-zones">15.7.3. Security Groups in Advanced Zones (KVM Only)</a></span></dt><dt><span class="section"><a href="#enable-security-groups">15.7.4. Habilitando grupos de segurança</a></span></dt><dt><span class="section"><a href="#add-ingress-egress-rules">15.7.5. Adicionando regras de ingresso e egresso a um grupo de segurança</a></span></dt></dl></dd><dt><span class="section"><a href="#external-firewalls-and-load-balancers">15.8. Firewalls e balanceadores de carga externos</a></span></dt><dd><dl><dt><span class="section"><a href="#using-netscaler-load-balancers">15.8.1. Sobre a utilização do balanceador de carga NetScaler</a></span></dt><dt><span class="section"><a href="#configure-snmp-rhel">15.8.2. Configuring SNMP Community String on a RHEL Server</a></span></dt><dt><span class="section"><a href="#initial-setup-of-external-firewalls-loadbalancer">15.8.3. Configuração inicial de firewalls e balanceadores de carga externos</a></span></dt><dt><span class="section"><a href="#ongoing-config-of-external-firewalls-ld">15.8.4. Configuração continuada de firewalls e balanceadores de carga externos</a></span></dt><dt><span class="section"><a href="#autoscale">15.8.5. Configuring AutoScale</a></span></dt></dl></dd><dt><span class="section"><a href="#load-balancer-rules">15.9. Regras de balanceamento de carga</a></span></dt><dd><dl><dt><span class="section"><a href="#add-load-balancer-rule">15.9.1. Adding a Load Balancer Rule</a></span></dt><dt><span class="section"><a href="#sticky-session-policies-for-lb-rules">15.9.2. Sticky Session Policies for Load Balancer Rules</a></span></dt></dl></dd><dt><span class="section"><a href="#guest-ip-ranges">15.10. Guest IP Ranges</a></span></dt><dt><span class="section"><a href="#acquire-new-ip-address">15.11. Obtendo um novo endereço IP</a></span></dt><dt><span class="section"><a href="#release-ip-address">15.12. Liberando um endereço IP</a></span></dt><dt><span class="section"><a href="#static-nat">15.13. NAT estática</a></span></dt><dd><dl><dt><span class="section"><a href="#enable-disable-static-nat">15.13.1. Habilitando ou desabilitando NAT estática</a></span></dt></dl></dd><dt><span class="section"><a href="#ip-forwarding-firewalling">15.14. Encaminhamento de IP e firewall</a></span></dt><dd><dl><dt><span class="section"><a href="#egress-firewall-rule">15.14.1. Creating Egress Firewall Rules in an Advanced Zone</a></span></dt><dt><span class="section"><a href="#firewall-rules">15.14.2. Regras de firewall</a></span></dt><dt><span class="section"><a href="#port-forwarding">15.14.3. Encaminhamento de Porta</a></span></dt></dl></dd><dt><span class="section"><a href="#ip-load-balancing">15.15. Balanceamento de carga de IP</a></span></dt><dt><span class="section"><a href="#dns-dhcp">15.16. DNS e DHCP</a></span></dt><dt><span class="section"><a href="#vpn">15.17. VPN</a></span></dt><dd><dl><dt><span class="section"><a href="#configure-vpn">15.17.1. Configurando VPN</a></span></dt><dt><span class="section"><a href="#using-vpn-with-windows">15.17.2. Usando VPN com Windows</a></span></dt><dt><span class="section"><a href="#using-vpn-with-mac">15.17.3. Using VPN with Mac OS X</a></span></dt><dt><span class="section"><a href="#site-to-site-vpn">15.17.4. Configurando uma conexão VPN Site-to-Site</a></span></dt></dl></dd><dt><span class="section"><a href="#inter-vlan-routing">15.18. About Inter-VLAN Routing</a></span></dt><dt><span class="section"><a href="#configure-vpc">15.19. Configuring a Virtual Private Cloud</a></span></dt><dd><dl><dt><span class="section"><a href="#vpc">15.19.1. About Virtual Private Clouds</a></span></dt><dt><span class="section"><a href="#add-vpc">15.19.2. Adding a Virtual Private Cloud</a></span></dt><dt><span class="section"><a href="#add-tier">15.19.3. Adding Tiers</a></span></dt><dt><span class="section"><a href="#configure-acl">15.19.4. Configuring Access Control List</a></span></dt><dt><span class="section"><a href="#add-gateway-vpc">15.19.5. Adicionando um gateway privado a uma VPC</a></span></dt><dt><span class="section"><a href="#add-vm-to-tier">15.19.6. Implantando máquinas virtuais na camada</a></span></dt><dt><span class="section"><a href="#acquire-new-ip-for-vpc">15.19.7. Obtendo um novo endereço IP para uma VPC</a></span></dt><dt><span class="section"><a href="#release-ip-for-vpc">15.19.8. Liberando um endereço IP atribuído a uma VPC</a></span></dt><dt><span class="section"><a href="#enable-disable-static-nat-vpc">15.19.9. Habilitando ou desabilitando NAT estática em uma VPC</a></span></dt><dt><span class="section"><a href="#add-loadbalancer-rule-vpc">15.19.10. Adicionando regras de balanceamento de carga em uma VPC</a></span></dt><dt><span class="section"><a href="#add-portforward-vpc">15.19.11. Adicionando uma regra de encaminhamento de porta em uma VPC</a></span></dt><dt><span class="section"><a href="#remove-tier">15.19.12. Removing Tiers</a></span></dt><dt><span class="section"><a href="#remove-vpc">15.19.13. Editing, Restarting, and Removing a Virtual Private Cloud</a></span></dt></dl></dd><dt><span class="section"><a href="#persistent-network">15.20. Persistent Networks</a></span></dt><dd><dl><dt><span class="section"><a href="#persistent-network-consideration">15.20.1. Persistent Network Considerations</a></span></dt><dt><span class="section"><a href="#set-up-persistent-network">15.20.2. Creating a Persistent Guest Network</a></span></dt></dl></dd></dl></div><div class="para">
		Em um ambiente CloudStack, máquinas virtuais hóspedes podem comunicar-se entre si usando uma infraestrutura compartilhada com segurança e com a percepção do usuário que os hóspedes têm uma rede privada. O roteador virtual do CloudStack é o principal componente a fornecer recursos de rede para o tráfego de hóspedes.
	</div><div xml:lang="pt-BR" class="section" id="guest-traffic" lang="pt-BR"><div class="titlepage"><div><div><h2 class="title" id="guest-traffic">15.1. Tráfego de hóspedes</h2></div></div></div><div class="para">
		Uma rede pode transportar tráfego de hóspedes somente entre máquinas virtuais em uma zona. Máquinas virtuais em diferentes zonas não podem se comunicar usando seus endereços IP; elas devem se comunicar através de roteamento em uma rede IP pública.
	</div><div class="para">
		This figure illustrates a typical guest traffic setup:
	</div><div class="mediaobject"><img src="./images/guest-traffic-setup.png" width="444" alt="Depicts a guest traffic setup." /></div><div class="para">
		O servidor de gerenciamento automaticamente cria um roteador virtual para cada rede. Um roteador virtual é uma máquina virtual especial que executa nos hosts. Cada roteador virtual tem três interfaces de rede. Seu interface eth0 serve como o gateway para o tráfego hóspede e tem o endereço IP 10.1.1.1. Seu interface eth1 é usado pelo sistema para configurar o roteador virtual. A seu interface eth2 é assinalado um endereço IP público para tráfego público.
	</div><div class="para">
		O roteador virtual provê DHCP e automaticamente irá assinalar um endereço IP para cada máquina virtual no intervalo de IPs assinalado para a rede. O usuário pode manualmente reconfigurar máquinas virtuais hóspedes para utilizarem diferentes endereços IP.
	</div><div class="para">
		NAT da origem é automaticamente configurado no roteador virtual para encaminhar tráfego de saída para todas as máquinas virtuais hóspedes
	</div></div><div xml:lang="pt-BR" class="section" id="networking-in-a-pod" lang="pt-BR"><div class="titlepage"><div><div><h2 class="title" id="networking-in-a-pod">15.2. Rede em um pod</h2></div></div></div><div class="para">
		The figure below illustrates network setup within a single pod. The hosts are connected to a pod-level switch. At a minimum, the hosts should have one physical uplink to each switch. Bonded NICs are supported as well. The pod-level switch is a pair of redundant gigabit switches with 10 G uplinks.
	</div><div class="mediaobject"><img src="./images/network-singlepod.png" width="444" alt="networksinglepod.png: diagram showing logical view of network in a pod" /></div><div class="para">
		Servidores são conectados como se segue:
	</div><div class="itemizedlist"><ul><li class="listitem"><div class="para">
				Equipamentos de storage são conectados somente à rede que transporta tráfego de gerenciamento.
			</div></li><li class="listitem"><div class="para">
				Hosts são conectados a redes tanto para tráfego de gerência quanto para tráfego público.
			</div></li><li class="listitem"><div class="para">
				Hosts também são conectados a uma ou mais redes que transportam tráfego de hóspedes.
			</div></li></ul></div><div class="para">
		Recomendamos o uso de múltiplas placas Ethernet físicas para implementar cada interface de rede, assim como switch fabrics redundantes, para maximizar o throughput e aumentar a confiabilidade.
	</div></div><div xml:lang="pt-BR" class="section" id="networking-in-a-zone" lang="pt-BR"><div class="titlepage"><div><div><h2 class="title" id="networking-in-a-zone">15.3. Rede em uma zona</h2></div></div></div><div class="para">
		The following figure illustrates the network setup within a single zone.
	</div><div class="mediaobject"><img src="./images/network-setup-zone.png" width="444" alt="networksetupzone.png: Depicts network setup in a single zone" /></div><div class="para">
		Um firewall para tráfego de gerência opera em modo NAT. Tipicamente à rede é assinalado um endereço IP do espaço de endereços classe B 192.168.0.0/16. A cada pod é assinalado um endereço IP no espaço de endereços classe C privado 192.168.*.0/24.
	</div><div class="para">
		Cada zona tem seu próprio conjunto de endereços IP públicos. Endereços IP públicos de diferentes zonas não se sobrepõem.
	</div></div><div xml:lang="pt-BR" class="section" id="basic-zone-physical-network-configuration" lang="pt-BR"><div class="titlepage"><div><div><h2 class="title" id="basic-zone-physical-network-configuration">15.4. Configuração de rede física de zona básica</h2></div></div></div><div class="para">
		Em uma rede básica, a configuração da rede física é bastante simples. Na maioria dos casos, você precisa somente configurar uma rede hóspede para transportar tráfego que é gerado pelas máquinas virtuais hóspedes. Quando você adiciona a primeira zona ao CloudStack, você configura a rede hóspede através das telas Add Zone.
	</div></div><div xml:lang="pt-BR" class="section" id="advanced-zone-physical-network-configuration" lang="pt-BR"><div class="titlepage"><div><div><h2 class="title" id="advanced-zone-physical-network-configuration">15.5. Configuração de rede física de zona avançada</h2></div></div></div><div class="para">
		Em uma zona que usa rede avançada, você precisa informar ao servidor de gerenciamento como a rede física é configurada para transportar diferentes tipos de tráfego com isolamento.
	</div><div xml:lang="pt-BR" class="section" id="configure-guest-traffic-in-advanced-zone" lang="pt-BR"><div class="titlepage"><div><div><h3 class="title" id="configure-guest-traffic-in-advanced-zone">15.5.1. Configure o tráfego hóspede na zona avançada</h3></div></div></div><div class="para">
		Nestes passos se supõe que você já está logado na interface de usuário do CloudStack. Para configurar a base da rede hóspede:
	</div><div class="orderedlist"><ol><li class="listitem"><div class="para">
				No painel de navegação à esquerda, selecione Infrastructure. Em Zones, clique View More, então clique a zona à qual você deseja adicionar uma rede.
			</div></li><li class="listitem"><div class="para">
				Clique na aba Network.
			</div></li><li class="listitem"><div class="para">
				Clique em Add guest network.
			</div><div class="para">
				A janela Add guest network é apresentada:
			</div><div class="mediaobject"><img src="./images/add-guest-network.png" alt="networksetupzone.png: Depicts network setup in a single zone" /></div></li><li class="listitem"><div class="para">
				Forneça as seguintes informações:
			</div><div class="itemizedlist"><ul><li class="listitem"><div class="para">
						<span class="bold bold"><strong>Name</strong></span>. O nome da rede. Isto será visível pelo usuário
					</div></li><li class="listitem"><div class="para">
						<span class="bold bold"><strong>Display Text</strong></span>: A descrição da rede. Isto será visível pelo usuário
					</div></li><li class="listitem"><div class="para">
						<span class="bold bold"><strong>Zone</strong></span>: A zona na qual você está configurando a rede hóspede.
					</div></li><li class="listitem"><div class="para">
						<span class="bold bold"><strong>Network offering</strong></span>: Se o administrador configurou múltiplas ofertas de rede, selecione a que você deseja usar para esta rede
					</div></li><li class="listitem"><div class="para">
						<span class="bold bold"><strong>Guest Gateway</strong></span>: O gateway que os hóspedes devem usar
					</div></li><li class="listitem"><div class="para">
						<span class="bold bold"><strong>Guest Netmask</strong></span>: A máscara de rede em uso na subnet que os hóspedes utilizarão
					</div></li></ul></div></li><li class="listitem"><div class="para">
				Clique em OK.
			</div></li></ol></div></div><div xml:lang="pt-BR" class="section" id="configure-public-traffic-in-an-advanced-zone" lang="pt-BR"><div class="titlepage"><div><div><h3 class="title" id="configure-public-traffic-in-an-advanced-zone">15.5.2. Configure o tráfego público na zona avançada</h3></div></div></div><div class="para">
		Em uma zona que usa rede avançada, você precisa configurar pelo menos um intervalo de endereços IP para tráfego de Internet.
	</div></div></div><div xml:lang="pt-BR" class="section" id="using-multiple-guest-networks" lang="pt-BR"><div class="titlepage"><div><div><h2 class="title" id="using-multiple-guest-networks">15.6. Usando múltiplas redes hóspedes</h2></div></div></div><div class="para">
		Em zonas que usam rede avançada, redes adicionais para tráfego hóspede podem ser adicionadas a qualquer tempo após a instalação inicial. Você pode também customizar o nome de domínio associado com a rede especificando um sufixo DNS para cada rede.
	</div><div class="para">
		As redes de uma máquina virtual são definidas em tempo de criação da máquina virtual. Uma máquina virtual não pode adicionar ou remover redes após ter sido criada, embora o usuário possa remover no hóspede o endereço IP da NIC de uma rede específica.
	</div><div class="para">
		Cada máquina virtual tem somente uma rede default. A resposta do DHCP do roteador virtual irá determinar o default gateway do hóspede como aquele da rede default. Múltiplas redes non-default podem ser adicionadas a um hóspede em adição à rede default, única, requerida. O administrador pode controlar quais redes são disponíveis como rede default.
	</div><div class="para">
		Redes adicionais podem estar disponíveis para todas as contas ou serem assinaladas a uma conta específica. Redes que estão disponíveis para todas as contas são zone-wide. Qualquer usuário com acesso à zona pode criar uma máquina virtual com acesso àquela rede. Estas redes zone-wide proveem pequeno ou nenhum isolamento entre hóspedes. Redes que são assinaladas a contas específicas proveem isolamento robusto.
	</div><div xml:lang="pt-BR" class="section" id="add-additional-guest-network" lang="pt-BR"><div class="titlepage"><div><div><h3 class="title" id="add-additional-guest-network">15.6.1. Adicionando uma rede hóspede adicional</h3></div></div></div><div class="orderedlist"><ol><li class="listitem"><div class="para">
				Faça login na interface de usuário do CloudStack como administrador ou usuário final.
			</div></li><li class="listitem"><div class="para">
				Na barra de navegação à esquerda, selecione Network.
			</div></li><li class="listitem"><div class="para">
				Clique em Add guest network. Forneça as seguintes informações:
			</div><div class="itemizedlist"><ul><li class="listitem"><div class="para">
						<span class="bold bold"><strong>Name</strong></span>. O nome da rede. Isto será visível pelo usuário.
					</div></li><li class="listitem"><div class="para">
						<span class="bold bold"><strong>Display Text</strong></span>: A descrição da rede. Isto será visível pelo usuário.
					</div></li><li class="listitem"><div class="para">
						<span class="bold bold"><strong>Zone</strong></span>. O nome da zona a qual esta rede se aplica. Cada zona é um domínio de broadcast, e portanto cada zona tem um diferente intervalo de IP para a rede hóspede. O administrador deve configurar o intervalo de IP para cada zona.
					</div></li><li class="listitem"><div class="para">
						<span class="bold bold"><strong>Network offering</strong></span>: Se o administrador configurou múltiplas ofertas de rede, selecione a que você deseja usar para esta rede.
					</div></li><li class="listitem"><div class="para">
						<span class="bold bold"><strong>Guest Gateway</strong></span>: O gateway que os hóspedes devem usar.
					</div></li><li class="listitem"><div class="para">
						<span class="bold bold"><strong>Guest Netmask</strong></span>: A máscara de rede em uso na subnet que os hóspedes utilizarão.
					</div></li></ul></div></li><li class="listitem"><div class="para">
				Clique em Create.
			</div></li></ol></div></div><div xml:lang="pt-BR" class="section" id="change-network-offering-on-guest-network" lang="pt-BR"><div class="titlepage"><div><div><h3 class="title" id="change-network-offering-on-guest-network">15.6.2. Alterando a oferta de rede em uma rede hóspede</h3></div></div></div><div class="para">
		Um usuário ou administrador pode alterar a oferta de rede associada com uma rede hóspede associada.
	</div><div class="itemizedlist"><ul><li class="listitem"><div class="para">
				Faça login na interface de usuário do CloudStack como administrador ou usuário final.
			</div></li><li class="listitem"><div class="para">
				If you are changing from a network offering that uses the CloudStack virtual router to one that uses external devices as network service providers, you must first stop all the VMs on the network.  <span>See <a class="xref" href="#stopping-and-starting-vms">Seção 10.6, “Stopping and Starting VMs”</a>.</span>
			</div></li><li class="listitem"><div class="para">
				Na barra de navegação à esquerda, selecione Network.
			</div></li><li class="listitem"><div class="para">
				Click the name of the network you want to modify.
			</div></li><li class="listitem"><div class="para">
				In the Details tab, click Edit.
				<span class="inlinemediaobject"><img src="./images/edit-icon.png" alt="EditButton.png: button to edit a network" /></span>
			</div></li><li class="listitem"><div class="para">
				Em Network Offering, escolha a nova oferta de rede, então clique em Apply.
			</div></li><li class="listitem"><div class="para">
				A prompt is displayed asking whether you want to keep the existing CIDR. This is to let you know that if you change the network offering, the CIDR will be affected. Choose No to proceed with the change.
			</div></li><li class="listitem"><div class="para">
				Wait for the update to complete. Don’t try to restart VMs until the network change is complete.
			</div></li><li class="listitem"><div class="para">
				If you stopped any VMs, restart them.
			</div></li></ul></div></div></div><div xml:lang="pt-BR" class="section" id="security-groups" lang="pt-BR"><div class="titlepage"><div><div><h2 class="title" id="security-groups">15.7. Grupos de segurança</h2></div></div></div><div xml:lang="pt-BR" class="section" id="about-security-groups" lang="pt-BR"><div class="titlepage"><div><div><h3 class="title" id="about-security-groups">15.7.1. About Security Groups</h3></div></div></div><div class="para">
		Security groups provide a way to isolate traffic to VMs. A security group is a group of VMs that filter their incoming and outgoing traffic according to a set of rules, called ingress and egress rules. These rules filter network traffic according to the IP address that is attempting to communicate with the VM. Security groups are particularly useful in zones that use basic networking, because there is a single guest network for all guest VMs. In advanced zones, security groups are supported only on the KVM hypervisor.
	</div><div class="note"><div class="admonition_header"><h2>Nota</h2></div><div class="admonition"><div class="para">
			In a zone that uses advanced networking, you can instead define multiple guest networks to isolate traffic to VMs.
		</div></div></div><div class="para">
	</div><div class="para">
		Each CloudStack account comes with a default security group that denies all inbound traffic and allows all outbound traffic. The default security group can be modified so that all new VMs inherit some other desired set of rules.
	</div><div class="para">
		Any CloudStack user can set up any number of additional security groups. When a new VM is launched, it is assigned to the default security group unless another user-defined security group is specified. A VM can be a member of any number of security groups. Once a VM is assigned to a security group, it remains in that group for its entire lifetime; you can not move a running VM from one security group to another.
	</div><div class="para">
		You can modify a security group by deleting or adding any number of ingress and egress rules. When you do, the new rules apply to all VMs in the group, whether running or stopped.
	</div><div class="para">
		If no ingress rules are specified, then no traffic will be allowed in, except for responses to any traffic that has been allowed out through an egress rule.
	</div></div><div xml:lang="pt-BR" class="section" id="add-security-group" lang="pt-BR"><div class="titlepage"><div><div><h3 class="title" id="add-security-group">15.7.2. Adicionando um grupo de segurança</h3></div></div></div><div class="para">
		Um usuário ou administrador pode definir um novo grupo de segurança.
	</div><div class="orderedlist"><ol><li class="listitem"><div class="para">
				Faça login na interface de usuário do CloudStack como administrador ou usuário final.
			</div></li><li class="listitem"><div class="para">
				Na barra de navegação à esquerda, selecione Network.
			</div></li><li class="listitem"><div class="para">
				Em Select view, selecione Security Groups.
			</div></li><li class="listitem"><div class="para">
				Clique em Add Security Group.
			</div></li><li class="listitem"><div class="para">
				Forneça um nome e descrição.
			</div></li><li class="listitem"><div class="para">
				Clique em OK.
			</div><div class="para">
				O novo grupo de segurança aparece na aba Security Groups Details.
			</div></li><li class="listitem"><div class="para">
				Para tornar útil o grupo de segurança, continue em Adicionando regras de ingresso e egresso a um grupo de segurança.
			</div></li></ol></div></div><div xml:lang="pt-BR" class="section" id="security-groups-advanced-zones" lang="pt-BR"><div class="titlepage"><div><div><h3 class="title" id="security-groups-advanced-zones">15.7.3. Security Groups in Advanced Zones (KVM Only)</h3></div></div></div><div class="para">
		CloudStack provides the ability to use security groups to provide isolation between guests on a single shared, zone-wide network in an advanced zone where KVM is the hypervisor. Using security groups in advanced zones rather than multiple VLANs allows a greater range of options for setting up guest isolation in a cloud.
	</div><div class="formalpara"><h5 class="formalpara" id="idp21979976">Limitations</h5>
			The following are not supported for this feature:
		</div><div class="itemizedlist"><ul><li class="listitem"><div class="para">
				Two IP ranges with the same VLAN and different gateway or netmask in security group-enabled shared network.
			</div></li><li class="listitem"><div class="para">
				Two IP ranges with the same VLAN and different gateway or netmask in account-specific shared networks.
			</div></li><li class="listitem"><div class="para">
				Multiple VLAN ranges in security group-enabled shared network.
			</div></li><li class="listitem"><div class="para">
				Multiple VLAN ranges in account-specific shared networks.
			</div></li></ul></div><div class="para">
		Security groups must be enabled in the zone in order for this feature to be used.
	</div></div><div xml:lang="pt-BR" class="section" id="enable-security-groups" lang="pt-BR"><div class="titlepage"><div><div><h3 class="title" id="enable-security-groups">15.7.4. Habilitando grupos de segurança</h3></div></div></div><div class="para">
		In order for security groups to function in a zone, the security groups feature must first be enabled for the zone. The administrator can do this when creating a new zone, by selecting a network offering that includes security groups. The procedure is described in Basic Zone Configuration in the Advanced Installation Guide. The administrator can not enable security groups for an existing zone, only when creating a new zone.
	</div></div><div xml:lang="pt-BR" class="section" id="add-ingress-egress-rules" lang="pt-BR"><div class="titlepage"><div><div><h3 class="title" id="add-ingress-egress-rules">15.7.5. Adicionando regras de ingresso e egresso a um grupo de segurança</h3></div></div></div><div class="orderedlist"><ol><li class="listitem"><div class="para">
				Faça login na interface de usuário do CloudStack como administrador ou usuário final.
			</div></li><li class="listitem"><div class="para">
				Na barra de navegação à esquerda, selecione Network.
			</div></li><li class="listitem"><div class="para">
				Em Select view, selecione Security Groups, então clique no grupo de segurança que você deseja.
			</div></li><li class="listitem"><div class="para">
				Para adicionar uma regra regra de ingresso, clique na aba Ingress Rules e preencha os campos seguintes para especificar qual tráfego de rede é permitido em instâncias de máquinas virtuais neste grupo de segurança. Se nenhuma regra de ingresso é especificada, então nenhum tráfego será permitido entrar, exceto respostas a qualquer tráfego que tenha sido permitido sair por uma regra de egresso.
			</div><div class="itemizedlist"><ul><li class="listitem"><div class="para">
						<span class="bold bold"><strong>Add by CIDR/Account</strong></span>. Indica se a fonte do tráfego será definida pelo endereço IP (CIDR) ou por um grupo de segurança existente em uma conta do CloudStack (Account). Selecione Account se você deseja permitir tráfego de entrada oriundo de todas as máquinas virtuais em outro grupo de segurança
					</div></li><li class="listitem"><div class="para">
						<span class="bold bold"><strong>Protocol</strong></span>. O protocolo de rede que as fontes utilizarão para enviar tráfego ao grupo de segurança. TCP e UDP são usados tipicamente para intercâmbio de dados e comunicações de usuários finais. ICMP é usado tipicamente para enviar mensagens de erro e dados de monitoração de rede.
					</div></li><li class="listitem"><div class="para">
						<span class="bold bold"><strong>Start Port, End Port</strong></span>. (somente para TCP e UDP) Um intervalo de listening ports que são os destinos do tráfego entrante. Se você está abrindo uma única porta, use o mesmo número em ambos os campos.
					</div></li><li class="listitem"><div class="para">
						<span class="bold bold"><strong>ICMP Type, ICMP Code</strong></span>. (somente ICMP) O tipo de mensagem e o código de erro que serão aceitos.
					</div></li><li class="listitem"><div class="para">
						<span class="bold bold"><strong>CIDR</strong></span>. (Adição somente por CIDR) Para aceitar tráfego somente de endereços IP em um bloco de endereços específico, informe um CIDR ou uma lista de CIDRs separados por vírgulas. O CIDR é o endereço IP base do tráfego entrante. Por exemplo, 192.168.0.0/22. Para permitir todos os CIDRs, especifique 0.0.0.0/0.
					</div></li><li class="listitem"><div class="para">
						<span class="bold bold"><strong>Account, Security Group</strong></span>. (Adição somente por conta) Para aceitar somente tráfego de outro grupo de segurança, informe a conta do CloudStack e nome de um grupo de segurança que já esteja definido naquela conta. Para permitir tráfego entre máquinas virtuais no grupo de segurança que você está editando, informe o mesmo nome que você usou no passo 7.
					</div></li></ul></div><div class="para">
				O exemplo a seguir permite acesso HTTP entrante de qualquer lugar:
			</div><div class="mediaobject"><img src="./images/http-access.png" width="444" alt="httpaccess.png: allows inbound HTTP access from anywhere" /></div></li><li class="listitem"><div class="para">
				Para adicionar uma regra de egresso, clique na aba Egress Rules e preencha os campos seguintes para especificar qual tipo de tráfego de rede é permitido ser enviado de instâncias de máquinas virtuais neste grupo de segurança. Se nenhuma regra de egresso é especificada, então todo tráfego será permitido sair. Uma vez que regras de egresso são especificadas, os seguintes tipos de tráfego são permitidos sair: tráfego especificado regras de egresso; queries a servidores DNS e DHCP; e respostas a qualquer tráfego que tenha sido permitido entrar através de uma regra de ingresso
			</div><div class="itemizedlist"><ul><li class="listitem"><div class="para">
						<span class="bold bold"><strong>Add by CIDR/Account</strong></span>. Indica se o destino do tráfego será definido pelo endereço IP (CIDR) ou por um grupo de segurança existente em uma conta do CloudStack (Account). Selecione Account se você deseja permitir tráfego de saída destinado a todas as máquinas virtuais em outro grupo de segurança.
					</div></li><li class="listitem"><div class="para">
						<span class="bold bold"><strong>Protocol</strong></span>. O protocolo de rede que máquinas virtuais usarão para enviar tráfego de saída. TCP e UDP são usados tipicamente para intercâmbio de dados e comunicações de usuários finais. ICMP é usado tipicamente para enviar mensagens de erro e dados de monitoração de rede.
					</div></li><li class="listitem"><div class="para">
						<span class="bold bold"><strong>Start Port, End Port</strong></span>. (somente para TCP e UDP) Um intervalo de listening ports que são os destinos do tráfego sainte. Se você está abrindo uma única porta, use o mesmo número em ambos os campos.
					</div></li><li class="listitem"><div class="para">
						<span class="bold bold"><strong>ICMP Type, ICMP Code</strong></span>. (somente ICMP) O tipo de mensagem e o código de erro que serão enviados.
					</div></li><li class="listitem"><div class="para">
						<span class="bold bold"><strong>CIDR</strong></span>. (Adição somente por CIDR) Para enviar tráfego somente a endereços IP em um bloco de endereços específico, informe um CIDR ou uma lista de CIDRs separados por vírgulas. O CIDR é o endereço IP base do tráfego entrante. Por exemplo, 192.168.0.0/22. Para permitir todos os CIDRs, especifique 0.0.0.0/0.
					</div></li><li class="listitem"><div class="para">
						<span class="bold bold"><strong>Account, Security Group</strong></span>. (Adição somente por conta) Para permitir o envio de tráfego a outro grupo de segurança, informe a conta do CloudStack e nome de um grupo de segurança que já esteja definido naquela conta. Para permitir tráfego entre máquinas virtuais no grupo de segurança que você está editando, informe o nome do grupo.
					</div></li></ul></div></li><li class="listitem"><div class="para">
				Clique em Add.
			</div></li></ol></div></div></div><div xml:lang="pt-BR" class="section" id="external-firewalls-and-load-balancers" lang="pt-BR"><div class="titlepage"><div><div><h2 class="title" id="external-firewalls-and-load-balancers">15.8. Firewalls e balanceadores de carga externos</h2></div></div></div><div class="para">
		O CloudStack é capaz de substituir seu roteador virtual por um equipamento Juniper SRX externo e um balanceador de carga externo NetScaler ou F5 para serviços de gateway e balanceamento de carga. Neste caso, as máquinas virtuais usam o SRX como seu gateway.
	</div><div xml:lang="pt-BR" class="section" id="using-netscaler-load-balancers" lang="pt-BR"><div class="titlepage"><div><div><h3 class="title" id="using-netscaler-load-balancers">15.8.1. Sobre a utilização do balanceador de carga NetScaler</h3></div></div></div><div class="para">
		O Citrix NetScaler é suportado como um elemento externo de rede para balanceamento de carga em zonas que usam rede avançada (também chamadas zonas avançadas). Configure um balanceador de carga externo quando você quiser prover balanceamento de carga por outros meios que o roteador virtual provido pelo CloudStack.
	</div><div class="para">
		O NetScaler pode ser configurado em modo direto (fora do firewall). Ele deve ser adicionado antes que qualquer regra de balanceamento de carga seja implementada em máquinas virtuais da zona.
	</div><div class="para">
		O comportamento funcional do NetScaler com o CloudStack é o mesmo que é descrito na documentação do CloudStack para uso de um balanceador de carga externo F5. A única exceção é que o F5 suporta domínios de roteamento, e o NetScaler não. O NetScaler ainda não pode ser usado como um firewall.
	</div><div class="para">
		O Citrix NetScaler é oferecido em três variantes. A tabela a seguir sumariza como estas variantes são tratadas no CloudStack.
	</div><div class="informaltable"><table border="1"><colgroup><col width="33%" /><col width="33%" /><col width="33%" /></colgroup><thead><tr><th align="left">
						<div class="para">
							Tipo de NetScaler ADC
						</div>
					</th><th align="left">
						<div class="para">
							Descrição das capacidades
						</div>
					</th><th align="left">
						<div class="para">
							Recursos suportados no CloudStack
						</div>
					</th></tr></thead><tbody><tr><td align="left">
						<div class="para">
							MPX
						</div>
					</td><td align="left">
						<div class="para">
							Dispositivo físico. Capaz de inspeção profunda de pacotes. Pode atuar como application firewall e balanceador de carga
						</div>
					</td><td align="left">
						<div class="para">
							Em zonas avançadas, a funcionalidade de balanceador de carga é suportada sem limitações. Em zonas básicas, NAT estática, elastic IP (EIP), e elastic load balancing (ELB) também são providos
						</div>
					</td></tr><tr><td align="left">
						<div class="para">
							VPX
						</div>
					</td><td align="left">
						<div class="para">
							Dispositivo virtual. Pode ser executado como máquina virtual nos hipervisores XenServer, ESXi, e Hyper-V. Mesma funcionalidade que MPX
						</div>
					</td><td align="left">
						<div class="para">
							Suportado somente no ESXi. Mesmo suporte funcional que MPX. O CloudStack tratará VPX e MPX como o mesmo tipo de dispositivo
						</div>
					</td></tr><tr><td align="left">
						<div class="para">
							SDX
						</div>
					</td><td align="left">
						<div class="para">
							Dispositivo físico. Pode criar múltiplas instâncias VPX completamente isoladas em um único dispositivo para suportar uso por múltiplos hóspedes
						</div>
					</td><td align="left">
						<div class="para">
							O CloudStack irá dinamicamente aprovisionar, configurar, e gerenciar o ciclo de vida de instâncias VPX no SDX. Instâncias fornecidas são automaticamente adicionadas ao CloudStack – nenhuma configuração manual pelo administrador é requerida. Uma vez que uma instância VPX é adicionada ao CloudStack, ela é tratada da mesma forma que uma VPX em um host ESXi.
						</div>
					</td></tr></tbody></table></div></div><div xml:lang="pt-BR" class="section" id="configure-snmp-rhel" lang="pt-BR"><div class="titlepage"><div><div><h3 class="title" id="configure-snmp-rhel">15.8.2. Configuring SNMP Community String on a RHEL Server</h3></div></div></div><div class="para">
		The SNMP Community string is similar to a user id or password that provides access to a network device, such as router. This string is sent along with all SNMP requests. If the community string is correct, the device responds with the requested information. If the community string is incorrect, the device discards the request and does not respond.
	</div><div class="para">
		The NetScaler device uses SNMP to communicate with the VMs. You must install SNMP and configure SNMP Community string for a secure communication between the NetScaler device and the RHEL machine.
	</div><div class="orderedlist"><ol><li class="listitem"><div class="para">
				Ensure that you installed SNMP on RedHat. If not, run the following command:
			</div><pre class="screen">yum install net-snmp-utils</pre></li><li class="listitem"><div class="para">
				Edit the /etc/snmp/snmpd.conf file to allow the SNMP polling from the NetScaler device.
			</div><div class="orderedlist"><ol><li class="listitem"><div class="para">
						Map the community name into a security name (local and mynetwork, depending on where the request is coming from):
					</div><div class="note"><div class="admonition_header"><h2>Nota</h2></div><div class="admonition"><div class="para">
							Use a strong password instead of public when you edit the following table.
						</div></div></div><pre class="screen">#         sec.name   source        community
com2sec    local      localhost     public
com2sec   mynetwork   0.0.0.0       public</pre><div class="note"><div class="admonition_header"><h2>Nota</h2></div><div class="admonition"><div class="para">
							Setting to 0.0.0.0 allows all IPs to poll the NetScaler server.
						</div></div></div></li><li class="listitem"><div class="para">
						Map the security names into group names:
					</div><pre class="screen">#      group.name   sec.model  sec.name
group   MyRWGroup     v1         local
group   MyRWGroup     v2c        local
group   MyROGroup     v1        mynetwork
group   MyROGroup     v2c       mynetwork</pre></li><li class="listitem"><div class="para">
						Create a view to allow the groups to have the permission to:
					</div><pre class="screen">incl/excl subtree mask view all included .1</pre></li><li class="listitem"><div class="para">
						Grant access with different write permissions to the two groups to the view you created.
					</div><pre class="screen"># context     sec.model     sec.level     prefix     read     write     notif
  access      MyROGroup ""  any noauth     exact      all      none     none
  access      MyRWGroup ""  any noauth     exact      all      all      all</pre></li></ol></div></li><li class="listitem"><div class="para">
				Unblock SNMP in iptables.
			</div><pre class="screen">iptables -A INPUT -p udp --dport 161 -j ACCEPT</pre></li><li class="listitem"><div class="para">
				Start the SNMP service:
			</div><pre class="screen">service snmpd start</pre></li><li class="listitem"><div class="para">
				Ensure that the SNMP service is started automatically during the system startup:
			</div><pre class="screen">chkconfig snmpd on</pre></li></ol></div></div><div xml:lang="pt-BR" class="section" id="initial-setup-of-external-firewalls-loadbalancer" lang="pt-BR"><div class="titlepage"><div><div><h3 class="title" id="initial-setup-of-external-firewalls-loadbalancer">15.8.3. Configuração inicial de firewalls e balanceadores de carga externos</h3></div></div></div><div class="para">
		Quando a primeira máquina virtual é criada para uma nova conta, o CloudStack programa o firewall e o balanceador de carga externos para trabalhar com a máquina virtual. Os seguintes objetos são criados no firewall:
	</div><div class="itemizedlist"><ul><li class="listitem"><div class="para">
				Uma nova interface lógica para conectar à VLAN privada da conta. O IP da interface é sempre o primeiro IP da subnet privada da conta (e.g. 10.1.1.1).
			</div></li><li class="listitem"><div class="para">
				Uma regra NAT de origem que encaminha todo o tráfego sainte da VLAN privada da conta para a Internet pública, usando o endereço IP público da conta como o endereço de origem
			</div></li><li class="listitem"><div class="para">
				Um contador de filtro de firewall que registra o número de bytes do tráfego sainte da conta
			</div></li></ul></div><div class="para">
		Os seguintes objetos são criados no balanceador de carga:
	</div><div class="itemizedlist"><ul><li class="listitem"><div class="para">
				Uma nova VLAN que corresponde à VLAN na zona fornecida para a conta
			</div></li><li class="listitem"><div class="para">
				Um IP para a VLAN. Este é sempre o segundo IP da subnet privada da conta (e.g. 10.1.1.2).
			</div></li></ul></div></div><div xml:lang="pt-BR" class="section" id="ongoing-config-of-external-firewalls-ld" lang="pt-BR"><div class="titlepage"><div><div><h3 class="title" id="ongoing-config-of-external-firewalls-ld">15.8.4. Configuração continuada de firewalls e balanceadores de carga externos</h3></div></div></div><div class="para">
		Ações adicionais de usuários (e.g. configuração de um encaminhamento de porta) causará programação adicional do firewall e balanceador de carga. Um usuário pode requisitar endereços IP públicos adicionais e encaminhamento de tráfego recebido nestes IPs para máquinas virtuais específicas. Isto é executado através da habilitação de NAT estático para um endereço IP público, assinalando o IP a uma máquina virtual, e especificando um conjunto de protocolos e intervalos de portas a liberar. Quando uma regra NAT estática é criada, o CloudStack programa o firewall externo da zona com os seguintes objetos:
	</div><div class="itemizedlist"><ul><li class="listitem"><div class="para">
				Uma regra NAT estática que mapeia o endereço IP público ao endereço IP privado de uma máquina virtual.
			</div></li><li class="listitem"><div class="para">
				Uma política de segurança que permite tráfego no conjunto de protocolos e intervalos de porta que são especificados.
			</div></li><li class="listitem"><div class="para">
				Um contador de filtro de firewall que registra o número de bytes do tráfego entrante no IP público.
			</div></li></ul></div><div class="para">
		O número de bytes entrantes e saintes através de NAT de origem, NAT estático, e regras de balanceamento de carga é medido e salvo em cada elemento externo. Este dado é coletado regularmente e armazenado no database do CloudStack.
	</div></div><div xml:lang="pt-BR" class="section" id="autoscale" lang="pt-BR"><div class="titlepage"><div><div><h3 class="title" id="autoscale">15.8.5. Configuring AutoScale</h3></div></div></div><div class="para">
		AutoScaling allows you to scale your back-end services or application VMs up or down seamlessly and automatically according to the conditions you define. With AutoScaling enabled, you can ensure that the number of VMs you are using seamlessly scale up when demand increases, and automatically decreases when demand subsides. Using AutoScaling, you can automatically shut down instances you don't need, or launch new instances, depending on demand.
	</div><div class="para">
		NetScaler AutoScaling is designed to seamlessly launch or terminate VMs based on user-defined conditions. Conditions for triggering a scaleup or scaledown action can vary from a simple use case like monitoring the CPU usage of a server to a complex use case of monitoring a combination of server's responsiveness and its CPU usage. For example, you can configure AutoScaling to launch an additional VM whenever CPU usage exceeds 80 percent for 15 minutes, or to remove a VM whenever CPU usage is less than 20 percent for 30 minutes.
	</div><div class="para">
		CloudStack uses the NetScaler load balancer to monitor all aspects of a system's health and work in unison with CloudStack to initiate scale-up or scale-down actions.
	</div><div class="note"><div class="admonition_header"><h2>Nota</h2></div><div class="admonition"><div class="para">
			AutoScale is supported on NetScaler Release 10 Build 73.e and beyond.
		</div></div></div><div class="formalpara"><h5 class="formalpara" id="idp28115000">Prerequisites</h5>
			Before you configure an AutoScale rule, consider the following:
		</div><div class="itemizedlist"><ul><li class="listitem"><div class="para">
				Ensure that the necessary template is prepared before configuring AutoScale. When a VM is deployed by using a template and when it comes up, the application should be up and running.
			</div><div class="note"><div class="admonition_header"><h2>Nota</h2></div><div class="admonition"><div class="para">
					If the application is not running, the NetScaler device considers the VM as ineffective and continues provisioning the VMs unconditionally until the resource limit is exhausted.
				</div></div></div></li><li class="listitem"><div class="para">
				Deploy the templates you prepared. Ensure that the applications come up on the first boot and is ready to take the traffic. Observe the time requires to deploy the template. Consider this time when you specify the quiet time while configuring AutoScale.
			</div></li><li class="listitem"><div class="para">
				The AutoScale feature supports the SNMP counters that can be used to define conditions for taking scale up or scale down actions. To monitor the SNMP-based counter, ensure that the SNMP agent is installed in the template used for creating the AutoScale VMs, and the SNMP operations work with the configured SNMP community and port by using standard SNMP managers. For example, see <a class="xref" href="#configure-snmp-rhel">Seção 15.8.2, “Configuring SNMP Community String on a RHEL Server”</a> to configure SNMP on a RHEL machine.
			</div></li><li class="listitem"><div class="para">
				Ensure that the endpointe.url parameter present in the Global Settings is set to the Management Server API URL. For example, http://10.102.102.22:8080/client/api. In a multi-node Management Server deployment, use the virtual IP address configured in the load balancer for the management server’s cluster. Additionally, ensure that the NetScaler device has access to this IP address to provide AutoScale support.
			</div><div class="para">
				If you update the endpointe.url, disable the AutoScale functionality of the load balancer rules in the system, then enable them back to reflect the changes. For more information see <a class="xref" href="#update-autoscale">Updating an AutoScale Configuration</a>
			</div></li><li class="listitem"><div class="para">
				If the API Key and Secret Key are regenerated for an AutoScale user, ensure that the AutoScale functionality of the load balancers that the user participates in are disabled and then enabled to reflect the configuration changes in the NetScaler.
			</div></li><li class="listitem"><div class="para">
				In an advanced Zone, ensure that at least one VM should be present before configuring a load balancer rule with AutoScale. Having one VM in the network ensures that the network is in implemented state for configuring AutoScale.
			</div></li></ul></div><div class="formalpara"><h5 class="formalpara" id="idp14272904">Configuração</h5>
			Especifique o seguinte:
		</div><div class="mediaobject"><img src="./images/autoscale-config.png" width="444" alt="autoscaleateconfig.png: Configuring AutoScale" /></div><div class="itemizedlist"><ul><li class="listitem"><div class="para">
				<span class="bold bold"><strong>Template</strong></span>: A template consists of a base OS image and application. A template is used to provision the new instance of an application on a scaleup action. When a VM is deployed from a template, the VM can start taking the traffic from the load balancer without any admin intervention. For example, if the VM is deployed for a Web service, it should have the Web server running, the database connected, and so on.
			</div></li><li class="listitem"><div class="para">
				<span class="bold bold"><strong>Compute offering</strong></span>: A predefined set of virtual hardware attributes, including CPU speed, number of CPUs, and RAM size, that the user can select when creating a new virtual machine instance. Choose one of the compute offerings to be used while provisioning a VM instance as part of scaleup action.
			</div></li><li class="listitem"><div class="para">
				<span class="bold bold"><strong>Min Instance</strong></span>: The minimum number of active VM instances that is assigned to a load balancing rule. The active VM instances are the application instances that are up and serving the traffic, and are being load balanced. This parameter ensures that a load balancing rule has at least the configured number of active VM instances are available to serve the traffic.
			</div><div class="note"><div class="admonition_header"><h2>Nota</h2></div><div class="admonition"><div class="para">
					If an application, such as SAP, running on a VM instance is down for some reason, the VM is then not counted as part of Min Instance parameter, and the AutoScale feature initiates a scaleup action if the number of active VM instances is below the configured value. Similarly, when an application instance comes up from its earlier down state, this application instance is counted as part of the active instance count and the AutoScale process initiates a scaledown action when the active instance count breaches the Max instance value.
				</div></div></div></li><li class="listitem"><div class="para">
				<span class="bold bold"><strong>Max Instance</strong></span>: Maximum number of active VM instances that <span class="bold bold"><strong>should be assigned to </strong></span>a load balancing rule. This parameter defines the upper limit of active VM instances that can be assigned to a load balancing rule.
			</div><div class="para">
				Specifying a large value for the maximum instance parameter might result in provisioning large number of VM instances, which in turn leads to a single load balancing rule exhausting the VM instances limit specified at the account or domain level.
			</div><div class="note"><div class="admonition_header"><h2>Nota</h2></div><div class="admonition"><div class="para">
					If an application, such as SAP, running on a VM instance is down for some reason, the VM is not counted as part of Max Instance parameter. So there may be scenarios where the number of VMs provisioned for a scaleup action might be more than the configured Max Instance value. Once the application instances in the VMs are up from an earlier down state, the AutoScale feature starts aligning to the configured Max Instance value.
				</div></div></div></li></ul></div><div class="para">
		Specify the following scale-up and scale-down policies:
	</div><div class="itemizedlist"><ul><li class="listitem"><div class="para">
				<span class="bold bold"><strong>Duration</strong></span>: The duration, in seconds, for which the conditions you specify must be true to trigger a scaleup action. The conditions defined should hold true for the entire duration you specify for an AutoScale action to be invoked.
			</div></li><li class="listitem"><div class="para">
				<span class="bold bold"><strong>Counter</strong></span>: The performance counters expose the state of the monitored instances. By default, CloudStack offers four performance counters: Three SNMP counters and one NetScaler counter. The SNMP counters are Linux User CPU, Linux System CPU, and Linux CPU Idle. The NetScaler counter is ResponseTime. The root administrator can add additional counters into CloudStack by using the CloudStack API.
			</div></li><li class="listitem"><div class="para">
				<span class="bold bold"><strong>Operator</strong></span>: The following five relational operators are supported in AutoScale feature: Greater than, Less than, Less than or equal to, Greater than or equal to, and Equal to.
			</div></li><li class="listitem"><div class="para">
				<span class="bold bold"><strong>Threshold</strong></span>: Threshold value to be used for the counter. Once the counter defined above breaches the threshold value, the AutoScale feature initiates a scaleup or scaledown action.
			</div></li><li class="listitem"><div class="para">
				<span class="bold bold"><strong>Add</strong></span>: Click Add to add the condition.
			</div></li></ul></div><div class="para">
		Additionally, if you want to configure the advanced settings, click Show advanced settings, and specify the following:
	</div><div class="itemizedlist"><ul><li class="listitem"><div class="para">
				<span class="bold bold"><strong>Polling interval</strong></span>: Frequency in which the conditions, combination of counter, operator and threshold, are to be evaluated before taking a scale up or down action. The default polling interval is 30 seconds.
			</div></li><li class="listitem"><div class="para">
				<span class="bold bold"><strong>Quiet Time</strong></span>: This is the cool down period after an AutoScale action is initiated. The time includes the time taken to complete provisioning a VM instance from its template and the time taken by an application to be ready to serve traffic. This quiet time allows the fleet to come up to a stable state before any action can take place. The default is 300 seconds.
			</div></li><li class="listitem"><div class="para">
				<span class="bold bold"><strong>Destroy VM Grace Period</strong></span>: The duration in seconds, after a scaledown action is initiated, to wait before the VM is destroyed as part of scaledown action. This is to ensure graceful close of any pending sessions or transactions being served by the VM marked for destroy. The default is 120 seconds.
			</div></li><li class="listitem"><div class="para">
				<span class="bold bold"><strong>Security Groups</strong></span>: Security groups provide a way to isolate traffic to the VM instances. A security group is a group of VMs that filter their incoming and outgoing traffic according to a set of rules, called ingress and egress rules. These rules filter network traffic according to the IP address that is attempting to communicate with the VM.
			</div></li><li class="listitem"><div class="para">
				<span class="bold bold"><strong>Disk Offerings</strong></span>: A predefined set of disk size for primary data storage.
			</div></li><li class="listitem"><div class="para">
				<span class="bold bold"><strong>SNMP Community</strong></span>: The SNMP community string to be used by the NetScaler device to query the configured counter value from the provisioned VM instances. Default is public.
			</div></li><li class="listitem"><div class="para">
				<span class="bold bold"><strong>SNMP Port</strong></span>: The port number on which the SNMP agent that run on the provisioned VMs is listening. Default port is 161.
			</div></li><li class="listitem"><div class="para">
				<span class="bold bold"><strong>User</strong></span>: This is the user that the NetScaler device use to invoke scaleup and scaledown API calls to the cloud. If no option is specified, the user who configures AutoScaling is applied. Specify another user name to override.
			</div></li><li class="listitem"><div class="para">
				<span class="bold bold"><strong>Apply</strong></span>: Click Apply to create the AutoScale configuration.
			</div></li></ul></div><div class="formalpara"><h5 class="formalpara" id="idp31402584">Disabling and Enabling an AutoScale Configuration</h5>
			If you want to perform any maintenance operation on the AutoScale VM instances, disable the AutoScale configuration. When the AutoScale configuration is disabled, no scaleup or scaledown action is performed. You can use this downtime for the maintenance activities. To disable the AutoScale configuration, click the Disable AutoScale
			<span class="inlinemediaobject"><img src="./images/enable-disable-autoscale.png" alt="EnableDisable.png: button to enable or disable AutoScale." /></span>
			button.
		</div><div class="para">
		The button toggles between enable and disable, depending on whether AutoScale is currently enabled or not. After the maintenance operations are done, you can enable the AutoScale configuration back. To enable, open the AutoScale configuration page again, then click the Enable AutoScale
		<span class="inlinemediaobject"><img src="./images/enable-disable-autoscale.png" alt="EnableDisable.png: button to enable or disable AutoScale." /></span>
		button.
	</div><div class="formalpara" id="update-autoscale"><h5 class="formalpara">Updating an AutoScale Configuration</h5>
			You can update the various parameters and add or delete the conditions in a scaleup or scaledown rule. Before you update an AutoScale configuration, ensure that you disable the AutoScale load balancer rule by clicking the Disable AutoScale button.
		</div><div class="para">
		After you modify the required AutoScale parameters, click Apply. To apply the new AutoScale policies, open the AutoScale configuration page again, then click the Enable AutoScale button.
	</div><div class="formalpara"><h5 class="formalpara" id="idp14043472">Runtime Considerations</h5>
		</div><div class="itemizedlist"><ul><li class="listitem"><div class="para">
				An administrator should not assign a VM to a load balancing rule which is configured for AutoScale.
			</div></li><li class="listitem"><div class="para">
				Before a VM provisioning is completed if NetScaler is shutdown or restarted, the provisioned VM cannot be a part of the load balancing rule though the intent was to assign it to a load balancing rule. To workaround, rename the AutoScale provisioned VMs based on the rule name or ID so at any point of time the VMs can be reconciled to its load balancing rule.
			</div></li><li class="listitem"><div class="para">
				Making API calls outside the context of AutoScale, such as destroyVM, on an autoscaled VM leaves the load balancing configuration in an inconsistent state. Though VM is destroyed from the load balancer rule, NetScaler continues to show the VM as a service assigned to a rule.
			</div></li></ul></div></div></div><div xml:lang="pt-BR" class="section" id="load-balancer-rules" lang="pt-BR"><div class="titlepage"><div><div><h2 class="title" id="load-balancer-rules">15.9. Regras de balanceamento de carga</h2></div></div></div><div class="para">
		Um usuário ou administrador do CloudStack pode criar regras de balanceamento de carga que distribuem o tráfego recebido em um endereço IP público por uma ou mais máquinas virtuais. Um usuário cria uma regra, especifica um algoritmo e assinala a regra a um conjunto de máquinas virtuais.
	</div><div class="note"><div class="admonition_header"><h2>Nota</h2></div><div class="admonition"><div class="para">
			Se você cria regras de balanceamento de carga enquanto usando um oferta de serviço de rede que inclui um equipamento externo de balanceamento de carga, como o NetScaler, e depois altera a oferta de serviço para um que usa o roteador virtual do CloudStack , você deve criar uma regra no firewall do roteador virtual para cada uma das regras de balanceamento de carga existentes, de forma que elas possam continuar funcionado.
		</div></div></div><div class="para">
	</div><div xml:lang="pt-BR" class="section" id="add-load-balancer-rule" lang="pt-BR"><div class="titlepage"><div><div><h3 class="title" id="add-load-balancer-rule">15.9.1. Adding a Load Balancer Rule</h3></div></div></div><div class="orderedlist"><ol><li class="listitem"><div class="para">
				Faça login na interface de usuário do CloudStack como administrador ou usuário final.
			</div></li><li class="listitem"><div class="para">
				Na barra de navegação à esquerda, selecione Network.
			</div></li><li class="listitem"><div class="para">
				Click the name of the network where you want to load balance the traffic.
			</div></li><li class="listitem"><div class="para">
				Clique em View IP Addresses.
			</div></li><li class="listitem"><div class="para">
				Clique no endereço IP para o qual você deseja criar a regra, então clique na aba Configuration.
			</div></li><li class="listitem"><div class="para">
				No nó Load Balancing do diagrama, clique em View All.
			</div><div class="para">
				In a Basic zone, you can also create a load balancing rule without acquiring or selecting an IP address. CloudStack internally assign an IP when you create the load balancing rule, which is listed in the IP Addresses page when the rule is created.
			</div><div class="para">
				To do that, select the name of the network, then click Add Load Balancer tab. Continue with <a class="xref" href="#config-lb">7</a>.
			</div></li><li class="listitem" id="config-lb"><div class="para">
				Fill in the following:
			</div><div class="itemizedlist"><ul><li class="listitem"><div class="para">
						<span class="bold bold"><strong>Name</strong></span>: Um nome para a regra de balanceamento de carga.
					</div></li><li class="listitem"><div class="para">
						<span class="bold bold"><strong>Public Port</strong></span>: The port receiving incoming traffic to be balanced.
					</div></li><li class="listitem"><div class="para">
						<span class="bold bold"><strong>Private Port</strong></span>: A porta que as máquinas virtuais usarão para receber o tráfego.
					</div></li><li class="listitem"><div class="para">
						<span class="bold bold"><strong>Algorithm</strong></span>: Choose the load balancing algorithm you want CloudStack to use. CloudStack supports a variety of well-known algorithms. If you are not familiar with these choices, you will find plenty of information about them on the Internet.
					</div></li><li class="listitem"><div class="para">
						<span class="bold bold"><strong>Stickiness</strong></span>: (Optional) Click Configure and choose the algorithm for the stickiness policy. See Sticky Session Policies for Load Balancer Rules.
					</div></li><li class="listitem"><div class="para">
						<span class="bold bold"><strong>AutoScale</strong></span>: Click Configure and complete the AutoScale configuration as explained in <a class="xref" href="#autoscale">Seção 15.8.5, “Configuring AutoScale”</a>.
					</div></li></ul></div></li><li class="listitem"><div class="para">
				Click Add VMs, then select two or more VMs that will divide the load of incoming traffic, and click Apply.
			</div><div class="para">
				The new load balancer rule appears in the list. You can repeat these steps to add more load balancer rules for this IP address.
			</div></li></ol></div></div><div xml:lang="pt-BR" class="section" id="sticky-session-policies-for-lb-rules" lang="pt-BR"><div class="titlepage"><div><div><h3 class="title" id="sticky-session-policies-for-lb-rules">15.9.2. Sticky Session Policies for Load Balancer Rules</h3></div></div></div><div class="para">
		Sticky sessions are used in Web-based applications to ensure continued availability of information across the multiple requests in a user's session. For example, if a shopper is filling a cart, you need to remember what has been purchased so far. The concept of "stickiness" is also referred to as persistence or maintaining state.
	</div><div class="para">
		Any load balancer rule defined in CloudStack can have a stickiness policy. The policy consists of a name, stickiness method, and parameters. The parameters are name-value pairs or flags, which are defined by the load balancer vendor. The stickiness method could be load balancer-generated cookie, application-generated cookie, or source-based. In the source-based method, the source IP address is used to identify the user and locate the user’s stored data. In the other methods, cookies are used. The cookie generated by the load balancer or application is included in request and response URLs to create persistence. The cookie name can be specified by the administrator or automatically generated. A variety of options are provided to control the exact behavior of cookies, such as how they are generated and whether they are cached.
	</div><div class="para">
		For the most up to date list of available stickiness methods, see the CloudStack UI or call listNetworks and check the SupportedStickinessMethods capability.
	</div></div></div><div xml:lang="pt-BR" class="section" id="guest-ip-ranges" lang="pt-BR"><div class="titlepage"><div><div><h2 class="title" id="guest-ip-ranges">15.10. Guest IP Ranges</h2></div></div></div><div class="para">
		The IP ranges for guest network traffic are set on a per-account basis by the user. This allows the users to configure their network in a fashion that will enable VPN linking between their guest network and their clients.
	</div></div><div xml:lang="pt-BR" class="section" id="acquire-new-ip-address" lang="pt-BR"><div class="titlepage"><div><div><h2 class="title" id="acquire-new-ip-address">15.11. Obtendo um novo endereço IP</h2></div></div></div><div class="orderedlist"><ol><li class="listitem"><div class="para">
				Faça login na interface de usuário do CloudStack como administrador ou usuário final.
			</div></li><li class="listitem"><div class="para">
				Na barra de navegação à esquerda, selecione Network.
			</div></li><li class="listitem"><div class="para">
				Clique no nome da rede com a qual você quer trabalhar.
			</div></li><li class="listitem"><div class="para">
				Clique em View IP Addresses.
			</div></li><li class="listitem"><div class="para">
				Clique em Acquire New IP, e clique Yes no diálogo de confirmação.
			</div><div class="para">
				Você deve confirmar porque, tipicamente, endereços IP são um recurso limitado. Em alguns momentos, o novo endereço IP deve aparecer no estado Allocated. Agora você pode usar o endereço IP no encaminhamento de porta ou regras NAT estáticas.
			</div></li></ol></div></div><div xml:lang="pt-BR" class="section" id="release-ip-address" lang="pt-BR"><div class="titlepage"><div><div><h2 class="title" id="release-ip-address">15.12. Liberando um endereço IP</h2></div></div></div><div class="para">
		When the last rule for an IP address is removed, you can release that IP address. The IP address still belongs to the VPC; however, it can be picked up for any guest network again.
	</div><div class="orderedlist"><ol><li class="listitem"><div class="para">
				Faça login na interface de usuário do CloudStack como administrador ou usuário final.
			</div></li><li class="listitem"><div class="para">
				Na barra de navegação à esquerda, selecione Network.
			</div></li><li class="listitem"><div class="para">
				Clique no nome da rede com a qual você quer trabalhar.
			</div></li><li class="listitem"><div class="para">
				Clique em View IP Addresses.
			</div></li><li class="listitem"><div class="para">
				Clique no endereço IP que você deseja liberar.
			</div></li><li class="listitem"><div class="para">
				Click the Release IP button. 
				<span class="inlinemediaobject"><img src="./images/release-ip-icon.png" alt="ReleaseIPButton.png: button to release an IP" /></span>
			</div></li></ol></div></div><div xml:lang="pt-BR" class="section" id="static-nat" lang="pt-BR"><div class="titlepage"><div><div><h2 class="title" id="static-nat">15.13. NAT estática</h2></div></div></div><div class="para">
		A static NAT rule maps a public IP address to the private IP address of a VM in order to allow Internet traffic into the VM. The public IP address always remains the same, which is why it is called “static” NAT. This section tells how to enable or disable static NAT for a particular IP address.
	</div><div xml:lang="pt-BR" class="section" id="enable-disable-static-nat" lang="pt-BR"><div class="titlepage"><div><div><h3 class="title" id="enable-disable-static-nat">15.13.1. Habilitando ou desabilitando NAT estática</h3></div></div></div><div class="para">
		Se regras de encaminhamento de portas já estão em efeito para um endereço IP, você não pode habilitar NAT estática para este IP.
	</div><div class="para">
		Se uma máquina virtual hóspede faz parte de mais de uma rede, regras de NAT estática funcionarão somente se elas estão definidas na rede default.
	</div><div class="orderedlist"><ol><li class="listitem"><div class="para">
				Faça login na interface de usuário do CloudStack como administrador ou usuário final.
			</div></li><li class="listitem"><div class="para">
				Na barra de navegação à esquerda, selecione Network.
			</div></li><li class="listitem"><div class="para">
				Clique no nome da rede com a qual você quer trabalhar.
			</div></li><li class="listitem"><div class="para">
				Clique em View IP Addresses.
			</div></li><li class="listitem"><div class="para">
				Clique no endereço IP com o qual você deseja trabalhar.
			</div></li><li class="listitem"><div class="para">
				Click the Static NAT 
				<span class="inlinemediaobject"><img src="./images/enable-disable.png" alt="ReleaseIPButton.png: button to release an IP" /></span>
				button.
			</div><div class="para">
				The button toggles between Enable and Disable, depending on whether static NAT is currently enabled for the IP address.
			</div></li><li class="listitem"><div class="para">
				If you are enabling static NAT, a dialog appears where you can choose the destination VM and click Apply.
			</div></li></ol></div></div></div><div xml:lang="pt-BR" class="section" id="ip-forwarding-firewalling" lang="pt-BR"><div class="titlepage"><div><div><h2 class="title" id="ip-forwarding-firewalling">15.14. Encaminhamento de IP e firewall</h2></div></div></div><div class="para">
		By default, all incoming traffic to the public IP address is rejected. All outgoing traffic from the guests is also blocked by default.
	</div><div class="para">
		To allow outgoing traffic, follow the procedure in <a class="xref" href="#egress-firewall-rule">Seção 15.14.1, “Creating Egress Firewall Rules in an Advanced Zone”</a>.
	</div><div class="para">
		To allow incoming traffic, users may set up firewall rules and/or port forwarding rules. For example, you can use a firewall rule to open a range of ports on the public IP address, such as 33 through 44. Then use port forwarding rules to direct traffic from individual ports within that range to specific ports on user VMs. For example, one port forwarding rule could route incoming traffic on the public IP's port 33 to port 100 on one user VM's private IP. For more information, see <a class="xref" href="#firewall-rules">Seção 15.14.2, “Regras de firewall”</a> and <a class="xref" href="#port-forwarding">Seção 15.14.3, “Encaminhamento de Porta”</a>.
	</div><div xml:lang="pt-BR" class="section" id="egress-firewall-rule" lang="pt-BR"><div class="titlepage"><div><div><h3 class="title" id="egress-firewall-rule">15.14.1. Creating Egress Firewall Rules in an Advanced Zone</h3></div></div></div><div class="note"><div class="admonition_header"><h2>Nota</h2></div><div class="admonition"><div class="para">
			The egress firewall rules are supported only on virtual routers.
		</div></div></div><div class="para">
	</div><div class="para">
		The egress traffic originates from a private network to a public network, such as the Internet. By default, the egress traffic is blocked, so no outgoing traffic is allowed from a guest network to the Internet. However, you can control the egress traffic in an Advanced zone by creating egress firewall rules. When an egress firewall rule is applied, the traffic specific to the rule is allowed and the remaining traffic is blocked. When all the firewall rules are removed the default policy, Block, is applied.
	</div><div class="para">
		Consider the following scenarios to apply egress firewall rules:
	</div><div class="itemizedlist"><ul><li class="listitem"><div class="para">
				Allow the egress traffic from specified source CIDR. The Source CIDR is part of guest network CIDR.
			</div></li><li class="listitem"><div class="para">
				Allow the egress traffic with destination protocol TCP,UDP,ICMP, or ALL.
			</div></li><li class="listitem"><div class="para">
				Allow the egress traffic with destination protocol and port range. The port range is specified for TCP, UDP or for ICMP type and code.
			</div></li></ul></div><div class="para">
		To configure an egress firewall rule:
	</div><div class="orderedlist"><ol><li class="listitem"><div class="para">
				Faça login na interface de usuário do CloudStack como administrador ou usuário final.
			</div></li><li class="listitem"><div class="para">
				Na barra de navegação à esquerda, selecione Network.
			</div></li><li class="listitem"><div class="para">
				In Select view, choose Guest networks, then click the Guest network you want.
			</div></li><li class="listitem"><div class="para">
				To add an egress rule, click the Egress rules tab and fill out the following fields to specify what type of traffic is allowed to be sent out of VM instances in this guest network:
			</div><div class="mediaobject"><img src="./images/egress-firewall-rule.png" width="444" alt="egress-firewall-rule.png: adding an egress firewall rule" /></div><div class="itemizedlist"><ul><li class="listitem"><div class="para">
						<span class="bold bold"><strong>CIDR</strong></span>: (Add by CIDR only) To send traffic only to the IP addresses within a particular address block, enter a CIDR or a comma-separated list of CIDRs. The CIDR is the base IP address of the destination. For example, 192.168.0.0/22. To allow all CIDRs, set to 0.0.0.0/0.
					</div></li><li class="listitem"><div class="para">
						<span class="bold bold"><strong>Protocol</strong></span>: The networking protocol that VMs uses to send outgoing traffic. The TCP and UDP protocols are typically used for data exchange and end-user communications. The ICMP protocol is typically used to send error messages or network monitoring data.
					</div></li><li class="listitem"><div class="para">
						<span class="bold bold"><strong>Start Port, End Port</strong></span>: (TCP, UDP only) A range of listening ports that are the destination for the outgoing traffic. If you are opening a single port, use the same number in both fields.
					</div></li><li class="listitem"><div class="para">
						<span class="bold bold"><strong>ICMP Type, ICMP Code</strong></span>: (ICMP only) The type of message and error code that are sent.
					</div></li></ul></div></li><li class="listitem"><div class="para">
				Clique em Add.
			</div></li></ol></div></div><div xml:lang="pt-BR" class="section" id="firewall-rules" lang="pt-BR"><div class="titlepage"><div><div><h3 class="title" id="firewall-rules">15.14.2. Regras de firewall</h3></div></div></div><div class="para">
		Por default, todo o tráfego entrante no endereço IP público é rejeitado pelo firewall. Para permitir tráfego externo, você pode abrir portas no firewall especificando regras de firewall. Opcionalmente, você pode especificar um ou mais CIDRs para filtrar os IPs de origem. Isto é útil quando você deseja permitir tráfego entrante somente de certos endereços IP.
	</div><div class="para">
		Você não pode usar regras de firewall para abrir portas para um endereço IP elástico. Quando um IP elástico é usado, acesso externo é controlado pelo uso de grupos de segurança. Veja <a class="xref" href="#add-security-group">Seção 15.7.2, “Adicionando um grupo de segurança”</a>.
	</div><div class="para">
		In an advanced zone, you can also create egress firewall rules by using the virtual router. For more information, see <a class="xref" href="#egress-firewall-rule">Seção 15.14.1, “Creating Egress Firewall Rules in an Advanced Zone”</a>.
	</div><div class="para">
		Regras de firewall podem ser criadas usando a aba Firewall no interface de usuário do Servidor de gerenciamento. Por default, esta aba não é apresentada quando o CloudStack é instalado. Para exibir a aba Firewall, o administrador do CloudStack deve configurar o parâmetro global firewall.rule.ui.enabled como "true."
	</div><div class="para">
		Para criar uma regra de firewall:
	</div><div class="orderedlist"><ol><li class="listitem"><div class="para">
				Faça login na interface de usuário do CloudStack como administrador ou usuário final.
			</div></li><li class="listitem"><div class="para">
				Na barra de navegação à esquerda, selecione Network.
			</div></li><li class="listitem"><div class="para">
				Clique no nome da rede com a qual você quer trabalhar.
			</div></li><li class="listitem"><div class="para">
				Clique em View IP Addresses.
			</div></li><li class="listitem"><div class="para">
				Clique no endereço IP com o qual você deseja trabalhar.
			</div></li><li class="listitem"><div class="para">
				Clique na aba Configuration e preencha os seguintes valores.
			</div><div class="itemizedlist"><ul><li class="listitem"><div class="para">
						<span class="bold bold"><strong>Source CIDR</strong></span>. (Opcional) Para aceitar tráfego somente de endereços IP em um bloco de endereços específico, informe um CIDR ou uma lista de CIDRs separados por vírgulas.. Exemplo: 192.168.0.0/22. Deixe vazio para permitir todos os CIDRs.
					</div></li><li class="listitem"><div class="para">
						<span class="bold bold"><strong>Protocol</strong></span>. O protocolo de comunicação em uso na(s) porta(s) aberta(s).
					</div></li><li class="listitem"><div class="para">
						<span class="bold bold"><strong>Start Port e End Port</strong></span>. A(s) porta(s) que você deseja abrir no firewall. Se você está abrindo um única porta, use o mesmo número em ambos os campos
					</div></li><li class="listitem"><div class="para">
						<span class="bold bold"><strong>ICMP Type e ICMP Code</strong></span>. Usados somete se Protocol é configurado como ICMP. Proveem o tipo e o código requeridos pelo protocolo ICMP para preencher o cabeçalho ICMP. Consulte a documentação do ICMP para mais detalhes se você não tem certeza do que informar
					</div></li></ul></div></li><li class="listitem"><div class="para">
				Clique em Add.
			</div></li></ol></div></div><div xml:lang="pt-BR" class="section" id="port-forwarding" lang="pt-BR"><div class="titlepage"><div><div><h3 class="title" id="port-forwarding">15.14.3. Encaminhamento de Porta</h3></div></div></div><div class="para">
		A port forward service is a set of port forwarding rules that define a policy. A port forward service is then applied to one or more guest VMs. The guest VM then has its inbound network access managed according to the policy defined by the port forwarding service. You can optionally specify one or more CIDRs to filter the source IPs. This is useful when you want to allow only incoming requests from certain IP addresses to be forwarded.
	</div><div class="para">
		A guest VM can be in any number of port forward services. Port forward services can be defined but have no members. If a guest VM is part of more than one network, port forwarding rules will function only if they are defined on the default network
	</div><div class="para">
		You cannot use port forwarding to open ports for an elastic IP address. When elastic IP is used, outside access is instead controlled through the use of security groups. See Security Groups.
	</div><div class="para">
		To set up port forwarding:
	</div><div class="orderedlist"><ol><li class="listitem"><div class="para">
				Faça login na interface de usuário do CloudStack como administrador ou usuário final.
			</div></li><li class="listitem"><div class="para">
				If you have not already done so, add a public IP address range to a zone in CloudStack. See Adding a Zone and Pod in the Installation Guide.
			</div></li><li class="listitem"><div class="para">
				Add one or more VM instances to CloudStack.
			</div></li><li class="listitem"><div class="para">
				In the left navigation bar, click Network.
			</div></li><li class="listitem"><div class="para">
				Click the name of the guest network where the VMs are running.
			</div></li><li class="listitem"><div class="para">
				Choose an existing IP address or acquire a new IP address. See <a class="xref" href="#acquire-new-ip-address">Seção 15.11, “Obtendo um novo endereço IP”</a>. Click the name of the IP address in the list.
			</div></li><li class="listitem"><div class="para">
				Click the Configuration tab.
			</div></li><li class="listitem"><div class="para">
				No nó Port Forwarding do diagrama, clique em View All.
			</div></li><li class="listitem"><div class="para">
				Fill in the following:
			</div><div class="itemizedlist"><ul><li class="listitem"><div class="para">
						<span class="bold bold"><strong>Public Port</strong></span>. The port to which public traffic will be addressed on the IP address you acquired in the previous step.
					</div></li><li class="listitem"><div class="para">
						<span class="bold bold"><strong>Private Port</strong></span>. The port on which the instance is listening for forwarded public traffic.
					</div></li><li class="listitem"><div class="para">
						<span class="bold bold"><strong>Protocol</strong></span>. The communication protocol in use between the two ports
					</div></li></ul></div></li><li class="listitem"><div class="para">
				Clique em Add.
			</div></li></ol></div></div></div><div xml:lang="pt-BR" class="section" id="ip-load-balancing" lang="pt-BR"><div class="titlepage"><div><div><h2 class="title" id="ip-load-balancing">15.15. Balanceamento de carga de IP</h2></div></div></div><div class="para">
		O usuário pode escolher associar o mesmo IP público para vários hóspedes. O CloudStack implementa um balanceador de carga em nível de TCP com as seguintes políticas.
	</div><div class="itemizedlist"><ul><li class="listitem"><div class="para">
				Round-robin
			</div></li><li class="listitem"><div class="para">
				Menor quantidade de conexões
			</div></li><li class="listitem"><div class="para">
				IP de origem
			</div></li></ul></div><div class="para">
		Isto é similar a encaminhamento de porta, mas o destino pode ser múltiplos endereços IP.
	</div></div><div xml:lang="pt-BR" class="section" id="dns-dhcp" lang="pt-BR"><div class="titlepage"><div><div><h2 class="title" id="dns-dhcp">15.16. DNS e DHCP</h2></div></div></div><div class="para">
		O roteador virtual provê serviços DNS e DHCP aos hóspedes. Ele faz proxy de requisições DNS ao servidor DNS configurado na Availability Zone.
	</div></div><div xml:lang="pt-BR" class="section" id="vpn" lang="pt-BR"><div class="titlepage"><div><div><h2 class="title" id="vpn">15.17. VPN</h2></div></div></div><div class="para">
		Donos de contas no CloudStack podem criar redes privadas virtuais (VPN) para acessar suas máquinas virtuais. Se a rede hóspede é instanciada de uma oferta de rede que oferece o serviço de acesso remoto por VPN, o roteador virtual (baseado na máquina virtual de sistema) é usado para prover o serviço. O CloudStack provê um serviço de acesso remoto por VPN baseado em L2TP-over-IPsec para redes virtuais hóspedes. Como cada rede obtém seu próprio roteador virtual, as VPNs não são compartilhadas pelas redes. Clientes VPN nativos em Windows, Mac OS X e iOS podem ser usados para conectar às redes hóspedes. O dono da conta pode criar e gerenciar usuários para suas VPNs. O CloudStack não usa seu database de contas com este propósito, mas usa uma tabela distinta. O database de usuários de VPN é compartilhado por todas as VPNs criadas pelo dono da conta. Todos os usuários de VPN obtêm acesso a todas as VPNs criadas pelo dono da conta.
	</div><div class="note"><div class="admonition_header"><h2>Nota</h2></div><div class="admonition"><div class="para">
			Certifique-se de que nem todo tráfego passa pela VPN. Isto é, a rota estabelecida pela VPN deve ser apenas para a rede hóspede e não para todo o tráfego.
		</div></div></div><div class="para">
	</div><div class="itemizedlist"><ul><li class="listitem"><div class="para">
				<span class="bold bold"><strong>Road Warrior / Remote Access</strong></span>. Usuários desejam ser capazes de se conectar com segurança de casa ou do escritório a uma rede privada na nuvem. Tipicamente, o endereço IP do cliente que se conecta é dinâmico e não pode ser pré-configurado no servidor VPN.
			</div></li><li class="listitem"><div class="para">
				<span class="bold bold"><strong>Site to Site</strong></span>. In this scenario, two private subnets are connected over the public Internet with a secure VPN tunnel. The cloud user’s subnet (for example, an office network) is connected through a gateway to the network in the cloud. The address of the user’s gateway must be preconfigured on the VPN server in the cloud. Note that although L2TP-over-IPsec can be used to set up Site-to-Site VPNs, this is not the primary intent of this feature. For more information, see <a class="xref" href="#site-to-site-vpn">Seção 15.17.4, “Configurando uma conexão VPN Site-to-Site”</a>
			</div></li></ul></div><div xml:lang="pt-BR" class="section" id="configure-vpn" lang="pt-BR"><div class="titlepage"><div><div><h3 class="title" id="configure-vpn">15.17.1. Configurando VPN</h3></div></div></div><div class="para">
		Para configurar VPN para a nuvem:
	</div><div class="orderedlist"><ol><li class="listitem"><div class="para">
				Faça login na interface de usuário do CloudStack como administrador ou usuário final.
			</div></li><li class="listitem"><div class="para">
				Na barra de navegação à esquerda, clique em Global Settings.
			</div></li><li class="listitem"><div class="para">
				Configure os seguintes parâmetros de configuração global.
			</div><div class="itemizedlist"><ul><li class="listitem"><div class="para">
						remote.access.vpn.client.ip.range – The range of IP addresses to be allocated to remote access VPN clients. The first IP in the range is used by the VPN server.
					</div></li><li class="listitem"><div class="para">
						remote.access.vpn.psk.length – Tamanho da chave IPSec.
					</div></li><li class="listitem"><div class="para">
						remote.access.vpn.user.limit – Número máximo de usuários VPN por conta.
					</div></li></ul></div></li></ol></div><div class="para">
		Para habilitar VPN para uma rede em particular:
	</div><div class="orderedlist"><ol><li class="listitem"><div class="para">
				Faça login na interface de usuário do CloudStack como administrador ou usuário final.
			</div></li><li class="listitem"><div class="para">
				Na barra de navegação à esquerda, clique em Network.
			</div></li><li class="listitem"><div class="para">
				Clique no nome da rede com a qual você quer trabalhar.
			</div></li><li class="listitem"><div class="para">
				Clique em View IP Addresses.
			</div></li><li class="listitem"><div class="para">
				Clique em um dos endereços IP apresentados.
			</div></li><li class="listitem"><div class="para">
				Click the Enable VPN button. 
				<span class="inlinemediaobject"><img src="./images/vpn-icon.png" alt="AttachDiskButton.png: button to attach a volume" /></span>
			</div><div class="para">
				A chave IPsec é apresentada em uma janela popup.
			</div></li></ol></div></div><div xml:lang="pt-BR" class="section" id="using-vpn-with-windows" lang="pt-BR"><div class="titlepage"><div><div><h3 class="title" id="using-vpn-with-windows">15.17.2. Usando VPN com Windows</h3></div></div></div><div class="para">
		O procedimento para usar VPN varia de acordo com a versão do Windows. Geralmente, o usuário deve editar as propriedades da VPN e certificar-se de que a rota default não é a VPN. Os passos seguintes são para clientes Windows L2TP no Windows Vista. Os comandos devem ser similares para outras versões do Windows.
	</div><div class="orderedlist"><ol><li class="listitem" id="source-nat"><div class="para">
				Faça login na interface de usuário do CloudStack e clique no IP NAT de origem para a conta. A aba VPN deve exibir a chave IPsec pré-compartilhada. Tome nota disto e do IP NAT de origem. A interface de usuário também lista um ou mais usuários e suas senhas. Escolha um destes usuários ou, se nenhum existe, adicione um usuário e uma senha.
			</div></li><li class="listitem"><div class="para">
				No Windows, vá para o Painel de Controle, selecione Centro de Rede e Compartilhamento. Clique em Configurar uma conexão ou uma rede.
			</div></li><li class="listitem"><div class="para">
				No próximo diálogo, selecione Conectar a um local de trabalho.
			</div></li><li class="listitem"><div class="para">
				No próximo diálogo, selecione Use minha conexão com a Internet (VPN).
			</div></li><li class="listitem"><div class="para">
				In the next dialog, enter the source NAT IP from step <a class="xref" href="#source-nat">1</a> and give the connection a name. Check Don't connect now.
			</div></li><li class="listitem"><div class="para">
				In the next dialog, enter the user name and password selected in step <a class="xref" href="#source-nat">1</a>.
			</div></li><li class="listitem"><div class="para">
				Clique em Create.
			</div></li><li class="listitem"><div class="para">
				Volte ao painel de Controle e clique em Conexões de Rede para ver a nova conexão. A conexão ainda não está ativa.
			</div></li><li class="listitem"><div class="para">
				Clique com o botão da direita na nova conexão e selecione Propriedades. No diálogo de Propriedades, selecione a aba Rede.
			</div></li><li class="listitem"><div class="para">
				In Type of VPN, choose L2TP IPsec VPN, then click IPsec settings. Select Use preshared key. Enter the preshared key from Step <a class="xref" href="#source-nat">1</a>.
			</div></li><li class="listitem"><div class="para">
				A conexão está pronta para ser ativada. Volte a Painel de Controle -&gt; Conexões de Rede e dê dois cliques na conexão criada.
			</div></li><li class="listitem"><div class="para">
				Enter the user name and password from Step <a class="xref" href="#source-nat">1</a>.
			</div></li></ol></div></div><div xml:lang="pt-BR" class="section" id="using-vpn-with-mac" lang="pt-BR"><div class="titlepage"><div><div><h3 class="title" id="using-vpn-with-mac">15.17.3. Using VPN with Mac OS X</h3></div></div></div><div class="para">
		First, be sure you've configured the VPN settings in your CloudStack install. This section is only concerned with connecting via Mac OS X to your VPN.
	</div><div class="para">
		Note, these instructions were written on Mac OS X 10.7.5. They may differ slightly in older or newer releases of Mac OS X.
	</div><div class="orderedlist"><ol><li class="listitem"><div class="para">
				On your Mac, open System Preferences and click Network.
			</div></li><li class="listitem"><div class="para">
				Make sure Send all traffic over VPN connection is not checked.
			</div></li><li class="listitem"><div class="para">
				If your preferences are locked, you'll need to click the lock in the bottom left-hand corner to make any changes and provide your administrator credentials.
			</div></li><li class="listitem"><div class="para">
				You will need to create a new network entry. Click the plus icon on the bottom left-hand side and you'll see a dialog that says "Select the interface and enter a name for the new service." Select VPN from the Interface drop-down menu, and "L2TP over IPSec" for the VPN Type. Enter whatever you like within the "Service Name" field.
			</div></li><li class="listitem"><div class="para">
				You'll now have a new network interface with the name of whatever you put in the "Service Name" field. For the purposes of this example, we'll assume you've named it "CloudStack." Click on that interface and provide the IP address of the interface for your VPN under the Server Address field, and the user name for your VPN under Account Name.
			</div></li><li class="listitem"><div class="para">
				Click Authentication Settings, and add the user's password under User Authentication and enter the pre-shared IPSec key in the Shared Secret field under Machine Authentication. Click OK.
			</div></li><li class="listitem"><div class="para">
				You may also want to click the "Show VPN status in menu bar" but that's entirely optional.
			</div></li><li class="listitem"><div class="para">
				Now click "Connect" and you will be connected to the CloudStack VPN.
			</div></li></ol></div></div><div xml:lang="pt-BR" class="section" id="site-to-site-vpn" lang="pt-BR"><div class="titlepage"><div><div><h3 class="title" id="site-to-site-vpn">15.17.4. Configurando uma conexão VPN Site-to-Site</h3></div></div></div><div class="para">
		Uma conexão VPN Site-to-Site o ajuda a estabelecer uma conexão segura de um centro de dados empresarial à infraestrutura de nuvem. Isto permite o acesso de usuários a máquinas virtuais hóspedes estabelecendo uma conexão VPN de um equipamento no centro de dados da empresa ao roteador virtual da conta . Possuindo este recurso é eliminada a necessidade de estabelecer conexões VPN a máquinas virtuais individuais.
	</div><div class="para">
		Os terminais suportados nos centros de dados remotos são:
	</div><div class="itemizedlist"><ul><li class="listitem"><div class="para">
				Cisco ISR com IOS 12.4 ou posterior
			</div></li><li class="listitem"><div class="para">
				Roteadores Juniper J-Series com JunOS 9.5 ou posterior
			</div></li></ul></div><div class="note"><div class="admonition_header"><h2>Nota</h2></div><div class="admonition"><div class="para">
			Adicionalmente aos equipamentos Cisco e Juniper específicos listados acima, a expectativa é que qualquer equipamento Cisco ou Juniper executando os sistemas operacionais suportados sejam capazes de estabelecer conexões VPN.
		</div></div></div><div class="para">
		Para configurar uma conexão VPN Site-to-Site, execute o seguinte:
	</div><div class="orderedlist"><ol><li class="listitem"><div class="para">
				Crie uma Virtual Private Cloud (VPC).
			</div><div class="para">
				Veja <a class="xref" href="#configure-vpc">Seção 15.19, “Configuring a Virtual Private Cloud”</a>.
			</div></li><li class="listitem"><div class="para">
				Crie um VPN Customer Gateway.
			</div></li><li class="listitem"><div class="para">
				Crie um VPN gateway para a VPC que você criou.
			</div></li><li class="listitem"><div class="para">
				Crie uma conexão VPN do VPN gateway da VPC para o customer VPN gateway.
			</div></li></ol></div><div class="note"><div class="admonition_header"><h2>Nota</h2></div><div class="admonition"><div class="para">
			Appropriate events are generated on the CloudStack UI when status of a Site-to-Site VPN connection changes from connected to disconnected, or vice versa. Currently no events are generated when establishing a VPN connection fails or pending.
		</div></div></div><div xml:lang="pt-BR" class="section" id="create-vpn-customer-gateway" lang="pt-BR"><div class="titlepage"><div><div><h4 class="title" id="create-vpn-customer-gateway">15.17.4.1. Creating and Updating a VPN Customer Gateway</h4></div></div></div><div class="note"><div class="admonition_header"><h2>Nota</h2></div><div class="admonition"><div class="para">
			A VPN customer gateway can be connected to only one VPN gateway at a time.
		</div></div></div><div class="para">
		To add a VPN Customer Gateway:
	</div><div class="orderedlist"><ol><li class="listitem"><div class="para">
				Faça login na interface de usuário do CloudStack como administrador ou usuário final.
			</div></li><li class="listitem"><div class="para">
				Na barra de navegação à esquerda, selecione Network.
			</div></li><li class="listitem"><div class="para">
				In the Select view, select VPN Customer Gateway.
			</div></li><li class="listitem"><div class="para">
				Click Add site-to-site VPN.
			</div><div class="mediaobject"><img src="./images/add-vpn-customer-gateway.png" alt="addvpncustomergateway.png: adding a customer gateway." /></div><div class="para">
				Forneça as seguintes informações:
			</div><div class="itemizedlist"><ul><li class="listitem"><div class="para">
						<span class="bold bold"><strong>Name</strong></span>: A unique name for the VPN customer gateway you create.
					</div></li><li class="listitem"><div class="para">
						<span class="bold bold"><strong>Gateway</strong></span>: The IP address for the remote gateway.
					</div></li><li class="listitem"><div class="para">
						<span class="bold bold"><strong>CIDR list</strong></span>: The guest CIDR list of the remote subnets. Enter a CIDR or a comma-separated list of CIDRs. Ensure that a guest CIDR list is not overlapped with the VPC’s CIDR, or another guest CIDR. The CIDR must be RFC1918-compliant.
					</div></li><li class="listitem"><div class="para">
						<span class="bold bold"><strong>IPsec Preshared Key</strong></span>: Preshared keying is a method where the endpoints of the VPN share a secret key. This key value is used to authenticate the customer gateway and the VPC VPN gateway to each other.
					</div><div class="note"><div class="admonition_header"><h2>Nota</h2></div><div class="admonition"><div class="para">
							The IKE peers (VPN end points) authenticate each other by computing and sending a keyed hash of data that includes the Preshared key. If the receiving peer is able to create the same hash independently by using its Preshared key, it knows that both peers must share the same secret, thus authenticating the customer gateway.
						</div></div></div></li><li class="listitem"><div class="para">
						<span class="bold bold"><strong>IKE Encryption</strong></span>: The Internet Key Exchange (IKE) policy for phase-1. The supported encryption algorithms are AES128, AES192, AES256, and 3DES. Authentication is accomplished through the Preshared Keys.
					</div><div class="note"><div class="admonition_header"><h2>Nota</h2></div><div class="admonition"><div class="para">
							The phase-1 is the first phase in the IKE process. In this initial negotiation phase, the two VPN endpoints agree on the methods to be used to provide security for the underlying IP traffic. The phase-1 authenticates the two VPN gateways to each other, by confirming that the remote gateway has a matching Preshared Key.
						</div></div></div></li><li class="listitem"><div class="para">
						<span class="bold bold"><strong>IKE Hash</strong></span>: The IKE hash for phase-1. The supported hash algorithms are SHA1 and MD5.
					</div></li><li class="listitem"><div class="para">
						<span class="bold bold"><strong>IKE DH</strong></span>: A public-key cryptography protocol which allows two parties to establish a shared secret over an insecure communications channel. The 1536-bit Diffie-Hellman group is used within IKE to establish session keys. The supported options are None, Group-5 (1536-bit) and Group-2 (1024-bit).
					</div></li><li class="listitem"><div class="para">
						<span class="bold bold"><strong>ESP Encryption</strong></span>: Encapsulating Security Payload (ESP) algorithm within phase-2. The supported encryption algorithms are AES128, AES192, AES256, and 3DES.
					</div><div class="note"><div class="admonition_header"><h2>Nota</h2></div><div class="admonition"><div class="para">
							The phase-2 is the second phase in the IKE process. The purpose of IKE phase-2 is to negotiate IPSec security associations (SA) to set up the IPSec tunnel. In phase-2, new keying material is extracted from the Diffie-Hellman key exchange in phase-1, to provide session keys to use in protecting the VPN data flow.
						</div></div></div></li><li class="listitem"><div class="para">
						<span class="bold bold"><strong>ESP Hash</strong></span>: Encapsulating Security Payload (ESP) hash for phase-2. Supported hash algorithms are SHA1 and MD5.
					</div></li><li class="listitem"><div class="para">
						<span class="bold bold"><strong>Perfect Forward Secrecy</strong></span>: Perfect Forward Secrecy (or PFS) is the property that ensures that a session key derived from a set of long-term public and private keys will not be compromised. This property enforces a new Diffie-Hellman key exchange. It provides the keying material that has greater key material life and thereby greater resistance to cryptographic attacks. The available options are None, Group-5 (1536-bit) and Group-2 (1024-bit). The security of the key exchanges increase as the DH groups grow larger, as does the time of the exchanges.
					</div><div class="note"><div class="admonition_header"><h2>Nota</h2></div><div class="admonition"><div class="para">
							When PFS is turned on, for every negotiation of a new phase-2 SA the two gateways must generate a new set of phase-1 keys. This adds an extra layer of protection that PFS adds, which ensures if the phase-2 SA’s have expired, the keys used for new phase-2 SA’s have not been generated from the current phase-1 keying material.
						</div></div></div></li><li class="listitem"><div class="para">
						<span class="bold bold"><strong>IKE Lifetime (seconds)</strong></span>: The phase-1 lifetime of the security association in seconds. Default is 86400 seconds (1 day). Whenever the time expires, a new phase-1 exchange is performed.
					</div></li><li class="listitem"><div class="para">
						<span class="bold bold"><strong>ESP Lifetime (seconds)</strong></span>: The phase-2 lifetime of the security association in seconds. Default is 3600 seconds (1 hour). Whenever the value is exceeded, a re-key is initiated to provide a new IPsec encryption and authentication session keys.
					</div></li><li class="listitem"><div class="para">
						<span class="bold bold"><strong>Dead Peer Detection</strong></span>: A method to detect an unavailable Internet Key Exchange (IKE) peer. Select this option if you want the virtual router to query the liveliness of its IKE peer at regular intervals. It’s recommended to have the same configuration of DPD on both side of VPN connection.
					</div></li></ul></div></li><li class="listitem"><div class="para">
				Clique em OK.
			</div></li></ol></div><div class="formalpara"><h5 class="formalpara" id="idp21891704">Updating and Removing a VPN Customer Gateway</h5>
			You can update a customer gateway either with no VPN connection, or related VPN connection is in error state.
		</div><div class="orderedlist"><ol><li class="listitem"><div class="para">
				Faça login na interface de usuário do CloudStack como administrador ou usuário final.
			</div></li><li class="listitem"><div class="para">
				Na barra de navegação à esquerda, selecione Network.
			</div></li><li class="listitem"><div class="para">
				In the Select view, select VPN Customer Gateway.
			</div></li><li class="listitem"><div class="para">
				Select the VPN customer gateway you want to work with.
			</div></li><li class="listitem"><div class="para">
				To modify the required parameters, click the Edit VPN Customer Gateway button
				<span class="inlinemediaobject"><img src="./images/edit-icon.png" alt="edit.png: button to edit a VPN customer gateway" /></span>
			</div></li><li class="listitem"><div class="para">
				To remove the VPN customer gateway, click the Delete VPN Customer Gateway button
				<span class="inlinemediaobject"><img src="./images/delete-button.png" alt="delete.png: button to remove a VPN customer gateway" /></span>
			</div></li><li class="listitem"><div class="para">
				Clique em OK.
			</div></li></ol></div></div><div xml:lang="pt-BR" class="section" id="create-vpn-gateway-for-vpc" lang="pt-BR"><div class="titlepage"><div><div><h4 class="title" id="create-vpn-gateway-for-vpc">15.17.4.2. Criando um gateway VPN para o VPC</h4></div></div></div><div class="orderedlist"><ol><li class="listitem"><div class="para">
				Faça login na interface de usuário do CloudStack como administrador ou usuário final.
			</div></li><li class="listitem"><div class="para">
				Na barra de navegação à esquerda, selecione Network.
			</div></li><li class="listitem"><div class="para">
				Na view Select, selecione VPC.
			</div><div class="para">
				Todas as VPCs que você criou para a conta são listadas na página.
			</div></li><li class="listitem"><div class="para">
				Clique no botão Configure da VPC na qual você deseja implementar as máquinas virtuais.
			</div><div class="para">
				Na página VPC apresentada, todas as camadas que você criou são listadas em um diagrama.
			</div></li><li class="listitem"><div class="para">
				Clique no ícone Settings.
			</div><div class="para">
				As seguintes opções são apresentadas.
			</div><div class="itemizedlist"><ul><li class="listitem"><div class="para">
						Endereços IP
					</div></li><li class="listitem"><div class="para">
						Gateways
					</div></li><li class="listitem"><div class="para">
						Site-to-Site VPN
					</div></li><li class="listitem"><div class="para">
						Network ACLs
					</div></li></ul></div></li><li class="listitem"><div class="para">
				Selecione Site-to-Site VPN.
			</div><div class="para">
				Se você está criando o gateway VPN pela primeira vez, selecionando Site-to-Site VPN requer de você criar um gateway VPN.
			</div></li><li class="listitem"><div class="para">
				No diálogo de confirmação, clique Yes para confirmar.
			</div><div class="para">
				Em poucos momentos, o gateway VPN é criado. Você será solicitado ver os detalhes do gateway VPN que você criou. Clique Yes para confirmar.
			</div><div class="para">
				Os seguintes detalhes são apresentados na página VPN Gateway:
			</div><div class="itemizedlist"><ul><li class="listitem"><div class="para">
						Endereço IP
					</div></li><li class="listitem"><div class="para">
						Conta
					</div></li><li class="listitem"><div class="para">
						Domínio
					</div></li></ul></div></li></ol></div></div><div xml:lang="pt-BR" class="section" id="create-vpn-connection-vpc" lang="pt-BR"><div class="titlepage"><div><div><h4 class="title" id="create-vpn-connection-vpc">15.17.4.3. Criando uma conexão VPN</h4></div></div></div><div class="orderedlist"><ol><li class="listitem"><div class="para">
				Faça login na interface de usuário do CloudStack como administrador ou usuário final.
			</div></li><li class="listitem"><div class="para">
				Na barra de navegação à esquerda, selecione Network.
			</div></li><li class="listitem"><div class="para">
				Na view Select, selecione VPC.
			</div><div class="para">
				Todas as VPCs que você cria para a conta são listadas na página.
			</div></li><li class="listitem"><div class="para">
				Clique no botão Configure da VPC na qual você deseja implementar as máquinas virtuais.
			</div><div class="para">
				Na página VPC apresentada, todas as camadas que você criou são listadas em um diagrama.
			</div></li><li class="listitem"><div class="para">
				Clique no ícone Settings.
			</div><div class="para">
				As seguintes opções são apresentadas.
			</div><div class="itemizedlist"><ul><li class="listitem"><div class="para">
						IP Addresses
					</div></li><li class="listitem"><div class="para">
						Gateways
					</div></li><li class="listitem"><div class="para">
						Site-to-Site VPN
					</div></li><li class="listitem"><div class="para">
						Network ACLs
					</div></li></ul></div></li><li class="listitem"><div class="para">
				Selecione Site-to-Site VPN.
			</div><div class="para">
				A página Site-to-Site VPN é apresentada.
			</div></li><li class="listitem"><div class="para">
				Na lista suspensa Select View, certifique-se de que VPN Connection é selecionada.
			</div></li><li class="listitem"><div class="para">
				Clique em Create VPN Connection.
			</div><div class="para">
				O diálogo Create VPN Connection é apresentado:
			</div><div class="mediaobject"><img src="./images/create-vpn-connection.png" alt="createvpnconnection.png: creating a vpn connection to the customer gateway." /></div></li><li class="listitem"><div class="para">
				Selecione o gateway desejado, então clique OK para confirmar.
			</div><div class="para">
				Em poucos momentos, a conexão VPN é apresentada.
			</div><div class="para">
				A seguinte informação sobre a conexão VPN é apresentada:
			</div><div class="itemizedlist"><ul><li class="listitem"><div class="para">
						Endereço IP
					</div></li><li class="listitem"><div class="para">
						Gateway
					</div></li><li class="listitem"><div class="para">
						Estado
					</div></li><li class="listitem"><div class="para">
						Chave IPSec pré compartilhada
					</div></li><li class="listitem"><div class="para">
						Política IKE
					</div></li><li class="listitem"><div class="para">
						Política ESP
					</div></li></ul></div></li></ol></div></div><div xml:lang="pt-BR" class="section" id="delete-reset-vpn" lang="pt-BR"><div class="titlepage"><div><div><h4 class="title" id="delete-reset-vpn">15.17.4.4. Reiniciando e removendo uma conexão VPN</h4></div></div></div><div class="orderedlist"><ol><li class="listitem"><div class="para">
				Faça login na interface de usuário do CloudStack como administrador ou usuário final.
			</div></li><li class="listitem"><div class="para">
				Na barra de navegação à esquerda, selecione Network.
			</div></li><li class="listitem"><div class="para">
				Na view Select, selecione VPC.
			</div><div class="para">
				Todas as VPCs que você criou para a conta são listadas na página.
			</div></li><li class="listitem"><div class="para">
				Clique no botão Configure da VPC na qual você deseja implementar as máquinas virtuais.
			</div><div class="para">
				Na página VPC apresentada, todas as camadas que você criou são listadas em um diagrama.
			</div></li><li class="listitem"><div class="para">
				Clique no ícone Settings.
			</div><div class="para">
				As seguintes opções são apresentadas.
			</div><div class="itemizedlist"><ul><li class="listitem"><div class="para">
						Endereços IP
					</div></li><li class="listitem"><div class="para">
						Gateways
					</div></li><li class="listitem"><div class="para">
						Site-to-Site VPN
					</div></li><li class="listitem"><div class="para">
						Network ACLs
					</div></li></ul></div></li><li class="listitem"><div class="para">
				Selecione Site-to-Site VPN.
			</div><div class="para">
				A página Site-to-Site VPN é apresentada.
			</div></li><li class="listitem"><div class="para">
				Na lista suspensa Select View, certifique-se de que VPN Connection é selecionada.
			</div><div class="para">
				Todas as conexões VPN que você criou são apresentadas.
			</div></li><li class="listitem"><div class="para">
				Selecione a conexão VPN com a qual você quer trabalhar.
			</div><div class="para">
				A aba Details é apresentada.
			</div></li><li class="listitem"><div class="para">
				Para remover uma conexão VPN, clique no botão Delete VPN connection 
				<span class="inlinemediaobject"><img src="./images/remove-vpn.png" alt="remove-vpn.png: botão para remover uma conexão VPN" /></span>
			</div><div class="para">
				Para reiniciar uma conexão VPN, clique no botão Reset VPN connection presente na aba Details.
				<span class="inlinemediaobject"><img src="./images/reset-vpn.png" alt="reset-vpn.png: botão para reiniciar uma conexão VPN" /></span>
			</div></li></ol></div></div></div></div><div xml:lang="pt-BR" class="section" id="inter-vlan-routing" lang="pt-BR"><div class="titlepage"><div><div><h2 class="title" id="inter-vlan-routing">15.18. About Inter-VLAN Routing</h2></div></div></div><div class="para">
		Inter-VLAN Routing is the capability to route network traffic between VLANs. This feature enables you to build Virtual Private Clouds (VPC), an isolated segment of your cloud, that can hold multi-tier applications. These tiers are deployed on different VLANs that can communicate with each other. You provision VLANs to the tiers your create, and VMs can be deployed on different tiers. The VLANs are connected to a virtual router, which facilitates communication between the VMs. In effect, you can segment VMs by means of VLANs into different networks that can host multi-tier applications, such as Web, Application, or Database. Such segmentation by means of VLANs logically separate application VMs for higher security and lower broadcasts, while remaining physically connected to the same device.
	</div><div class="para">
		This feature is supported on XenServer and VMware hypervisors.
	</div><div class="para">
		The major advantages are:
	</div><div class="itemizedlist"><ul><li class="listitem"><div class="para">
				The administrator can deploy a set of VLANs and allow users to deploy VMs on these VLANs. A guest VLAN is randomly alloted to an account from a pre-specified set of guest VLANs. All the VMs of a certain tier of an account reside on the guest VLAN allotted to that account.
			</div><div class="note"><div class="admonition_header"><h2>Nota</h2></div><div class="admonition"><div class="para">
					A VLAN allocated for an account cannot be shared between multiple accounts.
				</div></div></div></li><li class="listitem"><div class="para">
				The administrator can allow users create their own VPC and deploy the application. In this scenario, the VMs that belong to the account are deployed on the VLANs allotted to that account.
			</div></li><li class="listitem"><div class="para">
				Both administrators and users can create multiple VPCs. The guest network NIC is plugged to the VPC virtual router when the first VM is deployed in a tier.
			</div></li><li class="listitem"><div class="para">
				The administrator can create the following gateways to send to or receive traffic from the VMs:
			</div><div class="itemizedlist"><ul><li class="listitem"><div class="para">
						<span class="bold bold"><strong>VPN Gateway</strong></span>: For more information, see <a class="xref" href="#create-vpn-gateway-for-vpc">Seção 15.17.4.2, “Criando um gateway VPN para o VPC”</a>.
					</div></li><li class="listitem"><div class="para">
						<span class="bold bold"><strong>Public Gateway</strong></span>: The public gateway for a VPC is added to the virtual router when the virtual router is created for VPC. The public gateway is not exposed to the end users. You are not allowed to list it, nor allowed to create any static routes.
					</div></li><li class="listitem"><div class="para">
						<span class="bold bold"><strong>Private Gateway</strong></span>: For more information, see <a class="xref" href="#add-gateway-vpc">Seção 15.19.5, “Adicionando um gateway privado a uma VPC”</a>.
					</div></li></ul></div></li><li class="listitem"><div class="para">
				Both administrators and users can create various possible destinations-gateway combinations. However, only one gateway of each type can be used in a deployment.
			</div><div class="para">
				For example:
			</div><div class="itemizedlist"><ul><li class="listitem"><div class="para">
						<span class="bold bold"><strong>VLANs and Public Gateway</strong></span>: For example, an application is deployed in the cloud, and the Web application VMs communicate with the Internet.
					</div></li><li class="listitem"><div class="para">
						<span class="bold bold"><strong>VLANs, VPN Gateway, and Public Gateway</strong></span>: For example, an application is deployed in the cloud; the Web application VMs communicate with the Internet; and the database VMs communicate with the on-premise devices.
					</div></li></ul></div></li><li class="listitem"><div class="para">
				The administrator can define Access Control List (ACL) on the virtual router to filter the traffic among the VLANs or between the Internet and a VLAN. You can define ACL based on CIDR, port range, protocol, type code (if ICMP protocol is selected) and Ingress/Egress type.
			</div></li></ul></div><div class="para">
		The following figure shows the possible deployment scenarios of a Inter-VLAN setup:
	</div><div class="mediaobject"><img src="./images/multi-tier-app.png" width="444" alt="mutltier.png: a multi-tier setup." /></div><div class="para">
		To set up a multi-tier Inter-VLAN deployment, see <a class="xref" href="#configure-vpc">Seção 15.19, “Configuring a Virtual Private Cloud”</a>.
	</div></div><div xml:lang="pt-BR" class="section" id="configure-vpc" lang="pt-BR"><div class="titlepage"><div><div><h2 class="title" id="configure-vpc">15.19. Configuring a Virtual Private Cloud</h2></div></div></div><div xml:lang="pt-BR" class="section" id="vpc" lang="pt-BR"><div class="titlepage"><div><div><h3 class="title" id="vpc">15.19.1. About Virtual Private Clouds</h3></div></div></div><div class="para">
		CloudStack Virtual Private Cloud is a private, isolated part of CloudStack. A VPC can have its own virtual network topology that resembles a traditional physical network. You can launch VMs in the virtual network that can have private addresses in the range of your choice, for example: 10.0.0.0/16. You can define network tiers within your VPC network range, which in turn enables you to group similar kinds of instances based on IP address range.
	</div><div class="para">
		For example, if a VPC has the private range 10.0.0.0/16, its guest networks can have the network ranges 10.0.1.0/24, 10.0.2.0/24, 10.0.3.0/24, and so on.
	</div><div class="formalpara"><h5 class="formalpara" id="idp25947632">Major Components of a VPC:</h5>
			A VPC is comprised of the following network components:
		</div><div class="itemizedlist"><ul><li class="listitem"><div class="para">
				<span class="bold bold"><strong>VPC</strong></span>: A VPC acts as a container for multiple isolated networks that can communicate with each other via its virtual router.
			</div></li><li class="listitem"><div class="para">
				<span class="bold bold"><strong>Network Tiers</strong></span>: Each tier acts as an isolated network with its own VLANs and CIDR list, where you can place groups of resources, such as VMs. The tiers are segmented by means of VLANs. The NIC of each tier acts as its gateway.
			</div></li><li class="listitem"><div class="para">
				<span class="bold bold"><strong>Virtual Router</strong></span>: A virtual router is automatically created and started when you create a VPC. The virtual router connect the tiers and direct traffic among the public gateway, the VPN gateways, and the NAT instances. For each tier, a corresponding NIC and IP exist in the virtual router. The virtual router provides DNS and DHCP services through its IP.
			</div></li><li class="listitem"><div class="para">
				<span class="bold bold"><strong>Public Gateway</strong></span>: The traffic to and from the Internet routed to the VPC through the public gateway. In a VPC, the public gateway is not exposed to the end user; therefore, static routes are not support for the public gateway.
			</div></li><li class="listitem"><div class="para">
				<span class="bold bold"><strong>Private Gateway</strong></span>: All the traffic to and from a private network routed to the VPC through the private gateway. For more information, see <a class="xref" href="#add-gateway-vpc">Seção 15.19.5, “Adicionando um gateway privado a uma VPC”</a>.
			</div></li><li class="listitem"><div class="para">
				<span class="bold bold"><strong>VPN Gateway</strong></span>: The VPC side of a VPN connection.
			</div></li><li class="listitem"><div class="para">
				<span class="bold bold"><strong>Site-to-Site VPN Connection</strong></span>: A hardware-based VPN connection between your VPC and your datacenter, home network, or co-location facility. For more information, see <a class="xref" href="#site-to-site-vpn">Seção 15.17.4, “Configurando uma conexão VPN Site-to-Site”</a>.
			</div></li><li class="listitem"><div class="para">
				<span class="bold bold"><strong>Customer Gateway</strong></span>: The customer side of a VPN Connection. For more information, see <a class="xref" href="#create-vpn-customer-gateway">Seção 15.17.4.1, “Creating and Updating a VPN Customer Gateway”</a>.
			</div></li><li class="listitem"><div class="para">
				<span class="bold bold"><strong>NAT Instance</strong></span>: An instance that provides Port Address Translation for instances to access the Internet via the public gateway. For more information, see <a class="xref" href="#enable-disable-static-nat-vpc">Seção 15.19.9, “Habilitando ou desabilitando NAT estática em uma VPC”</a>.
			</div></li></ul></div><div class="formalpara"><h5 class="formalpara" id="idp7041624">Network Architecture in a VPC</h5>
			In a VPC, the following four basic options of network architectures are present:
		</div><div class="itemizedlist"><ul><li class="listitem"><div class="para">
				VPC with a public gateway only
			</div></li><li class="listitem"><div class="para">
				VPC with public and private gateways
			</div></li><li class="listitem"><div class="para">
				VPC with public and private gateways and site-to-site VPN access
			</div></li><li class="listitem"><div class="para">
				VPC with a private gateway only and site-to-site VPN access
			</div></li></ul></div><div class="formalpara"><h5 class="formalpara" id="idm4362144">Connectivity Options for a VPC</h5>
			You can connect your VPC to:
		</div><div class="itemizedlist"><ul><li class="listitem"><div class="para">
				The Internet through the public gateway.
			</div></li><li class="listitem"><div class="para">
				The corporate datacenter by using a site-to-site VPN connection through the VPN gateway.
			</div></li><li class="listitem"><div class="para">
				Both the Internet and your corporate datacenter by using both the public gateway and a VPN gateway.
			</div></li></ul></div><div class="formalpara"><h5 class="formalpara" id="idm2766296">VPC Network Considerations</h5>
			Consider the following before you create a VPC:
		</div><div class="itemizedlist"><ul><li class="listitem"><div class="para">
				A VPC, by default, is created in the enabled state.
			</div></li><li class="listitem"><div class="para">
				A VPC can be created in Advance zone only, and can't belong to more than one zone at a time.
			</div></li><li class="listitem"><div class="para">
				The default number of VPCs an account can create is 20. However, you can change it by using the max.account.vpcs global parameter, which controls the maximum number of VPCs an account is allowed to create.
			</div></li><li class="listitem"><div class="para">
				The default number of tiers an account can create within a VPC is 3. You can configure this number by using the vpc.max.networks parameter.
			</div></li><li class="listitem"><div class="para">
				Each tier should have an unique CIDR in the VPC. Ensure that the tier's CIDR should be within the VPC CIDR range.
			</div></li><li class="listitem"><div class="para">
				A tier belongs to only one VPC.
			</div></li><li class="listitem"><div class="para">
				All network tiers inside the VPC should belong to the same account.
			</div></li><li class="listitem"><div class="para">
				When a VPC is created, by default, a SourceNAT IP is allocated to it. The Source NAT IP is released only when the VPC is removed.
			</div></li><li class="listitem"><div class="para">
				A public IP can be used for only one purpose at a time. If the IP is a sourceNAT, it cannot be used for StaticNAT or port forwarding.
			</div></li><li class="listitem"><div class="para">
				The instances only have a private IP address that you provision. To communicate with the Internet, enable NAT to an instance that you launch in your VPC.
			</div></li><li class="listitem"><div class="para">
				Only new networks can be added to a VPC. The maximum number of networks per VPC is limited by the value you specify in the vpc.max.networks parameter. The default value is three.
			</div></li><li class="listitem"><div class="para">
				The load balancing service can be supported by only one tier inside the VPC.
			</div></li><li class="listitem"><div class="para">
				If an IP address is assigned to a tier:
			</div><div class="itemizedlist"><ul><li class="listitem"><div class="para">
						That IP can't be used by more than one tier at a time in the VPC. For example, if you have tiers A and B, and a public IP1, you can create a port forwarding rule by using the IP either for A or B, but not for both.
					</div></li><li class="listitem"><div class="para">
						That IP can't be used for StaticNAT, load balancing, or port forwarding rules for another guest network inside the VPC.
					</div></li></ul></div></li><li class="listitem"><div class="para">
				Remote access VPN is not supported in VPC networks.
			</div></li></ul></div></div><div xml:lang="pt-BR" class="section" id="add-vpc" lang="pt-BR"><div class="titlepage"><div><div><h3 class="title" id="add-vpc">15.19.2. Adding a Virtual Private Cloud</h3></div></div></div><div class="para">
		When creating the VPC, you simply provide the zone and a set of IP addresses for the VPC network address space. You specify this set of addresses in the form of a Classless Inter-Domain Routing (CIDR) block.
	</div><div class="orderedlist"><ol><li class="listitem"><div class="para">
				Faça login na interface de usuário do CloudStack como administrador ou usuário final.
			</div></li><li class="listitem"><div class="para">
				Na barra de navegação à esquerda, selecione Network.
			</div></li><li class="listitem"><div class="para">
				Na view Select, selecione VPC.
			</div></li><li class="listitem"><div class="para">
				Click Add VPC. The Add VPC page is displayed as follows:
			</div><div class="mediaobject"><img src="./images/add-vpc.png" alt="add-vpc.png: adding a vpc." /></div><div class="para">
				Forneça as seguintes informações:
			</div><div class="itemizedlist"><ul><li class="listitem"><div class="para">
						<span class="bold bold"><strong>Name</strong></span>: A short name for the VPC that you are creating.
					</div></li><li class="listitem"><div class="para">
						<span class="bold bold"><strong>Description</strong></span>: A brief description of the VPC.
					</div></li><li class="listitem"><div class="para">
						<span class="bold bold"><strong>Zone</strong></span>: Choose the zone where you want the VPC to be available.
					</div></li><li class="listitem"><div class="para">
						<span class="bold bold"><strong>Super CIDR for Guest Networks</strong></span>: Defines the CIDR range for all the tiers (guest networks) within a VPC. When you create a tier, ensure that its CIDR is within the Super CIDR value you enter. The CIDR must be RFC1918 compliant.
					</div></li><li class="listitem"><div class="para">
						<span class="bold bold"><strong>DNS domain for Guest Networks</strong></span>: If you want to assign a special domain name, specify the DNS suffix. This parameter is applied to all the tiers within the VPC. That implies, all the tiers you create in the VPC belong to the same DNS domain. If the parameter is not specified, a DNS domain name is generated automatically.
					</div></li></ul></div></li></ol></div></div><div xml:lang="pt-BR" class="section" id="add-tier" lang="pt-BR"><div class="titlepage"><div><div><h3 class="title" id="add-tier">15.19.3. Adding Tiers</h3></div></div></div><div class="para">
		Tiers are distinct locations within a VPC that act as isolated networks, which do not have access to other tiers by default. Tiers are set up on different VLANs that can communicate with each other by using a virtual router. Tiers provide inexpensive, low latency network connectivity to other tiers within the VPC.
	</div><div class="orderedlist"><ol><li class="listitem"><div class="para">
				Faça login na interface de usuário do CloudStack como administrador ou usuário final.
			</div></li><li class="listitem"><div class="para">
				Na barra de navegação à esquerda, selecione Network.
			</div></li><li class="listitem"><div class="para">
				Na view Select, selecione VPC.
			</div><div class="para">
				All the VPC that you have created for the account is listed in the page.
			</div><div class="note"><div class="admonition_header"><h2>Nota</h2></div><div class="admonition"><div class="para">
					The end users can see their own VPCs, while root and domain admin can see any VPC they are authorized to see.
				</div></div></div></li><li class="listitem"><div class="para">
				Click the Configure button of the VPC for which you want to set up tiers.
			</div><div class="para">
				The Add new tier dialog is displayed, as follows:
			</div><div class="mediaobject"><img src="./images/add-tier.png" alt="add-tier.png: adding a tier to a vpc." /></div><div class="para">
				If you have already created tiers, the VPC diagram is displayed. Click Create Tier to add a new tier.
			</div></li><li class="listitem"><div class="para">
				Especifique o seguinte:
			</div><div class="para">
				All the fields are mandatory.
			</div><div class="itemizedlist"><ul><li class="listitem"><div class="para">
						<span class="bold bold"><strong>Name</strong></span>: A unique name for the tier you create.
					</div></li><li class="listitem"><div class="para">
						<span class="bold bold"><strong>Network Offering</strong></span>: The following default network offerings are listed: DefaultIsolatedNetworkOfferingForVpcNetworksNoLB, DefaultIsolatedNetworkOfferingForVpcNetworks
					</div><div class="para">
						In a VPC, only one tier can be created by using LB-enabled network offering.
					</div></li><li class="listitem"><div class="para">
						<span class="bold bold"><strong>Gateway</strong></span>: The gateway for the tier you create. Ensure that the gateway is within the Super CIDR range that you specified while creating the VPC, and is not overlapped with the CIDR of any existing tier within the VPC.
					</div></li><li class="listitem"><div class="para">
						<span class="bold bold"><strong>Netmask</strong></span>: The netmask for the tier you create.
					</div><div class="para">
						For example, if the VPC CIDR is 10.0.0.0/16 and the network tier CIDR is 10.0.1.0/24, the gateway of the tier is 10.0.1.1, and the netmask of the tier is 255.255.255.0.
					</div></li></ul></div></li><li class="listitem"><div class="para">
				Clique em OK.
			</div></li><li class="listitem"><div class="para">
				Continue with configuring access control list for the tier.
			</div></li></ol></div></div><div xml:lang="pt-BR" class="section" id="configure-acl" lang="pt-BR"><div class="titlepage"><div><div><h3 class="title" id="configure-acl">15.19.4. Configuring Access Control List</h3></div></div></div><div class="para">
		Define Network Access Control List (ACL) on the VPC virtual router to control incoming (ingress) and outgoing (egress) traffic between the VPC tiers, and the tiers and Internet. By default, all incoming and outgoing traffic to the guest networks is blocked. To open the ports, you must create a new network ACL. The network ACLs can be created for the tiers only if the NetworkACL service is supported.
	</div><div class="orderedlist"><ol><li class="listitem"><div class="para">
				Faça login na interface de usuário do CloudStack como administrador ou usuário final.
			</div></li><li class="listitem"><div class="para">
				Na barra de navegação à esquerda, selecione Network.
			</div></li><li class="listitem"><div class="para">
				Na view Select, selecione VPC.
			</div><div class="para">
				Todas as VPCs que você criou para a conta são listadas na página.
			</div></li><li class="listitem"><div class="para">
				Clique no ícone Settings.
			</div><div class="para">
				As seguintes opções são apresentadas.
			</div><div class="itemizedlist"><ul><li class="listitem"><div class="para">
						Endereços IP
					</div></li><li class="listitem"><div class="para">
						Gateways
					</div></li><li class="listitem"><div class="para">
						Site-to-Site VPN
					</div></li><li class="listitem"><div class="para">
						Network ACLs
					</div></li></ul></div></li><li class="listitem"><div class="para">
				Select Network ACLs.
			</div><div class="para">
				The Network ACLs page is displayed.
			</div></li><li class="listitem"><div class="para">
				Click Add Network ACLs.
			</div><div class="para">
				To add an ACL rule, fill in the following fields to specify what kind of network traffic is allowed in this tier.
			</div><div class="itemizedlist"><ul><li class="listitem"><div class="para">
						<span class="bold bold"><strong>CIDR</strong></span>: The CIDR acts as the Source CIDR for the Ingress rules, and Destination CIDR for the Egress rules. To accept traffic only from or to the IP addresses within a particular address block, enter a CIDR or a comma-separated list of CIDRs. The CIDR is the base IP address of the incoming traffic. For example, 192.168.0.0/22. To allow all CIDRs, set to 0.0.0.0/0.
					</div></li><li class="listitem"><div class="para">
						<span class="bold bold"><strong>Protocol</strong></span>: The networking protocol that sources use to send traffic to the tier. The TCP and UDP protocols are typically used for data exchange and end-user communications. The ICMP protocol is typically used to send error messages or network monitoring data.
					</div></li><li class="listitem"><div class="para">
						<span class="bold bold"><strong>Start Port</strong></span>, <span class="bold bold"><strong>End Port</strong></span> (TCP, UDP only): A range of listening ports that are the destination for the incoming traffic. If you are opening a single port, use the same number in both fields.
					</div></li><li class="listitem"><div class="para">
						<span class="bold bold"><strong>Select Tier</strong></span>: Select the tier for which you want to add this ACL rule.
					</div></li><li class="listitem"><div class="para">
						<span class="bold bold"><strong>ICMP Type</strong></span>, <span class="bold bold"><strong>ICMP Code</strong></span> (ICMP only): The type of message and error code that will be sent.
					</div></li><li class="listitem"><div class="para">
						<span class="bold bold"><strong>Traffic Type</strong></span>: Select the traffic type you want to apply.
					</div><div class="itemizedlist"><ul><li class="listitem"><div class="para">
								<span class="bold bold"><strong>Egress</strong></span>: To add an egress rule, select Egress from the Traffic type drop-down box and click Add. This specifies what type of traffic is allowed to be sent out of VM instances in this tier. If no egress rules are specified, all traffic from the tier is allowed out at the VPC virtual router. Once egress rules are specified, only the traffic specified in egress rules and the responses to any traffic that has been allowed in through an ingress rule are allowed out. No egress rule is required for the VMs in a tier to communicate with each other.
							</div></li><li class="listitem"><div class="para">
								<span class="bold bold"><strong>Ingress</strong></span>: To add an ingress rule, select Ingress from the Traffic type drop-down box and click Add. This specifies what network traffic is allowed into the VM instances in this tier. If no ingress rules are specified, then no traffic will be allowed in, except for responses to any traffic that has been allowed out through an egress rule.
							</div></li></ul></div><div class="note"><div class="admonition_header"><h2>Nota</h2></div><div class="admonition"><div class="para">
							By default, all incoming and outgoing traffic to the guest networks is blocked. To open the ports, create a new network ACL.
						</div></div></div></li></ul></div></li><li class="listitem"><div class="para">
				Click Add. The ACL rule is added.
			</div><div class="para">
				To view the list of ACL rules you have added, click the desired tier from the Network ACLs page, then select the Network ACL tab.
			</div><div class="mediaobject"><img src="./images/network-acl.png" width="444" alt="network-acl.png: adding, editing, deleting an ACL rule." /></div><div class="para">
				You can edit the tags assigned to the ACL rules and delete the ACL rules you have created. Click the appropriate button in the Actions column.
			</div></li></ol></div></div><div xml:lang="pt-BR" class="section" id="add-gateway-vpc" lang="pt-BR"><div class="titlepage"><div><div><h3 class="title" id="add-gateway-vpc">15.19.5. Adicionando um gateway privado a uma VPC</h3></div></div></div><div class="para">
		Um gateway privado somente pode ser adicionado pelo administrador root. A rede privada da VPC tem uma relação 1:1 com a NIC da rede física. Nenhum gateway com VLAN e IP duplicado é permitido no mesmo centro de dados.
	</div><div class="orderedlist"><ol><li class="listitem"><div class="para">
				Faça login na interface de usuário do CloudStack como administrador ou usuário final.
			</div></li><li class="listitem"><div class="para">
				Na barra de navegação à esquerda, selecione Network.
			</div></li><li class="listitem"><div class="para">
				Na view Select, selecione VPC.
			</div><div class="para">
				Todas as VPCs que você criou para a conta são listadas na página.
			</div></li><li class="listitem"><div class="para">
				Clique no botão Configure da VPC na qual você deseja configurar regras de balanceamento de carga.
			</div><div class="para">
				Na página VPC apresentada, todas as camadas que você criou são listadas em um diagrama.
			</div></li><li class="listitem"><div class="para">
				Clique no ícone Settings.
			</div><div class="para">
				As seguintes opções são apresentadas.
			</div><div class="itemizedlist"><ul><li class="listitem"><div class="para">
						Endereços IP
					</div></li><li class="listitem"><div class="para">
						Private Gateways
					</div></li><li class="listitem"><div class="para">
						Site-to-Site VPN
					</div></li><li class="listitem"><div class="para">
						Network ACLs
					</div></li></ul></div></li><li class="listitem"><div class="para">
				Selecione Private Gateways.
			</div><div class="para">
				A página Gateways é apresentada.
			</div></li><li class="listitem"><div class="para">
				Clique em Add new gateway:
			</div><div class="mediaobject"><img src="./images/add-new-gateway-vpc.png" alt="add-new-gateway-vpc.png: adding a private gateway for the VPC." /></div></li><li class="listitem"><div class="para">
				Especifique o seguinte:
			</div><div class="itemizedlist"><ul><li class="listitem"><div class="para">
						<span class="bold bold"><strong>Physical Network</strong></span>: A rede física que você criou na zona.
					</div></li><li class="listitem"><div class="para">
						<span class="bold bold"><strong>IP Address</strong></span>: O endereço IP associado com o gateway VPC.
					</div></li><li class="listitem"><div class="para">
						<span class="bold bold"><strong>Gateway</strong></span>: O gateway através do qual o tráfego é roteado de e para a VPC.
					</div></li><li class="listitem"><div class="para">
						<span class="bold bold"><strong>Netmask</strong></span>: A máscara de rede associada com o gateway VPC.
					</div></li><li class="listitem"><div class="para">
						<span class="bold bold"><strong>VLAN</strong></span>: A VLAN associada com o gateway VPC.
					</div></li></ul></div><div class="para">
				O novo gateway aparece na lista. Você pode repetir estes passo para adicionar mais gateways para esta VPC.
			</div></li></ol></div></div><div xml:lang="pt-BR" class="section" id="add-vm-to-tier" lang="pt-BR"><div class="titlepage"><div><div><h3 class="title" id="add-vm-to-tier">15.19.6. Implantando máquinas virtuais na camada</h3></div></div></div><div class="orderedlist"><ol><li class="listitem"><div class="para">
				Faça login na interface de usuário do CloudStack como administrador ou usuário final.
			</div></li><li class="listitem"><div class="para">
				Na barra de navegação à esquerda, selecione Network.
			</div></li><li class="listitem"><div class="para">
				Na view Select, selecione VPC.
			</div><div class="para">
				Todas as VPCs que você criou para a conta são listadas na página.
			</div></li><li class="listitem"><div class="para">
				Clique no botão Configure da VPC na qual você deseja implementar as máquinas virtuais.
			</div><div class="para">
				Na página VPC apresentada, todas as camadas que você criou são listadas.
			</div></li><li class="listitem"><div class="para">
				Clique no botão Add VM da camada a qual você deseja adicionar uma máquina virtual.
			</div><div class="para">
				A página Add Instance é apresentada.
			</div><div class="para">
				Siga as instruções na tela para adicionar uma instância. Para informações sobre adição de uma instância, veja a seção Adicionando instâncias no Guia de Instalação.
			</div></li></ol></div></div><div xml:lang="pt-BR" class="section" id="acquire-new-ip-for-vpc" lang="pt-BR"><div class="titlepage"><div><div><h3 class="title" id="acquire-new-ip-for-vpc">15.19.7. Obtendo um novo endereço IP para uma VPC</h3></div></div></div><div class="para">
		Quando você obtém um endereço IP, todos os endereços IP são alocados à VPC, não às redes hóspedes na VPC. Os IPs são associados à rede hóspede somente quando a primeira regra de port-forwarding, balanceamento de carga ou NAT estática é criada para o IP ou para a rede. Um IP não pode ser associado a mais de uma rede de cada vez.
	</div><div class="orderedlist"><ol><li class="listitem"><div class="para">
				Faça login na interface de usuário do CloudStack como administrador ou usuário final.
			</div></li><li class="listitem"><div class="para">
				Na barra de navegação à esquerda, selecione Network.
			</div></li><li class="listitem"><div class="para">
				Na view Select, selecione VPC.
			</div><div class="para">
				Todas as VPCs que você criou para a conta são listadas na página.
			</div></li><li class="listitem"><div class="para">
				Clique no botão Configure da VPC na qual você deseja implementar as máquinas virtuais.
			</div><div class="para">
				Na página VPC apresentada, todas as camadas que você criou são listadas em um diagrama.
			</div></li><li class="listitem"><div class="para">
				Clique no ícone Settings.
			</div><div class="para">
				As seguintes opções são apresentadas.
			</div><div class="itemizedlist"><ul><li class="listitem"><div class="para">
						Endereços IP
					</div></li><li class="listitem"><div class="para">
						Gateways
					</div></li><li class="listitem"><div class="para">
						Site-to-Site VPN
					</div></li><li class="listitem"><div class="para">
						Network ACLs
					</div></li></ul></div></li><li class="listitem"><div class="para">
				Selecione IP Addresses.
			</div><div class="para">
				A página IP Addresses é apresentada.
			</div></li><li class="listitem"><div class="para">
				Clique em Acquire New IP, e clique Yes no diálogo de confirmação.
			</div><div class="para">
				Você deve confirmar porque, tipicamente, endereços IP são um recurso limitado. Em alguns momentos, o novo endereço IP deve aparecer no estado Allocated. Agora você pode usar o endereço IP no encaminhamento de porta, balanceamento de carga, ou regras NAT estáticas.
			</div></li></ol></div></div><div xml:lang="pt-BR" class="section" id="release-ip-for-vpc" lang="pt-BR"><div class="titlepage"><div><div><h3 class="title" id="release-ip-for-vpc">15.19.8. Liberando um endereço IP atribuído a uma VPC</h3></div></div></div><div class="para">
		O endereço IP é um recurso limitado. Se você não precisa mais de um IP particular, você pode desassociá-lo de sua VPC e retorná-lo ao pool de endereços disponíveis. Um endereço IP pode ser liberado de sua camada somente quando todas as rede de rede (port forwarding, balanceamento de carga, ou NAT estática) são removidas para este endereço IP. O endereço IP liberado ainda irá pertencer à mesma VPC.
	</div><div class="orderedlist"><ol><li class="listitem"><div class="para">
				Faça login na interface de usuário do CloudStack como administrador ou usuário final.
			</div></li><li class="listitem"><div class="para">
				Na barra de navegação à esquerda, selecione Network.
			</div></li><li class="listitem"><div class="para">
				Na view Select, selecione VPC.
			</div><div class="para">
				Todas as VPCs que você criou para a conta são listadas na página.
			</div></li><li class="listitem"><div class="para">
				Clique no botão Configure da VPC da qual você deseja liberar o IP.
			</div><div class="para">
				Na página VPC apresentada, todas as camadas que você criou são listadas em um diagrama.
			</div></li><li class="listitem"><div class="para">
				Clique no ícone Settings.
			</div><div class="para">
				As seguintes opções são apresentadas.
			</div><div class="itemizedlist"><ul><li class="listitem"><div class="para">
						Endereços IP
					</div></li><li class="listitem"><div class="para">
						Gateways
					</div></li><li class="listitem"><div class="para">
						Site-to-Site VPN
					</div></li><li class="listitem"><div class="para">
						Network ACLs
					</div></li></ul></div></li><li class="listitem"><div class="para">
				Selecione IP Addresses.
			</div><div class="para">
				A página IP Addresses é apresentada.
			</div></li><li class="listitem"><div class="para">
				Clique no IP que você deseja liberar.
			</div></li><li class="listitem"><div class="para">
				Na aba Details, clique no botão Release IP 
				<span class="inlinemediaobject"><img src="./images/release-ip-icon.png" alt="release-ip-icon.png: botão para liberar um IP." /></span>
			</div></li></ol></div></div><div xml:lang="pt-BR" class="section" id="enable-disable-static-nat-vpc" lang="pt-BR"><div class="titlepage"><div><div><h3 class="title" id="enable-disable-static-nat-vpc">15.19.9. Habilitando ou desabilitando NAT estática em uma VPC</h3></div></div></div><div class="para">
		Uma regra NAT estática mapeia um endereço IP público para o endereço IP privado de uma máquina virtual em uma VPC para permitir tráfego da Internet para ela. Esta seção informa como habilitar ou desabilitar NAT estática para um endereço IP em particular em uma VPC.
	</div><div class="para">
		Se regras de encaminhamento de portas já estão em efeito para um endereço IP, você não pode habilitar NAT estática para este IP.
	</div><div class="para">
		Se uma máquina virtual hóspede faz parte de mais de uma rede, regras de NAT estática funcionarão somente se elas estão definidas na rede default.
	</div><div class="orderedlist"><ol><li class="listitem"><div class="para">
				Faça login na interface de usuário do CloudStack como administrador ou usuário final.
			</div></li><li class="listitem"><div class="para">
				Na barra de navegação à esquerda, selecione Network.
			</div></li><li class="listitem"><div class="para">
				Na view Select, selecione VPC.
			</div><div class="para">
				Todas as VPCs que você criou para a conta são listadas na página.
			</div></li><li class="listitem"><div class="para">
				Clique no botão Configure da VPC na qual você deseja implementar as máquinas virtuais.
			</div><div class="para">
				Na página VPC apresentada, todas as camadas que você criou são listadas em um diagrama.
			</div></li><li class="listitem"><div class="para">
				Clique no ícone Settings.
			</div><div class="para">
				As seguintes opções são apresentadas.
			</div><div class="itemizedlist"><ul><li class="listitem"><div class="para">
						Endereços IP
					</div></li><li class="listitem"><div class="para">
						Gateways
					</div></li><li class="listitem"><div class="para">
						Site-to-Site VPN
					</div></li><li class="listitem"><div class="para">
						Network ACLs
					</div></li></ul></div></li><li class="listitem"><div class="para">
				Selecione IP Addresses.
			</div><div class="para">
				A página IP Addresses é apresentada.
			</div></li><li class="listitem"><div class="para">
				Clique no IP com o qual você deseja trabalhar.
			</div></li><li class="listitem"><div class="para">
				Na aba Details,clique no botão Static NAT.
				<span class="inlinemediaobject"><img src="./images/enable-disable.png" alt="enable-disable.png: botão para habilitar Static NAT." /></span>
				O botão alterna entre Enable e Disable, dependendo se NAT estática está habilitada ou não para o endereço IP.
			</div></li><li class="listitem"><div class="para">
				Se você está habilitando NAT estática, um diálogo é apresentado como se segue:
			</div><div class="mediaobject"><img src="./images/select-vm-staticnat-vpc.png" width="444" alt="select-vmstatic-nat.png: selecting a tier to apply staticNAT." /></div></li><li class="listitem"><div class="para">
				Selecione a camada e a máquina virtual de destino, e então clique em Apply.
			</div></li></ol></div></div><div xml:lang="pt-BR" class="section" id="add-loadbalancer-rule-vpc" lang="pt-BR"><div class="titlepage"><div><div><h3 class="title" id="add-loadbalancer-rule-vpc">15.19.10. Adicionando regras de balanceamento de carga em uma VPC</h3></div></div></div><div class="para">
		Um usuário ou administrador do CloudStack pode criar regras de balanceamento de carga que distribuem o tráfego recebido em um endereço IP público por uma ou mais máquinas virtuais que pertencem a uma camada de rede que provê serviço de balanceamento de carga em uma VPC. Um usuário cria uma regra, especifica um algoritmo e assinala a regra a um conjunto de máquinas virtuais em uma VPC.
	</div><div class="orderedlist"><ol><li class="listitem"><div class="para">
				Faça login na interface de usuário do CloudStack como administrador ou usuário final.
			</div></li><li class="listitem"><div class="para">
				Na barra de navegação à esquerda, selecione Network.
			</div></li><li class="listitem"><div class="para">
				Na view Select, selecione VPC.
			</div><div class="para">
				Todas as VPCs que você criou para a conta são listadas na página.
			</div></li><li class="listitem"><div class="para">
				Clique no botão Configure da VPC na qual você deseja configurar regras de balanceamento de carga.
			</div><div class="para">
				Na página VPC apresentada, todas as camadas que você criou são listadas em um diagrama.
			</div></li><li class="listitem"><div class="para">
				Clique no ícone Settings.
			</div><div class="para">
				As seguintes opções são apresentadas.
			</div><div class="itemizedlist"><ul><li class="listitem"><div class="para">
						IP Addresses
					</div></li><li class="listitem"><div class="para">
						Gateways
					</div></li><li class="listitem"><div class="para">
						Site-to-Site VPN
					</div></li><li class="listitem"><div class="para">
						Network ACLs
					</div></li></ul></div></li><li class="listitem"><div class="para">
				Selecione IP Addresses.
			</div><div class="para">
				A página IP Addresses é apresentada.
			</div></li><li class="listitem"><div class="para">
				Clique no endereço IP para o qual você deseja criar a regra, então clique na aba Configuration.
			</div></li><li class="listitem"><div class="para">
				No nó Load Balancing do diagrama, clique em View All.
			</div></li><li class="listitem"><div class="para">
				Selecione a camada para a qual você deseja aplicar a regra.
			</div><div class="note"><div class="admonition_header"><h2>Nota</h2></div><div class="admonition"><div class="para">
					Em uma VPC, o serviço de balanceamento de carga é suportado somente em uma única camada.
				</div></div></div></li><li class="listitem"><div class="para">
				Especifique o seguinte:
			</div><div class="itemizedlist"><ul><li class="listitem"><div class="para">
						<span class="bold bold"><strong>Name</strong></span>: Um nome para a regra de balanceamento de carga.
					</div></li><li class="listitem"><div class="para">
						<span class="bold bold"><strong>Public Port</strong></span>: A porta que recebe o tráfego entrante a ser balanceado.
					</div></li><li class="listitem"><div class="para">
						<span class="bold bold"><strong>Private Port</strong></span>: A porta que as máquinas virtuais usarão para receber o tráfego.
					</div></li><li class="listitem"><div class="para">
						<span class="bold bold"><strong>Algorithm</strong></span>. Escolha o algoritmo de balanceamento de carga que você deseja que o CloudStack use. O CloudStack suporta os seguintes algoritmos bem conhecidos:
					</div><div class="itemizedlist"><ul><li class="listitem"><div class="para">
								Round-robin
							</div></li><li class="listitem"><div class="para">
								Menos conexões
							</div></li><li class="listitem"><div class="para">
								Origem
							</div></li></ul></div></li><li class="listitem"><div class="para">
						<span class="bold bold"><strong>Stickiness</strong></span>. (Opcional) Clique Configure e escolha o algoritmo para a política de afinidade. Veja Sticky Session Policies for Load Balancer Rules.
					</div></li><li class="listitem"><div class="para">
						<span class="bold bold"><strong>Add VMs</strong></span>: Clique em Add VMs, então selecione duas ou mais máquinas virtuais que irão dividir a carga do tráfego entrante, e clique em Apply.
					</div></li></ul></div></li></ol></div><div class="para">
		A nova regra de balanceamento de carga aparece na lista. Você pode repetir estes passos para adicionar mais regras de balanceamento de carga para este endereço IP.
	</div></div><div xml:lang="pt-BR" class="section" id="add-portforward-vpc" lang="pt-BR"><div class="titlepage"><div><div><h3 class="title" id="add-portforward-vpc">15.19.11. Adicionando uma regra de encaminhamento de porta em uma VPC</h3></div></div></div><div class="orderedlist"><ol><li class="listitem"><div class="para">
				Faça login na interface de usuário do CloudStack como administrador ou usuário final.
			</div></li><li class="listitem"><div class="para">
				Na barra de navegação à esquerda, selecione Network.
			</div></li><li class="listitem"><div class="para">
				Na view Select, selecione VPC.
			</div><div class="para">
				Todas as VPCs que você criou para a conta são listadas na página.
			</div></li><li class="listitem"><div class="para">
				Clique no botão Configure da VPC na qual você deseja implementar as máquinas virtuais.
			</div><div class="para">
				Na página VPC apresentada, todas as camadas que você criou são listadas em um diagrama.
			</div></li><li class="listitem"><div class="para">
				Clique no ícone Settings.
			</div><div class="para">
				As seguintes opções são apresentadas.
			</div><div class="itemizedlist"><ul><li class="listitem"><div class="para">
						Endereços IP
					</div></li><li class="listitem"><div class="para">
						Gateways
					</div></li><li class="listitem"><div class="para">
						Site-to-Site VPN
					</div></li><li class="listitem"><div class="para">
						Network ACLs
					</div></li></ul></div></li><li class="listitem"><div class="para">
				Escolha um endereço IP existente ou obtenha um novo endereço IP. Clique no nome do endereço IP na lista.
			</div><div class="para">
				A página IP Addresses é apresentada.
			</div></li><li class="listitem"><div class="para">
				Clique no endereço IP para o qual você deseja criar a regra, então clique na aba Configuration.
			</div></li><li class="listitem"><div class="para">
				No nó Port Forwarding do diagrama, clique em View All.
			</div></li><li class="listitem"><div class="para">
				Selecione a camada para a qual você deseja aplicar a regra.
			</div></li><li class="listitem"><div class="para">
				Especifique o seguinte:
			</div><div class="itemizedlist"><ul><li class="listitem"><div class="para">
						<span class="bold bold"><strong>Public Port</strong></span>: A porta para a qual tráfego público será encaminhado no endereço IP que você obteve no passo anterior.
					</div></li><li class="listitem"><div class="para">
						<span class="bold bold"><strong>Private Port</strong></span>: A porta na qual a instância está ouvindo por tráfego público encaminhado.
					</div></li><li class="listitem"><div class="para">
						<span class="bold bold"><strong>Protocol</strong></span>: O protocolo de comunicações em uso entre as duas portas.
					</div><div class="itemizedlist"><ul><li class="listitem"><div class="para">
								TCP
							</div></li><li class="listitem"><div class="para">
								UDP
							</div></li></ul></div></li><li class="listitem"><div class="para">
						<span class="bold bold"><strong>Add VM</strong></span>: Clique em Add VM. Selecione o nome da instância a qual esta regra se aplica, e clique Apply.
					</div><div class="para">
						Você pode testar a regra abrindo uma sessão ssh com a instância.
					</div></li></ul></div></li></ol></div></div><div xml:lang="pt-BR" class="section" id="remove-tier" lang="pt-BR"><div class="titlepage"><div><div><h3 class="title" id="remove-tier">15.19.12. Removing Tiers</h3></div></div></div><div class="para">
		You can remove a tier from a VPC. A removed tier cannot be revoked. When a tier is removed, only the resources of the tier are expunged. All the network rules (port forwarding, load balancing and staticNAT) and the IP addresses associated to the tier are removed. The IP address still be belonging to the same VPC.
	</div><div class="orderedlist"><ol><li class="listitem"><div class="para">
				Faça login na interface de usuário do CloudStack como administrador ou usuário final.
			</div></li><li class="listitem"><div class="para">
				Na barra de navegação à esquerda, selecione Network.
			</div></li><li class="listitem"><div class="para">
				Na view Select, selecione VPC.
			</div><div class="para">
				All the VPC that you have created for the account is listed in the page.
			</div></li><li class="listitem"><div class="para">
				Click the Configure button of the VPC for which you want to set up tiers.
			</div><div class="para">
				The Configure VPC page is displayed. Locate the tier you want to work with.
			</div></li><li class="listitem"><div class="para">
				Click the Remove VPC button:
			</div><div class="mediaobject"><img src="./images/remove-tier.png" alt="remove-tier.png: removing a tier from a vpc." /></div><div class="para">
				Wait for some time for the tier to be removed.
			</div></li></ol></div></div><div xml:lang="pt-BR" class="section" id="remove-vpc" lang="pt-BR"><div class="titlepage"><div><div><h3 class="title" id="remove-vpc">15.19.13. Editing, Restarting, and Removing a Virtual Private Cloud</h3></div></div></div><div class="note"><div class="admonition_header"><h2>Nota</h2></div><div class="admonition"><div class="para">
			Ensure that all the tiers are removed before you remove a VPC.
		</div></div></div><div class="orderedlist"><ol><li class="listitem"><div class="para">
				Faça login na interface de usuário do CloudStack como administrador ou usuário final.
			</div></li><li class="listitem"><div class="para">
				Na barra de navegação à esquerda, selecione Network.
			</div></li><li class="listitem"><div class="para">
				Na view Select, selecione VPC.
			</div><div class="para">
				Todas as VPCs que você criou para a conta são listadas na página.
			</div></li><li class="listitem"><div class="para">
				Select the VPC you want to work with.
			</div></li><li class="listitem"><div class="para">
				To remove, click the Remove VPC button
				<span class="inlinemediaobject"><img src="./images/remove-vpc.png" alt="remove-vpc.png: button to remove a VPC" /></span>

			</div><div class="para">
				You can edit the name and description of a VPC. To do that, select the VPC, then click the Edit button. 
				<span class="inlinemediaobject"><img src="./images/edit-icon.png" alt="edit-icon.png: button to edit a VPC" /></span>

			</div><div class="para">
				To restart a VPC, select the VPC, then click the Restart button.
				<span class="inlinemediaobject"><img src="./images/restart-vpc.png" alt="restart-vpc.png: button to restart a VPC" /></span>
				i
			</div></li></ol></div></div></div><div xml:lang="pt-BR" class="section" id="persistent-network" lang="pt-BR"><div class="titlepage"><div><div><h2 class="title" id="persistent-network">15.20. Persistent Networks</h2></div></div></div><div class="para">
		The network that you can provision without having to deploy any VMs on it is called a persistent network. A persistent network can be part of a VPC or a non-VPC environment.
	</div><div class="para">
		When you create other types of network, a network is only a database entry until the first VM is created on that network. When the first VM is created, a VLAN ID is assigned and the network is provisioned. Also, when the last VM is destroyed, the VLAN ID is released and the network is no longer available. With the addition of persistent network, you will have the ability to create a network in CloudStack in which physical devices can be deployed without having to run any VMs. Additionally, you can deploy physical devices on that network.
	</div><div class="para">
		One of the advantages of having a persistent network is that you can create a VPC with a tier consisting of only physical devices. For example, you might create a VPC for a three-tier application, deploy VMs for Web and Application tier, and use physical machines for the Database tier. Another use case is that if you are providing services by using physical hardware, you can define the network as persistent and therefore even if all its VMs are destroyed the services will not be discontinued.
	</div><div class="section" id="persistent-network-consideration"><div class="titlepage"><div><div><h3 class="title" id="persistent-network-consideration">15.20.1. Persistent Network Considerations</h3></div></div></div><div class="itemizedlist"><ul><li class="listitem"><div class="para">
					Persistent network is designed for isolated networks.
				</div></li><li class="listitem"><div class="para">
					All default network offerings are non-persistent.
				</div></li><li class="listitem"><div class="para">
					A network offering cannot be editable because changing it affects the behavior of the existing networks that were created using this network offering.
				</div></li><li class="listitem"><div class="para">
					When you create a guest network, the network offering that you select defines the network persistence. This in turn depends on whether persistent network is enabled in the selected network offering.
				</div></li><li class="listitem"><div class="para">
					An existing network can be made persistent by changing its network offering to an offering that has the Persistent option enabled. While setting this property, even if the network has no running VMs, the network is provisioned.
				</div></li><li class="listitem"><div class="para">
					An existing network can be made non-persistent by changing its network offering to an offering that has the Persistent option disabled. If the network has no running VMs, during the next network garbage collection run the network is shut down.
				</div></li><li class="listitem"><div class="para">
					When the last VM on a network is destroyed, the network garbage collector checks if the network offering associated with the network is persistent, and shuts down the network only if it is non-persistent.
				</div></li></ul></div></div><div class="section" id="set-up-persistent-network"><div class="titlepage"><div><div><h3 class="title" id="set-up-persistent-network">15.20.2. Creating a Persistent Guest Network</h3></div></div></div><div class="para">
			To create a persistent network, perform the following:
		</div><div class="orderedlist"><ol><li class="listitem"><div class="para">
					Create a network offering with the Persistent option enabled.
				</div><div class="para">
					See <a class="xref" href="#creating-network-offerings">Seção 9.4.1, “Creating a New Network Offering”</a>.
				</div></li><li class="listitem"><div class="para">
					Select Network from the left navigation pane.
				</div></li><li class="listitem"><div class="para">
					Select the guest network that you want to offer this network service to.
				</div></li><li class="listitem"><div class="para">
					Click the Edit button.
				</div></li><li class="listitem"><div class="para">
					From the Network Offering drop-down, select the persistent network offering you have just created.
				</div></li><li class="listitem"><div class="para">
					Clique em OK.
				</div></li></ol></div></div></div></div><div xml:lang="pt-BR" class="chapter" id="working-with-system-vm" lang="pt-BR"><div class="titlepage"><div><div><h2 class="title">Capítulo 16. Working with System Virtual Machines</h2></div></div></div><div class="toc"><dl><dt><span class="section"><a href="#system-vm-template">16.1. The System VM Template</a></span></dt><dt><span class="section"><a href="#multiple-system-vm-vmware">16.2. Multiple System VM Support for VMware</a></span></dt><dt><span class="section"><a href="#console-proxy">16.3. Console Proxy</a></span></dt><dd><dl><dt><span class="section"><a href="#use-cert">16.3.1. Using a SSL Certificate for the Console Proxy</a></span></dt><dt><span class="section"><a href="#change-console-proxy-ssl-certificate-domain">16.3.2. Changing the Console Proxy SSL Certificate and Domain</a></span></dt></dl></dd><dt><span class="section"><a href="#virtual-router">16.4. Virtual Router</a></span></dt><dd><dl><dt><span class="section"><a href="#configure-virtual-router">16.4.1. Configuring the Virtual Router</a></span></dt><dt><span class="section"><a href="#upgrade-virtual-router-with-service-offering">16.4.2. Upgrading a Virtual Router with System Service Offerings</a></span></dt><dt><span class="section"><a href="#best-practices-virtual-router">16.4.3. Best Practices for Virtual Routers</a></span></dt></dl></dd><dt><span class="section"><a href="#secondary-storage-vm">16.5. Secondary Storage VM</a></span></dt></dl></div><div class="para">
		CloudStack uses several types of system virtual machines to perform tasks in the cloud. In general CloudStack manages these system VMs and creates, starts, and stops them as needed based on scale and immediate needs. However, the administrator should be aware of them and their roles to assist in debugging issues.
	</div><div class="note"><div class="admonition_header"><h2>Nota</h2></div><div class="admonition"><div class="para">
			You can configure the system.vm.random.password parameter to create a random system VM password to ensure higher security. If you reset the value for system.vm.random.password to true and restart the Management Server, a random password is generated and stored encrypted in the database. You can view the decrypted password under the system.vm.password global parameter on the CloudStack UI or by calling the listConfigurations API.
		</div></div></div><div xml:lang="pt-BR" class="section" id="system-vm-template" lang="pt-BR"><div class="titlepage"><div><div><h2 class="title" id="system-vm-template">16.1. The System VM Template</h2></div></div></div><div class="para">
		The System VMs come from a single template. The System VM has the following characteristics:
	</div><div class="itemizedlist"><ul><li class="listitem"><div class="para">
				Debian 6.0 ("Squeeze"), 2.6.32 kernel with the latest security patches from the Debian security APT repository
			</div></li><li class="listitem"><div class="para">
				Has a minimal set of packages installed thereby reducing the attack surface
			</div></li><li class="listitem"><div class="para">
				32-bit for enhanced performance on Xen/VMWare
			</div></li><li class="listitem"><div class="para">
				pvops kernel with Xen PV drivers, KVM virtio drivers, and VMware tools for optimum performance on all hypervisors
			</div></li><li class="listitem"><div class="para">
				Xen tools inclusion allows performance monitoring
			</div></li><li class="listitem"><div class="para">
				Latest versions of HAProxy, iptables, IPsec, and Apache from debian repository ensures improved security and speed
			</div></li><li class="listitem"><div class="para">
				Latest version of JRE from Sun/Oracle ensures improved security and speed
			</div></li></ul></div></div><div xml:lang="pt-BR" class="section" id="multiple-system-vm-vmware" lang="pt-BR"><div class="titlepage"><div><div><h2 class="title" id="multiple-system-vm-vmware">16.2. Multiple System VM Support for VMware</h2></div></div></div><div class="para">
		Every CloudStack zone has single System VM for template processing tasks such as downloading templates, uploading templates, and uploading ISOs. In a zone where VMware is being used, additional System VMs can be launched to process VMware-specific tasks such as taking snapshots and creating private templates. The CloudStack management server launches additional System VMs for VMware-specific tasks as the load increases. The management server monitors and weights all commands sent to these System VMs and performs dynamic load balancing and scaling-up of more System VMs.
	</div></div><div xml:lang="pt-BR" class="section" id="console-proxy" lang="pt-BR"><div class="titlepage"><div><div><h2 class="title" id="console-proxy">16.3. Console Proxy</h2></div></div></div><div class="para">
		The Console Proxy is a type of System Virtual Machine that has a role in presenting a console view via the web UI. It connects the user’s browser to the VNC port made available via the hypervisor for the console of the guest. Both the administrator and end user web UIs offer a console connection.
	</div><div class="para">
		Clicking a console icon brings up a new window. The AJAX code downloaded into that window refers to the public IP address of a console proxy VM. There is exactly one public IP address allocated per console proxy VM. The AJAX application connects to this IP. The console proxy then proxies the connection to the VNC port for the requested VM on the Host hosting the guest.
	</div><div class="note"><div class="admonition_header"><h2>Nota</h2></div><div class="admonition"><div class="para">
			The hypervisors will have many ports assigned to VNC usage so that multiple VNC sessions can occur simultaneously.
		</div></div></div><div class="para">
		There is never any traffic to the guest virtual IP, and there is no need to enable VNC within the guest.
	</div><div class="para">
		The console proxy VM will periodically report its active session count to the Management Server. The default reporting interval is five seconds. This can be changed through standard Management Server configuration with the parameter consoleproxy.loadscan.interval.
	</div><div class="para">
		Assignment of guest VM to console proxy is determined by first determining if the guest VM has a previous session associated with a console proxy. If it does, the Management Server will assign the guest VM to the target Console Proxy VM regardless of the load on the proxy VM. Failing that, the first available running Console Proxy VM that has the capacity to handle new sessions is used.
	</div><div class="para">
		Console proxies can be restarted by administrators but this will interrupt existing console sessions for users.
	</div><div class="section" id="use-cert"><div class="titlepage"><div><div><h3 class="title" id="use-cert">16.3.1. Using a SSL Certificate for the Console Proxy</h3></div></div></div><div class="para">
			The console viewing functionality uses a dynamic DNS service under the domain name realhostip.com to assist in providing SSL security to console sessions. The console proxy is assigned a public IP address. In order to avoid browser warnings for mismatched SSL certificates, the URL for the new console window is set to the form of https://aaa-bbb-ccc-ddd.realhostip.com. You will see this URL during console session creation. CloudStack includes the realhostip.com SSL certificate in the console proxy VM. Of course, CloudStack cannot know about the DNS A records for our customers' public IPs prior to shipping the software. CloudStack therefore runs a dynamic DNS server that is authoritative for the realhostip.com domain. It maps the aaa-bbb-ccc-ddd part of the DNS name to the IP address aaa.bbb.ccc.ddd on lookups. This allows the browser to correctly connect to the console proxy's public IP, where it then expects and receives a SSL certificate for realhostip.com, and SSL is set up without browser warnings.
		</div></div><div class="section" id="change-console-proxy-ssl-certificate-domain"><div class="titlepage"><div><div><h3 class="title" id="change-console-proxy-ssl-certificate-domain">16.3.2. Changing the Console Proxy SSL Certificate and Domain</h3></div></div></div><div class="para">
			If the administrator prefers, it is possible for the URL of the customer's console session to show a domain other than realhostip.com. The administrator can customize the displayed domain by selecting a different domain and uploading a new SSL certificate and private key. The domain must run a DNS service that is capable of resolving queries for addresses of the form aaa-bbb-ccc-ddd.your.domain to an IPv4 IP address in the form aaa.bbb.ccc.ddd, for example, 202.8.44.1. To change the console proxy domain, SSL certificate, and private key:
		</div><div class="orderedlist"><ol><li class="listitem"><div class="para">
					Set up dynamic name resolution or populate all possible DNS names in your public IP range into your existing DNS server with the format aaa-bbb-ccc-ddd.company.com -&gt; aaa.bbb.ccc.ddd.
				</div></li><li class="listitem"><div class="para">
					Generate the private key and certificate signing request (CSR). When you are using openssl to generate private/public key pairs and CSRs, for the private key that you are going to paste into the CloudStack UI, be sure to convert it into PKCS#8 format.
				</div><div class="orderedlist"><ol class="loweralpha"><li class="listitem"><div class="para">
							Generate a new 2048-bit private key
						</div><pre class="programlisting">openssl genrsa -des3 -out yourprivate.key 2048</pre></li><li class="listitem"><div class="para">
							Generate a new certificate CSR
						</div><pre class="programlisting">openssl req -new -key yourprivate.key -out yourcertificate.csr</pre></li><li class="listitem"><div class="para">
							Head to the website of your favorite trusted Certificate Authority, purchase an SSL certificate, and submit the CSR. You should receive a valid certificate in return
						</div></li><li class="listitem"><div class="para">
							Convert your private key format into PKCS#8 encrypted format.
						</div><pre class="programlisting">openssl pkcs8 -topk8 -in yourprivate.key -out yourprivate.pkcs8.encrypted.key</pre></li><li class="listitem"><div class="para">
							Convert your PKCS#8 encrypted private key into the PKCS#8 format that is compliant with CloudStack
						</div><pre class="programlisting">openssl pkcs8 -in yourprivate.pkcs8.encrypted.key -out yourprivate.pkcs8.key</pre></li></ol></div></li><li class="listitem"><div class="para">
					In the Update SSL Certificate screen of the CloudStack UI, paste the following:
				</div><div class="itemizedlist"><ul><li class="listitem"><div class="para">
							The certificate you've just generated.
						</div></li><li class="listitem"><div class="para">
							The private key you've just generated.
						</div></li><li class="listitem"><div class="para">
							The desired new domain name; for example, company.com
						</div></li></ul></div><div class="mediaobject"><img src="./images/update-ssl.png" alt="updatessl.png: Updating Console Proxy SSL Certificate" /></div></li><li class="listitem"><div class="para">
					The desired new domain name; for example, company.com
				</div><div class="para">
					This stops all currently running console proxy VMs, then restarts them with the new certificate and key. Users might notice a brief interruption in console availability.
				</div></li></ol></div><div class="para">
			The Management Server generates URLs of the form "aaa-bbb-ccc-ddd.company.com" after this change is made. The new console requests will be served with the new DNS domain name, certificate, and key.
		</div></div></div><div xml:lang="pt-BR" class="section" id="virtual-router" lang="pt-BR"><div class="titlepage"><div><div><h2 class="title" id="virtual-router">16.4. Virtual Router</h2></div></div></div><div class="para">
		The virtual router is a type of System Virtual Machine. The virtual router is one of the most frequently used service providers in CloudStack. The end user has no direct access to the virtual router. Users can ping the virtual router and take actions that affect it (such as setting up port forwarding), but users do not have SSH access into the virtual router.
	</div><div class="para">
		There is no mechanism for the administrator to log in to the virtual router. Virtual routers can be restarted by administrators, but this will interrupt public network access and other services for end users. A basic test in debugging networking issues is to attempt to ping the virtual router from a guest VM. Some of the characteristics of the virtual router are determined by its associated system service offering..
	</div><div xml:lang="pt-BR" class="section" id="configure-virtual-router" lang="pt-BR"><div class="titlepage"><div><div><h3 class="title" id="configure-virtual-router">16.4.1. Configuring the Virtual Router</h3></div></div></div><div class="para">
		You can set the following:
	</div><div class="itemizedlist"><ul><li class="listitem"><div class="para">
				IP range
			</div></li><li class="listitem"><div class="para">
				Supported network services
			</div></li><li class="listitem"><div class="para">
				Default domain name for the network serviced by the virtual router
			</div></li><li class="listitem"><div class="para">
				Gateway IP address
			</div></li><li class="listitem"><div class="para">
				How often CloudStack fetches network usage statistics from CloudStack virtual routers. If you want to collect traffic metering data from the virtual router, set the global configuration parameter router.stats.interval. If you are not using the virtual router to gather network usage statistics, set it to 0.
			</div></li></ul></div></div><div xml:lang="pt-BR" class="section" id="upgrade-virtual-router-with-service-offering" lang="pt-BR"><div class="titlepage"><div><div><h3 class="title" id="upgrade-virtual-router-with-service-offering">16.4.2. Upgrading a Virtual Router with System Service Offerings</h3></div></div></div><div class="para">
		When CloudStack creates a virtual router, it uses default settings which are defined in a default system service offering. See <a class="xref" href="#system-service-offerings">Seção 8.2, “System Service Offerings”</a>. All the virtual routers in a single guest network use the same system service offering. You can upgrade the capabilities of the virtual router by creating and applying a custom system service offering.
	</div><div class="orderedlist"><ol><li class="listitem"><div class="para">
				Define your custom system service offering. See <a class="xref" href="#creating-system-service-offerings">Seção 8.2.1, “Creating a New System Service Offering”</a>. In System VM Type, choose Domain Router.
			</div></li><li class="listitem"><div class="para">
				Associate the system service offering with a network offering.  <span>See <a class="xref" href="#creating-network-offerings">Seção 9.4.1, “Creating a New Network Offering”</a>.</span>
			</div></li><li class="listitem"><div class="para">
				Apply the network offering to the network where you want the virtual routers to use the new system service offering. If this is a new network, follow the steps in Adding an Additional Guest Network on page 66. To change the service offering for existing virtual routers, follow the steps in <a class="xref" href="#change-network-offering-on-guest-network">Seção 15.6.2, “Alterando a oferta de rede em uma rede hóspede”</a>.
			</div></li></ol></div></div><div xml:lang="pt-BR" class="section" id="best-practices-virtual-router" lang="pt-BR"><div class="titlepage"><div><div><h3 class="title" id="best-practices-virtual-router">16.4.3. Best Practices for Virtual Routers</h3></div></div></div><div class="itemizedlist"><ul><li class="listitem"><div class="para">
				WARNING: Restarting a virtual router from a hypervisor console deletes all the iptables rules. To work around this issue, stop the virtual router and start it from the CloudStack UI.
			</div></li><li class="listitem"><div class="para">
				WARNING: Do not use the destroyRouter API when only one router is available in the network, because restartNetwork API with the cleanup=false parameter can't recreate it later. If you want to destroy and recreate the single router available in the network, use the restartNetwork API with the cleanup=true parameter.
			</div></li></ul></div></div></div><div xml:lang="pt-BR" class="section" id="secondary-storage-vm" lang="pt-BR"><div class="titlepage"><div><div><h2 class="title" id="secondary-storage-vm">16.5. Secondary Storage VM</h2></div></div></div><div class="para">
		In addition to the hosts, CloudStack’s Secondary Storage VM mounts and writes to secondary storage.
	</div><div class="para">
		Submissions to secondary storage go through the Secondary Storage VM. The Secondary Storage VM can retrieve templates and ISO images from URLs using a variety of protocols.
	</div><div class="para">
		The secondary storage VM provides a background task that takes care of a variety of secondary storage activities: downloading a new template to a Zone, copying templates between Zones, and snapshot backups.
	</div><div class="para">
		The administrator can log in to the secondary storage VM if needed.
	</div></div></div><div xml:lang="pt-BR" class="chapter" id="sys-reliability-and-ha" lang="pt-BR"><div class="titlepage"><div><div><h2 class="title">Capítulo 17. System Reliability and High Availability</h2></div></div></div><div class="toc"><dl><dt><span class="section"><a href="#ha-management-server">17.1. HA for Management Server</a></span></dt><dt><span class="section"><a href="#management-server-lb">17.2. Management Server Load Balancing</a></span></dt><dt><span class="section"><a href="#ha-enabled-vm">17.3. HA-Enabled Virtual Machines</a></span></dt><dt><span class="section"><a href="#ha-for-hosts">17.4. HA for Hosts</a></span></dt><dd><dl><dt><span class="section"><a href="#dedicated-ha-hosts">17.4.1. Dedicated HA Hosts</a></span></dt></dl></dd><dt><span class="section"><a href="#primary-storage-outage-and-data-loss">17.5. Primary Storage Outage and Data Loss</a></span></dt><dt><span class="section"><a href="#secondary-storage-outage-and-data-loss">17.6. Secondary Storage Outage and Data Loss</a></span></dt><dt><span class="section"><a href="#api-throttling">17.7. Limiting the Rate of API Requests</a></span></dt><dd><dl><dt><span class="section"><a href="#api-throttling-configure">17.7.1. Configuring the API Request Rate</a></span></dt><dt><span class="section"><a href="#api-throttling-limitations">17.7.2. Limitations on API Throttling</a></span></dt></dl></dd></dl></div><div xml:lang="pt-BR" class="section" id="ha-management-server" lang="pt-BR"><div class="titlepage"><div><div><h2 class="title" id="ha-management-server">17.1. HA for Management Server</h2></div></div></div><div class="para">
		The CloudStack Management Server should be deployed in a multi-node configuration such that it is not susceptible to individual server failures. The Management Server itself (as distinct from the MySQL database) is stateless and may be placed behind a load balancer.
	</div><div class="para">
		Normal operation of Hosts is not impacted by an outage of all Management Serves. All guest VMs will continue to work.
	</div><div class="para">
		When the Management Server is down, no new VMs can be created, and the end user and admin UI, API, dynamic load distribution, and HA will cease to work.
	</div></div><div xml:lang="pt-BR" class="section" id="management-server-lb" lang="pt-BR"><div class="titlepage"><div><div><h2 class="title" id="management-server-lb">17.2. Management Server Load Balancing</h2></div></div></div><div class="para">
		CloudStack can use a load balancer to provide a virtual IP for multiple Management Servers. The administrator is responsible for creating the load balancer rules for the Management Servers. The application requires persistence or stickiness across multiple sessions. The following chart lists the ports that should be load balanced and whether or not persistence is required.
	</div><div class="para">
		Even if persistence is not required, enabling it is permitted.
	</div><div class="informaltable"><table border="1"><colgroup><col width="25%" /><col width="25%" /><col width="25%" /><col width="25%" /></colgroup><thead><tr><th align="left">
						<div class="para">
							Source Port
						</div>
					</th><th align="left">
						<div class="para">
							Destination Port
						</div>
					</th><th align="left">
						<div class="para">
							Protocolo
						</div>
					</th><th align="left">
						<div class="para">
							Persistence Required?
						</div>
					</th></tr></thead><tbody><tr><td align="left">
						<div class="para">
							80 or 443
						</div>
					</td><td align="left">
						<div class="para">
							8080 (or 20400 with AJP)
						</div>
					</td><td align="left">
						<div class="para">
							HTTP (or AJP)
						</div>
					</td><td align="left">
						<div class="para">
							Sim
						</div>
					</td></tr><tr><td align="left">
						<div class="para">
							8250
						</div>
					</td><td align="left">
						<div class="para">
							8250
						</div>
					</td><td align="left">
						<div class="para">
							TCP
						</div>
					</td><td align="left">
						<div class="para">
							Sim
						</div>
					</td></tr><tr><td align="left">
						<div class="para">
							8096
						</div>
					</td><td align="left">
						<div class="para">
							8096
						</div>
					</td><td align="left">
						<div class="para">
							HTTP
						</div>
					</td><td align="left">
						<div class="para">
							Não
						</div>
					</td></tr></tbody></table></div><div class="para">
		In addition to above settings, the administrator is responsible for setting the 'host' global config value from the management server IP to load balancer virtual IP address. If the 'host' value is not set to the VIP for Port 8250 and one of your management servers crashes, the UI is still available but the system VMs will not be able to contact the management server.
	</div></div><div xml:lang="pt-BR" class="section" id="ha-enabled-vm" lang="pt-BR"><div class="titlepage"><div><div><h2 class="title" id="ha-enabled-vm">17.3. HA-Enabled Virtual Machines</h2></div></div></div><div class="para">
		The user can specify a virtual machine as HA-enabled. By default, all virtual router VMs and Elastic Load Balancing VMs are automatically configured as HA-enabled. When an HA-enabled VM crashes, CloudStack detects the crash and restarts the VM automatically within the same Availability Zone. HA is never performed across different Availability Zones. CloudStack has a conservative policy towards restarting VMs and ensures that there will never be two instances of the same VM running at the same time. The Management Server attempts to start the VM on another Host in the same cluster.
	</div><div class="para">
		HA features work with iSCSI or NFS primary storage. HA with local storage is not supported.
	</div></div><div xml:lang="pt-BR" class="section" id="ha-for-hosts" lang="pt-BR"><div class="titlepage"><div><div><h2 class="title" id="ha-for-hosts">17.4. HA for Hosts</h2></div></div></div><div class="para">
		The user can specify a virtual machine as HA-enabled. By default, all virtual router VMs and Elastic Load Balancing VMs are automatically configured as HA-enabled. When an HA-enabled VM crashes, CloudStack detects the crash and restarts the VM automatically within the same Availability Zone. HA is never performed across different Availability Zones. CloudStack has a conservative policy towards restarting VMs and ensures that there will never be two instances of the same VM running at the same time. The Management Server attempts to start the VM on another Host in the same cluster.
	</div><div class="para">
		HA features work with iSCSI or NFS primary storage. HA with local storage is not supported.
	</div><div xml:lang="pt-BR" class="section" id="dedicated-ha-hosts" lang="pt-BR"><div class="titlepage"><div><div><h3 class="title" id="dedicated-ha-hosts">17.4.1. Dedicated HA Hosts</h3></div></div></div><div class="para">
		One or more hosts can be designated for use only by HA-enabled VMs that are restarting due to a host failure. Setting up a pool of such dedicated HA hosts as the recovery destination for all HA-enabled VMs is useful to:
	</div><div class="itemizedlist"><ul><li class="listitem"><div class="para">
				Make it easier to determine which VMs have been restarted as part of the CloudStack high-availability function. If a VM is running on a dedicated HA host, then it must be an HA-enabled VM whose original host failed. (With one exception: It is possible for an administrator to manually migrate any VM to a dedicated HA host.).
			</div></li><li class="listitem"><div class="para">
				Keep HA-enabled VMs from restarting on hosts which may be reserved for other purposes.
			</div></li></ul></div><div class="para">
		The dedicated HA option is set through a special host tag when the host is created. To allow the administrator to dedicate hosts to only HA-enabled VMs, set the global configuration variable ha.tag to the desired tag (for example, "ha_host"), and restart the Management Server. Enter the value in the Host Tags field when adding the host(s) that you want to dedicate to HA-enabled VMs.
	</div><div class="note"><div class="admonition_header"><h2>Nota</h2></div><div class="admonition"><div class="para">
			If you set ha.tag, be sure to actually use that tag on at least one host in your cloud. If the tag specified in ha.tag is not set for any host in the cloud, the HA-enabled VMs will fail to restart after a crash.
		</div></div></div></div></div><div xml:lang="pt-BR" class="section" id="primary-storage-outage-and-data-loss" lang="pt-BR"><div class="titlepage"><div><div><h2 class="title" id="primary-storage-outage-and-data-loss">17.5. Primary Storage Outage and Data Loss</h2></div></div></div><div class="para">
		When a primary storage outage occurs the hypervisor immediately stops all VMs stored on that storage device. Guests that are marked for HA will be restarted as soon as practical when the primary storage comes back on line. With NFS, the hypervisor may allow the virtual machines to continue running depending on the nature of the issue. For example, an NFS hang will cause the guest VMs to be suspended until storage connectivity is restored.Primary storage is not designed to be backed up. Individual volumes in primary storage can be backed up using snapshots.
	</div></div><div xml:lang="pt-BR" class="section" id="secondary-storage-outage-and-data-loss" lang="pt-BR"><div class="titlepage"><div><div><h2 class="title" id="secondary-storage-outage-and-data-loss">17.6. Secondary Storage Outage and Data Loss</h2></div></div></div><div class="para">
		For a Zone that has only one secondary storage server, a secondary storage outage will have feature level impact to the system but will not impact running guest VMs. It may become impossible to create a VM with the selected template for a user. A user may also not be able to save snapshots or examine/restore saved snapshots. These features will automatically be available when the secondary storage comes back online.
	</div><div class="para">
		Secondary storage data loss will impact recently added user data including templates, snapshots, and ISO images. Secondary storage should be backed up periodically. Multiple secondary storage servers can be provisioned within each zone to increase the scalability of the system.
	</div></div><div xml:lang="pt-BR" class="section" id="api-throttling" lang="pt-BR"><div class="titlepage"><div><div><h2 class="title" id="api-throttling">17.7. Limiting the Rate of API Requests</h2></div></div></div><div class="para">
		You can limit the rate at which API requests can be placed for each account. This is useful to avoid malicious attacks on the Management Server, prevent performance degradation, and provide fairness to all accounts.
	</div><div class="para">
		If the number of API calls exceeds the threshold, an error message is returned for any additional API calls. The caller will have to retry these API calls at another time.
	</div><div class="section" id="api-throttling-configure"><div class="titlepage"><div><div><h3 class="title" id="api-throttling-configure">17.7.1. Configuring the API Request Rate</h3></div></div></div><div class="para">
			To control the API request rate, use the following global configuration settings:
		</div><div class="itemizedlist"><ul><li class="listitem"><div class="para">
					api.throttling.enabled - Enable/Disable API throttling. By default, this setting is false, so API throttling is not enabled.
				</div></li><li class="listitem"><div class="para">
					api.throttling.interval (in seconds) - Time interval during which the number of API requests is to be counted. When the interval has passed, the API count is reset to 0.
				</div></li><li class="listitem"><div class="para">
					api.throttling.max - Maximum number of APIs that can be placed within the api.throttling.interval period.
				</div></li><li class="listitem"><div class="para">
					api.throttling.cachesize - Cache size for storing API counters. Use a value higher than the total number of accounts managed by the cloud. One cache entry is needed for each account, to store the running API total for that account.
				</div></li></ul></div></div><div class="section" id="api-throttling-limitations"><div class="titlepage"><div><div><h3 class="title" id="api-throttling-limitations">17.7.2. Limitations on API Throttling</h3></div></div></div><div class="para">
			The following limitations exist in the current implementation of this feature.
		</div><div class="note"><div class="admonition_header"><h2>Nota</h2></div><div class="admonition"><div class="para">
				Even with these limitations, CloudStack is still able to effectively use API throttling to avoid malicious attacks causing denial of service.
			</div></div></div><div class="para">
		</div><div class="itemizedlist"><ul><li class="listitem"><div class="para">
					In a deployment with multiple Management Servers, the cache is not synchronized across them. In this case, CloudStack might not be able to ensure that only the exact desired number of API requests are allowed. In the worst case, the number of API calls that might be allowed is (number of Management Servers) * (api.throttling.max).
				</div></li><li class="listitem"><div class="para">
					The API commands resetApiLimit and getApiLimit are limited to the Management Server where the API is invoked.
				</div></li></ul></div></div></div></div><div xml:lang="pt-BR" class="chapter" id="manage-cloud" lang="pt-BR"><div class="titlepage"><div><div><h2 class="title">Capítulo 18. Gerenciando a nuvem</h2></div></div></div><div class="toc"><dl><dt><span class="section"><a href="#tagging-resources">18.1. Using Tags to Organize Resources in the Cloud</a></span></dt><dt><span class="section"><a href="#change-database-config">18.2. Changing the Database Configuration</a></span></dt><dt><span class="section"><a href="#change-database-password">18.3. Changing the Database Password</a></span></dt><dt><span class="section"><a href="#admin-alerts">18.4. Administrator Alerts</a></span></dt><dt><span class="section"><a href="#customizing-dns">18.5. Customizing the Network Domain Name</a></span></dt><dt><span class="section"><a href="#stop-restart-management-server">18.6. Stopping and Restarting the Management Server</a></span></dt></dl></div><div xml:lang="pt-BR" class="section" id="tagging-resources" lang="pt-BR"><div class="titlepage"><div><div><h2 class="title" id="tagging-resources">18.1. Using Tags to Organize Resources in the Cloud</h2></div></div></div><div class="para">
		A tag is a key-value pair that stores metadata about a resource in the cloud. Tags are useful for categorizing resources. For example, you can tag a user VM with a value that indicates the user's city of residence. In this case, the key would be "city" and the value might be "Toronto" or "Tokyo." You can then request CloudStack to find all resources that have a given tag; for example, VMs for users in a given city.
	</div><div class="para">
		You can tag a user virtual machine, volume, snapshot, guest network, template, ISO, firewall rule, port forwarding rule, public IP address, security group, load balancer rule, project, VPC, network ACL, or static route. You can not tag a remote access VPN.
	</div><div class="para">
		You can work with tags through the UI or through the API commands createTags, deleteTags, and listTags. You can define multiple tags for each resource. There is no limit on the number of tags you can define. Each tag can be up to 255 characters long. Users can define tags on the resources they own, and administrators can define tags on any resources in the cloud.
	</div><div class="para">
		An optional input parameter, "tags," exists on many of the list* API commands. The following example shows how to use this new parameter to find all the volumes having tag region=canada OR tag city=Toronto:
	</div><pre class="programlisting">command=listVolumes
				&amp;listAll=true
				&amp;tags[0].key=region
				&amp;tags[0].value=canada
				&amp;tags[1].key=city
				&amp;tags[1].value=Toronto</pre><div class="para">
		The following API commands have the "tags" input parameter:
	</div><div class="itemizedlist"><ul><li class="listitem"><div class="para">
				listVirtualMachines
			</div></li><li class="listitem"><div class="para">
				listVolumes
			</div></li><li class="listitem"><div class="para">
				listSnapshots
			</div></li><li class="listitem"><div class="para">
				listNetworks
			</div></li><li class="listitem"><div class="para">
				listTemplates
			</div></li><li class="listitem"><div class="para">
				listIsos
			</div></li><li class="listitem"><div class="para">
				listFirewallRules
			</div></li><li class="listitem"><div class="para">
				listPortForwardingRules
			</div></li><li class="listitem"><div class="para">
				listPublicIpAddresses
			</div></li><li class="listitem"><div class="para">
				listSecurityGroups
			</div></li><li class="listitem"><div class="para">
				listLoadBalancerRules
			</div></li><li class="listitem"><div class="para">
				listProjects
			</div></li><li class="listitem"><div class="para">
				listVPCs
			</div></li><li class="listitem"><div class="para">
				listNetworkACLs
			</div></li><li class="listitem"><div class="para">
				listStaticRoutes
			</div></li></ul></div></div><div xml:lang="pt-BR" class="section" id="change-database-config" lang="pt-BR"><div class="titlepage"><div><div><h2 class="title" id="change-database-config">18.2. Changing the Database Configuration</h2></div></div></div><div class="para">
		The CloudStack Management Server stores database configuration information (e.g., hostname, port, credentials) in the file <code class="filename">/etc/cloud/management/db.properties</code>. To effect a change, edit this file on each Management Server, then restart the Management Server.
	</div></div><div xml:lang="pt-BR" class="section" id="change-database-password" lang="pt-BR"><div class="titlepage"><div><div><h2 class="title" id="change-database-password">18.3. Changing the Database Password</h2></div></div></div><div class="para">
		You may need to change the password for the MySQL account used by CloudStack. If so, you'll need to change the password in MySQL, and then add the encrypted password to <code class="filename">/etc/cloud/management/db.properties</code>.
	</div><div class="orderedlist"><ol><li class="listitem"><div class="para">
				Before changing the password, you'll need to stop CloudStack's management server and the usage engine if you've deployed that component.
			</div><pre class="screen">
<code class="command"># service cloudstack-management stop</code>
<code class="command"># service cloudstack-usage stop</code></pre></li><li class="listitem"><div class="para">
				Next, you'll update the password for the CloudStack user on the MySQL server.
			</div><pre class="screen">
<code class="command"># mysql -u root -p</code></pre><div class="para">
				At the MySQL shell, you'll change the password and flush privileges:
			</div><pre class="screen">
<code class="command">update mysql.user set password=PASSWORD("newpassword123") where User='cloud';</code>
<code class="command">flush privileges;</code>
<code class="command">quit;</code></pre></li><li class="listitem"><div class="para">
				The next step is to encrypt the password and copy the encrypted password to CloudStack's database configuration (<code class="filename">/etc/cloud/management/db.properties</code>).
			</div><pre class="screen">
<code class="command"># java -classpath /usr/share/java/cloud-jasypt-1.8.jar \ org.jasypt.intf.cli.JasyptPBEStringEncryptionCLI encrypt.sh \ input="newpassword123" password="`cat /etc/cloud/management/key`" \ verbose=false </code></pre><div class="note"><div class="admonition_header"><h2>File encryption type</h2></div><div class="admonition"><div class="para">
					Note that this is for the file encryption type. If you're using the web encryption type then you'll use password="management_server_secret_key"
				</div></div></div></li><li class="listitem"><div class="para">
				Now, you'll update <code class="filename">/etc/cloud/management/db.properties</code> with the new ciphertext. Open <code class="filename">/etc/cloud/management/db.properties</code> in a text editor, and update these parameters:
			</div><pre class="programlisting">
db.cloud.password=ENC(encrypted_password_from_above) 
db.usage.password=ENC(encrypted_password_from_above)
</pre></li><li class="listitem"><div class="para">
				After copying the new password over, you can now start CloudStack (and the usage engine, if necessary).
			</div><pre class="screen">
        <code class="command"># service cloudstack-management start</code>
        <code class="command"># service cloudstack-usage start</code>
</pre></li></ol></div></div><div xml:lang="pt-BR" class="section" id="admin-alerts" lang="pt-BR"><div class="titlepage"><div><div><h2 class="title" id="admin-alerts">18.4. Administrator Alerts</h2></div></div></div><div class="para">
		The system provides alerts and events to help with the management of the cloud. Alerts are notices to an administrator, generally delivered by e-mail, notifying the administrator that an error has occurred in the cloud. Alert behavior is configurable.
	</div><div class="para">
		Events track all of the user and administrator actions in the cloud. For example, every guest VM start creates an associated event. Events are stored in the Management Server’s database.
	</div><div class="para">
		Emails will be sent to administrators under the following circumstances:
	</div><div class="itemizedlist"><ul><li class="listitem"><div class="para">
				The Management Server cluster runs low on CPU, memory, or storage resources
			</div></li><li class="listitem"><div class="para">
				The Management Server loses heartbeat from a Host for more than 3 minutes
			</div></li><li class="listitem"><div class="para">
				The Host cluster runs low on CPU, memory, or storage resources
			</div></li></ul></div></div><div xml:lang="pt-BR" class="section" id="customizing-dns" lang="pt-BR"><div class="titlepage"><div><div><h2 class="title" id="customizing-dns">18.5. Customizing the Network Domain Name</h2></div></div></div><div class="para">
		The root administrator can optionally assign a custom DNS suffix at the level of a network, account, domain, zone, or entire CloudStack installation, and a domain administrator can do so within their own domain. To specify a custom domain name and put it into effect, follow these steps.
	</div><div class="orderedlist"><ol><li class="listitem"><div class="para">
				Set the DNS suffix at the desired scope
			</div><div class="itemizedlist"><ul><li class="listitem"><div class="para">
						At the network level, the DNS suffix can be assigned through the UI when creating a new network, as described in <a class="xref" href="#add-additional-guest-network">Seção 15.6.1, “Adicionando uma rede hóspede adicional”</a> or with the updateNetwork command in the CloudStack API.
					</div></li><li class="listitem"><div class="para">
						At the account, domain, or zone level, the DNS suffix can be assigned with the appropriate CloudStack API commands: createAccount, editAccount, createDomain, editDomain, createZone, or editZone.
					</div></li><li class="listitem"><div class="para">
						At the global level, use the configuration parameter guest.domain.suffix. You can also use the CloudStack API command updateConfiguration. After modifying this global configuration, restart the Management Server to put the new setting into effect.
					</div></li></ul></div></li><li class="listitem"><div class="para">
				To make the new DNS suffix take effect for an existing network, call the CloudStack API command updateNetwork. This step is not necessary when the DNS suffix was specified while creating a new network.
			</div></li></ol></div><div class="para">
		The source of the network domain that is used depends on the following rules.
	</div><div class="itemizedlist"><ul><li class="listitem"><div class="para">
				For all networks, if a network domain is specified as part of a network's own configuration, that value is used.
			</div></li><li class="listitem"><div class="para">
				For an account-specific network, the network domain specified for the account is used. If none is specified, the system looks for a value in the domain, zone, and global configuration, in that order.
			</div></li><li class="listitem"><div class="para">
				For a domain-specific network, the network domain specified for the domain is used. If none is specified, the system looks for a value in the zone and global configuration, in that order.
			</div></li><li class="listitem"><div class="para">
				For a zone-specific network, the network domain specified for the zone is used. If none is specified, the system looks for a value in the global configuration.
			</div></li></ul></div></div><div xml:lang="pt-BR" class="section" id="stop-restart-management-server" lang="pt-BR"><div class="titlepage"><div><div><h2 class="title" id="stop-restart-management-server">18.6. Stopping and Restarting the Management Server</h2></div></div></div><div class="para">
		The root administrator will need to stop and restart the Management Server from time to time.
	</div><div class="para">
		For example, after changing a global configuration parameter, a restart is required. If you have multiple Management Server nodes, restart all of them to put the new parameter value into effect consistently throughout the cloud..
	</div><div class="para">
		To stop the Management Server, issue the following command at the operating system prompt on the Management Server node:
	</div><pre class="programlisting"># service cloudstack-management stop</pre><div class="para">
		To start the Management Server:
	</div><pre class="programlisting"># service cloudstack-management start</pre><div class="para">
		To stop the Management Server:
	</div><pre class="programlisting"># service cloudstack-management stop</pre></div></div><div xml:lang="pt-BR" class="chapter" id="global-config" lang="pt-BR"><div class="titlepage"><div><div><h2 class="title">Capítulo 19. Global Configuration Parameters</h2></div></div></div><div class="toc"><dl><dt><span class="section"><a href="#setting-global-config-parameters">19.1. Setting Global Configuration Parameters</a></span></dt><dt><span class="section"><a href="#about-global-config-parameters">19.2. About Global Configuration Parameters</a></span></dt></dl></div><div class="section" id="setting-global-config-parameters"><div class="titlepage"><div><div><h2 class="title" id="setting-global-config-parameters">19.1. Setting Global Configuration Parameters</h2></div></div></div><div class="para">
			CloudStack provides parameters that you can set to control many aspects of the cloud. When CloudStack is first installed, and periodically thereafter, you might need to modify these settings.
		</div><div class="orderedlist"><ol><li class="listitem"><div class="para">
					Log in to the UI as administrator.
				</div></li><li class="listitem"><div class="para">
					Na barra de navegação à esquerda, clique em Global Settings.
				</div></li><li class="listitem"><div class="para">
					In Select View, choose one of the following:
				</div><div class="itemizedlist"><ul><li class="listitem"><div class="para">
							Global Settings. This displays a list of the parameters with brief descriptions and current values.
						</div></li><li class="listitem"><div class="para">
							Hypervisor Capabilities. This displays a list of hypervisor versions with the maximum number of guests supported for each.
						</div></li></ul></div></li><li class="listitem"><div class="para">
					Use the search box to narrow down the list to those you are interested in.
				</div></li><li class="listitem"><div class="para">
					Click the Edit icon to modify a value. If you are viewing Hypervisor Capabilities, you must click the name of the hypervisor first to display the editing screen.
				</div></li></ol></div></div><div class="section" id="about-global-config-parameters"><div class="titlepage"><div><div><h2 class="title" id="about-global-config-parameters">19.2. About Global Configuration Parameters</h2></div></div></div><div class="para">
			CloudStack provides a variety of settings you can use to set limits, configure features, and enable or disable features in the cloud. Once your Management Server is running, you might need to set some of these global configuration parameters, depending on what optional features you are setting up.
		</div><div class="para">
			To modify global configuration parameters, use the steps in "Setting Global Configuration Parameters."
		</div><div class="para">
			The documentation for each CloudStack feature should direct you to the names of the applicable parameters. Many of them are discussed in the CloudStack Administration Guide. The following table shows a few of the more useful parameters.
		</div><div class="informaltable"><table border="1"><colgroup><col width="67%" align="left" class="c1" /><col width="33%" align="left" class="c2" /></colgroup><thead><tr><th align="left">
							<div class="para">
								Field
							</div>
						</th><th align="left">
							<div class="para">
								Valor
							</div>
						</th></tr></thead><tbody><tr><td align="left">
							<div class="para">
								management.network.cidr
							</div>
						</td><td align="left">
							<div class="para">
								A CIDR that describes the network that the management CIDRs reside on. This variable must be set for deployments that use vSphere. It is recommended to be set for other deployments as well. Example: 192.168.3.0/24.
							</div>
						</td></tr><tr><td align="left">
							<div class="para">
								xen.setup.multipath
							</div>
						</td><td align="left">
							<div class="para">
								For XenServer nodes, this is a true/false variable that instructs CloudStack to enable iSCSI multipath on the XenServer Hosts when they are added. This defaults to false. Set it to true if you would like CloudStack to enable multipath.
							</div>
							 <div class="para">
								If this is true for a NFS-based deployment multipath will still be enabled on the XenServer host. However, this does not impact NFS operation and is harmless.
							</div>
						</td></tr><tr><td align="left">
							<div class="para">
								secstorage.allowed.internal.sites
							</div>
						</td><td align="left">
							<div class="para">
								This is used to protect your internal network from rogue attempts to download arbitrary files using the template download feature. This is a comma-separated list of CIDRs. If a requested URL matches any of these CIDRs the Secondary Storage VM will use the private network interface to fetch the URL. Other URLs will go through the public interface. We suggest you set this to 1 or 2 hardened internal machines where you keep your templates. For example, set it to 192.168.1.66/32.
							</div>
						</td></tr><tr><td align="left">
							<div class="para">
								use.local.storage
							</div>
						</td><td align="left">
							<div class="para">
								Determines whether CloudStack will use storage that is local to the Host for data disks, templates, and snapshots. By default CloudStack will not use this storage. You should change this to true if you want to use local storage and you understand the reliability and feature drawbacks to choosing local storage.
							</div>
						</td></tr><tr><td align="left">
							<div class="para">
								host
							</div>
						</td><td align="left">
							<div class="para">
								This is the IP address of the Management Server. If you are using multiple Management Servers you should enter a load balanced IP address that is reachable via the private network.
							</div>
						</td></tr><tr><td align="left">
							<div class="para">
								default.page.size
							</div>
						</td><td align="left">
							<div class="para">
								Maximum number of items per page that can be returned by a CloudStack API command. The limit applies at the cloud level and can vary from cloud to cloud. You can override this with a lower value on a particular API call by using the page and pagesize API command parameters. For more information, see the Developer's Guide. Default: 500.
							</div>
						</td></tr><tr><td align="left">
							<div class="para">
								ha.tag
							</div>
						</td><td align="left">
							<div class="para">
								The label you want to use throughout the cloud to designate certain hosts as dedicated HA hosts. These hosts will be used only for HA-enabled VMs that are restarting due to the failure of another host. For example, you could set this to ha_host. Specify the ha.tag value as a host tag when you add a new host to the cloud.
							</div>
						</td></tr></tbody></table></div></div></div><div xml:lang="pt-BR" class="chapter" id="api-overview" lang="pt-BR"><div class="titlepage"><div><div><h2 class="title">Capítulo 20. CloudStack API</h2></div></div></div><div class="toc"><dl><dt><span class="section"><a href="#provisioning-auth-api">20.1. Provisioning and Authentication API</a></span></dt><dt><span class="section"><a href="#allocators">20.2. Allocators</a></span></dt><dt><span class="section"><a href="#user-data-and-meta-data">20.3. User Data and Meta Data</a></span></dt></dl></div><div class="para">
		The CloudStack API is a low level API that has been used to implement the CloudStack web UIs. It is also a good basis for implementing other popular APIs such as EC2/S3 and emerging DMTF standards.
	</div><div class="para">
		Many CloudStack API calls are asynchronous. These will return a Job ID immediately when called. This Job ID can be used to query the status of the job later. Also, status calls on impacted resources will provide some indication of their state.
	</div><div class="para">
		The API has a REST-like query basis and returns results in XML or JSON.
	</div><div class="para">
		See <a href="http://docs.cloudstack.org/CloudStack_Documentation/Developer's_Guide%3A_CloudStack">the Developer’s Guide</a> and <a href="http://docs.cloudstack.org/CloudStack_Documentation/API_Reference%3A_CloudStack">the API Reference</a>.
	</div><div xml:lang="pt-BR" class="section" id="provisioning-auth-api" lang="pt-BR"><div class="titlepage"><div><div><h2 class="title" id="provisioning-auth-api">20.1. Provisioning and Authentication API</h2></div></div></div><div class="para">
		CloudStack expects that a customer will have their own user provisioning infrastructure. It provides APIs to integrate with these existing systems where the systems call out to CloudStack to add/remove users..
	</div><div class="para">
		CloudStack supports pluggable authenticators. By default, CloudStack assumes it is provisioned with the user’s password, and as a result authentication is done locally. However, external authentication is possible as well. For example, see Using an LDAP Server for User Authentication.
	</div></div><div xml:lang="pt-BR" class="section" id="allocators" lang="pt-BR"><div class="titlepage"><div><div><h2 class="title" id="allocators">20.2. Allocators</h2></div></div></div><div class="para">
		CloudStack enables administrators to write custom allocators that will choose the Host to place a new guest and the storage host from which to allocate guest virtual disk images.
	</div></div><div xml:lang="pt-BR" class="section" id="user-data-and-meta-data" lang="pt-BR"><div class="titlepage"><div><div><h2 class="title" id="user-data-and-meta-data">20.3. User Data and Meta Data</h2></div></div></div><div class="para">
		CloudStack provides API access to attach user data to a deployed VM. Deployed VMs also have access to instance metadata via the virtual router.
	</div><div class="para">
		User data can be accessed once the IP address of the virtual router is known. Once the IP address is known, use the following steps to access the user data:
	</div><div class="orderedlist"><ol><li class="listitem"><div class="para">
				Run the following command to find the virtual router.
			</div><pre class="programlisting"># cat /var/lib/dhclient/dhclient-eth0.leases | grep dhcp-server-identifier | tail -1</pre></li><li class="listitem"><div class="para">
				Access user data by running the following command using the result of the above command
			</div><pre class="programlisting"># curl http://10.1.1.1/latest/user-data</pre></li></ol></div><div class="para">
		Meta Data can be accessed similarly, using a URL of the form http://10.1.1.1/latest/meta-data/{metadata type}. (For backwards compatibility, the previous URL http://10.1.1.1/latest/{metadata type} is also supported.) For metadata type, use one of the following:
	</div><div class="itemizedlist"><ul><li class="listitem"><div class="para">
				service-offering. A description of the VMs service offering
			</div></li><li class="listitem"><div class="para">
				availability-zone. The Zone name
			</div></li><li class="listitem"><div class="para">
				local-ipv4. The guest IP of the VM
			</div></li><li class="listitem"><div class="para">
				local-hostname. The hostname of the VM
			</div></li><li class="listitem"><div class="para">
				public-ipv4. The first public IP for the router. (E.g. the first IP of eth2)
			</div></li><li class="listitem"><div class="para">
				public-hostname. This is the same as public-ipv4
			</div></li><li class="listitem"><div class="para">
				instance-id. The instance name of the VM
			</div></li></ul></div></div></div><div xml:lang="pt-BR" class="chapter" id="tuning" lang="pt-BR"><div class="titlepage"><div><div><h2 class="title">Capítulo 21. Tuning</h2></div></div></div><div class="toc"><dl><dt><span class="section"><a href="#performance-monitoring">21.1. Performance Monitoring</a></span></dt><dt><span class="section"><a href="#increase-management-server-max-memory">21.2. Increase Management Server Maximum Memory</a></span></dt><dt><span class="section"><a href="#set-database-buffer-pool-size">21.3. Set Database Buffer Pool Size</a></span></dt><dt><span class="section"><a href="#set-monitor-total-vm-limits-per-host">21.4. Set and Monitor Total VM Limits per Host</a></span></dt><dt><span class="section"><a href="#configure-xenserver-dom0-memory">21.5. Configure XenServer dom0 Memory</a></span></dt></dl></div><div class="para">
		This section provides tips on how to improve the performance of your cloud.
	</div><div xml:lang="pt-BR" class="section" id="performance-monitoring" lang="pt-BR"><div class="titlepage"><div><div><h2 class="title" id="performance-monitoring">21.1. Performance Monitoring</h2></div></div></div><div class="para">
		Host and guest performance monitoring is available to end users and administrators. This allows the user to monitor their utilization of resources and determine when it is appropriate to choose a more powerful service offering or larger disk.
	</div></div><div xml:lang="pt-BR" class="section" id="increase-management-server-max-memory" lang="pt-BR"><div class="titlepage"><div><div><h2 class="title" id="increase-management-server-max-memory">21.2. Increase Management Server Maximum Memory</h2></div></div></div><div class="para">
		If the Management Server is subject to high demand, the default maximum JVM memory allocation can be insufficient. To increase the memory:
	</div><div class="orderedlist"><ol><li class="listitem"><div class="para">
				Edit the Tomcat configuration file:
			</div><pre class="programlisting">/etc/cloud/management/tomcat6.conf</pre></li><li class="listitem"><div class="para">
				Change the command-line parameter -XmxNNNm to a higher value of N.
			</div><div class="para">
				For example, if the current value is -Xmx128m, change it to -Xmx1024m or higher.
			</div></li><li class="listitem"><div class="para">
				To put the new setting into effect, restart the Management Server.
			</div><pre class="programlisting"># service cloudstack-management restart</pre></li></ol></div><div class="para">
		For more information about memory issues, see "FAQ: Memory" at <a href="http://wiki.apache.org/tomcat/FAQ/Memory">Tomcat Wiki.</a>
	</div></div><div xml:lang="pt-BR" class="section" id="set-database-buffer-pool-size" lang="pt-BR"><div class="titlepage"><div><div><h2 class="title" id="set-database-buffer-pool-size">21.3. Set Database Buffer Pool Size</h2></div></div></div><div class="para">
		It is important to provide enough memory space for the MySQL database to cache data and indexes:
	</div><div class="orderedlist"><ol><li class="listitem"><div class="para">
				Edit the MySQL configuration file:
			</div><pre class="programlisting">/etc/my.cnf</pre></li><li class="listitem"><div class="para">
				Insert the following line in the [mysqld] section, below the datadir line. Use a value that is appropriate for your situation. We recommend setting the buffer pool at 40% of RAM if MySQL is on the same server as the management server or 70% of RAM if MySQL has a dedicated server. The following example assumes a dedicated server with 1024M of RAM.
			</div><pre class="programlisting">innodb_buffer_pool_size=700M</pre></li><li class="listitem"><div class="para">
				Reinicie o serviço MySQL.
			</div><pre class="programlisting"># service mysqld restart</pre></li></ol></div><div class="para">
		For more information about the buffer pool, see "The InnoDB Buffer Pool" at <a href="http://dev.mysql.com/doc/refman/5.5/en/innodb-buffer-pool.html">MySQL Reference Manual</a>.
	</div></div><div xml:lang="pt-BR" class="section" id="set-monitor-total-vm-limits-per-host" lang="pt-BR"><div class="titlepage"><div><div><h2 class="title" id="set-monitor-total-vm-limits-per-host">21.4. Set and Monitor Total VM Limits per Host</h2></div></div></div><div class="para">
		The CloudStack administrator should monitor the total number of VM instances in each cluster, and disable allocation to the cluster if the total is approaching the maximum that the hypervisor can handle. Be sure to leave a safety margin to allow for the possibility of one or more hosts failing, which would increase the VM load on the other hosts as the VMs are automatically redeployed. Consult the documentation for your chosen hypervisor to find the maximum permitted number of VMs per host, then use CloudStack global configuration settings to set this as the default limit. Monitor the VM activity in each cluster at all times. Keep the total number of VMs below a safe level that allows for the occasional host failure. For example, if there are N hosts in the cluster, and you want to allow for one host in the cluster to be down at any given time, the total number of VM instances you can permit in the cluster is at most (N-1) * (per-host-limit). Once a cluster reaches this number of VMs, use the CloudStack UI to disable allocation of more VMs to the cluster.
	</div></div><div xml:lang="pt-BR" class="section" id="configure-xenserver-dom0-memory" lang="pt-BR"><div class="titlepage"><div><div><h2 class="title" id="configure-xenserver-dom0-memory">21.5. Configure XenServer dom0 Memory</h2></div></div></div><div class="para">
		Configure the XenServer dom0 settings to allocate more memory to dom0. This can enable XenServer to handle larger numbers of virtual machines. We recommend 2940 MB of RAM for XenServer dom0. For instructions on how to do this, see <a href="http://support.citrix.com/article/CTX126531">Citrix Knowledgebase Article</a>.The article refers to XenServer 5.6, but the same information applies to XenServer 6
	</div></div></div><div xml:lang="pt-BR" class="chapter" id="troubleshooting" lang="pt-BR"><div class="titlepage"><div><div><h2 class="title">Capítulo 22. Troubleshooting</h2></div></div></div><div class="toc"><dl><dt><span class="section"><a href="#events">22.1. Events</a></span></dt><dd><dl><dt><span class="section"><a href="#events-log">22.1.1. Event Logs</a></span></dt><dt><span class="section"><a href="#event-framework">22.1.2. Event Notification</a></span></dt><dt><span class="section"><a href="#standard-events">22.1.3. Standard Events</a></span></dt><dt><span class="section"><a href="#long-running-job-events">22.1.4. Long Running Job Events</a></span></dt><dt><span class="section"><a href="#event-log-queries">22.1.5. Event Log Queries</a></span></dt></dl></dd><dt><span class="section"><a href="#troubleshooting-working-with-server-logs">22.2. Working with Server Logs</a></span></dt><dt><span class="section"><a href="#troubleshooting-dataloss-on-exported-primary-storage">22.3. Data Loss on Exported Primary Storage</a></span></dt><dt><span class="section"><a href="#troubleshooting-recover-lost-virtual-router">22.4. Recovering a Lost Virtual Router </a></span></dt><dt><span class="section"><a href="#troubleshooting-maintenance-mode-not-working-on-vCenter">22.5. Maintenance mode not working on vCenter</a></span></dt><dt><span class="section"><a href="#troubleshooting-unable-to-deploy-vms">22.6. Unable to deploy VMs from uploaded vSphere template</a></span></dt><dt><span class="section"><a href="#troubleshooting-unable-to-power-on-vm">22.7. Unable to power on virtual machine on VMware</a></span></dt><dt><span class="section"><a href="#troubleshooting-lb-rules-fails">22.8. Load balancer rules fail after changing network offering</a></span></dt></dl></div><div xml:lang="pt-BR" class="section" id="events" lang="pt-BR"><div class="titlepage"><div><div><h2 class="title" id="events">22.1. Events</h2></div></div></div><div class="para">
		An event is essentially a significant or meaningful change in the state of both virtual and physical resources associated with a cloud environment. Events are used by monitoring systems, usage and billing systems, or any other event-driven workflow systems to discern a pattern and make the right business decision. In CloudStack an event could be a state change of virtual or psychical resources, an action performed by an user (action events), or policy based events (alerts).
	</div><div xml:lang="pt-BR" class="section" id="events-log" lang="pt-BR"><div class="titlepage"><div><div><h3 class="title" id="events-log">22.1.1. Event Logs</h3></div></div></div><div class="para">
		There are two types of events logged in the CloudStack Event Log. Standard events log the success or failure of an event and can be used to identify jobs or processes that have failed. There are also long running job events. Events for asynchronous jobs log when a job is scheduled, when it starts, and when it completes. Other long running synchronous jobs log when a job starts, and when it completes. Long running synchronous and asynchronous event logs can be used to gain more information on the status of a pending job or can be used to identify a job that is hanging or has not started. The following sections provide more information on these events..
	</div></div><div xml:lang="pt-BR" class="section" id="event-framework" lang="pt-BR"><div class="titlepage"><div><div><h3 class="title" id="event-framework">22.1.2. Event Notification</h3></div></div></div><div class="para">
		Event notification framework provides a means for the Management Server components to publish and subscribe to CloudStack events. Event notification is achieved by implementing the concept of event bus abstraction in the Management Server. An event bus is introduced in the Management Server that allows the CloudStackcomponents and extension plug-ins to subscribe to the events by using the Advanced Message Queuing Protocol (AMQP) client. In CloudStack, a default implementation of event bus is provided as a plug-in that uses the RabbitMQ AMQP client. The AMQP client pushes the published events to a compatible AMQP server. Therefore all the CloudStack events are published to an exchange in the AMQP server.
	</div><div class="para">
		A new event for state change, resource state change, is introduced as part of Event notification framework. Every resource, such as user VM, volume, NIC, network, public IP, snapshot, and template, is associated with a state machine and generates events as part of the state change. That implies that a change in the state of a resource results in a state change event, and the event is published in the corresponding state machine on the event bus. All the CloudStack events (alerts, action events, usage events) and the additional category of resource state change events, are published on to the events bus.
	</div><div class="formalpara"><h5 class="formalpara" id="idp31060968">Use Cases</h5>
			The following are some of the use cases:
		</div><div class="itemizedlist"><ul><li class="listitem"><div class="para">
				Usage or Billing Engines: A third-party cloud usage solution can implement a plug-in that can connects to CloudStack to subscribe to CloudStack events and generate usage data. The usage data is consumed by their usage software.
			</div></li><li class="listitem"><div class="para">
				AMQP plug-in can place all the events on the a message queue, then a AMQP message broker can provide topic-based notification to the subscribers.
			</div></li><li class="listitem"><div class="para">
				Publish and Subscribe notification service can be implemented as a pluggable service in CloudStack that can provide rich set of APIs for event notification, such as topics-based subscription and notification. Additionally, the pluggable service can deal with multi-tenancy, authentication, and authorization issues.
			</div></li></ul></div><div class="formalpara"><h5 class="formalpara" id="idm10965128">Configuração</h5>
			As a CloudStack administrator, perform the following one-time configuration to enable event notification framework. At run time no changes can control the behaviour.
		</div><div class="orderedlist"><ol><li class="listitem"><div class="para">
				Open <code class="filename">'componentContext.xml</code>.
			</div></li><li class="listitem"><div class="para">
				Define a bean named <code class="filename">eventNotificationBus</code> as follows:
			</div><div class="itemizedlist"><ul><li class="listitem"><div class="para">
						name : Specify a name for the bean.
					</div></li><li class="listitem"><div class="para">
						server : The name or the IP address of the RabbitMQ AMQP server.
					</div></li><li class="listitem"><div class="para">
						port : The port on which RabbitMQ server is running.
					</div></li><li class="listitem"><div class="para">
						username : The username associated with the account to access the RabbitMQ server.
					</div></li><li class="listitem"><div class="para">
						password : The password associated with the username of the account to access the RabbitMQ server.
					</div></li><li class="listitem"><div class="para">
						exchange : The exchange name on the RabbitMQ server where CloudStack events are published.
					</div><div class="para">
						A sample bean is given below:
					</div><pre class="programlisting">&lt;bean id="eventNotificationBus" class="org.apache.cloudstack.mom.rabbitmq.RabbitMQEventBus"&gt;
    &lt;property name="name" value="eventNotificationBus"/&gt;
    &lt;property name="server" value="127.0.0.1"/&gt;
    &lt;property name="port" value="5672"/&gt;
    &lt;property name="username" value="guest"/&gt;
    &lt;property name="password" value="guest"/&gt;
   &lt;property name="exchange" value="cloudstack-events"/&gt;
   &lt;/bean&gt;</pre><div class="para">
						The <code class="filename">eventNotificationBus</code> bean represents the <code class="filename">org.apache.cloudstack.mom.rabbitmq.RabbitMQEventBus</code> class.
					</div></li></ul></div></li><li class="listitem"><div class="para">
				Reinicie o servidor de gerenciamento.
			</div></li></ol></div></div><div xml:lang="pt-BR" class="section" id="standard-events" lang="pt-BR"><div class="titlepage"><div><div><h3 class="title" id="standard-events">22.1.3. Standard Events</h3></div></div></div><div class="para">
		The events log records three types of standard events.
	</div><div class="itemizedlist"><ul><li class="listitem"><div class="para">
				INFO. This event is generated when an operation has been successfully performed.
			</div></li><li class="listitem"><div class="para">
				WARN. This event is generated in the following circumstances.
			</div><div class="itemizedlist"><ul><li class="listitem"><div class="para">
						When a network is disconnected while monitoring a template download.
					</div></li><li class="listitem"><div class="para">
						When a template download is abandoned.
					</div></li><li class="listitem"><div class="para">
						When an issue on the storage server causes the volumes to fail over to the mirror storage server.
					</div></li></ul></div></li><li class="listitem"><div class="para">
				ERROR. This event is generated when an operation has not been successfully performed
			</div></li></ul></div></div><div xml:lang="pt-BR" class="section" id="long-running-job-events" lang="pt-BR"><div class="titlepage"><div><div><h3 class="title" id="long-running-job-events">22.1.4. Long Running Job Events</h3></div></div></div><div class="para">
		The events log records three types of standard events.
	</div><div class="itemizedlist"><ul><li class="listitem"><div class="para">
				INFO. This event is generated when an operation has been successfully performed.
			</div></li><li class="listitem"><div class="para">
				WARN. This event is generated in the following circumstances.
			</div><div class="itemizedlist"><ul><li class="listitem"><div class="para">
						When a network is disconnected while monitoring a template download.
					</div></li><li class="listitem"><div class="para">
						When a template download is abandoned.
					</div></li><li class="listitem"><div class="para">
						When an issue on the storage server causes the volumes to fail over to the mirror storage server.
					</div></li></ul></div></li><li class="listitem"><div class="para">
				ERROR. This event is generated when an operation has not been successfully performed
			</div></li></ul></div></div><div xml:lang="pt-BR" class="section" id="event-log-queries" lang="pt-BR"><div class="titlepage"><div><div><h3 class="title" id="event-log-queries">22.1.5. Event Log Queries</h3></div></div></div><div class="para">
		Database logs can be queried from the user interface. The list of events captured by the system includes:
	</div><div class="itemizedlist"><ul><li class="listitem"><div class="para">
				Virtual machine creation, deletion, and on-going management operations
			</div></li><li class="listitem"><div class="para">
				Virtual router creation, deletion, and on-going management operations
			</div></li><li class="listitem"><div class="para">
				Template creation and deletion
			</div></li><li class="listitem"><div class="para">
				Network/load balancer rules creation and deletion
			</div></li><li class="listitem"><div class="para">
				Storage volume creation and deletion
			</div></li><li class="listitem"><div class="para">
				User login and logout
			</div></li></ul></div></div></div><div xml:lang="pt-BR" class="section" id="troubleshooting-working-with-server-logs" lang="pt-BR"><div class="titlepage"><div><div><h2 class="title" id="troubleshooting-working-with-server-logs">22.2. Working with Server Logs</h2></div></div></div><div class="para">
		The CloudStack Management Server logs all web site, middle tier, and database activities for diagnostics purposes in /var/log/cloudstack/management/. The CloudStack logs a variety of error messages. We recommend this command to find the problematic output in the Management Server log:.
	</div><div class="note"><div class="admonition_header"><h2>Nota</h2></div><div class="admonition"><div class="para">
			Ao copiar e colar um comando, certifique-se que o comando tenha colado como uma única linha antes de executar. Alguns viewers documento pode introduzir quebras de linha indesejadas no texto copiado.
		</div></div></div><pre class="programlisting">
        grep -i -E 'exception|unable|fail|invalid|leak|warn|error' /var/log/cloudstack/management/management-server.log
</pre><div class="para">
		The CloudStack processes requests with a Job ID. If you find an error in the logs and you are interested in debugging the issue you can grep for this job ID in the management server log. For example, suppose that you find the following ERROR message:
	</div><pre class="programlisting">
        2010-10-04 13:49:32,595 ERROR [cloud.vm.UserVmManagerImpl] (Job-Executor-11:job-1076) Unable to find any host for [User|i-8-42-VM-untagged]
</pre><div class="para">
		Note that the job ID is 1076. You can track back the events relating to job 1076 with the following grep:
	</div><pre class="programlisting">
        grep "job-1076)" management-server.log
</pre><div class="para">
		The CloudStack Agent Server logs its activities in /var/log/cloudstack/agent/.
	</div></div><div xml:lang="pt-BR" class="section" id="troubleshooting-dataloss-on-exported-primary-storage" lang="pt-BR"><div class="titlepage"><div><div><h2 class="title" id="troubleshooting-dataloss-on-exported-primary-storage">22.3. Data Loss on Exported Primary Storage</h2></div></div></div><div class="formalpara"><h5 class="formalpara" id="idp3690448">Symptom</h5>
			Loss of existing data on primary storage which has been exposed as a Linux NFS server export on an iSCSI volume.
		</div><div class="formalpara"><h5 class="formalpara" id="idp20540752">Cause</h5>
			It is possible that a client from outside the intended pool has mounted the storage. When this occurs, the LVM is wiped and all data in the volume is lost
		</div><div class="formalpara"><h5 class="formalpara" id="idm6675616">Solution</h5>
			When setting up LUN exports, restrict the range of IP addresses that are allowed access by specifying a subnet mask. For example:
		</div><pre class="programlisting">echo “/export 192.168.1.0/24(rw,async,no_root_squash)” &gt; /etc/exports</pre><div class="para">
		Adjust the above command to suit your deployment needs.
	</div><div class="formalpara"><h5 class="formalpara" id="idm13449560">More Information</h5>
			See the export procedure in the "Secondary Storage" section of the CloudStack Installation Guide
		</div></div><div xml:lang="pt-BR" class="section" id="troubleshooting-recover-lost-virtual-router" lang="pt-BR"><div class="titlepage"><div><div><h2 class="title" id="troubleshooting-recover-lost-virtual-router">22.4. Recovering a Lost Virtual Router </h2></div></div></div><div class="formalpara"><h5 class="formalpara" id="idp3486584">Symptom</h5>
			A virtual router is running, but the host is disconnected. A virtual router no longer functions as expected.
		</div><div class="formalpara"><h5 class="formalpara" id="idp27164328">Cause</h5>
			The Virtual router is lost or down.
		</div><div class="formalpara"><h5 class="formalpara" id="idm6531128">Solution</h5>
			If you are sure that a virtual router is down forever, or no longer functions as expected, destroy it. You must create one afresh while keeping the backup router up and running (it is assumed this is in a redundant router setup):
		</div><div class="itemizedlist"><ul><li class="listitem"><div class="para">
				Force stop the router. Use the stopRouter API with forced=true parameter to do so.
			</div></li><li class="listitem"><div class="para">
				Before you continue with destroying this router, ensure that the backup router is running. Otherwise the network connection will be lost.
			</div></li><li class="listitem"><div class="para">
				Destroy the router by using the destroyRouter API.
			</div></li></ul></div><div class="para">
		Recreate the missing router by using the restartNetwork API with cleanup=false parameter. For more information about redundant router setup, see Creating a New Network Offering.
	</div><div class="para">
		For more information about the API syntax, see the API Reference at <a href="http://docs.cloudstack.org/CloudStack_Documentation/API_Reference%3A_CloudStack">http://docs.cloudstack.org/CloudStack_Documentation/API_Reference%3A_CloudStack</a>API Reference.
	</div></div><div xml:lang="pt-BR" class="section" id="troubleshooting-maintenance-mode-not-working-on-vCenter" lang="pt-BR"><div class="titlepage"><div><div><h2 class="title" id="troubleshooting-maintenance-mode-not-working-on-vCenter">22.5. Maintenance mode not working on vCenter</h2></div></div></div><div class="formalpara"><h5 class="formalpara" id="idm16000528">Symptom</h5>
			Host was placed in maintenance mode, but still appears live in vCenter.
		</div><div class="formalpara"><h5 class="formalpara" id="idp17675584">Cause</h5>
			The CloudStack administrator UI was used to place the host in scheduled maintenance mode. This mode is separate from vCenter's maintenance mode.
		</div><div class="formalpara"><h5 class="formalpara" id="idp5511096">Solution</h5>
			Use vCenter to place the host in maintenance mode.
		</div><div class="formalpara"><h5 class="formalpara" id="idp2254176">More Information</h5>
			See <a class="xref" href="#scheduled-maintenance-maintenance-mode-hosts">Seção 11.2, “Scheduled Maintenance and Maintenance Mode for Hosts”</a>
		</div></div><div xml:lang="pt-BR" class="section" id="troubleshooting-unable-to-deploy-vms" lang="pt-BR"><div class="titlepage"><div><div><h2 class="title" id="troubleshooting-unable-to-deploy-vms">22.6. Unable to deploy VMs from uploaded vSphere template</h2></div></div></div><div class="formalpara"><h5 class="formalpara" id="idp15304744">Symptom</h5>
			When attempting to create a VM, the VM will not deploy.
		</div><div class="formalpara"><h5 class="formalpara" id="idp16473448">Cause</h5>
			If the template was created by uploading an OVA file that was created using vSphere Client, it is possible the OVA contained an ISO image. If it does, the deployment of VMs from the template will fail.
		</div><div class="formalpara"><h5 class="formalpara" id="idp31389736">Solution</h5>
			Remove the ISO and re-upload the template.
		</div></div><div xml:lang="pt-BR" class="section" id="troubleshooting-unable-to-power-on-vm" lang="pt-BR"><div class="titlepage"><div><div><h2 class="title" id="troubleshooting-unable-to-power-on-vm">22.7. Unable to power on virtual machine on VMware</h2></div></div></div><div class="formalpara"><h5 class="formalpara" id="idp30013672">Symptom</h5>
			Virtual machine does not power on. You might see errors like:
		</div><div class="itemizedlist"><ul><li class="listitem"><div class="para">
				Unable to open Swap File
			</div></li><li class="listitem"><div class="para">
				Unable to access a file since it is locked
			</div></li><li class="listitem"><div class="para">
				Unable to access Virtual machine configuration
			</div></li></ul></div><div class="formalpara"><h5 class="formalpara" id="idp26239608">Cause</h5>
			A known issue on VMware machines. ESX hosts lock certain critical virtual machine files and file systems to prevent concurrent changes. Sometimes the files are not unlocked when the virtual machine is powered off. When a virtual machine attempts to power on, it can not access these critical files, and the virtual machine is unable to power on.
		</div><div class="formalpara"><h5 class="formalpara" id="idp10934280">Solution</h5>
			See the following:
		</div><div class="para">
		<a href="http://kb.vmware.com/selfservice/microsites/search.do?language=en_US&amp;cmd=displayKC&amp;externalId=10051/">VMware Knowledge Base Article</a>
	</div></div><div xml:lang="pt-BR" class="section" id="troubleshooting-lb-rules-fails" lang="pt-BR"><div class="titlepage"><div><div><h2 class="title" id="troubleshooting-lb-rules-fails">22.8. Load balancer rules fail after changing network offering</h2></div></div></div><div class="formalpara"><h5 class="formalpara" id="idp29744152">Symptom</h5>
			After changing the network offering on a network, load balancer rules stop working.
		</div><div class="formalpara"><h5 class="formalpara" id="idm5648552">Cause</h5>
			Load balancing rules were created while using a network service offering that includes an external load balancer device such as NetScaler, and later the network service offering changed to one that uses the CloudStack virtual router.
		</div><div class="formalpara"><h5 class="formalpara" id="idm7627200">Solution</h5>
			Create a firewall rule on the virtual router for each of your existing load balancing rules so that they continue to function.
		</div></div></div><div xml:lang="pt-BR" class="appendix" id="time-zones" lang="pt-BR"><div class="titlepage"><div><div><h1 class="title">Time Zones</h1></div></div></div><div class="para">
		The following time zone identifiers are accepted by CloudStack. There are several places that have a time zone as a required or optional parameter. These include scheduling recurring snapshots, creating a user, and specifying the usage time zone in the Configuration table.
	</div><div class="informaltable"><table border="1"><colgroup><col align="left" class="c1" width="33%" /><col align="left" class="c2" width="33%" /><col align="left" class="c3" width="33%" /></colgroup><tbody><tr><td align="left">
						<div class="para">
							Etc/GMT+12
						</div>
					</td><td align="left">
						<div class="para">
							Etc/GMT+11
						</div>
					</td><td align="left">
						<div class="para">
							Pacific/Samoa
						</div>
					</td></tr><tr><td align="left">
						<div class="para">
							Pacific/Honolulu
						</div>
					</td><td align="left">
						<div class="para">
							US/Alaska
						</div>
					</td><td align="left">
						<div class="para">
							America/Los_Angeles
						</div>
					</td></tr><tr><td align="left">
						<div class="para">
							Mexico/BajaNorte
						</div>
					</td><td align="left">
						<div class="para">
							US/Arizona
						</div>
					</td><td align="left">
						<div class="para">
							US/Mountain
						</div>
					</td></tr><tr><td align="left">
						<div class="para">
							America/Chihuahua
						</div>
					</td><td align="left">
						<div class="para">
							America/Chicago
						</div>
					</td><td align="left">
						<div class="para">
							America/Costa_Rica
						</div>
					</td></tr><tr><td align="left">
						<div class="para">
							America/Mexico_City
						</div>
					</td><td align="left">
						<div class="para">
							Canada/Saskatchewan
						</div>
					</td><td align="left">
						<div class="para">
							America/Bogota
						</div>
					</td></tr><tr><td align="left">
						<div class="para">
							America/New_York
						</div>
					</td><td align="left">
						<div class="para">
							America/Caracas
						</div>
					</td><td align="left">
						<div class="para">
							America/Asuncion
						</div>
					</td></tr><tr><td align="left">
						<div class="para">
							America/Cuiaba
						</div>
					</td><td align="left">
						<div class="para">
							America/Halifax
						</div>
					</td><td align="left">
						<div class="para">
							America/La_Paz
						</div>
					</td></tr><tr><td align="left">
						<div class="para">
							America/Santiago
						</div>
					</td><td align="left">
						<div class="para">
							America/St_Johns
						</div>
					</td><td align="left">
						<div class="para">
							America/Araguaina
						</div>
					</td></tr><tr><td align="left">
						<div class="para">
							America/Argentina/Buenos_Aires
						</div>
					</td><td align="left">
						<div class="para">
							America/Cayenne
						</div>
					</td><td align="left">
						<div class="para">
							America/Godthab
						</div>
					</td></tr><tr><td align="left">
						<div class="para">
							America/Montevideo
						</div>
					</td><td align="left">
						<div class="para">
							Etc/GMT+2
						</div>
					</td><td align="left">
						<div class="para">
							Atlantic/Azores
						</div>
					</td></tr><tr><td align="left">
						<div class="para">
							Atlantic/Cape_Verde
						</div>
					</td><td align="left">
						<div class="para">
							Africa/Casablanca
						</div>
					</td><td align="left">
						<div class="para">
							Etc/UTC
						</div>
					</td></tr><tr><td align="left">
						<div class="para">
							Atlantic/Reykjavik
						</div>
					</td><td align="left">
						<div class="para">
							Europe/London
						</div>
					</td><td align="left">
						<div class="para">
							CET
						</div>
					</td></tr><tr><td align="left">
						<div class="para">
							Europe/Bucharest
						</div>
					</td><td align="left">
						<div class="para">
							Africa/Johannesburg
						</div>
					</td><td align="left">
						<div class="para">
							Asia/Beirut
						</div>
					</td></tr><tr><td align="left">
						<div class="para">
							Africa/Cairo
						</div>
					</td><td align="left">
						<div class="para">
							Asia/Jerusalem
						</div>
					</td><td align="left">
						<div class="para">
							Europe/Minsk
						</div>
					</td></tr><tr><td align="left">
						<div class="para">
							Europe/Moscow
						</div>
					</td><td align="left">
						<div class="para">
							Africa/Nairobi
						</div>
					</td><td align="left">
						<div class="para">
							Asia/Karachi
						</div>
					</td></tr><tr><td align="left">
						<div class="para">
							Asia/Kolkata
						</div>
					</td><td align="left">
						<div class="para">
							Asia/Bangkok
						</div>
					</td><td align="left">
						<div class="para">
							Asia/Shanghai
						</div>
					</td></tr><tr><td align="left">
						<div class="para">
							Asia/Kuala_Lumpur
						</div>
					</td><td align="left">
						<div class="para">
							Australia/Perth
						</div>
					</td><td align="left">
						<div class="para">
							Asia/Taipei
						</div>
					</td></tr><tr><td align="left">
						<div class="para">
							Asia/Tokyo
						</div>
					</td><td align="left">
						<div class="para">
							Asia/Seoul
						</div>
					</td><td align="left">
						<div class="para">
							Australia/Adelaide
						</div>
					</td></tr><tr><td align="left">
						<div class="para">
							Australia/Darwin
						</div>
					</td><td align="left">
						<div class="para">
							Australia/Brisbane
						</div>
					</td><td align="left">
						<div class="para">
							Australia/Canberra
						</div>
					</td></tr><tr><td align="left">
						<div class="para">
							Pacific/Guam
						</div>
					</td><td align="left">
						<div class="para">
							Pacific/Auckland
						</div>
					</td><td align="left">
						<div class="para">
						</div>
					</td></tr></tbody></table></div></div><div xml:lang="pt-BR" class="appendix" id="event-types" lang="pt-BR"><div class="titlepage"><div><div><h1 class="title">Event Types</h1></div></div></div><div class="informaltable"><table border="1"><colgroup><col align="left" class="c1" width="33%" /><col align="left" class="c2" width="33%" /><col width="33%" /></colgroup><tbody><tr><td align="left">
						<div class="para">
							VM.CREATE
						</div>
					</td><td align="left">
						<div class="para">
							TEMPLATE.EXTRACT
						</div>
					</td><td align="left">
						<div class="para">
							SG.REVOKE.INGRESS
						</div>
					</td></tr><tr><td align="left">
						<div class="para">
							VM.DESTROY
						</div>
					</td><td align="left">
						<div class="para">
							TEMPLATE.UPLOAD
						</div>
					</td><td align="left">
						<div class="para">
							HOST.RECONNECT
						</div>
					</td></tr><tr><td align="left">
						<div class="para">
							VM.START
						</div>
					</td><td align="left">
						<div class="para">
							TEMPLATE.CLEANUP
						</div>
					</td><td align="left">
						<div class="para">
							MAINT.CANCEL
						</div>
					</td></tr><tr><td align="left">
						<div class="para">
							VM.STOP
						</div>
					</td><td align="left">
						<div class="para">
							VOLUME.CREATE
						</div>
					</td><td align="left">
						<div class="para">
							MAINT.CANCEL.PS
						</div>
					</td></tr><tr><td align="left">
						<div class="para">
							VM.REBOOT
						</div>
					</td><td align="left">
						<div class="para">
							VOLUME.DELETE
						</div>
					</td><td align="left">
						<div class="para">
							MAINT.PREPARE
						</div>
					</td></tr><tr><td align="left">
						<div class="para">
							VM.UPGRADE
						</div>
					</td><td align="left">
						<div class="para">
							VOLUME.ATTACH
						</div>
					</td><td align="left">
						<div class="para">
							MAINT.PREPARE.PS
						</div>
					</td></tr><tr><td align="left">
						<div class="para">
							VM.RESETPASSWORD
						</div>
					</td><td align="left">
						<div class="para">
							VOLUME.DETACH
						</div>
					</td><td align="left">
						<div class="para">
							VPN.REMOTE.ACCESS.CREATE
						</div>
					</td></tr><tr><td align="left">
						<div class="para">
							ROUTER.CREATE
						</div>
					</td><td align="left">
						<div class="para">
							VOLUME.UPLOAD
						</div>
					</td><td align="left">
						<div class="para">
							VPN.USER.ADD
						</div>
					</td></tr><tr><td align="left">
						<div class="para">
							ROUTER.DESTROY
						</div>
					</td><td align="left">
						<div class="para">
							SERVICEOFFERING.CREATE
						</div>
					</td><td align="left">
						<div class="para">
							VPN.USER.REMOVE
						</div>
					</td></tr><tr><td align="left">
						<div class="para">
							ROUTER.START
						</div>
					</td><td align="left">
						<div class="para">
							SERVICEOFFERING.UPDATE
						</div>
					</td><td align="left">
						<div class="para">
							NETWORK.RESTART
						</div>
					</td></tr><tr><td align="left">
						<div class="para">
							ROUTER.STOP
						</div>
					</td><td align="left">
						<div class="para">
							SERVICEOFFERING.DELETE
						</div>
					</td><td align="left">
						<div class="para">
							UPLOAD.CUSTOM.CERTIFICATE
						</div>
					</td></tr><tr><td align="left">
						<div class="para">
							ROUTER.REBOOT
						</div>
					</td><td align="left">
						<div class="para">
							DOMAIN.CREATE
						</div>
					</td><td align="left">
						<div class="para">
							UPLOAD.CUSTOM.CERTIFICATE
						</div>
					</td></tr><tr><td align="left">
						<div class="para">
							ROUTER.HA
						</div>
					</td><td align="left">
						<div class="para">
							DOMAIN.DELETE
						</div>
					</td><td align="left">
						<div class="para">
							STATICNAT.DISABLE
						</div>
					</td></tr><tr><td align="left">
						<div class="para">
							PROXY.CREATE
						</div>
					</td><td align="left">
						<div class="para">
							DOMAIN.UPDATE
						</div>
					</td><td align="left">
						<div class="para">
							SSVM.CREATE
						</div>
					</td></tr><tr><td align="left">
						<div class="para">
							PROXY.DESTROY
						</div>
					</td><td align="left">
						<div class="para">
							SNAPSHOT.CREATE
						</div>
					</td><td align="left">
						<div class="para">
							SSVM.DESTROY
						</div>
					</td></tr><tr><td align="left">
						<div class="para">
							PROXY.START
						</div>
					</td><td align="left">
						<div class="para">
							SNAPSHOT.DELETE
						</div>
					</td><td align="left">
						<div class="para">
							SSVM.START
						</div>
					</td></tr><tr><td align="left">
						<div class="para">
							PROXY.STOP
						</div>
					</td><td align="left">
						<div class="para">
							SNAPSHOTPOLICY.CREATE
						</div>
					</td><td align="left">
						<div class="para">
							SSVM.STOP
						</div>
					</td></tr><tr><td align="left">
						<div class="para">
							PROXY.REBOOT
						</div>
					</td><td align="left">
						<div class="para">
							SNAPSHOTPOLICY.UPDATE
						</div>
					</td><td align="left">
						<div class="para">
							SSVM.REBOOT
						</div>
					</td></tr><tr><td align="left">
						<div class="para">
							PROXY.HA
						</div>
					</td><td align="left">
						<div class="para">
							SNAPSHOTPOLICY.DELETE
						</div>
					</td><td align="left">
						<div class="para">
							SSVM.H
						</div>
					</td></tr><tr><td align="left">
						<div class="para">
							VNC.CONNECT
						</div>
					</td><td align="left">
						<div class="para">
							VNC.DISCONNECT
						</div>
					</td><td align="left">
						<div class="para">
							NET.IPASSIGN
						</div>
					</td></tr><tr><td align="left">
						<div class="para">
							NET.IPRELEASE
						</div>
					</td><td align="left">
						<div class="para">
							NET.RULEADD
						</div>
					</td><td align="left">
						<div class="para">
							NET.RULEDELETE
						</div>
					</td></tr><tr><td align="left">
						<div class="para">
							NET.RULEMODIFY
						</div>
					</td><td align="left">
						<div class="para">
							NETWORK.CREATE
						</div>
					</td><td align="left">
						<div class="para">
							NETWORK.DELETE
						</div>
					</td></tr><tr><td align="left">
						<div class="para">
							LB.ASSIGN.TO.RULE
						</div>
					</td><td align="left">
						<div class="para">
							LB.REMOVE.FROM.RULE
						</div>
					</td><td align="left">
						<div class="para">
							LB.CREATE
						</div>
					</td></tr><tr><td align="left">
						<div class="para">
							LB.DELETE
						</div>
					</td><td align="left">
						<div class="para">
							LB.UPDATE
						</div>
					</td><td align="left">
						<div class="para">
							USER.LOGIN
						</div>
					</td></tr><tr><td align="left">
						<div class="para">
							USER.LOGOUT
						</div>
					</td><td align="left">
						<div class="para">
							USER.CREATE
						</div>
					</td><td align="left">
						<div class="para">
							USER.DELETE
						</div>
					</td></tr><tr><td align="left">
						<div class="para">
							USER.UPDATE
						</div>
					</td><td align="left">
						<div class="para">
							USER.DISABLE
						</div>
					</td><td align="left">
						<div class="para">
							TEMPLATE.CREATE
						</div>
					</td></tr><tr><td align="left">
						<div class="para">
							TEMPLATE.DELETE
						</div>
					</td><td align="left">
						<div class="para">
							TEMPLATE.UPDATE
						</div>
					</td><td align="left">
						<div class="para">
							TEMPLATE.COPY
						</div>
					</td></tr><tr><td align="left">
						<div class="para">
							TEMPLATE.DOWNLOAD.START
						</div>
					</td><td align="left">
						<div class="para">
							TEMPLATE.DOWNLOAD.SUCCESS
						</div>
					</td><td align="left">
						<div class="para">
							TEMPLATE.DOWNLOAD.FAILED
						</div>
					</td></tr><tr><td align="left">
						<div class="para">
							ISO.CREATE
						</div>
					</td><td align="left">
						<div class="para">
							ISO.DELETE
						</div>
					</td><td align="left">
						<div class="para">
							ISO.COPY
						</div>
					</td></tr><tr><td align="left">
						<div class="para">
							ISO.ATTACH
						</div>
					</td><td align="left">
						<div class="para">
							ISO.DETACH
						</div>
					</td><td align="left">
						<div class="para">
							ISO.EXTRACT
						</div>
					</td></tr><tr><td align="left">
						<div class="para">
							ISO.UPLOAD
						</div>
					</td><td align="left">
						<div class="para">
							SERVICE.OFFERING.CREATE
						</div>
					</td><td align="left">
						<div class="para">
							SERVICE.OFFERING.EDIT
						</div>
					</td></tr><tr><td align="left">
						<div class="para">
							SERVICE.OFFERING.DELETE
						</div>
					</td><td align="left">
						<div class="para">
							DISK.OFFERING.CREATE
						</div>
					</td><td align="left">
						<div class="para">
							DISK.OFFERING.EDIT
						</div>
					</td></tr><tr><td align="left">
						<div class="para">
							DISK.OFFERING.DELETE
						</div>
					</td><td align="left">
						<div class="para">
							NETWORK.OFFERING.CREATE
						</div>
					</td><td align="left">
						<div class="para">
							NETWORK.OFFERING.EDIT
						</div>
					</td></tr><tr><td align="left">
						<div class="para">
							NETWORK.OFFERING.DELETE
						</div>
					</td><td align="left">
						<div class="para">
							POD.CREATE
						</div>
					</td><td align="left">
						<div class="para">
							POD.EDIT
						</div>
					</td></tr><tr><td align="left">
						<div class="para">
							POD.DELETE
						</div>
					</td><td align="left">
						<div class="para">
							ZONE.CREATE
						</div>
					</td><td align="left">
						<div class="para">
							ZONE.EDIT
						</div>
					</td></tr><tr><td align="left">
						<div class="para">
							ZONE.DELETE
						</div>
					</td><td align="left">
						<div class="para">
							VLAN.IP.RANGE.CREATE
						</div>
					</td><td align="left">
						<div class="para">
							VLAN.IP.RANGE.DELETE
						</div>
					</td></tr><tr><td align="left">
						<div class="para">
							CONFIGURATION.VALUE.EDIT
						</div>
					</td><td align="left">
						<div class="para">
							SG.AUTH.INGRESS
						</div>
					</td><td align="left">
						<div class="para">
						</div>
					</td></tr></tbody></table></div></div><div xml:lang="pt-BR" class="appendix" id="alerts" lang="pt-BR"><div class="titlepage"><div><div><h1 class="title">Alerts</h1></div></div></div><div class="para">
		The following is the list of alert type numbers. The current alerts can be found by calling listAlerts.
	</div><pre class="programlisting">MEMORY = 0</pre><pre class="programlisting">CPU = 1</pre><pre class="programlisting">STORAGE =2</pre><pre class="programlisting">STORAGE_ALLOCATED = 3</pre><pre class="programlisting">PUBLIC_IP = 4</pre><pre class="programlisting">PRIVATE_IP = 5</pre><pre class="programlisting">HOST = 6</pre><pre class="programlisting">USERVM = 7</pre><pre class="programlisting">DOMAIN_ROUTER = 8</pre><pre class="programlisting">CONSOLE_PROXY = 9</pre><pre class="programlisting">ROUTING = 10// lost connection to default route (to the gateway)</pre><pre class="programlisting">STORAGE_MISC = 11 // lost connection to default route (to the gateway)</pre><pre class="programlisting">USAGE_SERVER = 12 // lost connection to default route (to the gateway)</pre><pre class="programlisting">MANAGMENT_NODE = 13 // lost connection to default route (to the gateway)</pre><pre class="programlisting">DOMAIN_ROUTER_MIGRATE = 14</pre><pre class="programlisting">CONSOLE_PROXY_MIGRATE = 15</pre><pre class="programlisting">USERVM_MIGRATE = 16</pre><pre class="programlisting">VLAN = 17</pre><pre class="programlisting">SSVM = 18</pre><pre class="programlisting">USAGE_SERVER_RESULT = 19</pre><pre class="programlisting">STORAGE_DELETE = 20;</pre><pre class="programlisting">UPDATE_RESOURCE_COUNT = 21; //Generated when we fail to update the resource count</pre><pre class="programlisting">USAGE_SANITY_RESULT = 22;</pre><pre class="programlisting">DIRECT_ATTACHED_PUBLIC_IP = 23;</pre><pre class="programlisting">LOCAL_STORAGE = 24;</pre><pre class="programlisting">RESOURCE_LIMIT_EXCEEDED = 25; //Generated when the resource limit exceeds the limit. Currently used for recurring snapshots only</pre></div><div xml:lang="pt-BR" class="appendix" id="appe-cloudstack-Revision_History" lang="pt-BR"><div class="titlepage"><div><div><h1 class="title">Revision History</h1></div></div></div><div class="para">
		<div class="revhistory"><table border="0" width="100%" summary="Revision history"><tr><th align="left" valign="top" colspan="3"><strong>Histórico de Revisões</strong></th></tr><tr><td align="left">Revisão 0-0</td><td align="left">Tue May 29 2012</td><td align="left"><span class="author"><span class="firstname">Jessica</span> <span class="surname">Tomechak</span></span></td></tr><tr><td align="left" colspan="3">
					<table border="0" summary="Simple list" class="simplelist"><tr><td>Initial creation of book by publican</td></tr></table>

				</td></tr></table></div>

	</div></div></div></body></html>