<?xml version="1.0" encoding="UTF-8"?>
<!DOCTYPE html PUBLIC "-//W3C//DTD XHTML 1.0 Strict//EN" "http://www.w3.org/TR/xhtml1/DTD/xhtml1-strict.dtd">
<html xmlns="http://www.w3.org/1999/xhtml"><head><meta http-equiv="Content-Type" content="text/html; charset=UTF-8" /><title>CloudStack 開​發​者​指​南​</title><link rel="stylesheet" type="text/css" href="Common_Content/css/default.css" /><link rel="stylesheet" media="print" href="Common_Content/css/print.css" type="text/css" /><meta name="generator" content="publican 2.8" /><meta name="package" content="Apache_CloudStack-Developers_Guide-4.1.0-zh-TW-1-" /><meta name="description" content="這​個​指​南​教​您​如​何​開​發​CloudStack、​使​用​API來​操​作​及​整​合​、​存​取​資​料​及​使​用​CloudStack特​定​工​具​來​簡​化​開​發​、​測​試​和​整​合​" /><script type="text/javascript" src="../../../../../toc.js"></script><script type="text/javascript">
              addID('Apache_CloudStack');
              
	      addID('Apache_CloudStack.4.1.0');
              
              addID('Apache_CloudStack.4.1.0.books');
	      addID('Apache_CloudStack.4.1.0.Developers_Guide');
              </script></head><body class="toc_embeded "><div id="tocdiv" class="toc"><iframe id="tocframe" class="toc" src="../../../../toc.html">This is an iframe, to view it upgrade your browser or enable iframe display.</iframe></div><p id="title"><a class="left" href="http://cloudstack.apache.org"><img src="Common_Content/images/image_left.png" alt="Product Site" /></a><a class="right" href="http://cloudstack.apache.org/docs"><img src="Common_Content/images/image_right.png" alt="Documentation Site" /></a></p><div xml:lang="zh-TW" class="book" id="idm208752" lang="zh-TW"><div class="titlepage"><div><div class="producttitle"><span class="productname">Apache CloudStack</span> <span class="productnumber">4.1.0</span></div><div><h1 id="idm208752" class="title">CloudStack 開​發​者​指​南​</h1></div><p class="edition">版 </p><div><h3 class="corpauthor">
			<span class="inlinemediaobject"><object data="Common_Content/images/title_logo.svg" type="image/svg+xml"> </object></span>

		</h3></div><div><div xml:lang="zh-TW" class="authorgroup" lang="zh-TW"><div class="author"><h3 class="author"><span class="firstname">Apache</span> <span class="surname">CloudStack</span></h3></div></div></div><hr /><div><div id="idm7990600" class="legalnotice"><h1 class="legalnotice">法律聲明</h1><div class="para">
		Licensed to the Apache Software Foundation (ASF) under one or more contributor license agreements. See the NOTICE file distributed with this work for additional information regarding copyright ownership. The ASF licenses this file to you under the Apache License, Version 2.0 (the "License"); you may not use this file except in compliance with the License. You may obtain a copy of the License at
	</div><div class="para">
		http://www.apache.org/licenses/LICENSE-2.0
	</div><div class="para">
		Unless required by applicable law or agreed to in writing, software distributed under the License is distributed on an "AS IS" BASIS, WITHOUT WARRANTIES OR CONDITIONS OF ANY KIND, either express or implied. See the License for the specific language governing permissions and limitations under the License.
	</div><div class="para">
		Apache CloudStack is an effort undergoing incubation at The Apache Software Foundation (ASF).
	</div><div class="para">
		Incubation is required of all newly accepted projects until a further review indicates that the infrastructure, communications, and decision making process have stabilized in a manner consistent with other successful ASF projects. While incubation status is not necessarily a reflection of the completeness or stability of the code, it does indicate that the project has yet to be fully endorsed by the ASF.
	</div></div></div><div><div class="abstract"><h6>摘要</h6><div class="para">
				這​個​指​南​教​您​如​何​開​發​CloudStack、​使​用​API來​操​作​及​整​合​、​存​取​資​料​及​使​用​CloudStack特​定​工​具​來​簡​化​開​發​、​測​試​和​整​合​
			</div></div></div></div><hr /></div><div class="toc"><dl><dt><span class="chapter"><a href="#concepts">1. 概​念​</a></span></dt><dd><dl><dt><span class="section"><a href="#whatis">1.1. 甚​麼​是​CloudStack？</a></span></dt><dt><span class="section"><a href="#feature-overview">1.2. What Can CloudStack Do?</a></span></dt><dt><span class="section"><a href="#deployment-architecture-overview">1.3. 架​設​架​構​總​攬​</a></span></dt><dd><dl><dt><span class="section"><a href="#management-server-overview">1.3.1. Management Server Overview</a></span></dt><dt><span class="section"><a href="#cloud-infrastructure-overview">1.3.2. 雲​端​基​礎​架​構​簡​介​</a></span></dt><dt><span class="section"><a href="#networking-overview">1.3.3. 網​路​簡​介​</a></span></dt></dl></dd></dl></dd><dt><span class="chapter"><a href="#building-with-maven">2. 使​用​ Maven建​立​ CloudStack</a></span></dt><dd><dl><dt><span class="section"><a href="#source-build">2.1. 從​原​始​碼​建​立​ CloudStack</a></span></dt><dt><span class="section"><a href="#build-prerequisites">2.2. 建​立​程​序​事​前​準​備​</a></span></dt><dt><span class="section"><a href="#building-with-maven-steps">2.3. 建​立​步​驟​</a></span></dt><dt><span class="section"><a href="#building-with-maven-deploy">2.4. 部​署​及​測​試​步​驟​</a></span></dt></dl></dd><dt><span class="chapter"><a href="#developer-introduction">3. Introduction to the CloudStack API</a></span></dt><dd><dl><dt><span class="section"><a href="#roles">3.1. Roles</a></span></dt><dt><span class="section"><a href="#api-reference">3.2. API Reference Documentation</a></span></dt><dt><span class="section"><a href="#getting-started">3.3. Getting Started</a></span></dt></dl></dd><dt><span class="chapter"><a href="#whats-new">4. 有​甚​麼​新​的​API？</a></span></dt><dd><dl><dt><span class="section"><a href="#whats-new-in-api-4.1">4.1. 4.1版​本​</a></span></dt><dd><dl><dt><span class="section"><a href="#add-remove-nic">4.1.1. Reconfiguring Physical Networks in VMs</a></span></dt><dt><span class="section"><a href="#ipv6-support">4.1.2. IPv6 Support in CloudStack</a></span></dt><dt><span class="section"><a href="#vmx-settings-dev">4.1.3. 額​外​的​VMX設​定​</a></span></dt><dt><span class="section"><a href="#reset-ssh-key-dev">4.1.4. 重​新​設​定​ SSH金​鑰​來​存​取​VM</a></span></dt><dt><span class="section"><a href="#changed-apicommands-4.1">4.1.5. Changed API Commands in 4.1</a></span></dt><dt><span class="section"><a href="#added-API-commands-4.1">4.1.6. 4.1-incubating新​增​API指​令​</a></span></dt></dl></dd><dt><span class="section"><a href="#whats-new-in-api-4.0">4.2. 4.0版​本​</a></span></dt><dd><dl><dt><span class="section"><a href="#changed-apicommands-4.0">4.2.1. 4.0.0-incubating改​變​API指​令​</a></span></dt><dt><span class="section"><a href="#added-API-commands-4.0">4.2.2. 4.0.0-incubating新​增​API指​令​</a></span></dt></dl></dd><dt><span class="section"><a href="#whats-new-in-api-3.0">4.3. 3.0版​本​</a></span></dt><dd><dl><dt><span class="section"><a href="#enabling-port-8096">4.3.1. 啟​用​8096網​路​連​接​埠​</a></span></dt><dt><span class="section"><a href="#stopped-vm">4.3.2. 已​停​止​的​虛​擬​機​器​</a></span></dt><dt><span class="section"><a href="#change-to-behavior-of-list-commands">4.3.3. Change to Behavior of List Commands</a></span></dt><dt><span class="section"><a href="#removed-API-commands">4.3.4. Removed API commands</a></span></dt><dt><span class="section"><a href="#added-API-commands">4.3.5. Added API commands in 3.0</a></span></dt><dt><span class="section"><a href="#added-error-codes">4.3.6. 增​加​的​CloudStack錯​誤​馬​</a></span></dt></dl></dd></dl></dd><dt><span class="chapter"><a href="#api-calls">5. 對​CloudStack API 發​出​請​求​</a></span></dt><dd><dl><dt><span class="section"><a href="#making-api-request">5.1. Making API Requests</a></span></dt><dt><span class="section"><a href="#signing-api-requests">5.2. Signing API Requests</a></span></dt><dd><dl><dt><span class="section"><a href="#signing-api-calls-python">5.2.1. How to sign an API call with Python</a></span></dt></dl></dd><dt><span class="section"><a href="#enabling-api-call-expiration">5.3. Enabling API Call Expiration</a></span></dt><dt><span class="section"><a href="#api-throttling">5.4. Limiting the Rate of API Requests</a></span></dt><dd><dl><dt><span class="section"><a href="#api-throttling-configure">5.4.1. Configuring the API Request Rate</a></span></dt><dt><span class="section"><a href="#api-throttling-limitations">5.4.2. Limitations on API Throttling</a></span></dt></dl></dd><dt><span class="section"><a href="#responses">5.5. Responses</a></span></dt><dd><dl><dt><span class="section"><a href="#response-formats">5.5.1. Response Formats: XML and JSON</a></span></dt><dt><span class="section"><a href="#max-result-page-returned">5.5.2. Maximum Result Pages Returned</a></span></dt><dt><span class="section"><a href="#error-handling">5.5.3. Error Handling</a></span></dt></dl></dd><dt><span class="section"><a href="#asynchronous-commands">5.6. Asynchronous Commands</a></span></dt><dd><dl><dt><span class="section"><a href="#job-status">5.6.1. 工​作​狀​態​</a></span></dt><dt><span class="section"><a href="#asynchronous-commands-example">5.6.2. Example</a></span></dt></dl></dd></dl></dd><dt><span class="chapter"><a href="#working-with-usage-data">6. 使​用​使​用​資​料​</a></span></dt><dd><dl><dt><span class="section"><a href="#usage-record-format">6.1. Usage Record Format</a></span></dt><dd><dl><dt><span class="section"><a href="#virtual-machine-usage-record-format">6.1.1. Virtual Machine Usage Record Format</a></span></dt><dt><span class="section"><a href="#network-usage-record-format">6.1.2. Network Usage Record Format</a></span></dt><dt><span class="section"><a href="#ipaddress-usage-record-format">6.1.3. IP位​址​使​用​紀​錄​的​格​式​</a></span></dt><dt><span class="section"><a href="#disk-volume-usage-record-format">6.1.4. Disk Volume Usage Record Format</a></span></dt><dt><span class="section"><a href="#template-iso-snapshot-usage-record-format">6.1.5. 模​組​、​ISO及​快​取​物​件​的​使​用​紀​錄​格​式​</a></span></dt><dt><span class="section"><a href="#loadbalancer-policy-port-forwarding-rule-usage-record-format">6.1.6. Load Balancer Policy 或​ Port Forwarding Rule 的​使​用​季​錄​格​式​</a></span></dt><dt><span class="section"><a href="#network-offering-usage-record-format">6.1.7. Network Offering Usage Record Format</a></span></dt><dt><span class="section"><a href="#VPN-user-usage-record-format">6.1.8. VPN使​用​者​使​用​紀​錄​格​式​</a></span></dt></dl></dd><dt><span class="section"><a href="#usage-types">6.2. Usage Types</a></span></dt><dt><span class="section"><a href="#example-response-from-listUsageRecords">6.3. Example response from listUsageRecords</a></span></dt><dt><span class="section"><a href="#dates-in-usage-record">6.4. Dates in the Usage Record</a></span></dt><dt><span class="section"><a href="#globally-configured-limits">6.5. 廣​域​設​定​限​制​</a></span></dt></dl></dd><dt><span class="chapter"><a href="#working-with-documentation">7. 準​備​及​建​立​CloudStack文​件​</a></span></dt><dd><dl><dt><span class="section"><a href="#installing-publican">7.1. 安​裝​</a></span></dt><dt><span class="section"><a href="#building-documentation">7.2. 建​立​CloudStack文​件​</a></span></dt><dt><span class="section"><a href="#writing-new-documentation">7.3. 撰​寫​CloudStack文​件​</a></span></dt><dt><span class="section"><a href="#building-translation">7.4. 翻​譯​CloudStack文​件​</a></span></dt><dd><dl><dt><span class="section"><a href="#translating-documentation">7.4.1. 翻​譯​CloudStack文​件​</a></span></dt></dl></dd></dl></dd><dt><span class="chapter"><a href="#tools">8. 工​具​</a></span></dt><dd><dl><dt><span class="section"><a href="#devcloud">8.1. DevCloud</a></span></dt><dd><dl><dt><span class="section"><a href="#devcloud-usage-mode">8.1.1. DevCloud使​用​模​式​</a></span></dt><dt><span class="section"><a href="#building-devcloud">8.1.2. 建​立​DevCloud</a></span></dt></dl></dd><dt><span class="section"><a href="#marvin">8.2. Marvin</a></span></dt><dd><dl><dt><span class="section"><a href="#building-marvin">8.2.1. 建​立​及​安​裝​ Marvin</a></span></dt></dl></dd><dt><span class="section"><a href="#cloudmonkey">8.3. CloudMonkey</a></span></dt><dd><dl><dt><span class="section"><a href="#gettingcloudmonkey">8.3.1. Installing CloudMonkey</a></span></dt><dt><span class="section"><a href="#configuringcloudmonkey">8.3.2. 系​統​設​定​</a></span></dt><dt><span class="section"><a href="#cliapidiscovery">8.3.3. API Discovery</a></span></dt><dt><span class="section"><a href="#clitabularoutput">8.3.4. Tabular Output</a></span></dt><dt><span class="section"><a href="#interactivecli">8.3.5. Interactive Shell Usage</a></span></dt><dt><span class="section"><a href="#startingavmexample">8.3.6. Starting a Virtual Machine instance with CloudMonkey</a></span></dt><dt><span class="section"><a href="#scriptingcli">8.3.7. Scripting with CloudMonkey</a></span></dt></dl></dd><dt><span class="section"><a href="#libcloud-examples">8.4. Apache Libcloud</a></span></dt></dl></dd><dt><span class="appendix"><a href="#event-types">A. Event Types</a></span></dt><dt><span class="appendix"><a href="#alerts">B. 警​告​</a></span></dt><dt><span class="appendix"><a href="#time-zones">C. 時​區​</a></span></dt><dt><span class="appendix"><a href="#appe-cloudstack-Revision_History">D. 修​訂​記​錄​</a></span></dt></dl></div><div xml:lang="zh-TW" class="chapter" id="concepts" lang="zh-TW"><div class="titlepage"><div><div><h2 class="title">章 1. 概​念​</h2></div></div></div><div class="toc"><dl><dt><span class="section"><a href="#whatis">1.1. 甚​麼​是​CloudStack？</a></span></dt><dt><span class="section"><a href="#feature-overview">1.2. What Can CloudStack Do?</a></span></dt><dt><span class="section"><a href="#deployment-architecture-overview">1.3. 架​設​架​構​總​攬​</a></span></dt><dd><dl><dt><span class="section"><a href="#management-server-overview">1.3.1. Management Server Overview</a></span></dt><dt><span class="section"><a href="#cloud-infrastructure-overview">1.3.2. 雲​端​基​礎​架​構​簡​介​</a></span></dt><dt><span class="section"><a href="#networking-overview">1.3.3. 網​路​簡​介​</a></span></dt></dl></dd></dl></div><div xml:lang="zh-TW" class="section" id="whatis" lang="zh-TW"><div class="titlepage"><div><div><h2 class="title" id="whatis">1.1. 甚​麼​是​CloudStack？</h2></div></div></div><div class="para">
		CloudStack 是​一​個​開​放​原​始​碼​的​軟​體​，將​運​算​資​源​抽​象​化​成​一​整​個​資​源​庫​提​供​了​公​有​、​私​有​以​及​混​和​式​的​雲​端​平​台​服​務​(IAAS)。​CloudStack具​備​了​管​理​網​路​、​儲​存​裝​置​和​計​算​資​源​的​能​力​，使​用​者​可​以​運​用​CloudStack 部​屬​、​管​理​、​設​定​雲​端​環​境​
	</div><div class="para">
		一​般​使​用​者​為​服​務​提​供​者​及​企​業​，有​了​CloudStack，您​可​以​：
	</div><div class="itemizedlist"><ul><li class="listitem"><div class="para">
				依​照​需​求​建​立​一​個​具​備​彈​性​的​雲​端​服​務​，網​路​服​務​提​供​業​者​可​以​販​售​虛​擬​機​、​儲​存​服​務​、​網​路​設​定​服​務​。​
			</div></li><li class="listitem"><div class="para">
				建​立​一​個​只​提​供​內​部​員​工​所​使​用​的​私​有​雲​服​務​，與​傳​統​管​理​實​體​主​機​的​方​式​有​所​不​同​，企​業​員​工​不​需​透​過​IT部​門​即​可​自​助​式​的​使​用​虛​擬​機​
			</div></li></ul></div><div class="mediaobject"><img src="./images/1000-foot-view.png" width="444" alt="1000-foot-view.png: Overview of CloudStack" /></div></div><div xml:lang="zh-TW" class="section" id="feature-overview" lang="zh-TW"><div class="titlepage"><div><div><h2 class="title" id="feature-overview">1.2. What Can CloudStack Do?</h2></div></div></div><div class="para">
		<span class="bold bold"><strong>Multiple Hypervisor Support</strong></span>
	</div><div class="para">
		CloudStack works with a variety of hypervisors, and a single cloud deployment can contain multiple hypervisor implementations. The current release of CloudStack supports pre-packaged enterprise solutions like Citrix XenServer and VMware vSphere, as well as KVM or Xen running on Ubuntu or CentOS.
	</div><div class="para">
		<span class="bold bold"><strong>Massively Scalable Infrastructure Management</strong></span>
	</div><div class="para">
		CloudStack can manage tens of thousands of servers installed in multiple geographically distributed datacenters. The centralized management server scales linearly, eliminating the need for intermediate cluster-level management servers. No single component failure can cause cloud-wide outage. Periodic maintenance of the management server can be performed without affecting the functioning of virtual machines running in the cloud.
	</div><div class="para">
		<span class="bold bold"><strong>Automatic Configuration Management</strong></span>
	</div><div class="para">
		CloudStack automatically configures each guest virtual machine’​s networking and storage settings.
	</div><div class="para">
		CloudStack internally manages a pool of virtual appliances to support the cloud itself. These appliances offer services such as firewalling, routing, DHCP, VPN access, console proxy, storage access, and storage replication. The extensive use of virtual appliances simplifies the installation, configuration, and ongoing management of a cloud deployment.
	</div><div class="para">
		<span class="bold bold"><strong>Graphical User Interface</strong></span>
	</div><div class="para">
		CloudStack offers an administrator's Web interface, used for provisioning and managing the cloud, as well as an end-user's Web interface, used for running VMs and managing VM templates. The UI can be customized to reflect the desired service provider or enterprise look and feel.
	</div><div class="para">
		<span class="bold bold"><strong>API and Extensibility</strong></span>
	</div><div class="para">
		CloudStack provides an API that gives programmatic access to all the management features available in the UI. The API is maintained and documented. This API enables the creation of command line tools and new user interfaces to suit particular needs. See the Developer’​s Guide and API Reference, both available at <a href="http://cloudstack.apache.org/docs/en-US/index.html">Apache CloudStack Guides</a> and <a href="http://cloudstack.apache.org/docs/api/index.html">Apache CloudStack API Reference</a> respectively.
	</div><div class="para">
		The CloudStack pluggable allocation architecture allows the creation of new types of allocators for the selection of storage and Hosts. See the Allocator Implementation Guide (<a href="http://docs.cloudstack.org/CloudStack_Documentation/Allocator_Implementation_Guide">http://docs.cloudstack.org/CloudStack_Documentation/Allocator_Implementation_Guide</a>).
	</div><div class="para">
		<span class="bold bold"><strong>High Availability</strong></span>
	</div><div class="para">
		CloudStack has a number of features to increase the availability of the system. The Management Server itself may be deployed in a multi-node installation where the servers are load balanced. MySQL may be configured to use replication to provide for a manual failover in the event of database loss. For the hosts, CloudStack supports NIC bonding and the use of separate networks for storage as well as iSCSI Multipath.
	</div></div><div xml:lang="zh-TW" class="section" id="deployment-architecture-overview" lang="zh-TW"><div class="titlepage"><div><div><h2 class="title" id="deployment-architecture-overview">1.3. 架​設​架​構​總​攬​</h2></div></div></div><div class="para">
		CloudStack的​安​裝​包​含​兩​個​部​分​：管​理​伺​服​器​及​雲​端​基​礎​架​構​，當​您​架​設​及​管​理​一​個​CloudStack雲​端​時​，您​需​要​提​供​如​主​機​、​儲​存​裝​置​及​IP位​址​等​資​源​給​管​理​伺​服​器​，而​管​理​伺​服​器​幫​您​管​理​這​些​資​源​
	</div><div class="para">
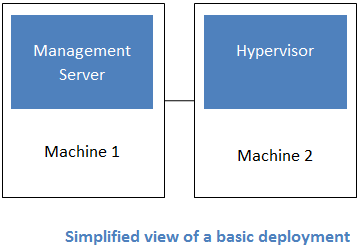
		產​品​的​最​少​安​裝​包​含​一​個​執​行​CloudStack管​理​伺​服​器​的​機​器​及​雲​端​基​礎​架​構​的​機​器​(這​個​例​子​是​只​包​含​一​個​執​行​超​級​監​督​者​程​式​的​主​機​)，在​最​小​的​架​構​中​，一​個​機​器​可​以​同​時​執​行​管​理​伺​服​器​及​超​級​監​督​者​主​機​(使​用​ KVM hypervisor )
	</div><div class="mediaobject"><img src="./images/basic-deployment.png" alt="basic-deployment.png: Basic two-machine deployment" /></div><div class="para">
		完​全​安​裝​包​含​多​點​管​理​伺​服​器​及​上​千​上​萬​使​用​多​種​進​階​網​路​設​定​的​主​機​，更​多​資​訊​詳​見​ $PRODUCT;安​裝​指​南​的​"Choosing a Deployment Architecture"部​分​
	</div><div xml:lang="zh-TW" class="section" id="management-server-overview" lang="zh-TW"><div class="titlepage"><div><div><h3 class="title" id="management-server-overview">1.3.1. Management Server Overview</h3></div></div></div><div class="para">
		The Management Server is the CloudStack software that manages cloud resources. By interacting with the Management Server through its UI or API, you can configure and manage your cloud infrastructure.
	</div><div class="para">
		The Management Server runs on a dedicated server or VM. It controls allocation of virtual machines to hosts and assigns storage and IP addresses to the virtual machine instances. The Management Server runs in a Tomcat container and requires a MySQL database for persistence.
	</div><div class="para">
		The machine must meet the system requirements described in System Requirements.
	</div><div class="para">
		The Management Server:
	</div><div class="itemizedlist"><ul><li class="listitem"><div class="para">
				Provides the web user interface for the administrator and a reference user interface for end users.
			</div></li><li class="listitem"><div class="para">
				Provides the APIs for CloudStack.
			</div></li><li class="listitem"><div class="para">
				Manages the assignment of guest VMs to particular hosts.
			</div></li><li class="listitem"><div class="para">
				Manages the assignment of public and private IP addresses to particular accounts.
			</div></li><li class="listitem"><div class="para">
				Manages the allocation of storage to guests as virtual disks.
			</div></li><li class="listitem"><div class="para">
				Manages snapshots, templates, and ISO images, possibly replicating them across data centers.
			</div></li><li class="listitem"><div class="para">
				Provides a single point of configuration for the cloud.
			</div></li></ul></div></div><div xml:lang="zh-TW" class="section" id="cloud-infrastructure-overview" lang="zh-TW"><div class="titlepage"><div><div><h3 class="title" id="cloud-infrastructure-overview">1.3.2. 雲​端​基​礎​架​構​簡​介​</h3></div></div></div><div class="para">
		管​理​伺​服​器​管​理​多​個​區​域​(通​常​為​資​料​中​心​)，包​含​訪​客​虛​擬​機​器​的​主​機​，雲​端​基​礎​架​構​可​以​組​織​為​下​：
	</div><div class="itemizedlist"><ul><li class="listitem"><div class="para">
				Zone：通​常​，區​域​等​於​一​個​資​料​中​心​。​區​域​包​含​一​至​多​個​pods極​次​要​儲​存​裝​置​
			</div></li><li class="listitem"><div class="para">
				Pod：通​常​是​一​層​硬​體​架​構​，包​含​ layer-2交​換​器​及​一​至​多​個​叢​集​
			</div></li><li class="listitem"><div class="para">
				Cluster：通​常​包​含​一​至​多​個​主​機​及​主​要​儲​存​裝​置​
			</div></li><li class="listitem"><div class="para">
				Host：叢​集​中​的​運​算​節​點​，以​訪​客​虛​擬​機​器​的​形​式​在​實​際​的​雲​端​運​行​
			</div></li><li class="listitem"><div class="para">
				主​要​儲​存​裝​置​連​結​到​叢​集​，存​放​所​有​VM的​硬​碟​容​量​
			</div></li><li class="listitem"><div class="para">
				次​要​儲​存​裝​置​連​結​到​區​域​，儲​存​模​組​、​ISO映​像​及​硬​碟​容​量​快​取​物​件​
			</div></li></ul></div><div class="mediaobject"><img src="./images/infrastructure-overview.png" width="444" alt="infrastructure_overview.png: Nested organization of a zone" /></div><div class="para">
		<span class="bold bold"><strong>More Information</strong></span>
	</div><div class="para">
		更​多​資​訊​，請​參​閱​cloud infrastructure concepts的​文​件​
	</div></div><div xml:lang="zh-TW" class="section" id="networking-overview" lang="zh-TW"><div class="titlepage"><div><div><h3 class="title" id="networking-overview">1.3.3. 網​路​簡​介​</h3></div></div></div><div class="para">
		CloudStack提​供​兩​種​網​路​範​本​：
	</div><div class="itemizedlist"><ul><li class="listitem"><div class="para">
				基​本​。​為​類​似​AWS模​式​的​網​路​架​構​，提​供​layer-3的​Security group安​全​機​制​(IP位​置​過​濾​機​制​)
			</div></li><li class="listitem"><div class="para">
				進​階​。​ 提​供​使​用​者​更​多​的​網​路​拓​撲​結​構​，選​擇​此​選​項​將​可​更​彈​性​的​設​定​網​路​
			</div></li></ul></div><div class="para">
		更​多​細​節​，見​Network Setup
	</div></div></div></div><div xml:lang="zh-TW" class="chapter" id="building-with-maven" lang="zh-TW"><div class="titlepage"><div><div><h2 class="title">章 2. 使​用​ Maven建​立​ CloudStack</h2></div></div></div><div class="toc"><dl><dt><span class="section"><a href="#source-build">2.1. 從​原​始​碼​建​立​ CloudStack</a></span></dt><dt><span class="section"><a href="#build-prerequisites">2.2. 建​立​程​序​事​前​準​備​</a></span></dt><dt><span class="section"><a href="#building-with-maven-steps">2.3. 建​立​步​驟​</a></span></dt><dt><span class="section"><a href="#building-with-maven-deploy">2.4. 部​署​及​測​試​步​驟​</a></span></dt></dl></div><div xml:lang="zh-TW" class="section" id="source-build" lang="zh-TW"><div class="titlepage"><div><div><h2 class="title" id="source-build">2.1. 從​原​始​碼​建​立​ CloudStack</h2></div></div></div><div class="note"><div class="admonition_header"><h2>注意</h2></div><div class="admonition"><div class="para">
			Prior to the 4.0.0 incubating release, Ant was used to build CloudStack. A migration to Maven started in the 4.0.0 cycle, and has completed in 4.1.0.
		</div><div class="para">
			網​站​及​維​基​皆​包​含​最​新​的​資​訊​：
		</div><div class="itemizedlist"><ul><li class="listitem"><div class="para">
					<a href="https://cwiki.apache.org/CLOUDSTACK/building-with-maven.html">https://cwiki.apache.org/CLOUDSTACK/building-with-maven.html</a>
				</div></li><li class="listitem"><div class="para">
					<a href="https://cwiki.apache.org/CLOUDSTACK/setting-up-cloudstack-development-environment.html">https://cwiki.apache.org/CLOUDSTACK/setting-up-cloudstack-development-environment.html</a>
				</div></li></ul></div></div></div><div class="para">
		建​立​ CloudStack 的​首​要​步​驟​為​：
	</div><div class="itemizedlist"><ul><li class="listitem"><div class="para">
				安​裝​先​決​條​件​及​設​定​環​境​
			</div></li><li class="listitem"><div class="para">
				理​解​Maven外​型​的​多​樣​性​及​建​立​目​標​
			</div></li><li class="listitem"><div class="para">
				部​署​及​測​試​
			</div></li><li class="listitem"><div class="para">
				如​果​需​要​，學​習​如​何​建​立​二​進​為​文​件​
			</div></li></ul></div><div class="note"><div class="admonition_header"><h2>注意</h2></div><div class="admonition"><div class="para">
			學​習​Maven不​再​此​文​件​範​圍​中​
		</div><div class="para">
			到​Maven網​站​<a href="http://maven.apache.org/guides/getting-started/index.html">http://maven.apache.org/guides/getting-started/index.html</a>
		</div></div></div></div><div xml:lang="zh-TW" class="section" id="build-prerequisites" lang="zh-TW"><div class="titlepage"><div><div><h2 class="title" id="build-prerequisites">2.2. 建​立​程​序​事​前​準​備​</h2></div></div></div><div class="para">
		此​章​節​，我​們​假​設​您​是​使​用​Ubuntu Linux distribution 的​ Advanced Packaging Tool (APT)，如​果​您​是​使​用​不​同​的​產​品​或​作​業​系​統​及​不​同​的​packaging tool，請​依​循​以​下​指​示​來​適​合​您​的​環​境​。​建​立​CloudStack您​需​要​：
	</div><div class="itemizedlist"><ul><li class="listitem"><div class="para">
				git, <a href="http://git-scm.com">http://git-scm.com</a>
			</div><div class="para">
				
<pre class="programlisting">sudo apt-get install git-core</pre>
			</div></li><li class="listitem"><div class="para">
				maven, <a href="http://maven.apache.org">http://maven.apache.org</a>
			</div><div class="para">
				
<pre class="programlisting">sudo apt-get install maven</pre>
			</div><div class="para">
				Make sure that you installed maven 3
			</div><div class="para">
				
<pre class="programlisting">$ mvn --version
Apache Maven 3.0.4
Maven home: /usr/share/maven
Java version: 1.6.0_24, vendor: Sun Microsystems Inc.
Java home: /usr/lib/jvm/java-6-openjdk-amd64/jre
Default locale: en_US, platform encoding: UTF-8
OS name: "linux", version: "3.2.0-33-generic", arch: "amd64", family: "unix"</pre>
			</div></li><li class="listitem"><div class="para">
				java
			</div><div class="para">
				設​定​ JAVA_HOME環​境​變​數​
			</div><div class="para">
				
<pre class="programlisting">$ export JAVA_HOME=/usr/lib/jvm/java-6-openjdk</pre>
			</div></li></ul></div><div class="para">
		除​此​之​外​，想​要​驗​開​發​環​境​下​部​署​及​執​行​CloudStack，您​需​要​：
	</div><div class="itemizedlist"><ul><li class="listitem"><div class="para">
				Mysql
			</div><div class="para">
				
<pre class="programlisting">sudo apt-get install mysql-server-5.5</pre>
			</div><div class="para">
				啟​動​mysqld服​務​，並​建​立​雲​端​使​用​者​及​密​碼​為​cloud
			</div></li><li class="listitem"><div class="para">
				Tomcat 6
			</div><div class="para">
				
<pre class="programlisting">sudo apt-get install tomcat6</pre>
			</div></li></ul></div></div><div xml:lang="zh-TW" class="section" id="building-with-maven-steps" lang="zh-TW"><div class="titlepage"><div><div><h2 class="title" id="building-with-maven-steps">2.3. 建​立​步​驟​</h2></div></div></div><div class="para">
		CloudStack使​用​git來​控​制​原​始​碼​版​本​，請​先​拉​它​確​定​您​有​原​始​碼​
	</div><pre class="programlisting">git clone https://git-wip-us.apache.org/repos/asf/cloudstack.git</pre><div class="para">
		許​多​Project Object Models (POM)定​義​為​處​理​多​種​CloudStack建​立​目​標​，特​定​功​能​需​要​以​些​不​相​容​Apache license的​packages，因​此​需​要​自​行​下​載​，檢​查​Wiki <a href="https://cwiki.apache.org/CLOUDSTACK/building-with-maven.html">https://cwiki.apache.org/CLOUDSTACK/building-with-maven.html</a>：
	</div><div class="para">
		
<pre class="programlisting">mvn clean install</pre>
	</div><div class="para">
		結​果​的​jar檔​案​會​在​目​標​資​料​夾​的​子​資​料​夾​下​，為​編​譯​過​的​組​件​
	</div></div><div xml:lang="zh-TW" class="section" id="building-with-maven-deploy" lang="zh-TW"><div class="titlepage"><div><div><h2 class="title" id="building-with-maven-deploy">2.4. 部​署​及​測​試​步​驟​</h2></div></div></div><div class="para">
		部​署​您​編​譯​的​CloudStack code有​兩​個​步​驟​：
	</div><div class="orderedlist"><ol><li class="listitem"><div class="para">
				如​果​您​還​沒​設​定​資​料​庫​或​修​改​其​性​質​，請​執​行​：
			</div><div class="para">
				
<pre class="programlisting">mvn -P developer -pl developer -Ddeploydb</pre>
			</div></li><li class="listitem"><div class="para">
				然​後​，您​需​要​執​行​CloudStack管​理​伺​服​器​，連​結​一​個​除​錯​器​到​伺​服​器​：
			</div><div class="para">
				
<pre class="programlisting">export MAVEN_OPTS="-Xmx1024 -Xdebug -Xrunjdwp:transport=dt_socket,address=8787,server=y,suspend=n"</pre>
			</div><div class="para">
				
<pre class="programlisting">mvn -pl :cloud-client-ui jetty:run</pre>
			</div></li></ol></div><div class="warning"><div class="admonition_header"><h2>警告</h2></div><div class="admonition"><div class="para">
			處​理​資​料​庫​時​，記​得​，您​可​能​會​整​個​刪​掉​它​及​失​去​所​有​資​料​中​心​設​定​
		</div></div></div></div></div><div xml:lang="zh-TW" class="chapter" id="developer-introduction" lang="zh-TW"><div class="titlepage"><div><div><h2 class="title">章 3. Introduction to the CloudStack API</h2></div></div></div><div class="toc"><dl><dt><span class="section"><a href="#roles">3.1. Roles</a></span></dt><dt><span class="section"><a href="#api-reference">3.2. API Reference Documentation</a></span></dt><dt><span class="section"><a href="#getting-started">3.3. Getting Started</a></span></dt></dl></div><div xml:lang="zh-TW" class="section" id="roles" lang="zh-TW"><div class="titlepage"><div><div><h2 class="title" id="roles">3.1. Roles</h2></div></div></div><div class="para">
		The CloudStack API supports three access roles:
	</div><div class="orderedlist"><ol><li class="listitem"><div class="para">
				Root Admin. Access to all features of the cloud, including both virtual and physical resource management.
			</div></li><li class="listitem"><div class="para">
				Domain Admin. Access to only the virtual resources of the clouds that belong to the administrator’​s domain.
			</div></li><li class="listitem"><div class="para">
				User. Access to only the features that allow management of the user’​s virtual instances, storage, and network.
			</div></li></ol></div></div><div xml:lang="zh-TW" class="section" id="api-reference" lang="zh-TW"><div class="titlepage"><div><div><h2 class="title" id="api-reference">3.2. API Reference Documentation</h2></div></div></div><div class="para">
		You can find all the API reference documentation at the below site:
	</div><div class="para">
		<a href="http://cloudstack.apache.org/docs/api/">http://cloudstack.apache.org/docs/api/</a>
	</div></div><div xml:lang="zh-TW" class="section" id="getting-started" lang="zh-TW"><div class="titlepage"><div><div><h2 class="title" id="getting-started">3.3. Getting Started</h2></div></div></div><div class="para">
		To get started using the CloudStack API, you should have the following:
	</div><div class="itemizedlist"><ul><li class="listitem"><div class="para">
				URL of the CloudStack server you wish to integrate with.
			</div></li><li class="listitem"><div class="para">
				Both the API Key and Secret Key for an account. This should have been generated by the administrator of the cloud instance and given to you.
			</div></li><li class="listitem"><div class="para">
				Familiarity with HTTP GET/POST and query strings.
			</div></li><li class="listitem"><div class="para">
				Knowledge of either XML or JSON.
			</div></li><li class="listitem"><div class="para">
				Knowledge of a programming language that can generate HTTP requests; for example, Java or PHP.
			</div></li></ul></div></div></div><div xml:lang="zh-TW" class="chapter" id="whats-new" lang="zh-TW"><div class="titlepage"><div><div><h2 class="title">章 4. 有​甚​麼​新​的​API？</h2></div></div></div><div class="toc"><dl><dt><span class="section"><a href="#whats-new-in-api-4.1">4.1. 4.1版​本​</a></span></dt><dd><dl><dt><span class="section"><a href="#add-remove-nic">4.1.1. Reconfiguring Physical Networks in VMs</a></span></dt><dt><span class="section"><a href="#ipv6-support">4.1.2. IPv6 Support in CloudStack</a></span></dt><dt><span class="section"><a href="#vmx-settings-dev">4.1.3. 額​外​的​VMX設​定​</a></span></dt><dt><span class="section"><a href="#reset-ssh-key-dev">4.1.4. 重​新​設​定​ SSH金​鑰​來​存​取​VM</a></span></dt><dt><span class="section"><a href="#changed-apicommands-4.1">4.1.5. Changed API Commands in 4.1</a></span></dt><dt><span class="section"><a href="#added-API-commands-4.1">4.1.6. 4.1-incubating新​增​API指​令​</a></span></dt></dl></dd><dt><span class="section"><a href="#whats-new-in-api-4.0">4.2. 4.0版​本​</a></span></dt><dd><dl><dt><span class="section"><a href="#changed-apicommands-4.0">4.2.1. 4.0.0-incubating改​變​API指​令​</a></span></dt><dt><span class="section"><a href="#added-API-commands-4.0">4.2.2. 4.0.0-incubating新​增​API指​令​</a></span></dt></dl></dd><dt><span class="section"><a href="#whats-new-in-api-3.0">4.3. 3.0版​本​</a></span></dt><dd><dl><dt><span class="section"><a href="#enabling-port-8096">4.3.1. 啟​用​8096網​路​連​接​埠​</a></span></dt><dt><span class="section"><a href="#stopped-vm">4.3.2. 已​停​止​的​虛​擬​機​器​</a></span></dt><dt><span class="section"><a href="#change-to-behavior-of-list-commands">4.3.3. Change to Behavior of List Commands</a></span></dt><dt><span class="section"><a href="#removed-API-commands">4.3.4. Removed API commands</a></span></dt><dt><span class="section"><a href="#added-API-commands">4.3.5. Added API commands in 3.0</a></span></dt><dt><span class="section"><a href="#added-error-codes">4.3.6. 增​加​的​CloudStack錯​誤​馬​</a></span></dt></dl></dd></dl></div><div class="para">
		以​下​描​述​每​個​CloudStack版​本​中​任​何​新​的​主​要​功​能​，功​能​適​用​於​API
	</div><div class="section" id="whats-new-in-api-4.1"><div class="titlepage"><div><div><h2 class="title" id="whats-new-in-api-4.1">4.1. 4.1版​本​</h2></div></div></div><div xml:lang="zh-TW" class="section" id="add-remove-nic" lang="zh-TW"><div class="titlepage"><div><div><h3 class="title" id="add-remove-nic">4.1.1. Reconfiguring Physical Networks in VMs</h3></div></div></div><div class="para">
		CloudStack provides the ability to move VMs between networks and reconfigure a VM's network. You can remove a VM from a physical network and add to a new physical network. You can also change the default physical network of a virtual machine. With this functionality, hybrid or traditional server loads can be accommodated with ease.
	</div><div class="para">
		This feature is supported on XenServer and KVM hypervisors.
	</div><div class="para">
		The following APIs have been added to support this feature. These API calls can function only while the VM is in running or stopped state.
	</div><div class="section" id="addnic"><div class="titlepage"><div><div><h4 class="title" id="addnic">4.1.1.1. addNicToVirtualMachine</h4></div></div></div><div class="para">
			The addNicToVirtualMachine API adds a new NIC to the specified VM on a selected network.
		</div><div class="informaltable"><table border="1"><colgroup><col width="33%" /><col width="33%" /><col width="33%" /></colgroup><thead><tr><th align="left">
							<div class="para">
								parameter
							</div>
						</th><th align="left">
							<div class="para">
								description
							</div>
						</th><th align="left">
							<div class="para">
								數​值​
							</div>
						</th></tr></thead><tbody><tr><td align="left">
							<div class="para">
								virtualmachineid
							</div>
						</td><td align="left">
							<div class="para">
								The unique ID of the VM to which the NIC is to be added.
							</div>
						</td><td align="left">
							<div class="para">
								true
							</div>
						</td></tr><tr><td align="left">
							<div class="para">
								networkid
							</div>
						</td><td align="left">
							<div class="para">
								The unique ID of the network the NIC that you add should apply to.
							</div>
						</td><td align="left">
							<div class="para">
								true
							</div>
						</td></tr><tr><td align="left">
							<div class="para">
								ipaddress
							</div>
						</td><td align="left">
							<div class="para">
								The IP address of the VM on the network.
							</div>
						</td><td align="left">
							<div class="para">
								false
							</div>
						</td></tr></tbody></table></div><div class="para">
			The network and VM must reside in the same zone. Two VMs with the same name cannot reside in the same network. Therefore, adding a second VM that duplicates a name on a network will fail.
		</div></div><div class="section" id="removenic"><div class="titlepage"><div><div><h4 class="title" id="removenic">4.1.1.2. removeNicFromVirtualMachine</h4></div></div></div><div class="para">
			The removeNicFromVirtualMachine API removes a NIC from the specified VM on a selected network.
		</div><div class="informaltable"><table border="1"><colgroup><col width="33%" /><col width="33%" /><col width="33%" /></colgroup><thead><tr><th align="left">
							<div class="para">
								parameter
							</div>
						</th><th align="left">
							<div class="para">
								description
							</div>
						</th><th align="left">
							<div class="para">
								數​值​
							</div>
						</th></tr></thead><tbody><tr><td align="left">
							<div class="para">
								virtualmachineid
							</div>
						</td><td align="left">
							<div class="para">
								The unique ID of the VM from which the NIC is to be removed.
							</div>
						</td><td align="left">
							<div class="para">
								true
							</div>
						</td></tr><tr><td align="left">
							<div class="para">
								nicid
							</div>
						</td><td align="left">
							<div class="para">
								The unique ID of the NIC that you want to remove.
							</div>
						</td><td align="left">
							<div class="para">
								true
							</div>
						</td></tr></tbody></table></div><div class="para">
			Removing the default NIC is not allowed.
		</div></div><div class="section" id="defaultnic"><div class="titlepage"><div><div><h4 class="title" id="defaultnic">4.1.1.3. updateDefaultNicForVirtualMachine</h4></div></div></div><div class="para">
			The updateDefaultNicForVirtualMachine API updates the specified NIC to be the default one for a selected VM.
		</div><div class="informaltable"><table border="1"><colgroup><col width="33%" /><col width="33%" /><col width="33%" /></colgroup><thead><tr><th align="left">
							<div class="para">
								parameter
							</div>
						</th><th align="left">
							<div class="para">
								description
							</div>
						</th><th align="left">
							<div class="para">
								數​值​
							</div>
						</th></tr></thead><tbody><tr><td align="left">
							<div class="para">
								virtualmachineid
							</div>
						</td><td align="left">
							<div class="para">
								The unique ID of the VM for which you want to specify the default NIC.
							</div>
						</td><td align="left">
							<div class="para">
								true
							</div>
						</td></tr><tr><td align="left">
							<div class="para">
								nicid
							</div>
						</td><td align="left">
							<div class="para">
								The unique ID of the NIC that you want to set as the default one.
							</div>
						</td><td align="left">
							<div class="para">
								true
							</div>
						</td></tr></tbody></table></div></div></div><div xml:lang="zh-TW" class="section" id="ipv6-support" lang="zh-TW"><div class="titlepage"><div><div><h3 class="title" id="ipv6-support">4.1.2. IPv6 Support in CloudStack</h3></div></div></div><div class="para">
		CloudStacksupports Internet Protocol version 6 (IPv6), the recent version of the Internet Protocol (IP) that defines routing the network traffic. IPv6 uses a 128-bit address that exponentially expands the current address space that is available to the users. IPv6 addresses consist of eight groups of four hexadecimal digits separated by colons, for example, 5001:0dt8:83a3:1012:1000:8s2e:0870:7454. CloudStack supports IPv6 for public IPs in shared networks. With IPv6 support, VMs in shared networks can obtain both IPv4 and IPv6 addresses from the DHCP server. You can deploy VMs either in a IPv6 or IPv4 network, or in a dual network environment. If IPv6 network is used, the VM generates a link-local IPv6 address by itself, and receives a stateful IPv6 address from the DHCPv6 server.
	</div><div class="para">
		IPv6 is supported only on KVM and XenServer hypervisors. The IPv6 support is only an experimental feature.
	</div><div class="para">
		Here's the sequence of events when IPv6 is used:
	</div><div class="orderedlist"><ol><li class="listitem"><div class="para">
				The administrator creates an IPv6 shared network in an advanced zone.
			</div></li><li class="listitem"><div class="para">
				The user deploys a VM in an IPv6 shared network.
			</div></li><li class="listitem"><div class="para">
				The user VM generates an IPv6 link local address by itself, and gets an IPv6 global or site local address through DHCPv6.
			</div><div class="para">
				For information on API changes, see <a class="xref" href="#changed-apicommands-4.1">節 4.1.5, “Changed API Commands in 4.1”</a>.
			</div></li></ol></div><div class="section" id="guidelines-ipv6"><div class="titlepage"><div><div><h4 class="title" id="guidelines-ipv6">4.1.2.1. Prerequisites and Guidelines</h4></div></div></div><div class="para">
			Consider the following:
		</div><div class="itemizedlist"><ul><li class="listitem"><div class="para">
					CIDR size must be 64 for IPv6 networks.
				</div></li><li class="listitem"><div class="para">
					The DHCP client of the guest VMs should support generating DUID based on Link-layer Address (DUID- LL). DUID-LL derives from the MAC address of guest VMs, and therefore the user VM can be identified by using DUID. See <a href="http://tools.ietf.org/html/rfc3315">Dynamic Host Configuration Protocol for IPv6 </a>for more information.
				</div></li><li class="listitem"><div class="para">
					The gateway of the guest network generates Router Advisement and Response messages to Router Solicitation. The M (Managed Address Configuration) flag of Router Advisement should enable stateful IP address configuration. Set the M flag to where the end nodes receive their IPv6 addresses from the DHCPv6 server as opposed to the router or switch.
				</div><div class="note"><div class="admonition_header"><h2>注意</h2></div><div class="admonition"><div class="para">
						The M flag is the 1-bit Managed Address Configuration flag for Router Advisement. When set, Dynamic Host Configuration Protocol (DHCPv6) is available for address configuration in addition to any IPs set by using stateless address auto-configuration.
					</div></div></div></li><li class="listitem"><div class="para">
					Use the System VM template exclusively designed to support IPv6. Download the System VM template from <a href="http://cloudstack.apt-get.eu/systemvm/">http://cloudstack.apt-get.eu/systemvm/</a>.
				</div></li><li class="listitem"><div class="para">
					The concept of Default Network applies to IPv6 networks. However, unlike IPv4 CloudStack does not control the routing information of IPv6 in shared network; the choice of Default Network will not affect the routing in the user VM.
				</div></li><li class="listitem"><div class="para">
					In a multiple shared network, the default route is set by the rack router, rather than the DHCP server, which is out of CloudStack control. Therefore, in order for the user VM to get only the default route from the default NIC, modify the configuration of the user VM, and set non-default NIC's <code class="code">accept_ra</code> to 0 explicitly. The <code class="code">accept_ra</code> parameter accepts Router Advertisements and auto-configure <code class="code">/proc/sys/net/ipv6/conf/interface</code> with received data.
				</div></li></ul></div></div><div class="section" id="limitsipv6"><div class="titlepage"><div><div><h4 class="title" id="limitsipv6">4.1.2.2. Limitations of IPv6 in CloudStack </h4></div></div></div><div class="para">
			The following are not yet supported:
		</div><div class="orderedlist"><ol><li class="listitem"><div class="para">
					Security groups
				</div></li><li class="listitem"><div class="para">
					Userdata and metadata
				</div></li><li class="listitem"><div class="para">
					Passwords
				</div></li></ol></div></div><div class="section" id="network-conf-dhcpv6"><div class="titlepage"><div><div><h4 class="title" id="network-conf-dhcpv6">4.1.2.3. Guest VM Configuration for DHCPv6</h4></div></div></div><div class="para">
			For the guest VMs to get IPv6 address, run dhclient command manually on each of the VMs. Use DUID-LL to set up dhclient.
		</div><div class="note"><div class="admonition_header"><h2>注意</h2></div><div class="admonition"><div class="para">
				The IPv6 address is lost when a VM is stopped and started. Therefore, use the same procedure to get an IPv6 address when a VM is stopped and started.
			</div></div></div><div class="orderedlist"><ol><li class="listitem"><div class="para">
					Set up dhclient by using DUID-LL.
				</div><div class="para">
					Perform the following for DHCP Client 4.2 and above:
				</div><div class="orderedlist"><ol class="loweralpha"><li class="listitem"><div class="para">
							Run the following command on the selected VM to get the dhcpv6 offer from VR:
						</div><pre class="programlisting">dhclient -6 -D LL &lt;dev&gt;</pre></li></ol></div><div class="para">
					Perform the following for DHCP Client 4.1:
				</div><div class="orderedlist"><ol class="loweralpha"><li class="listitem"><div class="para">
							Open the following to the dhclient configuration file:
						</div><pre class="programlisting">vi /etc/dhcp/dhclient.conf</pre></li><li class="listitem"><div class="para">
							Add the following to the dhclient configuration file:
						</div><pre class="programlisting">send dhcp6.client-id = concat(00:03:00, hardware);</pre></li></ol></div></li><li class="listitem"><div class="para">
					Get IPv6 address from DHCP server as part of the system or network restart.
				</div><div class="para">
					Based on the operating systems, perform the following:
				</div><div class="para">
					On CentOS 6.2:
				</div><div class="orderedlist"><ol class="loweralpha"><li class="listitem"><div class="para">
							Open the Ethernet interface configuration file:
						</div><pre class="programlisting">vi /etc/sysconfig/network-scripts/ifcfg-eth0</pre><div class="para">
							The <code class="code">ifcfg-eth0</code> file controls the first NIC in a system.
						</div></li><li class="listitem"><div class="para">
							Make the necessary configuration changes, as given below:
						</div><pre class="programlisting">DEVICE=eth0
HWADDR=06:A0:F0:00:00:38
NM_CONTROLLED=no
ONBOOT=yes
BOOTPROTO=dhcp6
TYPE=Ethernet
USERCTL=no
PEERDNS=yes
IPV6INIT=yes
DHCPV6C=yes</pre></li><li class="listitem"><div class="para">
							Open the following:
						</div><pre class="programlisting">vi /etc/sysconfig/network</pre></li><li class="listitem"><div class="para">
							Make the necessary configuration changes, as given below:
						</div><pre class="programlisting">NETWORKING=yes
HOSTNAME=centos62mgmt.lab.vmops.com
NETWORKING_IPV6=yes
IPV6_AUTOCONF=no</pre></li></ol></div><div class="para">
					On Ubuntu 12.10
				</div><div class="orderedlist"><ol class="loweralpha"><li class="listitem"><div class="para">
							Open the following:
						</div><pre class="programlisting">etc/network/interfaces:</pre></li><li class="listitem"><div class="para">
							Make the necessary configuration changes, as given below:
						</div><pre class="programlisting">iface eth0 inet6 dhcp
autoconf 0
accept_ra 1</pre></li></ol></div></li></ol></div></div></div><div xml:lang="zh-TW" class="section" id="vmx-settings-dev" lang="zh-TW"><div class="titlepage"><div><div><h3 class="title" id="vmx-settings-dev">4.1.3. 額​外​的​VMX設​定​</h3></div></div></div><div class="para">
		VMX (.vmx)檔​案​是​虛​擬​機​器​的​主​要​設​定​檔​，當​新​的​VM建​立​時​，作​業​系​統​、​硬​碟​大​小​及​網​路​等​資​訊​都​存​在​這​個​檔​案​裡​。​VM主​動​將​所​有​設​定​變​更​寫​入​.vmx檔​案​內​。​通​常​此​檔​案​會​在​VM的​資​料​夾​內​。​對​於​Windows Vista / Windows 7 / Windows Server 2008，預​設​位​置​為​C:\Users\&lt;your_user_name&gt;\My Documents\Virtual Machines\&lt;virtual_machine_name&gt;.vmx。​對​於​linux,vmware-cmd -l列​出​所​有​登​路​的​VMX檔​案​的​完​整​路​徑​。​任​何​從​ESX/ESXi的​手​動​新​增​都​會​從​ vCenter Server database的​入​口​複​寫​掉​。​因​此​，請​您​在​編​輯​檔​案​之​前​，先​將​VM從​vCenter server's inventory移​除​，等​更​新​完​後​再​登​錄​回​去​
	</div><div class="para">
		CloudStack API中​，registerTemplate支​援​通​過​一​些​VMX設​定​。​支​援​的​參​數​為​rootDiskController, nicAdapter及​鍵​盤​。​除​了​這​些​已​知​的​VMX參​數​，您​現​在​可​以​使​用​在​registerTemplate API call中​的​ keyboard.typematicMinDelay參​數​。​這​個​參​數​控​制​在​遠​端​主​機​的​重​複​按​鍵​延​遲​，想​知​道​更​多​內​容​，參​見​<a href=" http://kb.vmware.com/selfservice/microsites/search.do?language=en_US&amp;cmd=displayKC&amp;externalId=196">keyboard.typematicMinDelay</a>
	</div></div><div xml:lang="zh-TW" class="section" id="reset-ssh-key-dev" lang="zh-TW"><div class="titlepage"><div><div><h3 class="title" id="reset-ssh-key-dev">4.1.4. 重​新​設​定​ SSH金​鑰​來​存​取​VM</h3></div></div></div><div class="para">
		使​用​ resetSSHKeyForVirtualMachine API來​設​定​或​重​設​指​定​到​虛​擬​機​器​的​SSH keypair，由​於​多​了​這​個​功​能​，忘​掉​或​有​危​害​的​SSH keypair可​以​被​換​掉​，使​用​者​可​以​使​用​新​的​keypair存​取​VM。​建​立​或​註​冊​新​的​keypair，然​後​呼​叫​ resetSSHKeyForVirtualMachine
	</div></div><div xml:lang="zh-TW" class="section" id="changed-apicommands-4.1" lang="zh-TW"><div class="titlepage"><div><div><h3 class="title" id="changed-apicommands-4.1">4.1.5. Changed API Commands in 4.1</h3></div></div></div><div class="informaltable"><table border="1"><colgroup><col width="50%" align="left" class="1" /><col width="50%" align="left" class="2" /></colgroup><thead><tr><th align="left">
						<div class="para">
							API Commands
						</div>
					</th><th align="left">
						<div class="para">
							Description
						</div>
					</th></tr></thead><tbody><tr><td align="left">
						<div class="para">
							createNetworkOffering
						</div>

					</td><td align="left">
						<div class="para">
							The following request parameters have been added:
						</div>
						 <div class="itemizedlist"><ul><li class="listitem"><div class="para">
									isPersistent
								</div></li><li class="listitem"><div class="para">
									startipv6
								</div></li><li class="listitem"><div class="para">
									endipv6
								</div></li><li class="listitem"><div class="para">
									ip6gateway
								</div></li><li class="listitem"><div class="para">
									ip6cidr
								</div></li></ul></div>

					</td></tr><tr><td align="left">
						<div class="para">
							listNetworkOfferings
						</div>
						 <div class="para">
							listNetworks
						</div>

					</td><td align="left">
						<div class="para">
							The following request parameters have been added:
						</div>
						 <div class="itemizedlist"><ul><li class="listitem"><div class="para">
									isPersistent
								</div><div class="para">
									This parameter determines if the network or network offering listed are persistent or not.
								</div></li><li class="listitem"><div class="para">
									ip6gateway
								</div></li><li class="listitem"><div class="para">
									ip6cidr
								</div></li></ul></div>

					</td></tr><tr><td align="left">
						<div class="para">
							createVlanIpRange
						</div>

					</td><td align="left">
						<div class="para">
							The following request parameters have been added:
						</div>
						 <div class="itemizedlist"><ul><li class="listitem"><div class="para">
									startipv6
								</div></li><li class="listitem"><div class="para">
									endipv6
								</div></li><li class="listitem"><div class="para">
									ip6gateway
								</div></li><li class="listitem"><div class="para">
									ip6cidr
								</div></li></ul></div>

					</td></tr><tr><td align="left">
						<div class="para">
							deployVirtualMachine
						</div>

					</td><td align="left">
						<div class="para">
							The following parameter has been added: ip6Address.
						</div>
						 <div class="para">
							The following parameter is updated to accept the IPv6 address: iptonetworklist.
						</div>

					</td></tr><tr><td align="left">
						<div class="para">
							CreateZoneCmd
						</div>

					</td><td align="left">
						<div class="para">
							The following parameter have been added: ip6dns1, ip6dns2.
						</div>

					</td></tr><tr><td align="left">
						<div class="para">
							listRouters
						</div>
						 <div class="para">
							listVirtualMachines
						</div>

					</td><td align="left">
						<div class="para">
							For nic responses, the following fields have been added.
						</div>
						 <div class="itemizedlist"><ul><li class="listitem"><div class="para">
									ip6address
								</div></li><li class="listitem"><div class="para">
									ip6gateway
								</div></li><li class="listitem"><div class="para">
									ip6cidr
								</div></li></ul></div>

					</td></tr><tr><td align="left">
						<div class="para">
							listVlanIpRanges
						</div>

					</td><td align="left">
						<div class="para">
							For nic responses, the following fields have been added.
						</div>
						 <div class="itemizedlist"><ul><li class="listitem"><div class="para">
									startipv6
								</div></li><li class="listitem"><div class="para">
									endipv6
								</div></li><li class="listitem"><div class="para">
									ip6gateway
								</div></li><li class="listitem"><div class="para">
									ip6cidr
								</div></li></ul></div>

					</td></tr><tr><td align="left">
						<div class="para">
							listRouters
						</div>
						 <div class="para">
							listZones
						</div>

					</td><td align="left">
						<div class="para">
							For DomainRouter and DataCenter response, the following fields have been added.
						</div>
						 <div class="itemizedlist"><ul><li class="listitem"><div class="para">
									ip6dns1
								</div></li><li class="listitem"><div class="para">
									ip6dns2
								</div></li></ul></div>

					</td></tr><tr><td align="left">
						<div class="para">
							addF5LoadBalancer
						</div>
						 <div class="para">
							configureNetscalerLoadBalancer
						</div>
						 <div class="para">
							addNetscalerLoadBalancer
						</div>
						 <div class="para">
							listF5LoadBalancers
						</div>
						 <div class="para">
							configureF5LoadBalancer
						</div>
						 <div class="para">
							listNetscalerLoadBalancers
						</div>

					</td><td align="left">
						<div class="para">
							The following response parameter is removed: inline.
						</div>

					</td></tr><tr><td align="left">
						<div class="para">
							listFirewallRules
						</div>
						 <div class="para">
							createFirewallRule
						</div>
					</td><td align="left">
						<div class="para">
							The following request parameter is added: traffictype (optional).
						</div>

					</td></tr><tr><td align="left">
						<div class="para">
							listUsageRecords
						</div>
					</td><td align="left">
						<div class="para">
							The following response parameter is added: virtualsize.
						</div>

					</td></tr><tr><td align="left">
						<div class="para">
							deleteIso
						</div>

					</td><td align="left">
						<div class="para">
							The following request parameter is added: forced (optional).
						</div>

					</td></tr><tr><td align="left">
						<div class="para">
							createStoragePool
						</div>

					</td><td align="left">
						<div class="para">
							The following request parameters are made mandatory:
						</div>
						 <div class="itemizedlist"><ul><li class="listitem"><div class="para">
									podid
								</div></li><li class="listitem"><div class="para">
									clusterid
								</div></li></ul></div>

					</td></tr><tr><td align="left">
						<div class="para">
							createAccount
						</div>
					</td><td align="left">
						<div class="para">
							The following new request parameters are added: accountid, userid
						</div>
					</td></tr><tr><td align="left">
						<div class="para">
							createUser
						</div>
					</td><td align="left">
						<div class="para">
							The following new request parameter is added: userid
						</div>
					</td></tr><tr><td align="left">
						<div class="para">
							createDomain
						</div>
					</td><td align="left">
						<div class="para">
							The following new request parameter is added: domainid
						</div>
					</td></tr><tr><td align="left">
						<div class="para">
							listZones
						</div>

					</td><td align="left">
						<div class="para">
							The following request parameters is added: securitygroupenabled
						</div>

					</td></tr></tbody></table></div></div><div xml:lang="zh-TW" class="section" id="added-API-commands-4.1" lang="zh-TW"><div class="titlepage"><div><div><h3 class="title" id="added-API-commands-4.1">4.1.6. 4.1-incubating新​增​API指​令​</h3></div></div></div><div class="itemizedlist"><ul><li class="listitem"><div class="para">
				createEgressFirewallRules (在​訪​客​網​路​建​立​egress firewall rule)
			</div></li><li class="listitem"><div class="para">
				deleteEgressFirewallRules (在​訪​客​網​路​刪​除​egress firewall rule)
			</div></li><li class="listitem"><div class="para">
				listEgressFirewallRules (為​訪​客​網​路​設​定​的​egress firewall rules表​單​)
			</div></li><li class="listitem"><div class="para">
				resetSSHKeyForVirtualMachine (重​新​設​定​虛​擬​機​器​的​SSHkey)
			</div></li><li class="listitem"><div class="para">
				addBaremetalHost (新​增​主​機​.)
			</div></li><li class="listitem"><div class="para">
				addNicToVirtualMachine (在​選​定​的​網​路​新​增​NIC到​指​定​的​VM)
			</div></li><li class="listitem"><div class="para">
				removeNicFromVirtualMachine(在​選​定​的​VM刪​除​指​定​的​NIC)
			</div></li><li class="listitem"><div class="para">
				updateDefaultNicForVirtualMachine (在​選​定​的​VM更​新​指​定​的​NIC成​為​預​設​值​)
			</div></li><li class="listitem"><div class="para">
				addRegion (登​路​一​個​Region到​另​一​個​Region)
			</div></li><li class="listitem"><div class="para">
				updateRegion (更​新​Region細​節​： ID, 名​稱​, 端​點​, 使​用​者​ API Key, 及​使​用​者​Secret Key.)
			</div></li><li class="listitem"><div class="para">
				removeRegion (從​現​在​的​Region移​除​一​個​Region)
			</div></li><li class="listitem"><div class="para">
				listRegions (列​出​所​有​ Regions. 用​ID 或​ Name過​濾​)
			</div></li><li class="listitem"><div class="para">
				getUser (此​API 只​能​由​管​理​者​使​用​。​用​API Key取​得​使​用​者​細​節​)
			</div></li></ul></div></div></div><div class="section" id="whats-new-in-api-4.0"><div class="titlepage"><div><div><h2 class="title" id="whats-new-in-api-4.0">4.2. 4.0版​本​</h2></div></div></div><div xml:lang="zh-TW" class="section" id="changed-apicommands-4.0" lang="zh-TW"><div class="titlepage"><div><div><h3 class="title" id="changed-apicommands-4.0">4.2.1. 4.0.0-incubating改​變​API指​令​</h3></div></div></div><div class="informaltable"><table border="1"><colgroup><col width="33%" align="left" class="1" /><col width="67%" align="left" class="2" /></colgroup><thead><tr><th align="left">
						<div class="para">
							API指​令​
						</div>
					</th><th align="left">
						<div class="para">
							敘​述​
						</div>
					</th></tr></thead><tbody><tr><td align="left">
						<div class="para">
							copyTemplate
						</div>
						 <div class="para">
							prepareTemplate
						</div>
						 <div class="para">
							registerTemplate
						</div>
						 <div class="para">
							updateTemplate
						</div>
						 <div class="para">
							createProject
						</div>
						 <div class="para">
							activateProject
						</div>
						 <div class="para">
							suspendProject
						</div>
						 <div class="para">
							updateProject
						</div>
						 <div class="para">
							listProjectAccounts
						</div>
						 <div class="para">
							createVolume
						</div>
						 <div class="para">
							migrateVolume
						</div>
						 <div class="para">
							attachVolume
						</div>
						 <div class="para">
							detachVolume
						</div>
						 <div class="para">
							uploadVolume
						</div>
						 <div class="para">
							createSecurityGroup
						</div>
						 <div class="para">
							registerIso
						</div>
						 <div class="para">
							copyIso
						</div>
						 <div class="para">
							updateIso
						</div>
						 <div class="para">
							createIpForwardingRule
						</div>
						 <div class="para">
							listIpForwardingRules
						</div>
						 <div class="para">
							createLoadBalancerRule
						</div>
						 <div class="para">
							updateLoadBalancerRule
						</div>
						 <div class="para">
							createSnapshot
						</div>

					</td><td align="left">
						<div class="para">
							表​中​指​令​有​一​個​新​的​response欄​位​，其​他​的​沒​有​改​變​
						</div>
						 <div class="para">
							新​的​response欄​位​: tags(*)
						</div>
						 <div class="note"><div class="admonition_header"><h2>注意</h2></div><div class="admonition"><div class="para">
								很​多​其​他​的​指​令​也​有​新​的​參​數​tags(*)，這​些​指​令​被​分​開​表​列​
							</div></div></div>
					</td></tr><tr><td align="left">
						<div class="para">
							rebootVirtualMachine
						</div>
						 <div class="para">
							attachIso
						</div>
						 <div class="para">
							detachIso
						</div>
						 <div class="para">
							listLoadBalancerRuleInstances
						</div>
						 <div class="para">
							resetPasswordForVirtualMachine
						</div>
						 <div class="para">
							changeServiceForVirtualMachine
						</div>
						 <div class="para">
							recoverVirtualMachine
						</div>
						 <div class="para">
							startVirtualMachine
						</div>
						 <div class="para">
							migrateVirtualMachine
						</div>
						 <div class="para">
							deployVirtualMachine
						</div>
						 <div class="para">
							assignVirtualMachine
						</div>
						 <div class="para">
							updateVirtualMachine
						</div>
						 <div class="para">
							restoreVirtualMachine
						</div>
						 <div class="para">
							stopVirtualMachine
						</div>
						 <div class="para">
							destroyVirtualMachine
						</div>

					</td><td align="left">
						<div class="para">
							表​中​的​指​令​有​兩​個​新​的​response欄​位​，其​他​的​沒​有​改​變​
						</div>
						 <div class="para">
							新​增​response欄​位​：keypair, tags(*)
						</div>

					</td></tr><tr><td align="left">
						<div class="para">
							listSecurityGroups
						</div>
						 <div class="para">
							listFirewallRules
						</div>
						 <div class="para">
							listPortForwardingRules
						</div>
						 <div class="para">
							listSnapshots
						</div>
						 <div class="para">
							listIsos
						</div>
						 <div class="para">
							listProjects
						</div>
						 <div class="para">
							listTemplates
						</div>
						 <div class="para">
							listLoadBalancerRules
						</div>

					</td><td align="left">
						<div class="para">
							表​中​指​令​有​新​增​以​下​欄​位​，其​他​的​沒​有​變​
						</div>
						 <div class="para">
							新​增​request欄​位​：tags (選​擇​性​)
						</div>
						 <div class="para">
							新​的​response欄​位​: tags(*)
						</div>

					</td></tr><tr><td align="left">
						<div class="para">
							listF5LoadBalancerNetworks
						</div>
						 <div class="para">
							listNetscalerLoadBalancerNetworks
						</div>
						 <div class="para">
							listSrxFirewallNetworks
						</div>
						 <div class="para">
							updateNetwork
						</div>

					</td><td align="left">
						<div class="para">
							表​中​指​令​有​三​個​response欄​位​，其​他​的​沒​有​變​
						</div>
						 <div class="para">
							新​增​response欄​位​：canusefordeploy, vpcid, tags(*)
						</div>

					</td></tr><tr><td align="left">
						<div class="para">
							createZone
						</div>
						 <div class="para">
							updateZone
						</div>

					</td><td align="left">
						<div class="para">
							表​中​指​令​有​新​增​以​下​欄​位​，其​他​的​沒​有​變​
						</div>
						 <div class="para">
							新​增​request欄​位​： localstorageenabled (選​擇​姓​)
						</div>
						 <div class="para">
							新​增​response欄​位​： localstorageenabled
						</div>

					</td></tr><tr><td align="left">
						<div class="para">
							listZones
						</div>
					</td><td align="left">
						<div class="para">
							新​增​response欄​位​： localstorageenabled
						</div>
					</td></tr><tr><td align="left">
						<div class="para">
							rebootRouter
						</div>
						 <div class="para">
							changeServiceForRouter
						</div>
						 <div class="para">
							startRouter
						</div>
						 <div class="para">
							destroyRouter
						</div>
						 <div class="para">
							stopRouter
						</div>

					</td><td align="left">
						<div class="para">
							表​中​的​指​令​有​兩​個​新​的​response欄​位​，其​他​的​沒​有​改​變​
						</div>
						 <div class="para">
							新​增​response欄​位​：vpcid, nic(*)
						</div>
					</td></tr><tr><td align="left">
						<div class="para">
							updateAccount
						</div>
						 <div class="para">
							disableAccount
						</div>
						 <div class="para">
							listAccounts
						</div>
						 <div class="para">
							markDefaultZoneForAccount
						</div>
						 <div class="para">
							enableAccount
						</div>

					</td><td align="left">
						<div class="para">
							表​中​指​令​有​三​個​response欄​位​，其​他​的​沒​有​變​
						</div>
						 <div class="para">
							新​增​response欄​位​：vpcavailable, vpclimit, vpctotal
						</div>
					</td></tr><tr><td align="left">
						<div class="para">
							listRouters
						</div>
					</td><td align="left">
						<div class="para">
							新​增​request欄​位​：forvpc (選​擇​性​), vpcid (選​擇​性​)
						</div>
						 <div class="para">
							新​增​response欄​位​：vpcid, nic(*)
						</div>

					</td></tr><tr><td align="left">
						<div class="para">
							listNetworkOfferings
						</div>
					</td><td align="left">
						<div class="para">
							新​增​request欄​位​： forvpc (選​擇​性​)
						</div>
						 <div class="para">
							新​增​response欄​位​： forvpc
						</div>

					</td></tr><tr><td align="left">
						<div class="para">
							listVolumes
						</div>
					</td><td align="left">
						<div class="para">
							新​增​request欄​位​：details (選​擇​性​), tags (選​擇​性​)
						</div>
						 <div class="para">
							新​的​response欄​位​: tags(*)
						</div>

					</td></tr><tr><td align="left">
						<div class="para">
							addTrafficMonitor
						</div>
					</td><td align="left">
						<div class="para">
							新​增​request欄​位​：excludezones (非​必​須​), includezones (非​必​須​)
						</div>

					</td></tr><tr><td align="left">
						<div class="para">
							createNetwork
						</div>
					</td><td align="left">
						<div class="para">
							新​增​request欄​位​：vpcid (選​擇​性​)
						</div>
						 <div class="para">
							新​增​response欄​位​：canusefordeploy, vpcid, tags(*)
						</div>

					</td></tr><tr><td align="left">
						<div class="para">
							listPublicIpAddresses
						</div>
					</td><td align="left">
						<div class="para">
							新​增​request欄​位​：tags (選​擇​性​),vpcid(選​擇​性​)
						</div>
						 <div class="para">
							新​增​response欄​位​：vpcid, tags(*)
						</div>

					</td></tr><tr><td align="left">
						<div class="para">
							listNetworks
						</div>
					</td><td align="left">
						<div class="para">
							新​增​request欄​位​：canusefordeploy (選​擇​性​), forvpc (選​擇​性​), tags (選​擇​性​), vpcid (選​擇​性​)
						</div>
						 <div class="para">
							新​增​response欄​位​：canusefordeploy, vpcid, tags(*)
						</div>

					</td></tr><tr><td align="left">
						<div class="para">
							restartNetwork
						</div>
					</td><td align="left">
						<div class="para">
							新​增​response欄​位​：vpcid, tags(*)
						</div>

					</td></tr><tr><td align="left">
						<div class="para">
							enableStaticNat
						</div>
					</td><td align="left">
						<div class="para">
							新​增​request欄​位​：networkid(非​必​須​)
						</div>

					</td></tr><tr><td align="left">
						<div class="para">
							createDiskOffering
						</div>
					</td><td align="left">
						<div class="para">
							新​增​request欄​位​：storagetype(非​必​須​)
						</div>
						 <div class="para">
							新​增​response欄​位​：storagetype
						</div>

					</td></tr><tr><td align="left">
						<div class="para">
							listDiskOfferings
						</div>
					</td><td align="left">
						<div class="para">
							新​增​response欄​位​：storagetype
						</div>

					</td></tr><tr><td align="left">
						<div class="para">
							updateDiskOffering
						</div>
					</td><td align="left">
						<div class="para">
							新​增​response欄​位​：storagetype
						</div>

					</td></tr><tr><td align="left">
						<div class="para">
							createFirewallRule
						</div>
					</td><td align="left">
						<div class="para">
							改​變​request欄​： ipaddressid (舊​版​ - 選​擇​性​,新​版​ - 需​要​)
						</div>
						 <div class="para">
							新​的​response欄​位​: tags(*)
						</div>

					</td></tr><tr><td align="left">
						<div class="para">
							listVirtualMachines
						</div>
					</td><td align="left">
						<div class="para">
							新​增​request欄​位​：isoid (選​擇​性​), tags (選​擇​性​), templateid (選​擇​性​)
						</div>
						 <div class="para">
							新​增​response欄​位​：keypair, tags(*)
						</div>

					</td></tr><tr><td align="left">
						<div class="para">
							updateStorageNetworkIpRange
						</div>
					</td><td align="left">
						<div class="para">
							新​增​response欄​位​：id, endip, gateway, netmask, networkid, podid, startip, vlan, zoneid
						</div>

					</td></tr></tbody></table></div></div><div xml:lang="zh-TW" class="section" id="added-API-commands-4.0" lang="zh-TW"><div class="titlepage"><div><div><h3 class="title" id="added-API-commands-4.0">4.2.2. 4.0.0-incubating新​增​API指​令​</h3></div></div></div><div class="itemizedlist"><ul><li class="listitem"><div class="para">
				createCounter (增​加​counter)
			</div></li><li class="listitem"><div class="para">
				deleteCounter (移​除​counter)
			</div></li><li class="listitem"><div class="para">
				listCounters (條​列​counters)
			</div></li><li class="listitem"><div class="para">
				createCondition (新​增​條​件​)
			</div></li><li class="listitem"><div class="para">
				deleteCondition (移​除​condition)
			</div></li><li class="listitem"><div class="para">
				listConditions (條​列​特​定​使​用​者​的​condition)
			</div></li><li class="listitem"><div class="para">
				createTags. 為​特​定​資​源​新​增​標​籤​，例​如​：
<pre class="programlisting">command=createTags
&amp;resourceIds=1,10,12
&amp;resourceType=userVm
&amp;tags[0].key=region
&amp;tags[0].value=canada
&amp;tags[1].key=city
&amp;tags[1].value=Toronto</pre>
			</div></li><li class="listitem"><div class="para">
				deleteTags. 移​除​選​定​資​源​標​籤​，例​如​：
<pre class="programlisting">command=deleteTags
&amp;resourceIds=1,12
&amp;resourceType=Snapshot
&amp;tags[0].key=city</pre>
			</div></li><li class="listitem"><div class="para">
				listTags (描​述​選​定​資​源​標​籤​)
			</div></li><li class="listitem"><div class="para">
				createVPC (新​增​VPC)
			</div></li><li class="listitem"><div class="para">
				listVPCs (條​列​所​有​VPC)
			</div></li><li class="listitem"><div class="para">
				deleteVPC (刪​除​一​個​VPC)
			</div></li><li class="listitem"><div class="para">
				updateVPC (更​新​一​個​VPC)
			</div></li><li class="listitem"><div class="para">
				restartVPC (重​新​啟​動​一​個​VPC)
			</div></li><li class="listitem"><div class="para">
				createVPCOffering (新​增​一​個​VPC offering)
			</div></li><li class="listitem"><div class="para">
				updateVPCOffering (更​新​一​個​VPC offering)
			</div></li><li class="listitem"><div class="para">
				deleteVPCOffering (刪​除​一​個​VPC offering)
			</div></li><li class="listitem"><div class="para">
				listVPCOfferings (條​列​所​有​的​VPC offerings)
			</div></li><li class="listitem"><div class="para">
				createPrivateGateway (新​增​私​人​扎​到​)
			</div></li><li class="listitem"><div class="para">
				listPrivateGateways (列​出​私​人​閘​道​)
			</div></li><li class="listitem"><div class="para">
				deletePrivateGateway (刪​除​私​人​閘​道​)
			</div></li><li class="listitem"><div class="para">
				createNetworkACL (新​增​ACL來​規​範​網​路​(網​路​屬​於​VPC))
			</div></li><li class="listitem"><div class="para">
				deleteNetworkACL (刪​除​網​路​ACL)
			</div></li><li class="listitem"><div class="para">
				listNetworkACLs (列​出​所​有​網​路​ACL)
			</div></li><li class="listitem"><div class="para">
				createStaticRoute (建​立​固​定​路​徑​)
			</div></li><li class="listitem"><div class="para">
				deleteStaticRoute (刪​除​固​定​路​徑​)
			</div></li><li class="listitem"><div class="para">
				listStaticRoutes (列​出​所​有​固​定​路​徑​)
			</div></li><li class="listitem"><div class="para">
				createVpnCustomerGateway (新​增​ site to site VPN客​戶​閘​道​)
			</div></li><li class="listitem"><div class="para">
				createVpnGateway (建​立​ site to site VPN本​地​閘​道​)
			</div></li><li class="listitem"><div class="para">
				createVpnConnection (新​增​ site to site VPN連​結​)
			</div></li><li class="listitem"><div class="para">
				deleteVpnCustomerGateway (刪​除​ site to site VPN訪​客​閘​道​)
			</div></li><li class="listitem"><div class="para">
				deleteVpnGateway (刪​除​ site to site VPN閘​道​)
			</div></li><li class="listitem"><div class="para">
				deleteVpnConnection (刪​除​ site to site VPN連​結​)
			</div></li><li class="listitem"><div class="para">
				updateVpnCustomerGateway (更​新​ site to site VPN訪​客​閘​道​)
			</div></li><li class="listitem"><div class="para">
				resetVpnConnection (重​設​ site to site VPN連​結​)
			</div></li><li class="listitem"><div class="para">
				listVpnCustomerGateways (列​出​ site to site VPN訪​客​閘​道​)
			</div></li><li class="listitem"><div class="para">
				listVpnGateways (列​出​ site 2 site VPN閘​道​)
			</div></li><li class="listitem"><div class="para">
				listVpnConnections (列​出​ site to site VPN連​結​閘​道​)
			</div></li><li class="listitem"><div class="para">
				enableCiscoNexusVSM (在​CloudStack啟​用​ Nexus 1000v dvSwitch)
			</div></li><li class="listitem"><div class="para">
				disableCiscoNexusVSM (在​CloudStack停​用​ Nexus 1000v dvSwitch)
			</div></li><li class="listitem"><div class="para">
				deleteCiscoNexusVSM (在​CloudStack刪​除​Nexus 1000v dvSwitch)
			</div></li><li class="listitem"><div class="para">
				listCiscoNexusVSMs (列​出​控​制​VLAN ID、​封​包​VLAN ID及​資​料​VLAN ID，同​時​也​列​出​Nexus 1000v dvSwitch的​IP位​址​)
			</div></li></ul></div></div></div><div class="section" id="whats-new-in-api-3.0"><div class="titlepage"><div><div><h2 class="title" id="whats-new-in-api-3.0">4.3. 3.0版​本​</h2></div></div></div><div xml:lang="zh-TW" class="section" id="enabling-port-8096" lang="zh-TW"><div class="titlepage"><div><div><h3 class="title" id="enabling-port-8096">4.3.1. 啟​用​8096網​路​連​接​埠​</h3></div></div></div><div class="para">
		8096網​路​連​接​埠​允​許​接​受​未​經​認​證​的​API呼​叫​，於​3.0.1版​本​中​預​設​為​關​閉​狀​態​，當​您​有​類​似​以​下​需​求​時​，可​以​啟​用​8096網​路​連​接​埠​(或​是​任​何​其​他​連​接​埠​)：
	</div><div class="orderedlist"><ol><li class="listitem"><div class="para">
				確​保​第​一​台​Management Server已​安​裝​並​為​運​行​狀​態​。​
			</div></li><li class="listitem"><div class="para">
				設​定​global configuration參​數​，指​定​integration.api.port的​連​接​埠​號​。​
			</div></li><li class="listitem"><div class="para">
				重​新​啟​動​ Management Server
			</div></li><li class="listitem"><div class="para">
				確​認​運​行​Management Server的​主​機​其​iptables的​設​定​中​，允​許​此​連​接​埠​的​通​行​。​
			</div></li></ol></div></div><div xml:lang="zh-TW" class="section" id="stopped-vm" lang="zh-TW"><div class="titlepage"><div><div><h3 class="title" id="stopped-vm">4.3.2. 已​停​止​的​虛​擬​機​器​</h3></div></div></div><div class="para">
		CloudStack 提​供​了​建​立​虛​擬​機​器​但​仍​為​停​止​狀​態​的​功​能​，你​可​以​決​定​是​否​開​啟​虛​擬​機​器​為​您​佈​署​過​程​的​一​部​分​。​一​台​虛​擬​機​器​可​以​有​兩​種​情​況​(預​設​建​立​後​啟​用​)，一​是​建​立​後​啟​用​虛​擬​機​器​或​是​建​立​後​不​啟​用​虛​擬​機​器​。​
	</div><div class="para">
		deployVM指​令​提​供​了​startVM的​新​參​數​，可​以​將​您​的​虛​擬​機​器​於​建​立​後​保​持​關​閉​狀​態​。​
	</div><div class="para">
		可​能​的​設​定​值​為​：
	</div><div class="itemizedlist"><ul><li class="listitem"><div class="para">
				true - 於​佈​署​虛​擬​機​器​之​後​開​啟​此​虛​擬​機​器​。​
			</div></li><li class="listitem"><div class="para">
				false - 於​佈​署​虛​擬​機​器​之​後​維​持​停​止​狀​態​。​
			</div></li></ul></div><div class="para">
		預​設​值​為​true。​
	</div></div><div xml:lang="zh-TW" class="section" id="change-to-behavior-of-list-commands" lang="zh-TW"><div class="titlepage"><div><div><h3 class="title" id="change-to-behavior-of-list-commands">4.3.3. Change to Behavior of List Commands</h3></div></div></div><div class="para">
		There was a major change in how our List* API commands work in CloudStack 3.0 compared to 2.2.x. The rules below apply only for managed resources –​ those that belong to an account, domain, or project. They are irrelevant for the List* commands displaying unmanaged (system) resources, such as hosts, clusters, and external network resources.
	</div><div class="para">
		When no parameters are passed in to the call, the caller sees only resources owned by the caller (even when the caller is the administrator). Previously, the administrator saw everyone else's resources by default.
	</div><div class="para">
		When accountName and domainId are passed in:
	</div><div class="itemizedlist"><ul><li class="listitem"><div class="para">
				The caller sees the resources dedicated to the account specified.
			</div></li><li class="listitem"><div class="para">
				If the call is executed by a regular user, the user is authorized to specify only the user's own account and domainId.
			</div></li><li class="listitem"><div class="para">
				If the caller is a domain administrator, CloudStack performs an authorization check to see whether the caller is permitted to view resources for the given account and domainId.
			</div></li></ul></div><div class="para">
		When projectId is passed in, only resources belonging to that project are listed.
	</div><div class="para">
		When domainId is passed in, the call returns only resources belonging to the domain specified. To see the resources of subdomains, use the parameter isRecursive=true. Again, the regular user can see only resources owned by that user, the root administrator can list anything, and a domain administrator is authorized to see only resources of the administrator's own domain and subdomains.
	</div><div class="para">
		To see all resources the caller is authorized to see, except for Project resources, use the parameter listAll=true.
	</div><div class="para">
		To see all Project resources the caller is authorized to see, use the parameter projectId=-1.
	</div><div class="para">
		There is one API command that doesn't fall under the rules above completely: the listTemplates command. This command has its own flags defining the list rules:
	</div><div class="informaltable"><table border="1"><colgroup><col align="left" class="c1" width="50%" /><col align="left" class="c2" width="50%" /></colgroup><thead><tr><th align="left">
						<div class="para">
							listTemplates Flag
						</div>
					</th><th align="left">
						<div class="para">
							敘​述​
						</div>
					</th></tr></thead><tbody><tr><td align="left">
						<div class="para">
							featured
						</div>
					</td><td align="left">
						<div class="para">
							Returns templates that have been marked as featured and public.
						</div>
					</td></tr><tr><td align="left">
						<div class="para">
							self
						</div>
					</td><td align="left">
						<div class="para">
							Returns templates that have been registered or created by the calling user.
						</div>
					</td></tr><tr><td align="left">
						<div class="para">
							selfexecutable
						</div>
					</td><td align="left">
						<div class="para">
							Same as self, but only returns templates that are ready to be deployed with.
						</div>
					</td></tr><tr><td align="left">
						<div class="para">
							sharedexecutable
						</div>
					</td><td align="left">
						<div class="para">
							Ready templates that have been granted to the calling user by another user.
						</div>
					</td></tr><tr><td align="left">
						<div class="para">
							executable
						</div>
					</td><td align="left">
						<div class="para">
							Templates that are owned by the calling user, or public templates, that can be used to deploy a new VM.
						</div>
					</td></tr><tr><td align="left">
						<div class="para">
							community
						</div>
					</td><td align="left">
						<div class="para">
							Returns templates that have been marked as public but not featured.
						</div>
					</td></tr><tr><td align="left">
						<div class="para">
							all
						</div>
					</td><td align="left">
						<div class="para">
							Returns all templates (only usable by admins).
						</div>
					</td></tr></tbody></table></div><div class="para">
		The CloudStack UI on a general view will display all resources that the logged-in user is authorized to see, except for project resources. To see the project resources, select the project view.
	</div></div><div xml:lang="zh-TW" class="section" id="removed-API-commands" lang="zh-TW"><div class="titlepage"><div><div><h3 class="title" id="removed-API-commands">4.3.4. Removed API commands</h3></div></div></div><div class="itemizedlist"><ul><li class="listitem"><div class="para">
				createConfiguration (Adds configuration value)
			</div></li><li class="listitem"><div class="para">
				configureSimulator (Configures simulator)
			</div></li></ul></div></div><div xml:lang="zh-TW" class="section" id="added-API-commands" lang="zh-TW"><div class="titlepage"><div><div><h3 class="title" id="added-API-commands">4.3.5. Added API commands in 3.0</h3></div></div></div><div class="section" id="added-api-commands-3.0.2"><div class="titlepage"><div><div><h4 class="title" id="added-api-commands-3.0.2">4.3.5.1. Added in 3.0.2</h4></div></div></div><div class="itemizedlist"><ul><li class="listitem"><div class="para">
					changeServiceForSystemVm
				</div><div class="para">
					Changes the service offering for a system VM (console proxy or secondary storage). The system VM must be in a "Stopped" state for this command to take effect.
				</div></li></ul></div></div><div class="section" id="added-api-commands-3.0.1"><div class="titlepage"><div><div><h4 class="title" id="added-api-commands-3.0.1">4.3.5.2. Added in 3.0.1</h4></div></div></div><div class="itemizedlist"><ul><li class="listitem"><div class="para">
					changeServiceForSystemVm
				</div><div class="para">
					Changes the service offering for a system VM (console proxy or secondary storage). The system VM must be in a "Stopped" state for this command to take effect.
				</div></li></ul></div></div><div class="section" id="added-api-commands-3.0.0"><div class="titlepage"><div><div><h4 class="title" id="added-api-commands-3.0.0">4.3.5.3. Added in 3.0.0</h4></div></div></div><div class="informaltable"><table border="1"><colgroup><col align="left" class="c1" width="33%" /><col align="left" class="c2" width="33%" /><col align="left" class="c3" width="33%" /></colgroup><tbody><tr><td align="left">
							<div class="para">
								assignVirtualMachine (Move a user VM to another user under same domain.)
							</div>
						</td><td align="left">
							<div class="para">
								restoreVirtualMachine (Restore a VM to original template or specific snapshot)
							</div>
						</td><td align="left">
							<div class="para">
								createLBStickinessPolicy (Creates a Load Balancer stickiness policy )
							</div>
						</td></tr><tr><td align="left">
							<div class="para">
								deleteLBStickinessPolicy (Deletes a LB stickiness policy.)
							</div>
						</td><td align="left">
							<div class="para">
								listLBStickinessPolicies (Lists LBStickiness policies.)
							</div>
						</td><td align="left">
							<div class="para">
								ldapConfig (Configure the LDAP context for this site.)
							</div>
						</td></tr><tr><td align="left">
							<div class="para">
								addSwift (Adds Swift.)
							</div>
						</td><td align="left">
							<div class="para">
								listSwifts (List Swift.)
							</div>
						</td><td align="left">
							<div class="para">
								migrateVolume (Migrate volume)
							</div>
						</td></tr><tr><td align="left">
							<div class="para">
								updateStoragePool (Updates a storage pool.)
							</div>
						</td><td align="left">
							<div class="para">
								authorizeSecurityGroupEgress (Authorizes a particular egress rule for this security group)
							</div>
						</td><td align="left">
							<div class="para">
								revokeSecurityGroupEgress (Deletes a particular egress rule from this security group)
							</div>
						</td></tr><tr><td align="left">
							<div class="para">
								createNetworkOffering (Creates a network offering.)
							</div>
						</td><td align="left">
							<div class="para">
								deleteNetworkOffering (Deletes a network offering.)
							</div>
						</td><td align="left">
							<div class="para">
								createProject (Creates a project)
							</div>
						</td></tr><tr><td align="left">
							<div class="para">
								deleteProject (Deletes a project)
							</div>
						</td><td align="left">
							<div class="para">
								updateProject (Updates a project)
							</div>
						</td><td align="left">
							<div class="para">
								activateProject (Activates a project)
							</div>
						</td></tr><tr><td align="left">
							<div class="para">
								suspendProject (Suspends a project)
							</div>
						</td><td align="left">
							<div class="para">
								listProjects (Lists projects and provides detailed information for listed projects)
							</div>
						</td><td align="left">
							<div class="para">
								addAccountToProject (Adds account to a project)
							</div>
						</td></tr><tr><td align="left">
							<div class="para">
								deleteAccountFromProject (Deletes account from the project)
							</div>
						</td><td align="left">
							<div class="para">
								listProjectAccounts (Lists project's accounts)
							</div>
						</td><td align="left">
							<div class="para">
								listProjectInvitations (Lists an account's invitations to join projects)
							</div>
						</td></tr><tr><td align="left">
							<div class="para">
								updateProjectInvitation (Accepts or declines project invitation)
							</div>
						</td><td align="left">
							<div class="para">
								deleteProjectInvitation (Deletes a project invitation)
							</div>
						</td><td align="left">
							<div class="para">
								updateHypervisorCapabilities (Updates a hypervisor capabilities.)
							</div>
						</td></tr><tr><td align="left">
							<div class="para">
								listHypervisorCapabilities (Lists all hypervisor capabilities.)
							</div>
						</td><td align="left">
							<div class="para">
								createPhysicalNetwork (Creates a physical network)
							</div>
						</td><td align="left">
							<div class="para">
								deletePhysicalNetwork (Deletes a Physical Network.)
							</div>
						</td></tr><tr><td align="left">
							<div class="para">
								listPhysicalNetworks (Lists physical networks)
							</div>
						</td><td align="left">
							<div class="para">
								updatePhysicalNetwork (Updates a physical network)
							</div>
						</td><td align="left">
							<div class="para">
								listSupportedNetworkServices (Lists all network services provided by CloudStack or for the given Provider.)
							</div>
						</td></tr><tr><td align="left">
							<div class="para">
								addNetworkServiceProvider (Adds a network serviceProvider to a physical network)
							</div>
						</td><td align="left">
							<div class="para">
								deleteNetworkServiceProvider (Deletes a Network Service Provider.)
							</div>
						</td><td align="left">
							<div class="para">
								listNetworkServiceProviders (Lists network serviceproviders for a given physical network.)
							</div>
						</td></tr><tr><td align="left">
							<div class="para">
								updateNetworkServiceProvider (Updates a network serviceProvider of a physical network)
							</div>
						</td><td align="left">
							<div class="para">
								addTrafficType (Adds traffic type to a physical network)
							</div>
						</td><td align="left">
							<div class="para">
								deleteTrafficType (Deletes traffic type of a physical network)
							</div>
						</td></tr><tr><td align="left">
							<div class="para">
								listTrafficTypes (Lists traffic types of a given physical network.)
							</div>
						</td><td align="left">
							<div class="para">
								updateTrafficType (Updates traffic type of a physical network)
							</div>
						</td><td align="left">
							<div class="para">
								listTrafficTypeImplementors (Lists implementors of implementor of a network traffic type or implementors of all network traffic types)
							</div>
						</td></tr><tr><td align="left">
							<div class="para">
								createStorageNetworkIpRange (Creates a Storage network IP range.)
							</div>
						</td><td align="left">
							<div class="para">
								deleteStorageNetworkIpRange (Deletes a storage network IP Range.)
							</div>
						</td><td align="left">
							<div class="para">
								listStorageNetworkIpRange (List a storage network IP range.)
							</div>
						</td></tr><tr><td align="left">
							<div class="para">
								updateStorageNetworkIpRange (Update a Storage network IP range, only allowed when no IPs in this range have been allocated.)
							</div>
						</td><td align="left">
							<div class="para">
								listUsageTypes (List Usage Types)
							</div>
						</td><td align="left">
							<div class="para">
								addF5LoadBalancer (Adds a F5 BigIP load balancer device)
							</div>
						</td></tr><tr><td align="left">
							<div class="para">
								configureF5LoadBalancer (configures a F5 load balancer device)
							</div>
						</td><td align="left">
							<div class="para">
								deleteF5LoadBalancer ( delete a F5 load balancer device)
							</div>
						</td><td align="left">
							<div class="para">
								listF5LoadBalancers (lists F5 load balancer devices)
							</div>
						</td></tr><tr><td align="left">
							<div class="para">
								listF5LoadBalancerNetworks (lists network that are using a F5 load balancer device)
							</div>
						</td><td align="left">
							<div class="para">
								addSrxFirewall (Adds a SRX firewall device)
							</div>
						</td><td align="left">
							<div class="para">
								deleteSrxFirewall ( delete a SRX firewall device)
							</div>
						</td></tr><tr><td align="left">
							<div class="para">
								listSrxFirewalls (lists SRX firewall devices in a physical network)
							</div>
						</td><td align="left">
							<div class="para">
								listSrxFirewallNetworks (lists network that are using SRX firewall device)
							</div>
						</td><td align="left">
							<div class="para">
								addNetscalerLoadBalancer (Adds a netscaler load balancer device)
							</div>
						</td></tr><tr><td align="left">
							<div class="para">
								deleteNetscalerLoadBalancer ( delete a netscaler load balancer device)
							</div>
						</td><td align="left">
							<div class="para">
								configureNetscalerLoadBalancer (configures a netscaler load balancer device)
							</div>
						</td><td align="left">
							<div class="para">
								listNetscalerLoadBalancers (lists netscaler load balancer devices)
							</div>
						</td></tr><tr><td align="left">
							<div class="para">
								listNetscalerLoadBalancerNetworks (lists network that are using a netscaler load balancer device)
							</div>
						</td><td align="left">
							<div class="para">
								createVirtualRouterElement (Create a virtual router element.)
							</div>
						</td><td align="left">
							<div class="para">
								configureVirtualRouterElement (Configures a virtual router element.)
							</div>
						</td></tr><tr><td align="left">
							<div class="para">
								listVirtualRouterElements (Lists all available virtual router elements.)
							</div>
						</td><td align="left">
							<div class="para">
							</div>
						</td><td align="left">
							<div class="para">
							</div>
						</td></tr></tbody></table></div></div></div><div xml:lang="zh-TW" class="section" id="added-error-codes" lang="zh-TW"><div class="titlepage"><div><div><h3 class="title" id="added-error-codes">4.3.6. 增​加​的​CloudStack錯​誤​馬​</h3></div></div></div><div class="para">
		您​可​以​在​每​種​類​型​的​例​外​中​找​到​ CloudStack-specific 錯​誤​碼​。​以​下​列​表​為​加​到​新​class 的​錯​誤​碼​，class名​稱​為​CSExceptionErrorCode
	</div><div class="informaltable"><table border="1"><colgroup><col align="left" class="c1" width="33%" /><col align="left" class="c2" width="33%" /><col align="left" class="c3" width="33%" /></colgroup><tbody><tr><td align="left">
						<div class="para">
							4250 : "com.cloud.utils.exception.CloudRuntimeException"
						</div>
					</td><td align="left">
						<div class="para">
							4255 : "com.cloud.utils.exception.ExceptionUtil"
						</div>
					</td><td align="left">
						<div class="para">
							4260 : "com.cloud.utils.exception.ExecutionException"
						</div>
					</td></tr><tr><td align="left">
						<div class="para">
							4265 : "com.cloud.utils.exception.HypervisorVersionChangedException"
						</div>
					</td><td align="left">
						<div class="para">
							4270 : "com.cloud.utils.exception.RuntimeCloudException"
						</div>
					</td><td align="left">
						<div class="para">
							4275 : "com.cloud.exception.CloudException"
						</div>
					</td></tr><tr><td align="left">
						<div class="para">
							4280 : "com.cloud.exception.AccountLimitException"
						</div>
					</td><td align="left">
						<div class="para">
							4285 : "com.cloud.exception.AgentUnavailableException"
						</div>
					</td><td align="left">
						<div class="para">
							4290 : "com.cloud.exception.CloudAuthenticationException"
						</div>
					</td></tr><tr><td align="left">
						<div class="para">
							4295 : "com.cloud.exception.CloudExecutionException"
						</div>
					</td><td align="left">
						<div class="para">
							4300 : "com.cloud.exception.ConcurrentOperationException"
						</div>
					</td><td align="left">
						<div class="para">
							4305 : "com.cloud.exception.ConflictingNetworkSettingsException"
						</div>
					</td></tr><tr><td align="left">
						<div class="para">
							4310 : "com.cloud.exception.DiscoveredWithErrorException"
						</div>
					</td><td align="left">
						<div class="para">
							4315 : "com.cloud.exception.HAStateException"
						</div>
					</td><td align="left">
						<div class="para">
							4320 : "com.cloud.exception.InsufficientAddressCapacityException"
						</div>
					</td></tr><tr><td align="left">
						<div class="para">
							4325 : "com.cloud.exception.InsufficientCapacityException"
						</div>
					</td><td align="left">
						<div class="para">
							4330 : "com.cloud.exception.InsufficientNetworkCapacityException"
						</div>
					</td><td align="left">
						<div class="para">
							4335 : "com.cloud.exception.InsufficientServerCapacityException"
						</div>
					</td></tr><tr><td align="left">
						<div class="para">
							4340 : "com.cloud.exception.InsufficientStorageCapacityException"
						</div>
					</td><td align="left">
						<div class="para">
							4345 : "com.cloud.exception.InternalErrorException"
						</div>
					</td><td align="left">
						<div class="para">
							4350 : "com.cloud.exception.InvalidParameterValueException"
						</div>
					</td></tr><tr><td align="left">
						<div class="para">
							4355 : "com.cloud.exception.ManagementServerException"
						</div>
					</td><td align="left">
						<div class="para">
							4360 : "com.cloud.exception.NetworkRuleConflictException"
						</div>
					</td><td align="left">
						<div class="para">
							4365 : "com.cloud.exception.PermissionDeniedException"
						</div>
					</td></tr><tr><td align="left">
						<div class="para">
							4370 : "com.cloud.exception.ResourceAllocationException"
						</div>
					</td><td align="left">
						<div class="para">
							4375 : "com.cloud.exception.ResourceInUseException"
						</div>
					</td><td align="left">
						<div class="para">
							4380 : "com.cloud.exception.ResourceUnavailableException"
						</div>
					</td></tr><tr><td align="left">
						<div class="para">
							4385 : "com.cloud.exception.StorageUnavailableException"
						</div>
					</td><td align="left">
						<div class="para">
							4390 : "com.cloud.exception.UnsupportedServiceException"
						</div>
					</td><td align="left">
						<div class="para">
							4395 : "com.cloud.exception.VirtualMachineMigrationException"
						</div>
					</td></tr><tr><td align="left">
						<div class="para">
							4400 : "com.cloud.exception.AccountLimitException"
						</div>
					</td><td align="left">
						<div class="para">
							4405 : "com.cloud.exception.AgentUnavailableException"
						</div>
					</td><td align="left">
						<div class="para">
							4410 : "com.cloud.exception.CloudAuthenticationException"
						</div>
					</td></tr><tr><td align="left">
						<div class="para">
							4415 : "com.cloud.exception.CloudException"
						</div>
					</td><td align="left">
						<div class="para">
							4420 : "com.cloud.exception.CloudExecutionException"
						</div>
					</td><td align="left">
						<div class="para">
							4425 : "com.cloud.exception.ConcurrentOperationException"
						</div>
					</td></tr><tr><td align="left">
						<div class="para">
							4430 : "com.cloud.exception.ConflictingNetworkSettingsException"
						</div>
					</td><td align="left">
						<div class="para">
							4435 : "com.cloud.exception.ConnectionException"
						</div>
					</td><td align="left">
						<div class="para">
							4440 : "com.cloud.exception.DiscoveredWithErrorException"
						</div>
					</td></tr><tr><td align="left">
						<div class="para">
							4445 : "com.cloud.exception.DiscoveryException"
						</div>
					</td><td align="left">
						<div class="para">
							4450 : "com.cloud.exception.HAStateException"
						</div>
					</td><td align="left">
						<div class="para">
							4455 : "com.cloud.exception.InsufficientAddressCapacityException"
						</div>
					</td></tr><tr><td align="left">
						<div class="para">
							4460 : "com.cloud.exception.InsufficientCapacityException"
						</div>
					</td><td align="left">
						<div class="para">
							4465 : "com.cloud.exception.InsufficientNetworkCapacityException"
						</div>
					</td><td align="left">
						<div class="para">
							4470 : "com.cloud.exception.InsufficientServerCapacityException"
						</div>
					</td></tr><tr><td align="left">
						<div class="para">
							4475 : "com.cloud.exception.InsufficientStorageCapacityException"
						</div>
					</td><td align="left">
						<div class="para">
							4480 : "com.cloud.exception.InsufficientVirtualNetworkCapcityException"
						</div>
					</td><td align="left">
						<div class="para">
							4485 : "com.cloud.exception.InternalErrorException"
						</div>
					</td></tr><tr><td align="left">
						<div class="para">
							4490 : "com.cloud.exception.InvalidParameterValueException"
						</div>
					</td><td align="left">
						<div class="para">
							4495 : "com.cloud.exception.ManagementServerException"
						</div>
					</td><td align="left">
						<div class="para">
							4500 : "com.cloud.exception.NetworkRuleConflictException"
						</div>
					</td></tr><tr><td align="left">
						<div class="para">
							4505 : "com.cloud.exception.PermissionDeniedException"
						</div>
					</td><td align="left">
						<div class="para">
							4510 : "com.cloud.exception.ResourceAllocationException"
						</div>
					</td><td align="left">
						<div class="para">
							4515 : "com.cloud.exception.ResourceInUseException"
						</div>
					</td></tr><tr><td align="left">
						<div class="para">
							4520 : "com.cloud.exception.ResourceUnavailableException"
						</div>
					</td><td align="left">
						<div class="para">
							4525 : "com.cloud.exception.StorageUnavailableException"
						</div>
					</td><td align="left">
						<div class="para">
							4530 : "com.cloud.exception.UnsupportedServiceException"
						</div>
					</td></tr><tr><td align="left">
						<div class="para">
							4535 : "com.cloud.exception.VirtualMachineMigrationException"
						</div>
					</td><td align="left">
						<div class="para">
							9999 : "org.apache.cloudstack.api.ServerApiException"
						</div>
					</td><td align="left">
						<div class="para">
						</div>
					</td></tr></tbody></table></div></div></div></div><div xml:lang="zh-TW" class="chapter" id="api-calls" lang="zh-TW"><div class="titlepage"><div><div><h2 class="title">章 5. 對​CloudStack API 發​出​請​求​</h2></div></div></div><div class="toc"><dl><dt><span class="section"><a href="#making-api-request">5.1. Making API Requests</a></span></dt><dt><span class="section"><a href="#signing-api-requests">5.2. Signing API Requests</a></span></dt><dd><dl><dt><span class="section"><a href="#signing-api-calls-python">5.2.1. How to sign an API call with Python</a></span></dt></dl></dd><dt><span class="section"><a href="#enabling-api-call-expiration">5.3. Enabling API Call Expiration</a></span></dt><dt><span class="section"><a href="#api-throttling">5.4. Limiting the Rate of API Requests</a></span></dt><dd><dl><dt><span class="section"><a href="#api-throttling-configure">5.4.1. Configuring the API Request Rate</a></span></dt><dt><span class="section"><a href="#api-throttling-limitations">5.4.2. Limitations on API Throttling</a></span></dt></dl></dd><dt><span class="section"><a href="#responses">5.5. Responses</a></span></dt><dd><dl><dt><span class="section"><a href="#response-formats">5.5.1. Response Formats: XML and JSON</a></span></dt><dt><span class="section"><a href="#max-result-page-returned">5.5.2. Maximum Result Pages Returned</a></span></dt><dt><span class="section"><a href="#error-handling">5.5.3. Error Handling</a></span></dt></dl></dd><dt><span class="section"><a href="#asynchronous-commands">5.6. Asynchronous Commands</a></span></dt><dd><dl><dt><span class="section"><a href="#job-status">5.6.1. 工​作​狀​態​</a></span></dt><dt><span class="section"><a href="#asynchronous-commands-example">5.6.2. Example</a></span></dt></dl></dd></dl></div><div xml:lang="zh-TW" class="section" id="making-api-request" lang="zh-TW"><div class="titlepage"><div><div><h2 class="title" id="making-api-request">5.1. Making API Requests</h2></div></div></div><div class="para">
		All CloudStack API requests are submitted in the form of a HTTP GET/POST with an associated command and any parameters. A request is composed of the following whether in HTTP or HTTPS:
	</div><div class="itemizedlist"><ul><li class="listitem"><div class="para">
				CloudStack API URL: This is the web services API entry point(for example, http://www.cloud.com:8080/client/api)
			</div></li><li class="listitem"><div class="para">
				Command: The web services command you wish to execute, such as start a virtual machine or create a disk volume
			</div></li><li class="listitem"><div class="para">
				Parameters: Any additional required or optional parameters for the command
			</div></li></ul></div><div class="para">
		A sample API GET request looks like the following:
	</div><pre class="programlisting">http://localhost:8080/client/api?command=deployVirtualMachine&amp;serviceOfferingId=1&amp;diskOfferingId=1&amp;templateId=2&amp;zoneId=4&amp;apiKey=miVr6X7u6bN_sdahOBpjNejPgEsT35eXq-jB8CG20YI3yaxXcgpyuaIRmFI_EJTVwZ0nUkkJbPmY3y2bciKwFQ&amp;signature=Lxx1DM40AjcXU%2FcaiK8RAP0O1hU%3D
</pre><div class="para">
		Or in a more readable format:
	</div><pre class="programlisting">
1. http://localhost:8080/client/api
2. ?command=deployVirtualMachine
3. &amp;serviceOfferingId=1
4. &amp;diskOfferingId=1
5. &amp;templateId=2
6. &amp;zoneId=4
7. &amp;apiKey=miVr6X7u6bN_sdahOBpjNejPgEsT35eXqjB8CG20YI3yaxXcgpyuaIRmFI_EJTVwZ0nUkkJbPmY3y2bciKwFQ
8. &amp;signature=Lxx1DM40AjcXU%2FcaiK8RAP0O1hU%3D
</pre><div class="para">
		The first line is the CloudStack API URL. This is the Cloud instance you wish to interact with.
	</div><div class="para">
		The second line refers to the command you wish to execute. In our example, we are attempting to deploy a fresh new virtual machine. It is preceded by a (?) to separate itself from the CloudStack API URL.
	</div><div class="para">
		Lines 3-6 are the parameters for this given command. To see the command and its request parameters, please refer to the appropriate section in the CloudStack API documentation. Each parameter field-value pair (field=value) is preceded by an ampersand character (&amp;).
	</div><div class="para">
		Line 7 is the user API Key that uniquely identifies the account. See Signing API Requests on page 7.
	</div><div class="para">
		Line 8 is the signature hash created to authenticate the user account executing the API command. See Signing API Requests on page 7.
	</div></div><div xml:lang="zh-TW" class="section" id="signing-api-requests" lang="zh-TW"><div class="titlepage"><div><div><h2 class="title" id="signing-api-requests">5.2. Signing API Requests</h2></div></div></div><div class="para">
		Whether you access the CloudStack API with HTTP or HTTPS, it must still be signed so that CloudStack can verify the caller has been authenticated and authorized to execute the command. Make sure that you have both the API Key and Secret Key provided by the CloudStack administrator for your account before proceeding with the signing process.
	</div><div class="para">
		To show how to sign a request, we will re-use the previous example.
	</div><pre class="programlisting">http://http://localhost:8080/client/api?command=deployVirtualMachine&amp;serviceOfferingId=1&amp;diskOfferingId=1&amp;templateId=2&amp;zoneId=4&amp;apiKey=miVr6X7u6bN_sdahOBpjNejPgEsT35eXq-jB8CG20YI3yaxXcgpyuaIRmFI_EJTVwZ0nUkkJbPmY3y2bciKwFQ&amp;signature=Lxx1DM40AjcXU%2FcaiK8RAP0O1hU%3D</pre><div class="para">
		Breaking this down, we have several distinct parts to this URL.
	</div><div class="itemizedlist"><ul><li class="listitem"><div class="para">
				Base URL: This is the base URL to the CloudStack Management Server.
			</div><pre class="programlisting">http://localhost:8080</pre></li><li class="listitem"><div class="para">
				API Path: This is the path to the API Servlet that processes the incoming requests.
			</div><pre class="programlisting">/client/api?</pre></li><li class="listitem"><div class="para">
				Command String: This part of the query string comprises of the command, its parameters, and the API Key that identifies the account.
			</div><div class="note"><div class="admonition_header"><h2>注意</h2></div><div class="admonition"><div class="para">
					As with all query string parameters of field-value pairs, the "field" component is case insensitive while all "value" values are case sensitive.
				</div></div></div><pre class="programlisting">command=deployVirtualMachine&amp;serviceOfferingId=1&amp;diskOfferingId=1&amp;templateId=2&amp;zoneId=4&amp;apiKey=miVr6X7u6bN_sdahOBpjNejPgEsT35eXq-jB8CG20YI3yaxXcgpyuaIRmFI_EJTVwZ0nUkkJbPmY3y2bciKwFQ</pre></li><li class="listitem"><div class="para">
				Signature: This is the hashed signature of the Base URL that is generated using a combination of the user’​s Secret Key and the HMAC SHA-1 hashing algorithm.
			</div><div class="para">
				&amp;signature=Lxx1DM40AjcXU%2FcaiK8RAP0O1hU%3D
			</div></li></ul></div><div class="para">
		Every API request has the format Base URL+API Path+Command String+Signature.
	</div><div class="para">
		To generate the signature.
	</div><div class="orderedlist"><ol><li class="listitem"><div class="para">
				For each field-value pair (as separated by a '&amp;') in the Command String, URL encode each value so that it can be safely sent via HTTP GET.
			</div><div class="note"><div class="admonition_header"><h2>注意</h2></div><div class="admonition"><div class="para">
					Make sure all spaces are encoded as "%20" rather than "+".
				</div></div></div></li><li class="listitem"><div class="para">
				Lower case the entire Command String and sort it alphabetically via the field for each field-value pair. The result of this step would look like the following.
			</div><pre class="programlisting">apikey=mivr6x7u6bn_sdahobpjnejpgest35exq-jb8cg20yi3yaxxcgpyuairmfi_ejtvwz0nukkjbpmy3y2bcikwfq&amp;command=deployvirtualmachine&amp;diskofferingid=1&amp;serviceofferingid=1&amp;templateid=2&amp;zoneid=4</pre></li><li class="listitem"><div class="para">
				Take the sorted Command String and run it through the HMAC SHA-1 hashing algorithm (most programming languages offer a utility method to do this) with the user’​s Secret Key. Base64 encode the resulting byte array in UTF-8 so that it can be safely transmitted via HTTP. The final string produced after Base64 encoding should be "Lxx1DM40AjcXU%2FcaiK8RAP0O1hU%3D".
			</div><div class="para">
				By reconstructing the final URL in the format Base URL+API Path+Command String+Signature, the final URL should look like:
			</div><pre class="programlisting">http://localhost:8080/client/api?command=deployVirtualMachine&amp;serviceOfferingId=1&amp;diskOfferingId=1&amp;templateId=2&amp;zoneId=4&amp;apiKey=miVr6X7u6bN_sdahOBpjNejPgEsT35eXq-jB8CG20YI3yaxXcgpyuaIRmFI_EJTVwZ0nUkkJbPmY3y2bciKwFQ&amp;signature=Lxx1DM40AjcXU%2FcaiK8RAP0O1hU%3D</pre></li></ol></div><div xml:lang="zh-TW" class="section" id="signing-api-calls-python" lang="zh-TW"><div class="titlepage"><div><div><h3 class="title" id="signing-api-calls-python">5.2.1. How to sign an API call with Python</h3></div></div></div><div class="para">
		To illustrate the procedure used to sign API calls we present a step by step interactive session using Python.
	</div><div class="para">
		First import the required modules:
	</div><pre class="programlisting">

 
$python
Python 2.7.3 (default, Nov 17 2012, 19:54:34) 
[GCC 4.2.1 Compatible Apple Clang 4.1 ((tags/Apple/clang-421.11.66))] on darwin
Type "help", "copyright", "credits" or "license" for more information.
&gt;&gt;&gt; import urllib2
&gt;&gt;&gt; import urllib
&gt;&gt;&gt; import hashlib
&gt;&gt;&gt; import hmac
&gt;&gt;&gt; import base64
 
</pre><div class="para">
		Define the endpoint of the Cloud, the command that you want to execute and the keys of the user.
	</div><pre class="programlisting">
 

&gt;&gt;&gt; baseurl='http://localhost:8080/client/api?'
&gt;&gt;&gt; request={}
&gt;&gt;&gt; request['command']='listUsers'
&gt;&gt;&gt; request['response']='json'
&gt;&gt;&gt; request['apikey']='plgWJfZK4gyS3mOMTVmjUVg-X-jlWlnfaUJ9GAbBbf9EdM-kAYMmAiLqzzq1ElZLYq_u38zCm0bewzGUdP66mg'
&gt;&gt;&gt; secretkey='VDaACYb0LV9eNjTetIOElcVQkvJck_J_QljX_FcHRj87ZKiy0z0ty0ZsYBkoXkY9b7eq1EhwJaw7FF3akA3KBQ'
  
</pre><div class="para">
		Build the request string:
	</div><pre class="programlisting">
 
&gt;&gt;&gt; request_str='&amp;'.join(['='.join([k,urllib.quote_plus(request[k])]) for k in request.keys()])
&gt;&gt;&gt; request_str
'apikey=plgWJfZK4gyS3mOMTVmjUVg-X-jlWlnfaUJ9GAbBbf9EdM-kAYMmAiLqzzq1ElZLYq_u38zCm0bewzGUdP66mg&amp;command=listUsers&amp;response=json'
  
</pre><div class="para">
		Compute the signature with hmac, do a 64 bit encoding and a url encoding:
	</div><pre class="programlisting">
  
&gt;&gt;&gt; sig_str='&amp;'.join(['='.join([k.lower(),urllib.quote_plus(request[k].lower().replace('+','%20'))])for k in sorted(request.iterkeys())]) 
&gt;&gt;&gt; sig_str
'apikey=plgwjfzk4gys3momtvmjuvg-x-jlwlnfauj9gabbbf9edm-kaymmailqzzq1elzlyq_u38zcm0bewzgudp66mg&amp;command=listusers&amp;response=json'
&gt;&gt;&gt; sig=hmac.new(secretkey,sig_str,hashlib.sha1)
&gt;&gt;&gt; sig
&lt;hmac.HMAC instance at 0x10d91d680&gt;
&gt;&gt;&gt; sig=hmac.new(secretkey,sig_str,hashlib.sha1).digest()
&gt;&gt;&gt; sig
'M:]\x0e\xaf\xfb\x8f\xf2y\xf1p\x91\x1e\x89\x8a\xa1\x05\xc4A\xdb'
&gt;&gt;&gt; sig=base64.encodestring(hmac.new(secretkey,sig_str,hashlib.sha1).digest())
&gt;&gt;&gt; sig
'TTpdDq/7j/J58XCRHomKoQXEQds=\n'
&gt;&gt;&gt; sig=base64.encodestring(hmac.new(secretkey,sig_str,hashlib.sha1).digest()).strip()
&gt;&gt;&gt; sig
'TTpdDq/7j/J58XCRHomKoQXEQds='
&gt;&gt;&gt; sig=urllib.quote_plus(base64.encodestring(hmac.new(secretkey,sig_str,hashlib.sha1).digest()).strip())
  
</pre><div class="para">
		Finally, build the entire string and do an http GET:
	</div><pre class="programlisting">
  
&gt;&gt;&gt; req=baseurl+request_str+'&amp;signature='+sig
&gt;&gt;&gt; req
'http://localhost:8080/client/api?apikey=plgWJfZK4gyS3mOMTVmjUVg-X-jlWlnfaUJ9GAbBbf9EdM-kAYMmAiLqzzq1ElZLYq_u38zCm0bewzGUdP66mg&amp;command=listUsers&amp;response=json&amp;signature=TTpdDq%2F7j%2FJ58XCRHomKoQXEQds%3D'
&gt;&gt;&gt; res=urllib2.urlopen(req)
&gt;&gt;&gt; res.read()
'{ "listusersresponse" : { "count":3 ,"user" : [  {"id":"7ed6d5da-93b2-4545-a502-23d20b48ef2a","username":"admin","firstname":"admin","lastname":"cloud","created":"2012-07-05T12:18:27-0700","state":"enabled","account":"admin","accounttype":1,"domainid":"8a111e58-e155-4482-93ce-84efff3c7c77","domain":"ROOT","apikey":"plgWJfZK4gyS3mOMTVmjUVg-X-jlWlnfaUJ9GAbBbf9EdM-kAYMmAiLqzzq1ElZLYq_u38zCm0bewzGUdP66mg","secretkey":"VDaACYb0LV9eNjTetIOElcVQkvJck_J_QljX_FcHRj87ZKiy0z0ty0ZsYBkoXkY9b7eq1EhwJaw7FF3akA3KBQ","accountid":"7548ac03-af1d-4c1c-9064-2f3e2c0eda0d"}, {"id":"1fea6418-5576-4989-a21e-4790787bbee3","username":"runseb","firstname":"foobar","lastname":"goa","email":"joe@smith.com","created":"2013-04-10T16:52:06-0700","state":"enabled","account":"admin","accounttype":1,"domainid":"8a111e58-e155-4482-93ce-84efff3c7c77","domain":"ROOT","apikey":"Xhsb3MewjJQaXXMszRcLvQI9_NPy_UcbDj1QXikkVbDC9MDSPwWdtZ1bUY1H7JBEYTtDDLY3yuchCeW778GkBA","secretkey":"gIsgmi8C5YwxMHjX5o51pSe0kqs6JnKriw0jJBLceY5bgnfzKjL4aM6ctJX-i1ddQIHJLbLJDK9MRzsKk6xZ_w","accountid":"7548ac03-af1d-4c1c-9064-2f3e2c0eda0d"}, {"id":"52f65396-183c-4473-883f-a37e7bb93967","username":"toto","firstname":"john","lastname":"smith","email":"john@smith.com","created":"2013-04-23T04:27:22-0700","state":"enabled","account":"admin","accounttype":1,"domainid":"8a111e58-e155-4482-93ce-84efff3c7c77","domain":"ROOT","apikey":"THaA6fFWS_OmvU8od201omxFC8yKNL_Hc5ZCS77LFCJsRzSx48JyZucbUul6XYbEg-ZyXMl_wuEpECzK-wKnow","secretkey":"O5ywpqJorAsEBKR_5jEvrtGHfWL1Y_j1E4Z_iCr8OKCYcsPIOdVcfzjJQ8YqK0a5EzSpoRrjOFiLsG0hQrYnDA","accountid":"7548ac03-af1d-4c1c-9064-2f3e2c0eda0d"} ] } }'
  
</pre></div></div><div xml:lang="zh-TW" class="section" id="enabling-api-call-expiration" lang="zh-TW"><div class="titlepage"><div><div><h2 class="title" id="enabling-api-call-expiration">5.3. Enabling API Call Expiration</h2></div></div></div><div class="para">
		You can set an expiry timestamp on API calls to prevent replay attacks over non-secure channels, such as HTTP. The server tracks the expiry timestamp you have specified and rejects all the subsequent API requests that come in after this validity period.
	</div><div class="para">
		To enable this feature, add the following parameters to the API request:
	</div><div class="itemizedlist"><ul><li class="listitem"><div class="para">
				signatureVersion=3: If the signatureVersion parameter is missing or is not equal to 3, the expires parameter is ignored in the API request.
			</div></li><li class="listitem"><div class="para">
				expires=YYYY-MM-DDThh:mm:ssZ: Specifies the date and time at which the signature included in the request is expired. The timestamp is expressed in the YYYY-MM-DDThh:mm:ssZ format, as specified in the ISO 8601 standard.
			</div></li></ul></div><div class="para">
		例​如​：
	</div><pre class="programlisting">expires=2011-10-10T12:00:00+0530</pre><div class="para">
		A sample API request with expiration is given below:
	</div><pre class="programlisting">http://&lt;IPAddress&gt;:8080/client/api?command=listZones&amp;signatureVersion=3&amp;expires=2011-10-10T12:00:00+0530&amp;apiKey=miVr6X7u6bN_sdahOBpjNejPgEsT35eXq-jB8CG20YI3yaxXcgpyuaIRmFI_EJTVwZ0nUkkJbPmY3y2bciKwFQ&amp;signature=Lxx1DM40AjcXU%2FcaiK8RAP0O1hU%3D</pre></div><div xml:lang="zh-TW" class="section" id="api-throttling" lang="zh-TW"><div class="titlepage"><div><div><h2 class="title" id="api-throttling">5.4. Limiting the Rate of API Requests</h2></div></div></div><div class="para">
		You can limit the rate at which API requests can be placed for each account. This is useful to avoid malicious attacks on the Management Server, prevent performance degradation, and provide fairness to all accounts.
	</div><div class="para">
		If the number of API calls exceeds the threshold, an error message is returned for any additional API calls. The caller will have to retry these API calls at another time.
	</div><div class="section" id="api-throttling-configure"><div class="titlepage"><div><div><h3 class="title" id="api-throttling-configure">5.4.1. Configuring the API Request Rate</h3></div></div></div><div class="para">
			To control the API request rate, use the following global configuration settings:
		</div><div class="itemizedlist"><ul><li class="listitem"><div class="para">
					api.throttling.enabled - Enable/Disable API throttling. By default, this setting is false, so API throttling is not enabled.
				</div></li><li class="listitem"><div class="para">
					api.throttling.interval (in seconds) - Time interval during which the number of API requests is to be counted. When the interval has passed, the API count is reset to 0.
				</div></li><li class="listitem"><div class="para">
					api.throttling.max - Maximum number of APIs that can be placed within the api.throttling.interval period.
				</div></li><li class="listitem"><div class="para">
					api.throttling.cachesize - Cache size for storing API counters. Use a value higher than the total number of accounts managed by the cloud. One cache entry is needed for each account, to store the running API total for that account.
				</div></li></ul></div></div><div class="section" id="api-throttling-limitations"><div class="titlepage"><div><div><h3 class="title" id="api-throttling-limitations">5.4.2. Limitations on API Throttling</h3></div></div></div><div class="para">
			The following limitations exist in the current implementation of this feature.
		</div><div class="note"><div class="admonition_header"><h2>注意</h2></div><div class="admonition"><div class="para">
				Even with these limitations, CloudStack is still able to effectively use API throttling to avoid malicious attacks causing denial of service.
			</div></div></div><div class="para">
		</div><div class="itemizedlist"><ul><li class="listitem"><div class="para">
					In a deployment with multiple Management Servers, the cache is not synchronized across them. In this case, CloudStack might not be able to ensure that only the exact desired number of API requests are allowed. In the worst case, the number of API calls that might be allowed is (number of Management Servers) * (api.throttling.max).
				</div></li><li class="listitem"><div class="para">
					The API commands resetApiLimit and getApiLimit are limited to the Management Server where the API is invoked.
				</div></li></ul></div></div></div><div xml:lang="zh-TW" class="section" id="responses" lang="zh-TW"><div class="titlepage"><div><div><h2 class="title" id="responses">5.5. Responses</h2></div></div></div><div xml:lang="zh-TW" class="section" id="response-formats" lang="zh-TW"><div class="titlepage"><div><div><h3 class="title" id="response-formats">5.5.1. Response Formats: XML and JSON</h3></div></div></div><div class="para">
		CloudStack supports two formats as the response to an API call. The default response is XML. If you would like the response to be in JSON, add &amp;response=json to the Command String.
	</div><div class="para">
		The two response formats differ in how they handle blank fields. In JSON, if there is no value for a response field, it will not appear in the response. If all the fields were empty, there might be no response at all. In XML, even if there is no value to be returned, an empty field will be returned as a placeholder XML element.
	</div><div class="para">
		Sample XML Response:
	</div><pre class="programlisting">
     &lt;listipaddressesresponse&gt; 
        &lt;allocatedipaddress&gt;
        &lt;ipaddress&gt;192.168.10.141&lt;/ipaddress&gt; 
        &lt;allocated&gt;2009-09-18T13:16:10-0700&lt;/allocated&gt; 
        &lt;zoneid&gt;4&lt;/zoneid&gt; 
            &lt;zonename&gt;WC&lt;/zonename&gt; 
            &lt;issourcenat&gt;true&lt;/issourcenat&gt; 
        &lt;/allocatedipaddress&gt;
     &lt;/listipaddressesresponse&gt;
</pre><div class="para">
		Sample JSON Response:
	</div><pre class="programlisting">
        { "listipaddressesresponse" : 
          { "allocatedipaddress" :
            [ 
              { 
                "ipaddress" : "192.168.10.141", 
                "allocated" : "2009-09-18T13:16:10-0700",
                "zoneid" : "4", 
                "zonename" : "WC", 
                "issourcenat" : "true" 
              } 
            ]
          } 
        } 
</pre></div><div xml:lang="zh-TW" class="section" id="max-result-page-returned" lang="zh-TW"><div class="titlepage"><div><div><h3 class="title" id="max-result-page-returned">5.5.2. Maximum Result Pages Returned</h3></div></div></div><div class="para">
		For each cloud, there is a default upper limit on the number of results that any API command will return in a single page. This is to help prevent overloading the cloud servers and prevent DOS attacks. For example, if the page size limit is 500 and a command returns 10,000 results, the command will return 20 pages.
	</div><div class="para">
		The default page size limit can be different for each cloud. It is set in the global configuration parameter default.page.size. If your cloud has many users with lots of VMs, you might need to increase the value of this parameter. At the same time, be careful not to set it so high that your site can be taken down by an enormous return from an API call. For more information about how to set global configuration parameters, see "Describe Your Deployment" in the Installation Guide.
	</div><div class="para">
		To decrease the page size limit for an individual API command, override the global setting with the page and pagesize parameters, which are available in any list* command (listCapabilities, listDiskOfferings, etc.).
	</div><div class="itemizedlist"><ul><li class="listitem"><div class="para">
				Both parameters must be specified together.
			</div></li><li class="listitem"><div class="para">
				The value of the pagesize parameter must be smaller than the value of default.page.size. That is, you can not increase the number of possible items in a result page, only decrease it.
			</div></li></ul></div><div class="para">
		For syntax information on the list* commands, see the API Reference.
	</div></div><div xml:lang="zh-TW" class="section" id="error-handling" lang="zh-TW"><div class="titlepage"><div><div><h3 class="title" id="error-handling">5.5.3. Error Handling</h3></div></div></div><div class="para">
		If an error occurs while processing an API request, the appropriate response in the format specified is returned. Each error response consists of an error code and an error text describing what possibly can go wrong. For an example error response, see page 12.
	</div><div class="para">
		An HTTP error code of 401 is always returned if API request was rejected due to bad signatures, missing API Keys, or the user simply did not have the permissions to execute the command.
	</div></div></div><div xml:lang="zh-TW" class="section" id="asynchronous-commands" lang="zh-TW"><div class="titlepage"><div><div><h2 class="title" id="asynchronous-commands">5.6. Asynchronous Commands</h2></div></div></div><div class="para">
		Asynchronous commands were introduced in CloudStack 2.x. Commands are designated as asynchronous when they can potentially take a long period of time to complete such as creating a snapshot or disk volume. They differ from synchronous commands by the following:
	</div><div class="itemizedlist"><ul><li class="listitem"><div class="para">
				They are identified in the API Reference by an (A).
			</div></li><li class="listitem"><div class="para">
				They will immediately return a job ID to refer to the job that will be responsible in processing the command.
			</div></li><li class="listitem"><div class="para">
				If executed as a "create" resource command, it will return the resource ID as well as the job ID.
			</div><div class="para">
				You can periodically check the status of the job by making a simple API call to the command, queryAsyncJobResult and passing in the job ID.
			</div></li></ul></div><div xml:lang="zh-TW" class="section" id="job-status" lang="zh-TW"><div class="titlepage"><div><div><h3 class="title" id="job-status">5.6.1. 工​作​狀​態​</h3></div></div></div><div class="para">
		使​用​非​同​步​指​令​的​訣​竅​為​工​作​ID，此​ID會​在​指​令​執​行​時​立​即​回​覆​。​當​您​取​得​ID，您​可​以​隨​時​檢​查​工​作​狀​態​，使​用​queryAsyncJobResult 指​令​，此​指​令​會​回​復​三​種​可​能​的​工​作​狀​態​正​數​：
	</div><div class="itemizedlist"><ul><li class="listitem"><div class="para">
				0 ：工​作​正​在​執​行​，繼​續​週​期​性​的​檢​查​
			</div></li><li class="listitem"><div class="para">
				1：工​作​完​成​，會​回​復​任​何​成​功​的​回​應​數​值​，與​一​開​始​執​行​的​指​令​有​關​
			</div></li><li class="listitem"><div class="para">
				2：工​作​執​行​失​敗​，請​檢​查​"jobresultcode"標​籤​檢​查​失​敗​原​因​的​程​式​碼​，及​"jobresult"檢​查​失​敗​原​因​
			</div></li></ul></div></div><div xml:lang="zh-TW" class="section" id="asynchronous-commands-example" lang="zh-TW"><div class="titlepage"><div><div><h3 class="title" id="asynchronous-commands-example">5.6.2. Example</h3></div></div></div><div class="para">
		The following shows an example of using an asynchronous command. Assume the API command:
	</div><pre class="programlisting">command=deployVirtualMachine&amp;zoneId=1&amp;serviceOfferingId=1&amp;diskOfferingId=1&amp;templateId=1
</pre><div class="para">
		CloudStack will immediately return a job ID and any other additional data.
	</div><pre class="programlisting">
         &lt;deployvirtualmachineresponse&gt; 
              &lt;jobid&gt;1&lt;/jobid&gt;
             &lt;id&gt;100&lt;/id&gt;
         &lt;/deployvirtualmachineresponse&gt;
</pre><div class="para">
		Using the job ID, you can periodically poll for the results by using the queryAsyncJobResult command.
	</div><pre class="programlisting">command=queryAsyncJobResult&amp;jobId=1</pre><div class="para">
		Three possible results could come from this query.
	</div><div class="para">
		Job is still pending:
	</div><pre class="programlisting">
         &lt;queryasyncjobresult&gt; 
              &lt;jobid&gt;1&lt;/jobid&gt;
              &lt;jobstatus&gt;0&lt;/jobstatus&gt;
              &lt;jobprocstatus&gt;1&lt;/jobprocstatus&gt;
         &lt;/queryasyncjobresult&gt;
</pre><div class="para">
		Job has succeeded:
	</div><pre class="programlisting">
            &lt;queryasyncjobresultresponse cloud-stack-version="3.0.1.6"&gt;
                  &lt;jobid&gt;1&lt;/jobid&gt;
                  &lt;jobstatus&gt;1&lt;/jobstatus&gt;
                  &lt;jobprocstatus&gt;0&lt;/jobprocstatus&gt;
                 &lt;jobresultcode&gt;0&lt;/jobresultcode&gt;
                  &lt;jobresulttype&gt;object&lt;/jobresulttype&gt;
                  &lt;jobresult&gt;
                    &lt;virtualmachine&gt;
                    &lt;id&gt;450&lt;/id&gt;
                    &lt;name&gt;i-2-450-VM&lt;/name&gt;
                    &lt;displayname&gt;i-2-450-VM&lt;/displayname&gt;
                    &lt;account&gt;admin&lt;/account&gt;
                    &lt;domainid&gt;1&lt;/domainid&gt;
                    &lt;domain&gt;ROOT&lt;/domain&gt;
                    &lt;created&gt;2011-03-10T18:20:25-0800&lt;/created&gt;
                    &lt;state&gt;Running&lt;/state&gt;
                    &lt;haenable&gt;false&lt;/haenable&gt;
                    &lt;zoneid&gt;1&lt;/zoneid&gt;
                    &lt;zonename&gt;San Jose 1&lt;/zonename&gt;
                    &lt;hostid&gt;2&lt;/hostid&gt;
                    &lt;hostname&gt;905-13.sjc.lab.vmops.com&lt;/hostname&gt;
                    &lt;templateid&gt;1&lt;/templateid&gt;
                    &lt;templatename&gt;CentOS 5.3 64bit LAMP&lt;/templatename&gt;
                    &lt;templatedisplaytext&gt;CentOS 5.3 64bit LAMP&lt;/templatedisplaytext&gt;
                    &lt;passwordenabled&gt;false&lt;/passwordenabled&gt;
                    &lt;serviceofferingid&gt;1&lt;/serviceofferingid&gt;
                    &lt;serviceofferingname&gt;Small Instance&lt;/serviceofferingname&gt;
                    &lt;cpunumber&gt;1&lt;/cpunumber&gt;
                    &lt;cpuspeed&gt;500&lt;/cpuspeed&gt;
                    &lt;memory&gt;512&lt;/memory&gt;
                    &lt;guestosid&gt;12&lt;/guestosid&gt;
                    &lt;rootdeviceid&gt;0&lt;/rootdeviceid&gt;
                    &lt;rootdevicetype&gt;NetworkFilesystem&lt;/rootdevicetype&gt;
                    &lt;nic&gt;
                      &lt;id&gt;561&lt;/id&gt;
                      &lt;networkid&gt;205&lt;/networkid&gt;
                      &lt;netmask&gt;255.255.255.0&lt;/netmask&gt;
                      &lt;gateway&gt;10.1.1.1&lt;/gateway&gt;
                      &lt;ipaddress&gt;10.1.1.225&lt;/ipaddress&gt;
                      &lt;isolationuri&gt;vlan://295&lt;/isolationuri&gt;
                      &lt;broadcasturi&gt;vlan://295&lt;/broadcasturi&gt;
                      &lt;traffictype&gt;Guest&lt;/traffictype&gt;
                      &lt;type&gt;Virtual&lt;/type&gt;
                      &lt;isdefault&gt;true&lt;/isdefault&gt;
                    &lt;/nic&gt;
                    &lt;hypervisor&gt;XenServer&lt;/hypervisor&gt;
                   &lt;/virtualmachine&gt;
                 &lt;/jobresult&gt;
            &lt;/queryasyncjobresultresponse&gt;
</pre><div class="para">
		Job has failed:
	</div><pre class="programlisting">
            &lt;queryasyncjobresult&gt;
                  &lt;jobid&gt;1&lt;/jobid&gt; 
                  &lt;jobstatus&gt;2&lt;/jobstatus&gt; 
                  &lt;jobprocstatus&gt;0&lt;/jobprocstatus&gt;
                  &lt;jobresultcode&gt;551&lt;/jobresultcode&gt;
                  &lt;jobresulttype&gt;text&lt;/jobresulttype&gt;
                  &lt;jobresult&gt;Unable to deploy virtual machine id = 100 due to not enough capacity&lt;/jobresult&gt; 
            &lt;/queryasyncjobresult&gt;
</pre></div></div></div><div xml:lang="zh-TW" class="chapter" id="working-with-usage-data" lang="zh-TW"><div class="titlepage"><div><div><h2 class="title">章 6. 使​用​使​用​資​料​</h2></div></div></div><div class="toc"><dl><dt><span class="section"><a href="#usage-record-format">6.1. Usage Record Format</a></span></dt><dd><dl><dt><span class="section"><a href="#virtual-machine-usage-record-format">6.1.1. Virtual Machine Usage Record Format</a></span></dt><dt><span class="section"><a href="#network-usage-record-format">6.1.2. Network Usage Record Format</a></span></dt><dt><span class="section"><a href="#ipaddress-usage-record-format">6.1.3. IP位​址​使​用​紀​錄​的​格​式​</a></span></dt><dt><span class="section"><a href="#disk-volume-usage-record-format">6.1.4. Disk Volume Usage Record Format</a></span></dt><dt><span class="section"><a href="#template-iso-snapshot-usage-record-format">6.1.5. 模​組​、​ISO及​快​取​物​件​的​使​用​紀​錄​格​式​</a></span></dt><dt><span class="section"><a href="#loadbalancer-policy-port-forwarding-rule-usage-record-format">6.1.6. Load Balancer Policy 或​ Port Forwarding Rule 的​使​用​季​錄​格​式​</a></span></dt><dt><span class="section"><a href="#network-offering-usage-record-format">6.1.7. Network Offering Usage Record Format</a></span></dt><dt><span class="section"><a href="#VPN-user-usage-record-format">6.1.8. VPN使​用​者​使​用​紀​錄​格​式​</a></span></dt></dl></dd><dt><span class="section"><a href="#usage-types">6.2. Usage Types</a></span></dt><dt><span class="section"><a href="#example-response-from-listUsageRecords">6.3. Example response from listUsageRecords</a></span></dt><dt><span class="section"><a href="#dates-in-usage-record">6.4. Dates in the Usage Record</a></span></dt><dt><span class="section"><a href="#globally-configured-limits">6.5. 廣​域​設​定​限​制​</a></span></dt></dl></div><div class="para">
		使​用​伺​服​器​提​供​彙​整​使​用​紀​錄​，讓​您​可​以​在​CloudStack上​建​立​廣​告​整​合​。​使​用​伺​服​器​會​從​事​件​紀​錄​擷​取​資​料​，然​後​創​立​使​用​記​錄​總​結​，您​可​以​用​istUsageRecords API call來​存​取​
	</div><div class="para">
		使​用​紀​錄​顯​示​資​源​的​數​量​，像​是​VM執​行​時​間​或​guest instances消​耗​的​模​組​儲​存​空​間​。​對​於​裸​金​ instances這​個​特​例​，沒​有​消​耗​模​組​儲​存​資​源​，但​會​紀​錄​零​使​用​率​，並​顯​示​在​使​用​伺​服​器​的​使​用​結​果​
	</div><div class="para">
		使​用​伺​服​器​至​少​每​天​執​行​一​次​，也​可​以​透​過​設​定​，每​天​執​行​多​次​。​其​行​為​由​ CloudStack管​理​者​指​南​中​描​述​的​系​統​設​定​控​制​
	</div><div xml:lang="zh-TW" class="section" id="usage-record-format" lang="zh-TW"><div class="titlepage"><div><div><h2 class="title" id="usage-record-format">6.1. Usage Record Format</h2></div></div></div><div xml:lang="zh-TW" class="section" id="virtual-machine-usage-record-format" lang="zh-TW"><div class="titlepage"><div><div><h3 class="title" id="virtual-machine-usage-record-format">6.1.1. Virtual Machine Usage Record Format</h3></div></div></div><div class="para">
		For running and allocated virtual machine usage, the following fields exist in a usage record:
	</div><div class="itemizedlist"><ul><li class="listitem"><div class="para">
				account：帳​戶​名​稱​
			</div></li><li class="listitem"><div class="para">
				accountid：帳​戶​的​ID
			</div></li><li class="listitem"><div class="para">
				domainid：帳​戶​所​在​的​網​域​ID
			</div></li><li class="listitem"><div class="para">
				zoneid：使​用​的​區​域​
			</div></li><li class="listitem"><div class="para">
				description：使​用​紀​錄​追​蹤​的​字​串​描​述​
			</div></li><li class="listitem"><div class="para">
				usage –​ String representation of the usage, including the units of usage (e.g. 'Hrs' for VM running time)
			</div></li><li class="listitem"><div class="para">
				usagetype：代​表​使​用​形​式​的​數​字​(詳​見​Usage Types)
			</div></li><li class="listitem"><div class="para">
				rawusage：代​表​實​際​使​用​率​的​數​字​，單​位​為​小​時​
			</div></li><li class="listitem"><div class="para">
				virtualMachineId –​ The ID of the virtual machine
			</div></li><li class="listitem"><div class="para">
				name –​ The name of the virtual machine
			</div></li><li class="listitem"><div class="para">
				offeringid –​ The ID of the service offering
			</div></li><li class="listitem"><div class="para">
				templateid –​ The ID of the template or the ID of the parent template. The parent template value is present when the current template was created from a volume.
			</div></li><li class="listitem"><div class="para">
				usageid –​ Virtual machine
			</div></li><li class="listitem"><div class="para">
				type –​ Hypervisor
			</div></li><li class="listitem"><div class="para">
				startdate, enddate：使​用​總​計​的​時​間​，詳​見​Dates in the Usage Record
			</div></li></ul></div></div><div xml:lang="zh-TW" class="section" id="network-usage-record-format" lang="zh-TW"><div class="titlepage"><div><div><h3 class="title" id="network-usage-record-format">6.1.2. Network Usage Record Format</h3></div></div></div><div class="para">
		For network usage (bytes sent/received), the following fields exist in a usage record.
	</div><div class="itemizedlist"><ul><li class="listitem"><div class="para">
				account：帳​戶​名​稱​
			</div></li><li class="listitem"><div class="para">
				accountid：帳​戶​的​ID
			</div></li><li class="listitem"><div class="para">
				domainid：帳​戶​所​在​的​網​域​ID
			</div></li><li class="listitem"><div class="para">
				zoneid：使​用​的​區​域​
			</div></li><li class="listitem"><div class="para">
				description：使​用​紀​錄​追​蹤​的​字​串​描​述​
			</div></li><li class="listitem"><div class="para">
				usagetype：代​表​使​用​形​式​的​數​字​(詳​見​Usage Types)
			</div></li><li class="listitem"><div class="para">
				rawusage：代​表​實​際​使​用​率​的​數​字​，單​位​為​小​時​
			</div></li><li class="listitem"><div class="para">
				usageid –​ Device ID (virtual router ID or external device ID)
			</div></li><li class="listitem"><div class="para">
				type –​ Device type (domain router, external load balancer, etc.)
			</div></li><li class="listitem"><div class="para">
				startdate, enddate：使​用​總​計​的​時​間​，詳​見​Dates in the Usage Record
			</div></li></ul></div></div><div xml:lang="zh-TW" class="section" id="ipaddress-usage-record-format" lang="zh-TW"><div class="titlepage"><div><div><h3 class="title" id="ipaddress-usage-record-format">6.1.3. IP位​址​使​用​紀​錄​的​格​式​</h3></div></div></div><div class="para">
		以​下​欄​位​會​出​現​在​使​用​紀​錄​中​
	</div><div class="itemizedlist"><ul><li class="listitem"><div class="para">
				account：帳​戶​名​稱​
			</div></li><li class="listitem"><div class="para">
				accountid：帳​戶​的​ID
			</div></li><li class="listitem"><div class="para">
				domainid：帳​戶​所​在​的​區​域​ID
			</div></li><li class="listitem"><div class="para">
				zoneid：使​用​的​地​區​
			</div></li><li class="listitem"><div class="para">
				description：描​述​使​用​紀​錄​在​追​蹤​甚​麼​的​字​串​
			</div></li><li class="listitem"><div class="para">
				usage：代​表​使​用​率​的​字​串​，包​括​單​位​
			</div></li><li class="listitem"><div class="para">
				usagetype：代​表​使​用​形​式​的​數​字​(詳​見​ Usage Types )
			</div></li><li class="listitem"><div class="para">
				rawusage：帶​表​實​際​使​用​率​的​數​字​，單​位​為​小​時​
			</div></li><li class="listitem"><div class="para">
				usageid：IP位​址​的​ID
			</div></li><li class="listitem"><div class="para">
				startdate, enddate：使​用​總​計​的​時​間​，詳​見​Dates in the Usage Record
			</div></li><li class="listitem"><div class="para">
				issourcenat：source NAT是​否​啟​用​
			</div></li><li class="listitem"><div class="para">
				iselastic：如​果​IP位​址​是​彈​性​的​，顯​示​True
			</div></li></ul></div></div><div xml:lang="zh-TW" class="section" id="disk-volume-usage-record-format" lang="zh-TW"><div class="titlepage"><div><div><h3 class="title" id="disk-volume-usage-record-format">6.1.4. Disk Volume Usage Record Format</h3></div></div></div><div class="para">
		For disk volumes, the following fields exist in a usage record.
	</div><div class="itemizedlist"><ul><li class="listitem"><div class="para">
				account：帳​戶​名​稱​
			</div></li><li class="listitem"><div class="para">
				accountid：帳​戶​的​ID
			</div></li><li class="listitem"><div class="para">
				domainid：帳​戶​所​在​的​網​域​ID
			</div></li><li class="listitem"><div class="para">
				zoneid：使​用​的​區​域​
			</div></li><li class="listitem"><div class="para">
				description：使​用​紀​錄​追​蹤​的​字​串​描​述​
			</div></li><li class="listitem"><div class="para">
				usage：代​表​使​用​率​的​字​串​，包​括​單​位​(e.g. 'Hrs' 代​表​小​時​)
			</div></li><li class="listitem"><div class="para">
				usagetype：代​表​使​用​形​式​的​數​字​(詳​見​Usage Types)
			</div></li><li class="listitem"><div class="para">
				rawusage：代​表​實​際​使​用​率​的​數​字​，單​位​為​小​時​
			</div></li><li class="listitem"><div class="para">
				usageid –​ The volume ID
			</div></li><li class="listitem"><div class="para">
				offeringid：硬​碟​服​務​的​ID
			</div></li><li class="listitem"><div class="para">
				type –​ Hypervisor
			</div></li><li class="listitem"><div class="para">
				templateid –​ ROOT template ID
			</div></li><li class="listitem"><div class="para">
				size –​ The amount of storage allocated
			</div></li><li class="listitem"><div class="para">
				startdate, enddate：使​用​總​計​的​時​間​，詳​見​Dates in the Usage Record
			</div></li></ul></div></div><div xml:lang="zh-TW" class="section" id="template-iso-snapshot-usage-record-format" lang="zh-TW"><div class="titlepage"><div><div><h3 class="title" id="template-iso-snapshot-usage-record-format">6.1.5. 模​組​、​ISO及​快​取​物​件​的​使​用​紀​錄​格​式​</h3></div></div></div><div class="itemizedlist"><ul><li class="listitem"><div class="para">
				account：帳​戶​名​稱​
			</div></li><li class="listitem"><div class="para">
				accountid：帳​戶​的​ID
			</div></li><li class="listitem"><div class="para">
				domainid：帳​戶​所​在​的​網​域​ID
			</div></li><li class="listitem"><div class="para">
				zoneid：使​用​的​區​域​
			</div></li><li class="listitem"><div class="para">
				description：使​用​紀​錄​追​蹤​的​字​串​描​述​
			</div></li><li class="listitem"><div class="para">
				usage：代​表​使​用​率​的​字​串​，包​括​單​位​(e.g. 'Hrs' 代​表​小​時​)
			</div></li><li class="listitem"><div class="para">
				usagetype：代​表​使​用​形​式​的​數​字​(詳​見​Usage Types)
			</div></li><li class="listitem"><div class="para">
				rawusage：代​表​實​際​使​用​率​的​數​字​，單​位​為​小​時​
			</div></li><li class="listitem"><div class="para">
				usageid：模​組​、​ISO或​快​取​物​件​的​ID
			</div></li><li class="listitem"><div class="para">
				offeringid：硬​碟​服​務​的​ID
			</div></li><li class="listitem"><div class="para">
				templateid：僅​模​組​(usage type 7)包​含​。​來​源​模​組​的​ID
			</div></li><li class="listitem"><div class="para">
				size：模​組​、​ISO或​快​取​物​件​的​大​小​
			</div></li><li class="listitem"><div class="para">
				startdate, enddate：使​用​總​計​的​時​間​，詳​見​Dates in the Usage Record
			</div></li></ul></div></div><div xml:lang="zh-TW" class="section" id="loadbalancer-policy-port-forwarding-rule-usage-record-format" lang="zh-TW"><div class="titlepage"><div><div><h3 class="title" id="loadbalancer-policy-port-forwarding-rule-usage-record-format">6.1.6. Load Balancer Policy 或​ Port Forwarding Rule 的​使​用​季​錄​格​式​</h3></div></div></div><div class="itemizedlist"><ul><li class="listitem"><div class="para">
				account：帳​戶​名​稱​
			</div></li><li class="listitem"><div class="para">
				accountid：帳​戶​的​ID
			</div></li><li class="listitem"><div class="para">
				domainid：帳​戶​所​在​的​區​域​ID
			</div></li><li class="listitem"><div class="para">
				zoneid：使​用​的​地​區​
			</div></li><li class="listitem"><div class="para">
				description：描​述​使​用​紀​錄​在​追​蹤​甚​麼​的​字​串​
			</div></li><li class="listitem"><div class="para">
				usage：代​表​使​用​率​的​字​串​，包​括​單​位​(e.g. 'Hrs' for hours)
			</div></li><li class="listitem"><div class="para">
				usagetype：代​表​使​用​形​式​的​數​字​(詳​見​)
			</div></li><li class="listitem"><div class="para">
				rawusage：帶​表​實​際​使​用​率​的​數​字​，單​位​為​小​時​
			</div></li><li class="listitem"><div class="para">
				usageid： load balancer policy 或​ port forwarding rule的​ID
			</div></li><li class="listitem"><div class="para">
				usagetype：代​表​使​用​形​式​的​數​字​(詳​見​)
			</div></li><li class="listitem"><div class="para">
				startdate, enddate：使​用​總​計​的​時​間​，詳​見​Dates in the Usage Record
			</div></li></ul></div></div><div xml:lang="zh-TW" class="section" id="network-offering-usage-record-format" lang="zh-TW"><div class="titlepage"><div><div><h3 class="title" id="network-offering-usage-record-format">6.1.7. Network Offering Usage Record Format</h3></div></div></div><div class="itemizedlist"><ul><li class="listitem"><div class="para">
				account：帳​戶​名​稱​
			</div></li><li class="listitem"><div class="para">
				accountid：帳​戶​的​ID
			</div></li><li class="listitem"><div class="para">
				domainid：帳​戶​所​在​的​網​域​ID
			</div></li><li class="listitem"><div class="para">
				zoneid：使​用​的​區​域​
			</div></li><li class="listitem"><div class="para">
				description：使​用​紀​錄​追​蹤​的​字​串​描​述​
			</div></li><li class="listitem"><div class="para">
				usage：代​表​使​用​率​的​字​串​，包​括​單​位​(e.g. 'Hrs' 代​表​小​時​)
			</div></li><li class="listitem"><div class="para">
				usagetype：代​表​使​用​形​式​的​數​字​(詳​見​Usage Types)
			</div></li><li class="listitem"><div class="para">
				rawusage：代​表​實​際​使​用​率​的​數​字​，單​位​為​小​時​
			</div></li><li class="listitem"><div class="para">
				usageid –​ ID of the network offering
			</div></li><li class="listitem"><div class="para">
				usagetype：代​表​使​用​形​式​的​數​字​(詳​見​Usage Types)
			</div></li><li class="listitem"><div class="para">
				offeringid –​ Network offering ID
			</div></li><li class="listitem"><div class="para">
				virtualMachineId –​ The ID of the virtual machine
			</div></li><li class="listitem"><div class="para">
				virtualMachineId –​ The ID of the virtual machine
			</div></li><li class="listitem"><div class="para">
				startdate, enddate：使​用​總​計​的​時​間​，詳​見​Dates in the Usage Record
			</div></li></ul></div></div><div xml:lang="zh-TW" class="section" id="VPN-user-usage-record-format" lang="zh-TW"><div class="titlepage"><div><div><h3 class="title" id="VPN-user-usage-record-format">6.1.8. VPN使​用​者​使​用​紀​錄​格​式​</h3></div></div></div><div class="itemizedlist"><ul><li class="listitem"><div class="para">
				account：帳​戶​名​稱​
			</div></li><li class="listitem"><div class="para">
				accountid：帳​戶​的​ID
			</div></li><li class="listitem"><div class="para">
				domainid：帳​戶​所​在​的​網​域​ID
			</div></li><li class="listitem"><div class="para">
				zoneid：使​用​的​區​域​
			</div></li><li class="listitem"><div class="para">
				description：使​用​紀​錄​追​蹤​的​字​串​描​述​
			</div></li><li class="listitem"><div class="para">
				usage：代​表​使​用​率​的​字​串​，包​括​單​位​(e.g. 'Hrs' 代​表​小​時​)
			</div></li><li class="listitem"><div class="para">
				usagetype：代​表​使​用​形​式​的​數​字​(詳​見​Usage Types)
			</div></li><li class="listitem"><div class="para">
				rawusage：代​表​實​際​使​用​率​的​數​字​，單​位​為​小​時​
			</div></li><li class="listitem"><div class="para">
				usageid：VPN使​用​者​的​ID
			</div></li><li class="listitem"><div class="para">
				usagetype：代​表​使​用​形​式​的​數​字​(詳​見​Usage Types)
			</div></li><li class="listitem"><div class="para">
				startdate, enddate：使​用​總​計​的​時​間​，詳​見​Dates in the Usage Record
			</div></li></ul></div></div></div><div xml:lang="zh-TW" class="section" id="usage-types" lang="zh-TW"><div class="titlepage"><div><div><h2 class="title" id="usage-types">6.2. Usage Types</h2></div></div></div><div class="para">
		The following table shows all usage types.
	</div><div class="informaltable"><table border="1"><colgroup><col width="4cm" class="c1" /><col width="8cm" class="c2" /><col width="5cm" class="c3" /></colgroup><thead><tr><th>
						Type ID
					</th><th>
						Type Name
					</th><th>
						敘​述​
					</th></tr></thead><tbody><tr><td>
						1
					</td><td>
						RUNNING_VM
					</td><td>
						Tracks the total running time of a VM per usage record period. If the VM is upgraded during the usage period, you will get a separate Usage Record for the new upgraded VM.
					</td></tr><tr><td>
						<div class="para">
							2
						</div>
					</td><td>
						<div class="para">
							ALLOCATED_VM
						</div>
					</td><td>
						<div class="para">
							Tracks the total time the VM has been created to the time when it has been destroyed. This usage type is also useful in determining usage for specific templates such as Windows-based templates.
						</div>
					</td></tr><tr><td>
						<div class="para">
							3
						</div>
					</td><td>
						<div class="para">
							IP_ADDRESS
						</div>
					</td><td>
						<div class="para">
							Tracks the public IP address owned by the account.
						</div>
					</td></tr><tr><td>
						<div class="para">
							4
						</div>
					</td><td>
						<div class="para">
							NETWORK_BYTES_SENT
						</div>
					</td><td>
						<div class="para">
							Tracks the total number of bytes sent by all the VMs for an account. Cloud.com does not currently track network traffic per VM.
						</div>
					</td></tr><tr><td>
						<div class="para">
							5
						</div>
					</td><td>
						<div class="para">
							NETWORK_BYTES_RECEIVED
						</div>
					</td><td>
						<div class="para">
							Tracks the total number of bytes received by all the VMs for an account. Cloud.com does not currently track network traffic per VM.
						</div>
					</td></tr><tr><td>
						<div class="para">
							6
						</div>
					</td><td>
						<div class="para">
							VOLUME
						</div>
					</td><td>
						<div class="para">
							Tracks the total time a disk volume has been created to the time when it has been destroyed.
						</div>
					</td></tr><tr><td>
						<div class="para">
							7
						</div>
					</td><td>
						<div class="para">
							TEMPLATE
						</div>
					</td><td>
						<div class="para">
							Tracks the total time a template (either created from a snapshot or uploaded to the cloud) has been created to the time it has been destroyed. The size of the template is also returned.
						</div>
					</td></tr><tr><td>
						<div class="para">
							8
						</div>
					</td><td>
						<div class="para">
							ISO
						</div>
					</td><td>
						<div class="para">
							Tracks the total time an ISO has been uploaded to the time it has been removed from the cloud. The size of the ISO is also returned.
						</div>
					</td></tr><tr><td>
						<div class="para">
							9
						</div>
					</td><td>
						<div class="para">
							SNAPSHOT
						</div>
					</td><td>
						<div class="para">
							Tracks the total time from when a snapshot has been created to the time it have been destroyed.
						</div>
					</td></tr><tr><td>
						<div class="para">
							11
						</div>
					</td><td>
						<div class="para">
							LOAD_BALANCER_POLICY
						</div>
					</td><td>
						<div class="para">
							Tracks the total time a load balancer policy has been created to the time it has been removed. Cloud.com does not track whether a VM has been assigned to a policy.
						</div>
					</td></tr><tr><td>
						<div class="para">
							12
						</div>
					</td><td>
						<div class="para">
							PORT_FORWARDING_RULE
						</div>
					</td><td>
						<div class="para">
							Tracks the time from when a port forwarding rule was created until the time it was removed.
						</div>
					</td></tr><tr><td>
						<div class="para">
							13
						</div>
					</td><td>
						<div class="para">
							NETWORK_OFFERING
						</div>
					</td><td>
						<div class="para">
							The time from when a network offering was assigned to a VM until it is removed.
						</div>
					</td></tr><tr><td>
						<div class="para">
							14
						</div>
					</td><td>
						<div class="para">
							VPN_USERS
						</div>
					</td><td>
						<div class="para">
							The time from when a VPN user is created until it is removed.
						</div>
					</td></tr></tbody></table></div></div><div xml:lang="zh-TW" class="section" id="example-response-from-listUsageRecords" lang="zh-TW"><div class="titlepage"><div><div><h2 class="title" id="example-response-from-listUsageRecords">6.3. Example response from listUsageRecords</h2></div></div></div><div class="para">
		All CloudStack API requests are submitted in the form of a HTTP GET/POST with an associated command and any parameters. A request is composed of the following whether in HTTP or HTTPS:
	</div><pre class="programlisting">
            &lt;listusagerecordsresponse&gt;
                  &lt;count&gt;1816&lt;/count&gt;
                 &lt;usagerecord&gt;
                    &lt;account&gt;user5&lt;/account&gt;
                    &lt;accountid&gt;10004&lt;/accountid&gt;
                    &lt;domainid&gt;1&lt;/domainid&gt;
                    &lt;zoneid&gt;1&lt;/zoneid&gt;
                        &lt;description&gt;i-3-4-WC running time (ServiceOffering: 1) (Template: 3)&lt;/description&gt;
                    &lt;usage&gt;2.95288 Hrs&lt;/usage&gt;
                       &lt;usagetype&gt;1&lt;/usagetype&gt;
                    &lt;rawusage&gt;2.95288&lt;/rawusage&gt;
                       &lt;virtualmachineid&gt;4&lt;/virtualmachineid&gt;
                    &lt;name&gt;i-3-4-WC&lt;/name&gt;
                       &lt;offeringid&gt;1&lt;/offeringid&gt;
                    &lt;templateid&gt;3&lt;/templateid&gt;
                    &lt;usageid&gt;245554&lt;/usageid&gt;
                    &lt;type&gt;XenServer&lt;/type&gt;
                    &lt;startdate&gt;2009-09-15T00:00:00-0700&lt;/startdate&gt;
                    &lt;enddate&gt;2009-09-18T16:14:26-0700&lt;/enddate&gt;
                  &lt;/usagerecord&gt;

               … (1,815 more usage records)
            &lt;/listusagerecordsresponse&gt;
</pre></div><div xml:lang="zh-TW" class="section" id="dates-in-usage-record" lang="zh-TW"><div class="titlepage"><div><div><h2 class="title" id="dates-in-usage-record">6.4. Dates in the Usage Record</h2></div></div></div><div class="para">
		Usage records include a start date and an end date. These dates define the period of time for which the raw usage number was calculated. If daily aggregation is used, the start date is midnight on the day in question and the end date is 23:59:59 on the day in question (with one exception; see below). A virtual machine could have been deployed at noon on that day, stopped at 6pm on that day, then started up again at 11pm. When usage is calculated on that day, there will be 7 hours of running VM usage (usage type 1) and 12 hours of allocated VM usage (usage type 2). If the same virtual machine runs for the entire next day, there will 24 hours of both running VM usage (type 1) and allocated VM usage (type 2).
	</div><div class="para">
		Note: The start date is not the time a virtual machine was started, and the end date is not the time when a virtual machine was stopped. The start and end dates give the time range within which usage was calculated.
	</div><div class="para">
		For network usage, the start date and end date again define the range in which the number of bytes transferred was calculated. If a user downloads 10 MB and uploads 1 MB in one day, there will be two records, one showing the 10 megabytes received and one showing the 1 megabyte sent.
	</div><div class="para">
		There is one case where the start date and end date do not correspond to midnight and 11:59:59pm when daily aggregation is used. This occurs only for network usage records. When the usage server has more than one day's worth of unprocessed data, the old data will be included in the aggregation period. The start date in the usage record will show the date and time of the earliest event. For other types of usage, such as IP addresses and VMs, the old unprocessed data is not included in daily aggregation.
	</div></div><div xml:lang="zh-TW" class="section" id="globally-configured-limits" lang="zh-TW"><div class="titlepage"><div><div><h2 class="title" id="globally-configured-limits">6.5. 廣​域​設​定​限​制​</h2></div></div></div><div class="para">
		一​個​區​域​內​，訪​客​虛​擬​網​路​預​設​上​有​24位​元​的​CIDR，此​限​制​訪​客​虛​擬​機​器​僅​能​執​行​254個​instance。​可​依​需​要​調​整​，但​是​必​須​在​任​何​instance加​到​區​域​前​調​整​。​例​如​，10.1.1.0/22會​提​供​~1000個​位​址​
	</div><div class="para">
		以​下​表​格​列​出​廣​域​組​態​的​限​制​：
	</div><div class="informaltable"><table border="1"><colgroup><col width="50%" /><col width="50%" /></colgroup><thead><tr><th>
						<div class="para">
							欄​位​名​稱​
						</div>
					</th><th>
						<div class="para">
							定​義​
						</div>
					</th></tr></thead><tbody><tr><td>
						<div class="para">
							max.account.public.ips
						</div>
					</td><td>
						<div class="para">
							可​以​被​一​個​帳​戶​擁​有​的​公​開​IP數​量​
						</div>
					</td></tr><tr><td>
						<div class="para">
							max.account.snapshots
						</div>
					</td><td>
						<div class="para">
							一​個​帳​戶​中​的​最​多​快​取​物​件​數​量​
						</div>
					</td></tr><tr><td>
						<div class="para">
							max.account.templates
						</div>
					</td><td>
						<div class="para">
							一​個​帳​戶​中​的​最​多​模​組​數​量​
						</div>
					</td></tr><tr><td>
						<div class="para">
							max.account.user.vms
						</div>
					</td><td>
						<div class="para">
							一​個​帳​戶​中​的​最​多​虛​擬​機​器​ instance數​量​
						</div>
					</td></tr><tr><td>
						<div class="para">
							max.account.volumes
						</div>
					</td><td>
						<div class="para">
							一​個​帳​戶​中​的​最​多​硬​碟​容​量​數​量​
						</div>
					</td></tr><tr><td>
						<div class="para">
							max.template.iso.size
						</div>
					</td><td>
						<div class="para">
							下​載​的​模​組​或​ISO的​最​大​大​小​，單​位​為​GB
						</div>
					</td></tr><tr><td>
						<div class="para">
							max.volume.size.gb
						</div>
					</td><td>
						<div class="para">
							容​量​最​大​的​大​小​，單​位​為​GB
						</div>
					</td></tr><tr><td>
						<div class="para">
							network.throttling.rate
						</div>
					</td><td>
						<div class="para">
							預​設​的​資​料​傳​輸​速​率​，單​位​為​MBit/s(支​援​XenServer)
						</div>
					</td></tr><tr><td>
						<div class="para">
							snapshot.max.hourly
						</div>
					</td><td>
						<div class="para">
							容​量​每​小​時​重​複​快​取​的​最​大​數​量​，如​果​快​達​限​制​，較​早​的​快​取​物​件​會​被​刪​除​。​此​限​制​不​適​用​手​動​快​取​。​如​果​設​為​0，每​小​時​重​複​快​取​將​無​法​排​程​
						</div>
					</td></tr><tr><td>
						<div class="para">
							snapshot.max.daily
						</div>
					</td><td>
						<div class="para">
							容​量​每​天​重​複​快​取​的​最​大​數​量​，如​果​快​達​限​制​，較​早​的​快​取​物​件​會​被​刪​除​。​此​限​制​不​適​用​手​動​快​取​。​如​果​設​為​0，每​天​重​複​快​取​將​無​法​排​程​
						</div>
					</td></tr><tr><td>
						<div class="para">
							snapshot.max.weekly
						</div>
					</td><td>
						<div class="para">
							容​量​每​周​重​複​快​取​的​最​大​數​量​，如​果​快​達​限​制​，較​早​的​快​取​物​件​會​被​刪​除​。​此​限​制​不​適​用​手​動​快​取​。​如​果​設​為​0，每​周​重​複​快​取​將​無​法​排​程​
						</div>
					</td></tr><tr><td>
						<div class="para">
							snapshot.max.monthly
						</div>
					</td><td>
						<div class="para">
							容​量​每​月​重​複​快​取​的​最​大​數​量​，如​果​快​達​限​制​，較​早​的​快​取​物​件​會​被​刪​除​。​此​限​制​不​適​用​手​動​快​取​。​如​果​設​為​0，每​月​重​複​快​取​將​無​法​排​程​
						</div>
					</td></tr></tbody></table></div><div class="para">
		使​用​CloudStack使​用​者​介​面​的​廣​域​組​態​視​窗​來​修​改​廣​域​組​態​參​數​欄​位​。​詳​見​Setting Global Configuration Parameters
	</div></div></div><div xml:lang="zh-TW" class="chapter" id="working-with-documentation" lang="zh-TW"><div class="titlepage"><div><div><h2 class="title">章 7. 準​備​及​建​立​CloudStack文​件​</h2></div></div></div><div class="toc"><dl><dt><span class="section"><a href="#installing-publican">7.1. 安​裝​</a></span></dt><dt><span class="section"><a href="#building-documentation">7.2. 建​立​CloudStack文​件​</a></span></dt><dt><span class="section"><a href="#writing-new-documentation">7.3. 撰​寫​CloudStack文​件​</a></span></dt><dt><span class="section"><a href="#building-translation">7.4. 翻​譯​CloudStack文​件​</a></span></dt><dd><dl><dt><span class="section"><a href="#translating-documentation">7.4.1. 翻​譯​CloudStack文​件​</a></span></dt></dl></dd></dl></div><div class="para">
		這​個​章​節​敘​述​如​何​安​裝​publican、​如​何​寫​新​的​文​件​、​建​立​指​南​及​如​何​使​用​transifex建​立​翻​譯​版​本​
	</div><div xml:lang="zh-TW" class="section" id="installing-publican" lang="zh-TW"><div class="titlepage"><div><div><h2 class="title" id="installing-publican">7.1. 安​裝​</h2></div></div></div><div class="para">
		CloudStack文​件​使​用​Publican建​立​，這​個​章​節​描​述​如​何​安​裝​在​您​的​機​器​上​
	</div><div class="note"><div class="admonition_header"><h2>注意</h2></div><div class="admonition"><div class="para">
			CloudStack文​件​原​始​碼​位​於​
		</div><div class="para">
			Publican文​件​也​非​常​<a href="http://docs.fedoraproject.org/en-US/Fedora_Contributor_Documentation/1/html/Users_Guide/chap-Users_Guide-Installing_Publican.html">useful</a>
		</div></div></div><div class="para">
		在​RHEL和​RHEL衍​生​的​東​西​，用​下​列​指​令​安​裝​：
	</div><pre class="programlisting">yum install publican publican-doc</pre><div class="para">
		在​ Ubuntu，用​以​下​指​令​安​裝​：
	</div><pre class="programlisting">apt-get install publican publican-doc</pre><div class="para">
		其​他​產​品​列​在​上​面​，對​於​最​新​版​的​OSX，您​需​要​從​ <a href="https://fedorahosted.org/publican/wiki/Installing_OSX">source</a> 安​裝​，並​轉​成​您​自​己​的​設​定​
	</div><div class="para">
		當​publican安​裝​好​了​，您​需​要​設​定​CloudStack brand，定​義​在​<span class="emphasis"><em>docs/publican-CloudStack</em></span>
	</div><div class="para">
		進​入​以​下​指​令​：
	</div><pre class="programlisting">
        sudo cp -R publican-cloudstack /usr/share/publican/Common_Content/cloudstack
</pre><div class="para">
		如​果​失​敗​或​您​之​後​看​見​錯​誤​，請​見​publican <a href="http://docs.fedoraproject.org/en-US/Fedora_Contributor_Documentation/1/html/Users_Guide/chap-Users_Guide-Branding.html#sect-Users_Guide-Installing_a_brand">documentation</a>
	</div><div class="para">
		當​您​publican和​CloudStack brand檔​案​都​建​好​了​，您​將​可​以​建​立​任​何​文​件​指​南​
	</div></div><div xml:lang="zh-TW" class="section" id="building-documentation" lang="zh-TW"><div class="titlepage"><div><div><h2 class="title" id="building-documentation">7.2. 建​立​CloudStack文​件​</h2></div></div></div><div class="para">
		要​建​立​特​別​的​指​南​，請​到​/docs中​文​件​的​source tree並​確​定​您​要​建​立​的​指​南​
	</div><div class="para">
		Currently there are four guides plus the release notes, all defined in publican configuration files:
	</div><pre class="programlisting">
        publican-adminguide.cfg
        publican-devguide.cfg
        publican-installation.cfg
        publican-plugin-niciranvp.cfg
        publican-release-notes.cfg
</pre><div class="para">
		要​建​立​Developer指​南​，執​行​以​下​：
	</div><pre class="programlisting">publican build --config=publican-devguide.cfg --formats=pdf --langs=en-US</pre><div class="para">
		有​一​個​PDF檔​案​會​以​ tmp/en-US/pdf建​立​，您​或​許​想​建​立​其​他​格​式​，例​如​html，那​麼​您​只​要​改​變​格​式​的​直​即​可​
	</div></div><div xml:lang="zh-TW" class="section" id="writing-new-documentation" lang="zh-TW"><div class="titlepage"><div><div><h2 class="title" id="writing-new-documentation">7.3. 撰​寫​CloudStack文​件​</h2></div></div></div><div class="para">
		CloudStack文​件​格​式​為​DocBook xml，每​份​指​南​以​參​考​DocBook <span class="emphasis"><em>book</em></span>的​publican configuration file 定​義​
	</div><div class="para">
		這​些​書​以​xml files in docs/en-US定​義​，因​此​，如​果​我​們​翻​閱​Developers指​南​，它​的​設​定​文​件​應​包​含​：
	</div><pre class="programlisting">
        xml_lang: en-US
        type: Book
        docname: Developers_Guide
        brand: cloudstack
        chunk_first: 1
        chunk_section_depth: 1
</pre><div class="para">
		The <span class="emphasis"><em>docname</em></span> key gives you the basename of the DocBook file located in the en-US directory that contains the description of the book.
	</div><div class="para">
		Looking closely at Developers_Guide.xml we see that it contains <span class="emphasis"><em>book</em></span> tags and several references to other xml files. These are the chapters of the book, currently they are:
	</div><pre class="programlisting">
    
        &lt;xi:include href="concepts.xml" xmlns:xi="http://www.w3.org/2001/XInclude" /&gt;
        &lt;xi:include href="building-with-maven.xml" xmlns:xi="http://www.w3.org/2001/XInclude" /&gt;
        &lt;xi:include href="developer-introduction.xml" xmlns:xi="http://www.w3.org/2001/XInclude" /&gt;
        &lt;xi:include href="whats-new.xml" xmlns:xi="http://www.w3.org/2001/XInclude" /&gt;
        &lt;xi:include href="api-calls.xml" xmlns:xi="http://www.w3.org/2001/XInclude" /&gt;
        &lt;xi:include href="working-with-usage-data.xml" xmlns:xi="http://www.w3.org/2001/XInclude" /&gt;
        &lt;xi:include href="working-with-documentation.xml" xmlns:xi="http://www.w3.org/2001/XInclude" /&gt;
        &lt;xi:include href="tools.xml" xmlns:xi="http://www.w3.org/2001/XInclude" /&gt;
        &lt;xi:include href="event-types.xml" xmlns:xi="http://www.w3.org/2001/XInclude" /&gt;
        &lt;xi:include href="alerts.xml" xmlns:xi="http://www.w3.org/2001/XInclude" /&gt;
        &lt;xi:include href="time-zones.xml" xmlns:xi="http://www.w3.org/2001/XInclude" /&gt;
        &lt;xi:include href="Revision_History.xml" xmlns:xi="http://www.w3.org/2001/XInclude" /&gt;
    
</pre><div class="para">
		所​有​ xml檔​案​都​是​DocBook格​式​
	</div><div class="note"><div class="admonition_header"><h2>注意</h2></div><div class="admonition"><div class="para">
			DocBook format is well <a href="http://www.docbook.org/tdg5/en/html/docbook.html">documented</a>, refer to the documentation for any questions about DocBook tags
		</div></div></div><div class="para">
		When writing documentation, you therefore need to located the book,chapter and section of the content you want to write/correct. Or create a new book,chapter,section.
	</div><div class="para">
		You will then learn much more about DocBook tagging. In order to write this chapter about documentation, I added the <span class="emphasis"><em>working-with-documentation.xml</em></span>file describing a chapter in the Developer book and I created several sections within that chapter like so:
	</div><pre class="programlisting">
    
        &lt;chapter id="working-with-documentation"&gt;
            &lt;title&gt;Preparing and Building CloudStack Documentation&lt;/title&gt;
            &lt;para&gt;This chapter describes how to install publican, how to write new documentation and build a guide as well as how to build a translated version of the documentation using transifex&lt;/para&gt;
            &lt;xi:include href="installing-publican.xml" xmlns:xi="http://www.w3.org/2001/XInclude" /&gt;
            &lt;xi:include href="building-documentation.xml" xmlns:xi="http://www.w3.org/2001/XInclude" /&gt;
            &lt;xi:include href="writing-new-documentation.xml" xmlns:xi="http://www.w3.org/2001/XInclude" /&gt;
            &lt;xi:include href="building-translation.xml" xmlns:xi="http://www.w3.org/2001/XInclude" /&gt;
        &lt;/chapter&gt;
    
</pre><div class="para">
		Note the id witin the chapter tag, it represents the basename of the xml file describing the chapter.
	</div><div class="para">
		For translation purposes it is important that this basename be less than 50 characters long.
	</div><div class="para">
		This chapter also refers to xml files which contains each section. While you could embed the sections directly in the chapter file and as a matter of fact also write the chapters within a single book file. Breaking things up in smaller files at the granularity of the section, allows us to re-use any section to build different books.
	</div><div class="para">
		For completeness here is an example of a section:
	</div><pre class="programlisting">
    
        &lt;section id="building-documentation"&gt;
            &lt;title&gt;Building CloudStack Documentation&lt;/title&gt;
            &lt;para&gt;To build a specific guide, go to the source tree of the documentation in /docs and identify the guide you want to build.&lt;/para&gt;
            &lt;para&gt;Currently there are four guides plus the release notes, all defined in publican configuration files:&lt;/para&gt;
            &lt;programlisting&gt;
               publican-adminguide.cfg
               publican-devguide.cfg
               publican-installation.cfg
               publican-plugin-niciranvp.cfg
               publican-release-notes.cfg
            &lt;/programlisting&gt;
            &lt;para&gt;To build the Developer guide for example, do the following:&lt;/para&gt;
            &lt;programlisting&gt;publican build --config=publican-devguide.cfg --formats=pdf --langs=en-US&lt;/programlisting&gt;
            &lt;para&gt;A pdf file will be created in tmp/en-US/pdf, you may choose to build the guide in a different format like html. In that case just replace the format value.&lt;/para&gt;
        &lt;/section&gt;
    
</pre><div class="para">
		Happy Publicating and DocBooking.
	</div></div><div xml:lang="zh-TW" class="section" id="building-translation" lang="zh-TW"><div class="titlepage"><div><div><h2 class="title" id="building-translation">7.4. 翻​譯​CloudStack文​件​</h2></div></div></div><div class="para">
		Now that you know how to build the documentation with Publican, let's move on to building it in different languages. Publican helps us build the documentation in various languages by using Portable Object Template (POT) files and Portable Objects (PO) files for each language.
	</div><div class="para">
		The POT files are generated by parsing all the DocBook files in the language of origin, en-US for us, and creating a long list of strings for each file that needs to be translated. The translation can be done by hand directly in the PO files of each target language or via the transifex service.
	</div><div class="note"><div class="admonition_header"><h2>注意</h2></div><div class="admonition"><div class="para">
			<a href="http://www.transifex.com">Transifex</a> is a free service to help translate documents and organize distributed teams of translators. Anyone interested in helping with the translation should get an account on Transifex
		</div><div class="para">
			Three CloudStack projects exist on Transifex. It is recommended to tour those projects to become familiar with Transifex: 
			<div class="itemizedlist"><ul><li class="listitem"><div class="para">
						<a href="https://www.transifex.com/projects/p/ACS_DOCS/">https://www.transifex.com/projects/p/ACS_DOCS/</a>
					</div></li><li class="listitem"><div class="para">
						<a href="https://www.transifex.com/projects/p/ACS_Runbook/">https://www.transifex.com/projects/p/ACS_Runbook/</a>
					</div></li><li class="listitem"><div class="para">
						<a href="https://www.transifex.com/projects/p/CloudStack_UI/">https://www.transifex.com/projects/p/CloudStackUI/</a>
					</div></li></ul></div>

		</div></div></div><div class="warning"><div class="admonition_header"><h2>警告</h2></div><div class="admonition"><div class="para">
			The pot directory should already exist in the source tree. If you want to build an up to date translation, you might have to update it to include any pot file that was not previously generated.
		</div><div class="para">
			To register new resources on transifex, you will need to be an admin of the transifex CloudStack site. Send an email to the developer list if you want access.
		</div></div></div><div class="para">
		First we need to generate the .pot files for all the DocBook xml files needed for a particular guide. This is well explained at the publican website in a section on how to <a href="http://rlandmann.fedorapeople.org/pug/sect-Users_Guide-Preparing_a_document_for_translation.html">prepare</a> a document for translation.
	</div><div class="para">
		The basic command to execute to build the pot files for the developer guide is:
	</div><pre class="programlisting">publican update_pot --config=publican-devguide.cfg</pre><div class="para">
		This will create a pot directory with pot files in it, one for each corresponding xml files needed to build the guide. Once generated, all pots files need to be configured for translation using transifex this is best done by using the transifex client that you can install with the following command (For RHEL and its derivatives):
	</div><pre class="programlisting">yum install transifex-client</pre><div class="para">
		The transifex client is also available via PyPi and you can install it like this:
	</div><pre class="programlisting">easy_install transifex-client</pre><div class="para">
		Once you have installed the transifex client you can run the <span class="emphasis"><em>settx.sh</em></span> script in the <span class="emphasis"><em>docs</em></span> directory. This will create the <span class="emphasis"><em>.tx/config</em></span> file used by transifex to push and pull all translation strings.
	</div><div class="para">
		All the resource files need to be uploaded to transifex, this is done with the transifex client like so:
	</div><pre class="programlisting">tx push -s</pre><div class="para">
		Once the translators have completed translation of the documentation, the translated strings can be pulled from transifex like so:
	</div><pre class="programlisting">tx pull -a</pre><div class="para">
		If you wish to push specific resource files or pull specific languages translation strings, you can do so with the transifex client. A complete documentation of the client is available on the <a href="http://help.transifex.com/features/client/">client</a> website
	</div><div class="para">
		When you pull new translation strings a directory will be created corresponding to the language of the translation. This directory will contain PO files that will be used by Publican to create the documentation in that specific language. For example assuming that you pull the French translation whose language code is fr-FR, you will build the documentation with publican:
	</div><pre class="programlisting">publican build --config=publican-devguide.cfg --formats=html --langs=fr-FR</pre><div class="warning"><div class="admonition_header"><h2>警告</h2></div><div class="admonition"><div class="para">
			Some languages like Chinese or Japanese will not render well in pdf format and html should be used.
		</div></div></div><div xml:lang="zh-TW" class="section" id="translating-documentation" lang="zh-TW"><div class="titlepage"><div><div><h3 class="title" id="translating-documentation">7.4.1. 翻​譯​CloudStack文​件​</h3></div></div></div><div class="para">
		有​兩​種​翻​譯​文​件​的​方​式​：
	</div><div class="para">
		<div class="itemizedlist"><ul><li class="listitem"><div class="para">
					使​用​Transifex網​站​直​接​翻​譯​
				</div></li><li class="listitem"><div class="para">
					使​用​Transifex client
				</div></li></ul></div>

	</div><div class="para">
		Once a translation is complete, a site admin will pull the translated strings within the CloudStack repository, build the documentation and publish it.
	</div><div class="para">
		對​於​如​何​使​用​ Transifex網​站​，參​見​ <a href="http://sebgoa.blogspot.ch/2012/11/translating-apache-cloudstack-docs-with.html">http://sebgoa.blogspot.ch/2012/11/translating-apache-cloudstack-docs-with.html</a>
	</div><div class="para">
		對​於​如​何​使​用​ Transifex client，參​見​ <a href="http://sebgoa.blogspot.ch/2012/12/using-transifex-client-to-translate.html">http://sebgoa.blogspot.ch/2012/12/using-transifex-client-to-translate.html</a>
	</div></div></div></div><div xml:lang="zh-TW" class="chapter" id="tools" lang="zh-TW"><div class="titlepage"><div><div><h2 class="title">章 8. 工​具​</h2></div></div></div><div class="toc"><dl><dt><span class="section"><a href="#devcloud">8.1. DevCloud</a></span></dt><dd><dl><dt><span class="section"><a href="#devcloud-usage-mode">8.1.1. DevCloud使​用​模​式​</a></span></dt><dt><span class="section"><a href="#building-devcloud">8.1.2. 建​立​DevCloud</a></span></dt></dl></dd><dt><span class="section"><a href="#marvin">8.2. Marvin</a></span></dt><dd><dl><dt><span class="section"><a href="#building-marvin">8.2.1. 建​立​及​安​裝​ Marvin</a></span></dt></dl></dd><dt><span class="section"><a href="#cloudmonkey">8.3. CloudMonkey</a></span></dt><dd><dl><dt><span class="section"><a href="#gettingcloudmonkey">8.3.1. Installing CloudMonkey</a></span></dt><dt><span class="section"><a href="#configuringcloudmonkey">8.3.2. 系​統​設​定​</a></span></dt><dt><span class="section"><a href="#cliapidiscovery">8.3.3. API Discovery</a></span></dt><dt><span class="section"><a href="#clitabularoutput">8.3.4. Tabular Output</a></span></dt><dt><span class="section"><a href="#interactivecli">8.3.5. Interactive Shell Usage</a></span></dt><dt><span class="section"><a href="#startingavmexample">8.3.6. Starting a Virtual Machine instance with CloudMonkey</a></span></dt><dt><span class="section"><a href="#scriptingcli">8.3.7. Scripting with CloudMonkey</a></span></dt></dl></dd><dt><span class="section"><a href="#libcloud-examples">8.4. Apache Libcloud</a></span></dt></dl></div><div xml:lang="zh-TW" class="section" id="devcloud" lang="zh-TW"><div class="titlepage"><div><div><h2 class="title" id="devcloud">8.1. DevCloud</h2></div></div></div><div class="para">
		DevCloud是​ CloudStack 的​沙​盒​，提​供​如​同​Virtual Box的​應​用​，作​為​開​發​環​境​來​輕​鬆​測​試​新​的​CloudStack 開​發​工​作​。​此​沙​盒​也​被​在​提​供​<span class="emphasis"><em>Cloud in a box</em></span>後​，用​來​訓​練​及​CloudStack 演​示​
	</div><div class="note"><div class="admonition_header"><h2>注意</h2></div><div class="admonition"><div class="para">
			DevCloud由​論​壇​成​員​提​供​，並​不​是​官​方​CloudStack 釋​出​
		</div><div class="para">
			CloudStack原​始​碼​提​供​工​具​給​您​建​立​自​己​的​DevCloud
		</div></div></div><div class="warning"><div class="admonition_header"><h2>警告</h2></div><div class="admonition"><div class="para">
			DevCloud正​在​開​發​，並​且​應​被​視​為​Work In Progress (WIP)，Wiki是​最​新​的​文​件​：
		</div><div class="para">
			<a href="https://cwiki.apache.org/confluence/display/CLOUDSTACK/DevCloud">https://cwiki.apache.org/confluence/display/CLOUDSTACK/DevCloud</a>
		</div></div></div><div xml:lang="zh-TW" class="section" id="devcloud-usage-mode" lang="zh-TW"><div class="titlepage"><div><div><h3 class="title" id="devcloud-usage-mode">8.1.1. DevCloud使​用​模​式​</h3></div></div></div><div class="para">
		DevCloud可​以​就​以​下​方​式​使​用​：
	</div><div class="orderedlist"><ol><li class="listitem"><div class="para">
				完​整​的​sandbox環​境​。​CloudStack運​行​在​Virtual Box的​DevCloud虛​擬​機​中​。​
			</div><div class="para">
				In this mode, the CloudStack management server runs within the instance and nested virtualization allows instantiation of tiny VMs within DevCloud itself. CloudStack code modifications are done within DevCloud.
			</div><div class="para">
				以​下​圖​形​顯​示​沙​盒​模​式​的​架​構​
			</div><div class="mediaobject"><img src="./images/DevCloud.png" width="270" alt="DevCloud.png: Schematic of the DevCloud SandBox architecture" /></div></li><li class="listitem"><div class="para">
				環​境​部​署​，當​CloudStack 程​式​已​在​本​地​主​機​開​發​，最​終​建​構​在​DevCloud開​發​
			</div><div class="para">
				此​模​式​使​用​為​測​試​CloudStack 4.0.0 incubating 釋​出​，參​閱​以​下​影​片​：<a href="http://vimeo.com/54621457">http://vimeo.com/54621457</a>
			</div></li><li class="listitem"><div class="para">
				離​線​模​式​，將​DevCloud作​為​主​機​，CloudStack管​理​伺​服​器​在​本​地​主​機​執​行​
			</div><div class="para">
				此​模​式​用​為​離​線​介​面​，由​ Virtual Box 偏​好​設​定​定​義​，參​閱​以​下​影​片​：<a href="http://vimeo.com/54610161">http://vimeo.com/54610161</a>
			</div><div class="para">
				以​下​為​離​線​模​式​架​構​的​草​圖​
			</div><div class="mediaobject"><img src="./images/DevCloud-hostonly.png" width="270" alt="DevCloud-hostonly.png: Schematic of the DevCloud host-only architecture" /></div></li></ol></div></div><div xml:lang="zh-TW" class="section" id="building-devcloud" lang="zh-TW"><div class="titlepage"><div><div><h3 class="title" id="building-devcloud">8.1.2. 建​立​DevCloud</h3></div></div></div><div class="para">
		DevCloud應​用​程​式​可​以​從​Wiki下​載​。​<a href="https://cwiki.apache.org/confluence/display/CLOUDSTACK/DevCloud">https://cwiki.apache.org/confluence/display/CLOUDSTACK/DevCloud</a>。​也​可​以​從​scratch建​立​，程​式​正​在​開​發​，以​提​供​替​代​的​方​法​建​立​，DevCloud以​<span class="emphasis"><em>veewee</em></span>, <span class="emphasis"><em>Vagrant</em></span> 及​<span class="emphasis"><em>Puppet</em></span>為​基​礎​
	</div><div class="para">
		目​標​為​自​動​化​DevCloud build，並​相​容​任​何​CloudStack釋​出​的​原​始​碼​
	</div><div class="warning"><div class="admonition_header"><h2>警告</h2></div><div class="admonition"><div class="para">
			正​在​努​力​研​發​，程​式​位​於​<span class="emphasis"><em>tools/devcloud</em></span>下​的​source tree
		</div><div class="para">
			初​步​的​Wiki頁​面​描​述​建​構​方​法​，<a href="https://cwiki.apache.org/CLOUDSTACK/building-devcloud.html">https://cwiki.pache.org/CLOUDSTACK/building-devcloud.html</a>
		</div></div></div></div></div><div xml:lang="zh-TW" class="section" id="marvin" lang="zh-TW"><div class="titlepage"><div><div><h2 class="title" id="marvin">8.2. Marvin</h2></div></div></div><div class="para">
		Marvin是​ CloudStack自​動​化​的​骨​架​，源​自​於​累​積​測​試​的​工​具​，但​現​在​也​使​用​為​建​立​DevCloud，同​時​也​提​供​Python CloudStack API
	</div><div class="note"><div class="admonition_header"><h2>注意</h2></div><div class="admonition"><div class="para">
			Marvin完​整​文​件​在​Wiki <a href="https://cwiki.apache.org/CLOUDSTACK/testing-with-python.html">https://cwiki.apache.org/CLOUDSTACK/testing-with-python.html</a>
		</div><div class="para">
			原​始​碼​在​<span class="emphasis"><em>tools/marvin</em></span>
		</div></div></div><div xml:lang="zh-TW" class="section" id="building-marvin" lang="zh-TW"><div class="titlepage"><div><div><h3 class="title" id="building-marvin">8.2.1. 建​立​及​安​裝​ Marvin</h3></div></div></div><div class="para">
		Marvin是​以​Maven建​立​，與​APIdoc相​關​。​想​要​建​立​Marvin來​使​用​root tree of CloudStack執​行​以​下​：
	</div><pre class="programlisting">mvn -P developer -pl :cloud-apidoc</pre><pre class="programlisting">mvn -P developer -pl :cloud-marvin</pre><div class="para">
		If successful the build will have created the cloudstackAPI Python package under tools/marvin/marvin/cloudstackAPI as well as a gziped Marvin package under tools/marvin dist. To install the Python Marvin module do the following in tools/marvin:
	</div><pre class="programlisting">sudo python ./setup.py install</pre><div class="para">
		當​ Python module安​裝​後​dependencies會​自​動​下​載​，並​且​您​就​可​以​在​Python使​用​Marvin，檢​查​您​可​以​在​啟​動​前​匯​入​module
	</div><pre class="programlisting">$ python
Python 2.7.3 (default, Nov 17 2012, 19:54:34) 
[GCC 4.2.1 Compatible Apple Clang 4.1 ((tags/Apple/clang-421.11.66))] on darwin
Type "help", "copyright", "credits" or "license" for more information.
&gt;&gt;&gt; import marvin
&gt;&gt;&gt; from marvin.cloudstackAPI import *
&gt;&gt;&gt;</pre><div class="para">
		您​也​可​以​使​用​<span class="emphasis"><em>pip</em></span> 或​ <span class="emphasis"><em>easy_install</em></span>來​安​裝​，藉​由​使​用​tools/marvin/dist中​的​ local distribution package：
	</div><pre class="programlisting">pip install tools/marvin/dist/Marvin-0.1.0.tar.gz</pre><div class="para">
		或​：
	</div><pre class="programlisting">easy_install tools/marvin/dist/Marvin-0.1.0.tar.gz</pre></div></div><div xml:lang="zh-TW" class="section" id="cloudmonkey" lang="zh-TW"><div class="titlepage"><div><div><h2 class="title" id="cloudmonkey">8.3. CloudMonkey</h2></div></div></div><div class="para">
		CloudMonkey is the CloudStack Command Line Interface (CLI). It is written in Python. CloudMonkey can be used both as an interactive shell and as a command line tool which simplifies CloudStack configuration and management. It can be used with CloudStack releases since the 4.0.x branch.
	</div><div class="warning"><div class="admonition_header"><h2>警告</h2></div><div class="admonition"><div class="para">
			CloudMonkey is still under development and should be considered a Work In Progress (WIP), the wiki is the most up to date documentation:
		</div><div class="para">
			<a href="https://cwiki.apache.org/CLOUDSTACK/cloudstack-cloudmonkey-cli.html">https://cwiki.apache.org/CLOUDSTACK/cloudstack-cloudmonkey-cli.html</a>
		</div></div></div><div class="section" id="gettingcloudmonkey"><div class="titlepage"><div><div><h3 class="title" id="gettingcloudmonkey">8.3.1. Installing CloudMonkey</h3></div></div></div><div class="para">
			CloudMonkey is dependent on <span class="emphasis"><em>readline, pygments, prettytable</em></span>, when installing from source you will need to resolve those dependencies. Using the cheese shop, the dependencies will be automatically installed.
		</div><div class="para">
			There are three ways to get CloudMonkey. Via the official CloudStack source releases or via a community maintained distribution at <a href="http://pypi.python.org/pypi/cloudmonkey/">the cheese shop</a>. Developers can also get it directly from the git repository in <span class="emphasis"><em>tools/cli/</em></span>.
		</div><div class="para">
			<div class="itemizedlist"><ul><li class="listitem"><div class="para">
						Via the official Apache CloudStack releases as well as the git repository.
					</div><pre class="programlisting">
    
$ git clone https://git-wip-us.apache.org/repos/asf/cloudstack.git # (optional if using a release download)
$ mvn clean install -P developer
$ cd tools/cli # cloudmonkey-x.x.x.tar.gz will be built in dist
$ python setup.py build
$ python setup.py install
    
</pre></li><li class="listitem"><div class="para">
						Via a community maintained package on Cheese Shop
					</div><div class="para">
						
<pre class="programlisting">pip install cloudmonkey</pre>
					</div></li></ul></div>

		</div></div><div class="section" id="configuringcloudmonkey"><div class="titlepage"><div><div><h3 class="title" id="configuringcloudmonkey">8.3.2. 系​統​設​定​</h3></div></div></div><div class="para">
			To configure CloudMonkey you can edit the ~/.cloudmonkey/config file in the user's home directory as shown below. The values can also be set interactively at the cloudmonkey prompt. Logs are kept in ~/.cloudmonkey/log, and history is stored in ~/.cloudmonkey/history. Discovered apis are listed in ~/.cloudmonkey/cache. Only the log and history files can be custom paths and can be configured by setting appropriate file paths in ~/.cloudmonkey/config
		</div><pre class="programlisting">
$ cat ~/.cloudmonkey/config 
[core]
log_file = /Users/sebastiengoasguen/.cloudmonkey/log
asyncblock = true
paramcompletion = false
history_file = /Users/sebastiengoasguen/.cloudmonkey/history

[ui]
color = true
prompt = &gt; 
tabularize = false

[user]
secretkey =VDaACYb0LV9eNjTetIOElcVQkvJck_J_QljX_FcHRj87ZKiy0z0ty0ZsYBkoXkY9b7eq1EhwJaw7FF3akA3KBQ 
apikey = plgWJfZK4gyS3mOMTVmjUVg-X-jlWlnfaUJ9GAbBbf9EdMkAYMmAiLqzzq1ElZLYq_u38zCm0bewzGUdP66mg

[server]
path = /client/api
host = localhost
protocol = http
port = 8080
timeout = 3600
</pre><div class="para">
			The values can also be set at the CloudMonkey prompt. The API and secret keys are obtained via the CloudStack UI or via a raw api call.
		</div><pre class="programlisting">

$ cloudmonkey
☁ Apache CloudStack cloudmonkey 4.1.0-snapshot. Type help or ? to list commands.

&gt; set prompt myprompt&gt;
myprompt&gt; set host localhost
myprompt&gt; set port 8080
myprompt&gt; set apikey &lt;your api key&gt;
myprompt&gt; set secretkey &lt;your secret key&gt;

</pre><div class="para">
			You can use CloudMonkey to interact with a local cloud, and even with a remote public cloud. You just need to set the host value properly and obtain the keys from the cloud administrator.
		</div></div><div class="section" id="cliapidiscovery"><div class="titlepage"><div><div><h3 class="title" id="cliapidiscovery">8.3.3. API Discovery</h3></div></div></div><div class="note"><div class="admonition_header"><h2>注意</h2></div><div class="admonition"><div class="para">
				In CloudStack 4.0.* releases, the list of api calls available will be pre-cached, while starting with CloudStack 4.1 releases and above an API discovery service is enabled. CloudMonkey will discover automatically the api calls available on the management server. The sync command in CloudMonkey pulls a list of apis which are accessible to your user role, along with help docs etc. and stores them in ~/.cloudmonkey/cache. This allows cloudmonkey to be adaptable to changes in mgmt server, so in case the sysadmin enables a plugin such as Nicira NVP for that user role, the users can get those changes. New verbs and grammar (DSL) rules are created on the fly.
			</div></div></div><div class="para">
			To discover the APIs available do:
		</div><pre class="programlisting">
 &gt; sync
324 APIs discovered and cached
</pre></div><div class="section" id="clitabularoutput"><div class="titlepage"><div><div><h3 class="title" id="clitabularoutput">8.3.4. Tabular Output</h3></div></div></div><div class="para">
			The number of key/value pairs returned by the api calls can be large resulting in a very long output. To enable easier viewing of the output, a tabular formatting can be setup. You may enable tabular listing and even choose set of column fields, this allows you to create your own field using the filter param which takes in comma separated argument. If argument has a space, put them under double quotes. The create table will have the same sequence of field filters provided
		</div><div class="para">
			To enable it, use the <span class="emphasis"><em>set</em></span> function and create filters like so:
		</div><pre class="programlisting">
&gt; set tabularize true
&gt; list users filter=id,domain,account
count = 1
user:
+--------------------------------------+--------+---------+
|                  id                  | domain | account |
+--------------------------------------+--------+---------+
| 7ed6d5da-93b2-4545-a502-23d20b48ef2a |  ROOT  |  admin  |
+--------------------------------------+--------+---------+
</pre></div><div class="section" id="interactivecli"><div class="titlepage"><div><div><h3 class="title" id="interactivecli">8.3.5. Interactive Shell Usage</h3></div></div></div><div class="para">
			To start learning CloudMonkey, the best is to use the interactive shell. Simply type CloudMonkey at the prompt and you should get the interactive shell.
		</div><div class="para">
			At the CloudMonkey prompt press the tab key twice, you will see all potential verbs available. Pick on, enter a space and then press tab twice. You will see all actions available for that verb
		</div><pre class="programlisting">

cloudmonkey&gt;
EOF        assign     cancel     create     detach     extract    ldap       prepare    reconnect  restart    shell      update     
activate   associate  change     delete     disable    generate   list       query      register   restore    start      upload     
add        attach     configure  deploy     enable     get        mark       quit       remove     revoke     stop       
api        authorize  copy       destroy    exit       help       migrate    reboot     reset      set        suspend    
cloudmonkey&gt;create 
account                diskoffering           loadbalancerrule       portforwardingrule     snapshot               tags                   vpc
autoscalepolicy        domain                 network                privategateway         snapshotpolicy         template               vpcoffering
autoscalevmgroup       firewallrule           networkacl             project                sshkeypair             user                   vpnconnection
autoscalevmprofile     instancegroup          networkoffering        remoteaccessvpn        staticroute            virtualrouterelement   vpncustomergateway
condition              ipforwardingrule       physicalnetwork        securitygroup          storagenetworkiprange  vlaniprange            vpngateway
counter                lbstickinesspolicy     pod                    serviceoffering        storagepool            volume                 zone

</pre><div class="para">
			Picking one action and entering a space plus the tab key, you will obtain the list of parameters for that specific api call.
		</div><pre class="programlisting">

cloudmonkey&gt;create network 
account=            domainid=           isAsync=            networkdomain=      projectid=          vlan=               
acltype=            endip=              name=               networkofferingid=  startip=            vpcid=              
displaytext=        gateway=            netmask=            physicalnetworkid=  subdomainaccess=    zoneid=             

</pre><div class="para">
			To get additional help on that specific api call you can use the following:
		</div><pre class="programlisting">

cloudmonkey&gt;create network -h
Creates a network
Required args: displaytext name networkofferingid zoneid
Args: account acltype displaytext domainid endip gateway isAsync name netmask networkdomain networkofferingid physicalnetworkid projectid startip subdomainaccess vlan vpcid zoneid

cloudmonkey&gt;create network -help
Creates a network
Required args: displaytext name networkofferingid zoneid
Args: account acltype displaytext domainid endip gateway isAsync name netmask networkdomain networkofferingid physicalnetworkid projectid startip subdomainaccess vlan vpcid zoneid

cloudmonkey&gt;create network --help
Creates a network
Required args: displaytext name networkofferingid zoneid
Args: account acltype displaytext domainid endip gateway isAsync name netmask networkdomain networkofferingid physicalnetworkid projectid startip subdomainaccess vlan vpcid zoneid
cloudmonkey&gt;    

</pre><div class="para">
			Note the required arguments necessary for the calls.
		</div><div class="note"><div class="admonition_header"><h2>注意</h2></div><div class="admonition"><div class="para">
				To find out the required parameters value, using a debugger console on the CloudStack UI might be very useful. For instance using Firebug on Firefox, you can navigate the UI and check the parameters values for each call you are making as you navigate the UI.
			</div></div></div></div><div class="section" id="startingavmexample"><div class="titlepage"><div><div><h3 class="title" id="startingavmexample">8.3.6. Starting a Virtual Machine instance with CloudMonkey</h3></div></div></div><div class="para">
			To start a virtual machine instance we will use the <span class="emphasis"><em>deploy virtualmachine</em></span> call.
		</div><pre class="programlisting">

cloudmonkey&gt;deploy virtualmachine -h
Creates and automatically starts a virtual machine based on a service offering, disk offering, and template.
Required args: serviceofferingid templateid zoneid
Args: account diskofferingid displayname domainid group hostid hypervisor ipaddress iptonetworklist isAsync keyboard keypair name networkids projectid securitygroupids securitygroupnames serviceofferingid size startvm templateid userdata zoneid

</pre><div class="para">
			The required arguments are <span class="emphasis"><em>serviceofferingid, templateid and zoneid</em></span>
		</div><div class="para">
			In order to specify the template that we want to use, we can list all available templates with the following call:
		</div><pre class="programlisting">

cloudmonkey&gt;list templates templatefilter=all
count = 2
template:
========
domain = ROOT
domainid = 8a111e58-e155-4482-93ce-84efff3c7c77
zoneid = e1bfdfaf-3d9b-43d4-9aea-2c9f173a1ae7
displaytext = SystemVM Template (XenServer)
ostypeid = 849d7d0a-9fbe-452a-85aa-70e0a0cbc688
passwordenabled = False
id = 6d360f79-4de9-468c-82f8-a348135d298e
size = 2101252608
isready = True
templatetype = SYSTEM
zonename = devcloud
...&lt;snipped&gt;

</pre><div class="para">
			In this snippet, I used DevCloud and only showed the beginning output of the first template, the SystemVM template
		</div><div class="para">
			Similarly to get the <span class="emphasis"><em>serviceofferingid</em></span> you would do:
		</div><pre class="programlisting">

cloudmonkey&gt;list serviceofferings | grep id
id = ef2537ad-c70f-11e1-821b-0800277e749c
id = c66c2557-12a7-4b32-94f4-48837da3fa84
id = 3d8b82e5-d8e7-48d5-a554-cf853111bc50

</pre><div class="para">
			Note that we can use the linux pipe as well as standard linux commands within the interactive shell. Finally we would start an instance with the following call:
		</div><pre class="programlisting">

cloudmonkey&gt;deploy virtualmachine templateid=13ccff62-132b-4caf-b456-e8ef20cbff0e zoneid=e1bfdfaf-3d9b-43d4-9aea-2c9f173a1ae7 serviceofferingid=ef2537ad-c70f-11e1-821b-0800277e749c
jobprocstatus = 0
created = 2013-03-05T13:04:51-0800
cmd = com.cloud.api.commands.DeployVMCmd
userid = 7ed6d5da-93b2-4545-a502-23d20b48ef2a
jobstatus = 1
jobid = c441d894-e116-402d-aa36-fdb45adb16b7
jobresultcode = 0
jobresulttype = object
jobresult:
=========
virtualmachine:
==============
domain = ROOT
domainid = 8a111e58-e155-4482-93ce-84efff3c7c77
haenable = False
templatename = tiny Linux
...&lt;snipped&gt;

</pre><div class="para">
			The instance would be stopped with:
		</div><pre class="programlisting">
cloudmonkey&gt;stop virtualmachine id=7efe0377-4102-4193-bff8-c706909cc2d2
</pre><div class="note"><div class="admonition_header"><h2>注意</h2></div><div class="admonition"><div class="para">
				The <span class="emphasis"><em>ids</em></span> that you will use will differ from this example. Make sure you use the ones that corresponds to your CloudStack cloud.
			</div></div></div></div><div class="section" id="scriptingcli"><div class="titlepage"><div><div><h3 class="title" id="scriptingcli">8.3.7. Scripting with CloudMonkey</h3></div></div></div><div class="para">
			All previous examples use CloudMonkey via the interactive shell, however it can be used as a straightfoward CLI, passing the commands to the <span class="emphasis"><em>cloudmonkey</em></span> command like shown below.
		</div><div class="para">
			
<pre class="programlisting">$cloudmonkey list users</pre>
		</div><div class="para">
			As such it can be used in shell scripts, it can received commands via stdin and its output can be parsed like any other unix commands as mentioned before.
		</div></div></div><div xml:lang="zh-TW" class="section" id="libcloud-examples" lang="zh-TW"><div class="titlepage"><div><div><h2 class="title" id="libcloud-examples">8.4. Apache Libcloud</h2></div></div></div><div class="para">
		There are many tools available to interface with the CloudStack API. Apache Libcloud is one of those. In this section we provide a basic example of how to use Libcloud with CloudStack. It assumes that you have access to a CloudStack endpoint and that you have the API access key and secret key of a user.
	</div><div class="para">
		To install Libcloud refer to the libcloud website. If you are familiar with Pypi simply do:
	</div><pre class="programlisting">pip install apache-libcloud</pre><div class="para">
		You should see the following output:
	</div><pre class="programlisting">
pip install apache-libcloud
Downloading/unpacking apache-libcloud
  Downloading apache-libcloud-0.12.4.tar.bz2 (376kB): 376kB downloaded
  Running setup.py egg_info for package apache-libcloud
    
Installing collected packages: apache-libcloud
  Running setup.py install for apache-libcloud
    
Successfully installed apache-libcloud
Cleaning up...
</pre><div class="para">
		You can then open a Python interactive shell, create an instance of a CloudStack driver and call the available methods via the libcloud API.
	</div><pre class="programlisting">
 
&gt;&gt;&gt; from libcloud.compute.types import Provider
&gt;&gt;&gt; from libcloud.compute.providers import get_driver
&gt;&gt;&gt; Driver = get_driver(Provider.CLOUDSTACK)
&gt;&gt;&gt; apikey='plgWJfZK4gyS3mOMTVmjUVg-X-jlWlnfaUJ9GAbBbf9EdM-kAYMmAiLqzzq1ElZLYq_u38zCm0bewzGUdP66mg'
&gt;&gt;&gt; secretkey='VDaACYb0LV9eNjTetIOElcVQkvJck_J_QljX_FcHRj87ZKiy0z0ty0ZsYBkoXkY9b7eq1EhwJaw7FF3akA3KBQ'
&gt;&gt;&gt; host='http://localhost:8080'
&gt;&gt;&gt; path='/client/api'
&gt;&gt;&gt; conn=Driver(apikey,secretkey,secure='False',host='localhost:8080',path=path)
&gt;&gt;&gt; conn=Driver(key=apikey,secret=secretkey,secure=False,host='localhost',port='8080',path=path)
&gt;&gt;&gt; conn.list_images()
[&lt;NodeImage: id=13ccff62-132b-4caf-b456-e8ef20cbff0e, name=tiny Linux, driver=CloudStack  ...&gt;]
&gt;&gt;&gt; conn.list_sizes()
[&lt;NodeSize: id=ef2537ad-c70f-11e1-821b-0800277e749c, name=tinyOffering, ram=100 disk=0 bandwidth=0 price=0 driver=CloudStack ...&gt;, &lt;NodeSize: id=c66c2557-12a7-4b32-94f4-48837da3fa84, name=Small Instance, ram=512 disk=0 bandwidth=0 price=0 driver=CloudStack ...&gt;, &lt;NodeSize: id=3d8b82e5-d8e7-48d5-a554-cf853111bc50, name=Medium Instance, ram=1024 disk=0 bandwidth=0 price=0 driver=CloudStack ...&gt;]
&gt;&gt;&gt; images=conn.list_images()
&gt;&gt;&gt; offerings=conn.list_sizes()
&gt;&gt;&gt; node=conn.create_node(name='toto',image=images[0],size=offerings[0])
&gt;&gt;&gt; help(node)
&gt;&gt;&gt; node.get_uuid()
'b1aa381ba1de7f2d5048e248848993d5a900984f'
&gt;&gt;&gt; node.name
u'toto'

</pre><div class="para">
		One of the interesting use cases of Libcloud is that you can use multiple Cloud Providers, such as AWS, Rackspace, OpenNebula, vCloud and so on. You can then create Driver instances to each of these clouds and create your own multi cloud application.
	</div></div></div><div xml:lang="zh-TW" class="appendix" id="event-types" lang="zh-TW"><div class="titlepage"><div><div><h1 class="title">Event Types</h1></div></div></div><div class="informaltable"><table border="1"><colgroup><col align="left" class="c1" width="33%" /><col align="left" class="c2" width="33%" /><col width="33%" /></colgroup><tbody><tr><td align="left">
						<div class="para">
							VM.CREATE
						</div>
					</td><td align="left">
						<div class="para">
							TEMPLATE.EXTRACT
						</div>
					</td><td align="left">
						<div class="para">
							SG.REVOKE.INGRESS
						</div>
					</td></tr><tr><td align="left">
						<div class="para">
							VM.DESTROY
						</div>
					</td><td align="left">
						<div class="para">
							TEMPLATE.UPLOAD
						</div>
					</td><td align="left">
						<div class="para">
							HOST.RECONNECT
						</div>
					</td></tr><tr><td align="left">
						<div class="para">
							VM.START
						</div>
					</td><td align="left">
						<div class="para">
							TEMPLATE.CLEANUP
						</div>
					</td><td align="left">
						<div class="para">
							MAINT.CANCEL
						</div>
					</td></tr><tr><td align="left">
						<div class="para">
							VM.STOP
						</div>
					</td><td align="left">
						<div class="para">
							VOLUME.CREATE
						</div>
					</td><td align="left">
						<div class="para">
							MAINT.CANCEL.PS
						</div>
					</td></tr><tr><td align="left">
						<div class="para">
							VM.REBOOT
						</div>
					</td><td align="left">
						<div class="para">
							VOLUME.DELETE
						</div>
					</td><td align="left">
						<div class="para">
							MAINT.PREPARE
						</div>
					</td></tr><tr><td align="left">
						<div class="para">
							VM.UPGRADE
						</div>
					</td><td align="left">
						<div class="para">
							VOLUME.ATTACH
						</div>
					</td><td align="left">
						<div class="para">
							MAINT.PREPARE.PS
						</div>
					</td></tr><tr><td align="left">
						<div class="para">
							VM.RESETPASSWORD
						</div>
					</td><td align="left">
						<div class="para">
							VOLUME.DETACH
						</div>
					</td><td align="left">
						<div class="para">
							VPN.REMOTE.ACCESS.CREATE
						</div>
					</td></tr><tr><td align="left">
						<div class="para">
							ROUTER.CREATE
						</div>
					</td><td align="left">
						<div class="para">
							VOLUME.UPLOAD
						</div>
					</td><td align="left">
						<div class="para">
							VPN.USER.ADD
						</div>
					</td></tr><tr><td align="left">
						<div class="para">
							ROUTER.DESTROY
						</div>
					</td><td align="left">
						<div class="para">
							SERVICEOFFERING.CREATE
						</div>
					</td><td align="left">
						<div class="para">
							VPN.USER.REMOVE
						</div>
					</td></tr><tr><td align="left">
						<div class="para">
							ROUTER.START
						</div>
					</td><td align="left">
						<div class="para">
							SERVICEOFFERING.UPDATE
						</div>
					</td><td align="left">
						<div class="para">
							NETWORK.RESTART
						</div>
					</td></tr><tr><td align="left">
						<div class="para">
							ROUTER.STOP
						</div>
					</td><td align="left">
						<div class="para">
							SERVICEOFFERING.DELETE
						</div>
					</td><td align="left">
						<div class="para">
							UPLOAD.CUSTOM.CERTIFICATE
						</div>
					</td></tr><tr><td align="left">
						<div class="para">
							ROUTER.REBOOT
						</div>
					</td><td align="left">
						<div class="para">
							DOMAIN.CREATE
						</div>
					</td><td align="left">
						<div class="para">
							UPLOAD.CUSTOM.CERTIFICATE
						</div>
					</td></tr><tr><td align="left">
						<div class="para">
							ROUTER.HA
						</div>
					</td><td align="left">
						<div class="para">
							DOMAIN.DELETE
						</div>
					</td><td align="left">
						<div class="para">
							STATICNAT.DISABLE
						</div>
					</td></tr><tr><td align="left">
						<div class="para">
							PROXY.CREATE
						</div>
					</td><td align="left">
						<div class="para">
							DOMAIN.UPDATE
						</div>
					</td><td align="left">
						<div class="para">
							SSVM.CREATE
						</div>
					</td></tr><tr><td align="left">
						<div class="para">
							PROXY.DESTROY
						</div>
					</td><td align="left">
						<div class="para">
							SNAPSHOT.CREATE
						</div>
					</td><td align="left">
						<div class="para">
							SSVM.DESTROY
						</div>
					</td></tr><tr><td align="left">
						<div class="para">
							PROXY.START
						</div>
					</td><td align="left">
						<div class="para">
							SNAPSHOT.DELETE
						</div>
					</td><td align="left">
						<div class="para">
							SSVM.START
						</div>
					</td></tr><tr><td align="left">
						<div class="para">
							PROXY.STOP
						</div>
					</td><td align="left">
						<div class="para">
							SNAPSHOTPOLICY.CREATE
						</div>
					</td><td align="left">
						<div class="para">
							SSVM.STOP
						</div>
					</td></tr><tr><td align="left">
						<div class="para">
							PROXY.REBOOT
						</div>
					</td><td align="left">
						<div class="para">
							SNAPSHOTPOLICY.UPDATE
						</div>
					</td><td align="left">
						<div class="para">
							SSVM.REBOOT
						</div>
					</td></tr><tr><td align="left">
						<div class="para">
							PROXY.HA
						</div>
					</td><td align="left">
						<div class="para">
							SNAPSHOTPOLICY.DELETE
						</div>
					</td><td align="left">
						<div class="para">
							SSVM.H
						</div>
					</td></tr><tr><td align="left">
						<div class="para">
							VNC.CONNECT
						</div>
					</td><td align="left">
						<div class="para">
							VNC.DISCONNECT
						</div>
					</td><td align="left">
						<div class="para">
							NET.IPASSIGN
						</div>
					</td></tr><tr><td align="left">
						<div class="para">
							NET.IPRELEASE
						</div>
					</td><td align="left">
						<div class="para">
							NET.RULEADD
						</div>
					</td><td align="left">
						<div class="para">
							NET.RULEDELETE
						</div>
					</td></tr><tr><td align="left">
						<div class="para">
							NET.RULEMODIFY
						</div>
					</td><td align="left">
						<div class="para">
							NETWORK.CREATE
						</div>
					</td><td align="left">
						<div class="para">
							NETWORK.DELETE
						</div>
					</td></tr><tr><td align="left">
						<div class="para">
							LB.ASSIGN.TO.RULE
						</div>
					</td><td align="left">
						<div class="para">
							LB.REMOVE.FROM.RULE
						</div>
					</td><td align="left">
						<div class="para">
							LB.CREATE
						</div>
					</td></tr><tr><td align="left">
						<div class="para">
							LB.DELETE
						</div>
					</td><td align="left">
						<div class="para">
							LB.UPDATE
						</div>
					</td><td align="left">
						<div class="para">
							USER.LOGIN
						</div>
					</td></tr><tr><td align="left">
						<div class="para">
							USER.LOGOUT
						</div>
					</td><td align="left">
						<div class="para">
							USER.CREATE
						</div>
					</td><td align="left">
						<div class="para">
							USER.DELETE
						</div>
					</td></tr><tr><td align="left">
						<div class="para">
							USER.UPDATE
						</div>
					</td><td align="left">
						<div class="para">
							USER.DISABLE
						</div>
					</td><td align="left">
						<div class="para">
							TEMPLATE.CREATE
						</div>
					</td></tr><tr><td align="left">
						<div class="para">
							TEMPLATE.DELETE
						</div>
					</td><td align="left">
						<div class="para">
							TEMPLATE.UPDATE
						</div>
					</td><td align="left">
						<div class="para">
							TEMPLATE.COPY
						</div>
					</td></tr><tr><td align="left">
						<div class="para">
							TEMPLATE.DOWNLOAD.START
						</div>
					</td><td align="left">
						<div class="para">
							TEMPLATE.DOWNLOAD.SUCCESS
						</div>
					</td><td align="left">
						<div class="para">
							TEMPLATE.DOWNLOAD.FAILED
						</div>
					</td></tr><tr><td align="left">
						<div class="para">
							ISO.CREATE
						</div>
					</td><td align="left">
						<div class="para">
							ISO.DELETE
						</div>
					</td><td align="left">
						<div class="para">
							ISO.COPY
						</div>
					</td></tr><tr><td align="left">
						<div class="para">
							ISO.ATTACH
						</div>
					</td><td align="left">
						<div class="para">
							ISO.DETACH
						</div>
					</td><td align="left">
						<div class="para">
							ISO.EXTRACT
						</div>
					</td></tr><tr><td align="left">
						<div class="para">
							ISO.UPLOAD
						</div>
					</td><td align="left">
						<div class="para">
							SERVICE.OFFERING.CREATE
						</div>
					</td><td align="left">
						<div class="para">
							SERVICE.OFFERING.EDIT
						</div>
					</td></tr><tr><td align="left">
						<div class="para">
							SERVICE.OFFERING.DELETE
						</div>
					</td><td align="left">
						<div class="para">
							DISK.OFFERING.CREATE
						</div>
					</td><td align="left">
						<div class="para">
							DISK.OFFERING.EDIT
						</div>
					</td></tr><tr><td align="left">
						<div class="para">
							DISK.OFFERING.DELETE
						</div>
					</td><td align="left">
						<div class="para">
							NETWORK.OFFERING.CREATE
						</div>
					</td><td align="left">
						<div class="para">
							NETWORK.OFFERING.EDIT
						</div>
					</td></tr><tr><td align="left">
						<div class="para">
							NETWORK.OFFERING.DELETE
						</div>
					</td><td align="left">
						<div class="para">
							POD.CREATE
						</div>
					</td><td align="left">
						<div class="para">
							POD.EDIT
						</div>
					</td></tr><tr><td align="left">
						<div class="para">
							POD.DELETE
						</div>
					</td><td align="left">
						<div class="para">
							ZONE.CREATE
						</div>
					</td><td align="left">
						<div class="para">
							ZONE.EDIT
						</div>
					</td></tr><tr><td align="left">
						<div class="para">
							ZONE.DELETE
						</div>
					</td><td align="left">
						<div class="para">
							VLAN.IP.RANGE.CREATE
						</div>
					</td><td align="left">
						<div class="para">
							VLAN.IP.RANGE.DELETE
						</div>
					</td></tr><tr><td align="left">
						<div class="para">
							CONFIGURATION.VALUE.EDIT
						</div>
					</td><td align="left">
						<div class="para">
							SG.AUTH.INGRESS
						</div>
					</td><td align="left">
						<div class="para">
						</div>
					</td></tr></tbody></table></div></div><div xml:lang="zh-TW" class="appendix" id="alerts" lang="zh-TW"><div class="titlepage"><div><div><h1 class="title">警​告​</h1></div></div></div><div class="para">
		The following is the list of alert type numbers. The current alerts can be found by calling listAlerts.
	</div><pre class="programlisting">MEMORY = 0</pre><pre class="programlisting">CPU = 1</pre><pre class="programlisting">STORAGE =2</pre><pre class="programlisting">STORAGE_ALLOCATED = 3</pre><pre class="programlisting">PUBLIC_IP = 4</pre><pre class="programlisting">PRIVATE_IP = 5</pre><pre class="programlisting">HOST = 6</pre><pre class="programlisting">USERVM = 7</pre><pre class="programlisting">DOMAIN_ROUTER = 8</pre><pre class="programlisting">CONSOLE_PROXY = 9</pre><pre class="programlisting">ROUTING = 10// lost connection to default route (to the gateway)</pre><pre class="programlisting">STORAGE_MISC = 11 // lost connection to default route (to the gateway)</pre><pre class="programlisting">USAGE_SERVER = 12 // lost connection to default route (to the gateway)</pre><pre class="programlisting">MANAGMENT_NODE = 13 // lost connection to default route (to the gateway)</pre><pre class="programlisting">DOMAIN_ROUTER_MIGRATE = 14</pre><pre class="programlisting">CONSOLE_PROXY_MIGRATE = 15</pre><pre class="programlisting">USERVM_MIGRATE = 16</pre><pre class="programlisting">VLAN = 17</pre><pre class="programlisting">SSVM = 18</pre><pre class="programlisting">USAGE_SERVER_RESULT = 19</pre><pre class="programlisting">STORAGE_DELETE = 20;</pre><pre class="programlisting">UPDATE_RESOURCE_COUNT = 21; //Generated when we fail to update the resource count</pre><pre class="programlisting">USAGE_SANITY_RESULT = 22;</pre><pre class="programlisting">DIRECT_ATTACHED_PUBLIC_IP = 23;</pre><pre class="programlisting">LOCAL_STORAGE = 24;</pre><pre class="programlisting">RESOURCE_LIMIT_EXCEEDED = 25; //Generated when the resource limit exceeds the limit. Currently used for recurring snapshots only</pre></div><div xml:lang="zh-TW" class="appendix" id="time-zones" lang="zh-TW"><div class="titlepage"><div><div><h1 class="title">時​區​</h1></div></div></div><div class="para">
		CloudStack可​使​用​以​下​時​區​確​認​器​，許​多​時​區​有​要​求​或​選​擇​的​欄​位​，這​些​包​含​在​Configuration表​中​排​程​常​用​快​取​物​件​、​建​立​使​用​者​及​指​定​使​用​時​區​
	</div><div class="informaltable"><table border="1"><colgroup><col align="left" class="c1" width="33%" /><col align="left" class="c2" width="33%" /><col align="left" class="c3" width="33%" /></colgroup><tbody><tr><td align="left">
						<div class="para">
							Etc/GMT+12
						</div>
					</td><td align="left">
						<div class="para">
							Etc/GMT+11
						</div>
					</td><td align="left">
						<div class="para">
							Pacific/Samoa
						</div>
					</td></tr><tr><td align="left">
						<div class="para">
							Pacific/Honolulu
						</div>
					</td><td align="left">
						<div class="para">
							US/Alaska
						</div>
					</td><td align="left">
						<div class="para">
							America/Los_Angeles
						</div>
					</td></tr><tr><td align="left">
						<div class="para">
							Mexico/BajaNorte
						</div>
					</td><td align="left">
						<div class="para">
							US/Arizona
						</div>
					</td><td align="left">
						<div class="para">
							US/Mountain
						</div>
					</td></tr><tr><td align="left">
						<div class="para">
							America/Chihuahua
						</div>
					</td><td align="left">
						<div class="para">
							America/Chicago
						</div>
					</td><td align="left">
						<div class="para">
							America/Costa_Rica
						</div>
					</td></tr><tr><td align="left">
						<div class="para">
							America/Mexico_City
						</div>
					</td><td align="left">
						<div class="para">
							Canada/Saskatchewan
						</div>
					</td><td align="left">
						<div class="para">
							America/Bogota
						</div>
					</td></tr><tr><td align="left">
						<div class="para">
							America/New_York
						</div>
					</td><td align="left">
						<div class="para">
							America/Caracas
						</div>
					</td><td align="left">
						<div class="para">
							America/Asuncion
						</div>
					</td></tr><tr><td align="left">
						<div class="para">
							America/Cuiaba
						</div>
					</td><td align="left">
						<div class="para">
							America/Halifax
						</div>
					</td><td align="left">
						<div class="para">
							America/La_Paz
						</div>
					</td></tr><tr><td align="left">
						<div class="para">
							America/Santiago
						</div>
					</td><td align="left">
						<div class="para">
							America/St_Johns
						</div>
					</td><td align="left">
						<div class="para">
							America/Araguaina
						</div>
					</td></tr><tr><td align="left">
						<div class="para">
							America/Argentina/Buenos_Aires
						</div>
					</td><td align="left">
						<div class="para">
							America/Cayenne
						</div>
					</td><td align="left">
						<div class="para">
							America/Godthab
						</div>
					</td></tr><tr><td align="left">
						<div class="para">
							America/Montevideo
						</div>
					</td><td align="left">
						<div class="para">
							Etc/GMT+2
						</div>
					</td><td align="left">
						<div class="para">
							Atlantic/Azores
						</div>
					</td></tr><tr><td align="left">
						<div class="para">
							Atlantic/Cape_Verde
						</div>
					</td><td align="left">
						<div class="para">
							Africa/Casablanca
						</div>
					</td><td align="left">
						<div class="para">
							Etc/UTC
						</div>
					</td></tr><tr><td align="left">
						<div class="para">
							Atlantic/Reykjavik
						</div>
					</td><td align="left">
						<div class="para">
							Europe/London
						</div>
					</td><td align="left">
						<div class="para">
							CET
						</div>
					</td></tr><tr><td align="left">
						<div class="para">
							Europe/Bucharest
						</div>
					</td><td align="left">
						<div class="para">
							Africa/Johannesburg
						</div>
					</td><td align="left">
						<div class="para">
							Asia/Beirut
						</div>
					</td></tr><tr><td align="left">
						<div class="para">
							Africa/Cairo
						</div>
					</td><td align="left">
						<div class="para">
							Asia/Jerusalem
						</div>
					</td><td align="left">
						<div class="para">
							Europe/Minsk
						</div>
					</td></tr><tr><td align="left">
						<div class="para">
							Europe/Moscow
						</div>
					</td><td align="left">
						<div class="para">
							Africa/Nairobi
						</div>
					</td><td align="left">
						<div class="para">
							Asia/Karachi
						</div>
					</td></tr><tr><td align="left">
						<div class="para">
							Asia/Kolkata
						</div>
					</td><td align="left">
						<div class="para">
							Asia/Bangkok
						</div>
					</td><td align="left">
						<div class="para">
							Asia/Shanghai
						</div>
					</td></tr><tr><td align="left">
						<div class="para">
							Asia/Kuala_Lumpur
						</div>
					</td><td align="left">
						<div class="para">
							Australia/Perth
						</div>
					</td><td align="left">
						<div class="para">
							Asia/Taipei
						</div>
					</td></tr><tr><td align="left">
						<div class="para">
							Asia/Tokyo
						</div>
					</td><td align="left">
						<div class="para">
							Asia/Seoul
						</div>
					</td><td align="left">
						<div class="para">
							Australia/Adelaide
						</div>
					</td></tr><tr><td align="left">
						<div class="para">
							Australia/Darwin
						</div>
					</td><td align="left">
						<div class="para">
							Australia/Brisbane
						</div>
					</td><td align="left">
						<div class="para">
							Australia/Canberra
						</div>
					</td></tr><tr><td align="left">
						<div class="para">
							Pacific/Guam
						</div>
					</td><td align="left">
						<div class="para">
							Pacific/Auckland
						</div>
					</td><td align="left">
						<div class="para">
						</div>
					</td></tr></tbody></table></div></div><div xml:lang="zh-TW" class="appendix" id="appe-cloudstack-Revision_History" lang="zh-TW"><div class="titlepage"><div><div><h1 class="title">修​訂​記​錄​</h1></div></div></div><div class="para">
		<div class="revhistory"><table border="0" width="100%" summary="Revision history"><tr><th align="left" valign="top" colspan="3"><strong>修訂記錄</strong></th></tr><tr><td align="left">修訂 0-0</td><td align="left">Tue May 29 2012</td><td align="left"><span class="author"><span class="firstname">Jessica</span> <span class="surname">Tomechak</span></span></td></tr><tr><td align="left" colspan="3">
					<table border="0" summary="Simple list" class="simplelist"><tr><td>初​始​版​本​</td></tr></table>

				</td></tr></table></div>

	</div></div></div></body></html>
